


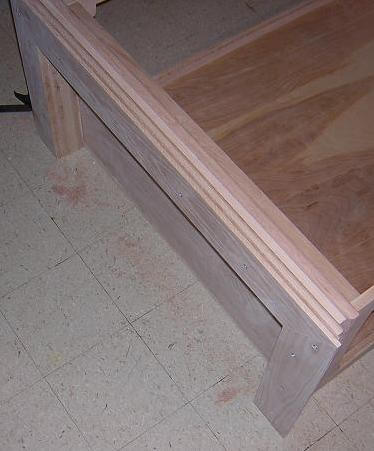
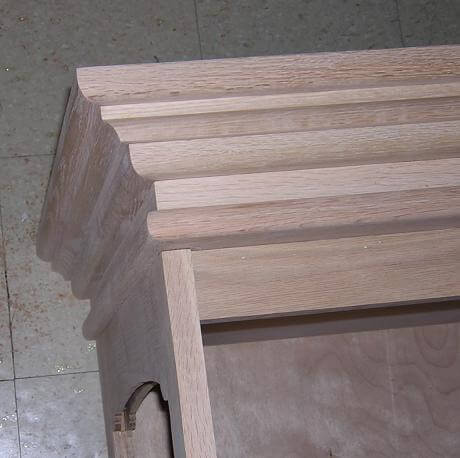
Now it was time to crown the cabinet. This was nothing more than five layers of mitered pieces of oak, each a slightly different width (but with matching inside dimensions) and with a different edge profile. The bottom layer had a bullnose, the next layer was left straight, the next had a 1/2" round-over, then next had a 1/2" cove and the final layer had another 1/2" round-over. All of the miter joints had a biscuit slot cut in them to reinforce the joint and help discourage it from opening up later.
I deviated from the plans at this point, which stated I should install each layer of moding by clamping the front piece in place, then gluing in the biscuits and clamping the side pieces. Once the pieces were clamped in place, you could attach them with screws, then move on to the next layer.
I didn't like this idea, because it would make the pieces difficult to sand after the glue dries. Instead, I decided to glue up each layer of the molding first, then sand it and make it pretty. Once each layer was ready, I could attach it to the top. Gluing up a three-sided frame like this proved to be tricky, because there wasn't an easy way to clamp the assembly. So, rather than clamping, after I glued up each joint I ran a couple of 5/8" brads through the top where the biscuit sat. This held the joint tight until the glue set up. I went ahead and glued up all five layers.

When the glue was dry I carefully sanded each piece, then proceded to attach it to the top of the carcass. I laid the carcass on it's back, ran a bead of glue around the top, then set the first layer of the crown molding in place. The back of the molding was set flush with the back of the carcass (which was easy because it was lying on it's back.) Carefully measuring to make sure I had the piece centered, I clamped it in place. Next, I drilled pilot holes and countersunk them for screws.
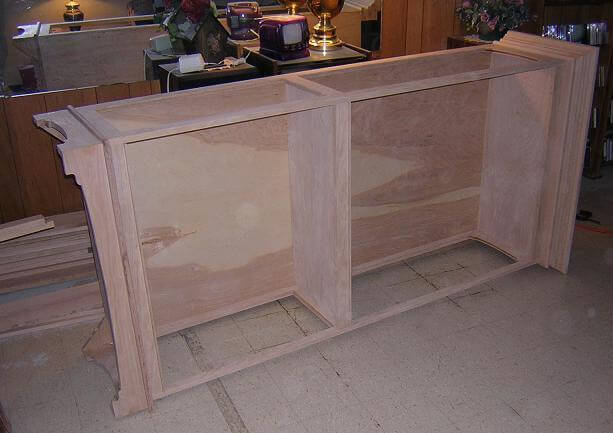
Once all of the crown molding was complete, it became official: the curio was now too large to stand upright in my basement. My ceilings are 7' 2" tall, and the curio is just shy of 7' tall. This means it can't be stood up because the diagonal measurement of the cabinet is longer than the height of the ceiling. So, from now on I have to do all work with the curio lying down. Luckily, my upstairs ceilings are 8 feet, so when the project is complete we should have plenty of clearance to set it upright.
Now it's time for the trickiest part: building and attaching the door.
Return to where we built the curio base.
Back To The Curio Cabinet Main Page
Return To The Main Wood Gallery
This page last updated on 06/28/2018