


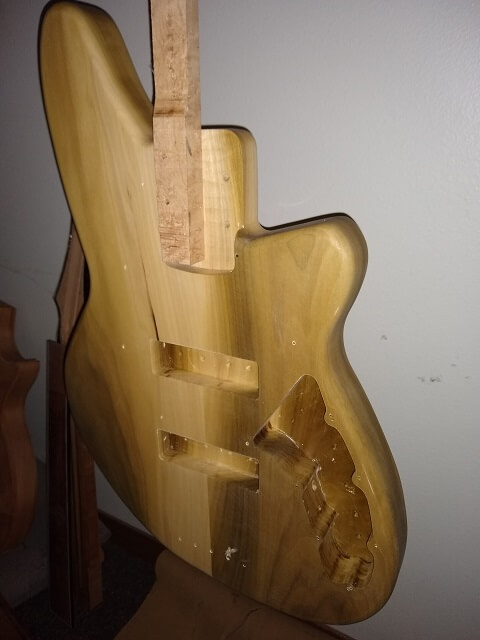
With all of the construction done, it was now time to apply a finish. This instrument will be finished in two different methods: gloss nitrocellulose lacquer on the body, and satin poly on the neck.
I love the look of gloss nitro, so for sure that's what I wanted on the body. I love the look of it on necks as well, but sometimes it can feel a little "sticky" on your hand when you're trying to slide it up and down the neck. So that's why I decided to use two different types of finishes.
This isn't uncommon. Fender and other manufacturers often do a gloss finish on the body and a satin finish on the neck.
I started with the body, as once the nitro is sprayed it needs to sit for a minimum of two weeks (even longer is better) before it can be buffed out. I figured once the body is done and I'm waiting, I can switch gears and work on the neck.
By the way, on my site when working with lacquer I often refer to the waiting period as letting the finish "cure." It was pointed out to me by someone way too hung up on semantics that lacquer does not "cure", it "dries." Curing is a chemical reaction and lacquer is an evaporative finish. I understand the difference, but I'm not going to get hung up on a syntax discrepancy. So here is my general disclaimer: whenever I use the word "cure" in reference to lacquer, mentally swap the word "dry" in its place. I'm not going to bother to go back through my hundreds of pages and find everywhere I incorrectly used the word "cure" and fix it.
So pedantics aside, lets get back to applying the nitrocellulose lacquer to the body. It started with a good sanding. I started with 100 grit, then 150 and finished with 220. I took my time with each grit and made sure every part of the body was addressed before moving to the next grit. Tedious, but as I've said before it's the detailed work like this that changes the way people say "you made that in your basement" to "you made that in your basement?!!!"
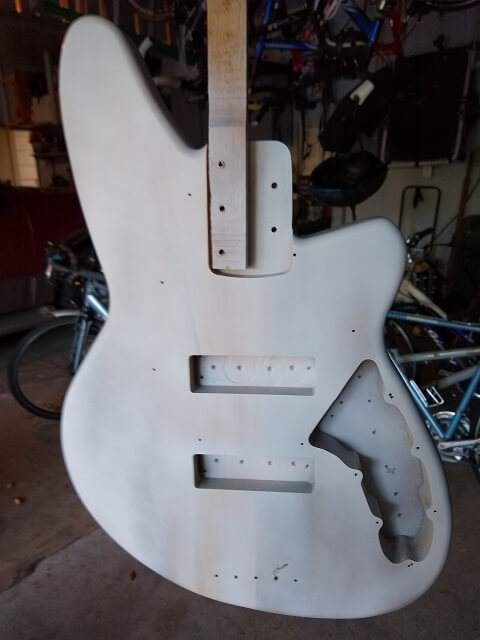
With the sanding done, I wanted to spray a layer of vinyl sealer. Technically I probably could have skipped this step as I was going to be shooting primer under the color coat, which is also a sealer. I decided to put a thick layer of vinyl down first so I could level sand it and fill any little surface discrepancies in the poplar. Poplar doesn't require grain filling, but I noticed this piece had some really small pores that I was worried would telegraph through the finish. The vinyl sealer would take care of those, and be way faster than actually trying to use a pore filling product.
I sprayed three thick coats of the vinyl sealer. One coat is generally sufficient, but like I said, I wanted a nice thick layer so I could level sand it back before the primer coat.
After the three coat of vinyl sealer had a chance to dry for a few days, I wet sanded the body with 320 grit paper. I was pretty happy with how smooth the body looked after the sealer was sanded level.
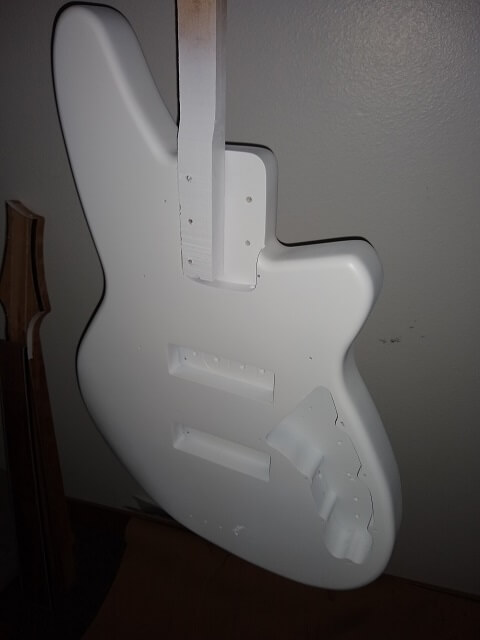
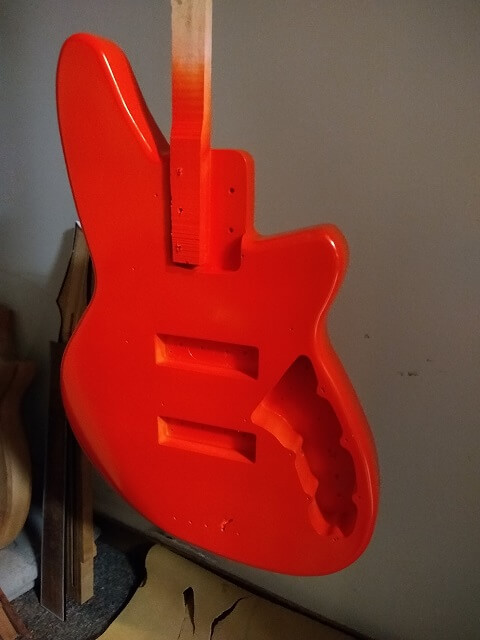
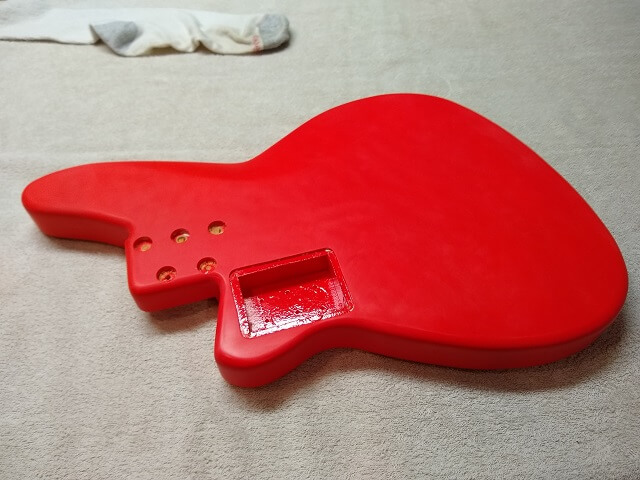
Now it was time to spray the primer coat. Because I had a layer of sealer down, the primer wasn't providing any sealing benefit as it normally would. The big reason for the primer was because the orange color I was using for the color coats required a white primer underneath in order to make the color even.
Both my primer and my color coats were done with spray cans I purchased from Ohio Valley Nitro. I didn't need a whole lot of either product, so it didn't make sense to purchase a bigger amount and use my regular spray gun. It was just more convenient to get the primer and color coats in a couple of rattle cans.
During the week I was going to spray the body of this guitar, I hit the jackpot with the weather. Most of the days were in the 70s, and the coldest day I sprayed was mid-60s. Being early October, the humidity was quite low. Other than one really windy day, it was perfect weather for spraying.
Because I only had one can of primer and one can of color, I didn't have much extra product to respray if something went wrong and I had to sand the finish back. So I took my time and did multiple light coats to make sure I didn't get any runs. Here's the body after I sprayed the very first coat of primer.
I wound up spraying four coats of primer, waiting about 15 minutes between each coat. After four coats I had a nice even coverage. I took the guitar back inside to my shop and hung it in the closet to dry.
The next day was an exciting one, as I was applying the color coat. I had seen a small color sample on the web site when I purchased the lacquer, but it is way different when you see the color in real life on the instrument itself.
I sprayed my first coat of color and...
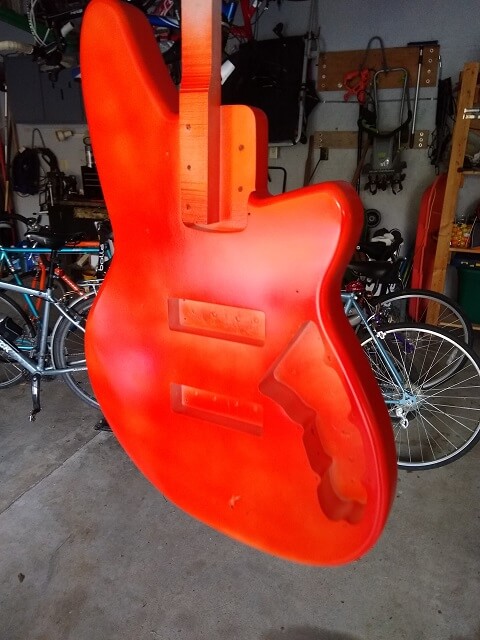
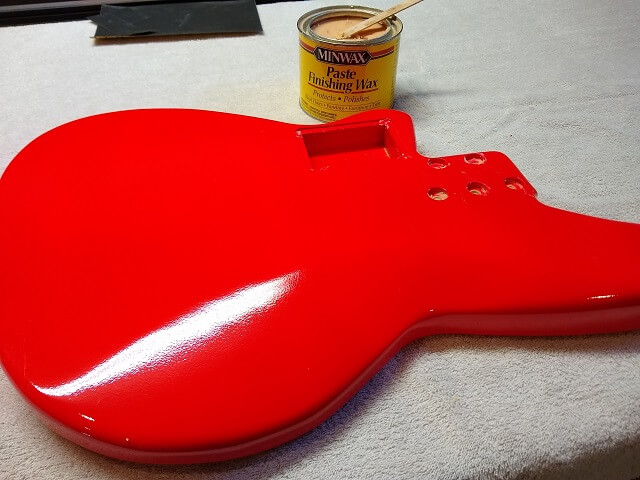
...it wasn't the shade I was expecting. On the web site it looked more of a pumpkin orange. What came out of the can had a lot more red in it. In fact, upon going back and looking at the Ohio Valley Nitro web page, it looks more like the Dakota Red color they sell.
It's not that I didn't like the color, it just wasn't quite what I had pictured in my head. It's interesting how when reality doesn't match what we've built up in our head, we can obsess about it even when reality is probably acceptable.
I kind of stewed on the color difference for a few days after I sprayed. It was really bugging me that the color was so different from the sample on the web site. Until I showed the Tundra Boy the color and he declared it "awesome!", and this is from someone who generally only likes naturally finished instruments.
So I decided in the end that the color was OK, even if it wasn't what I expected. In fact, back in 2nd grade I remember getting a new set of Crayola crayons, and in the box was a color called "orange red". I loved that crayon color, and wound up wearing that crayon out long before all the others. The color of this instrument is that exact same shade. So how can I complain about that?
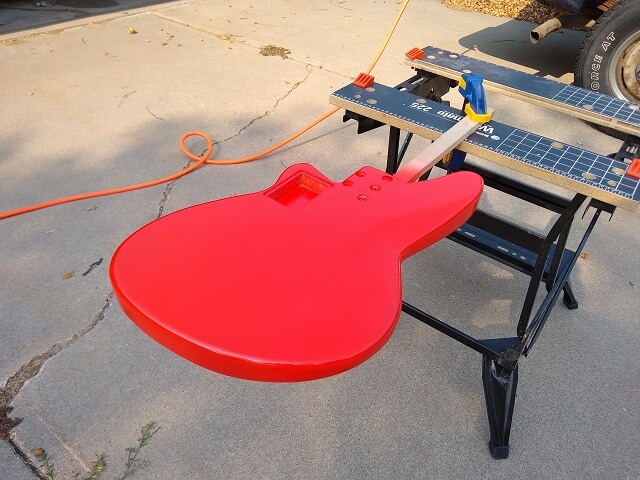
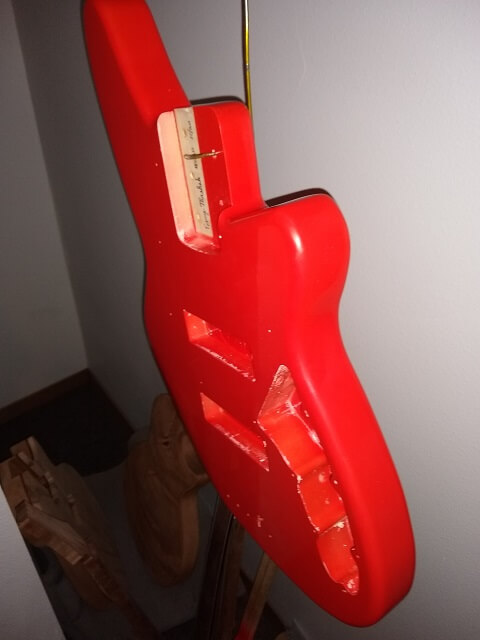
I sprayed four coats of color total, again waiting 15 minutes between coats. Then I hung it back up in the closet to dry. One thing that is striking about this color is how bright it is. At times it almost hurts your eyes. Even the camera has a hard time focusing in on the color, which caused a bunch of really blurry photos until I finally got this picture, which is only slightly blurry.
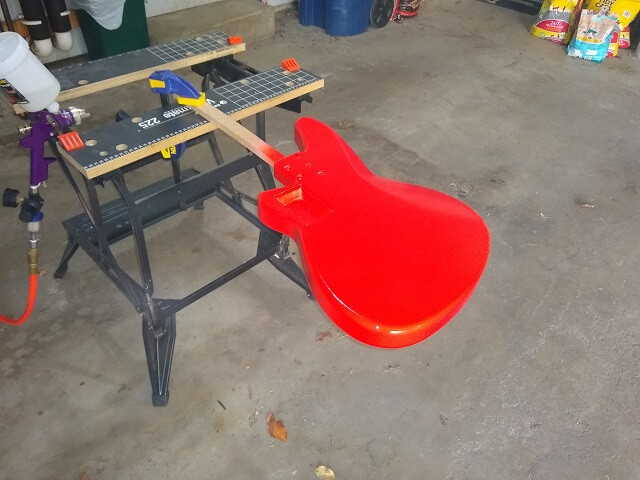
The next day I continued spraying, moving on to the clear coats. A while ago I had bought a gallon of clear lacquer, so I went back to my normal spray gun. Here's a picture of my super-fancy (sarcasm) spray setup in the driveway.
The spray gun lays down a lot more lacquer with each coat than the rattle cans did, so I would only do three coats of clear each day, waiting 15 minutes between each coat, then quitting for the day and resuming the next day.
I sprayed a total of nine coats of clear over a three day span. I wanted a good layer on the body so I didn't have to worry about sanding through the finish into the color coat.
On the last day of spraying, the winds came up pretty strong with gusts north of 40 mph. Trying to spray in the driveway in that level of wind is an exercise in futility. Very little finish will wind up on the instrument, and every chunk of dirt in the neighborhoood will. I only had three coats to go and wanted to finish up spraying before the temperature dropped and I lost my window of opportunity.
I generally don't like to spray inside the garage as the lacquer fumes are so toxic, but I decided that I could bend my rule for one final day. I moved the cars out into the driveway and closed the garage door. I did open the other garage door on the opposite side just to let a little fresh air in and hopefully reduce the amount of fumes. Obviously, I wore a respirator, which I always do when spraying lacquer.
It went fine, and surprisingly the garage didn't smell like lacquer for days afterwards. I left the 2nd garage door open for a few hours after I was done, and I think that helped dissipate the smell. So after about 10 days of work I had the finish applied to the body.
Now while the lacquer is drying it's time to turn my attention to the neck. I had wanted the nitro on the body to sit for at least two weeks before I level sanded and buffed, and as it turned out it sat almost three weeks before I got back to it.
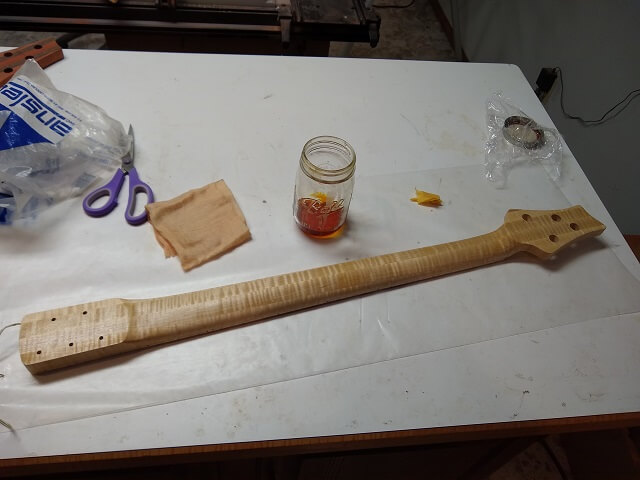
In the mean time I continued work on other parts of the instrument. I applied a couple of coats of amber shellac to the neck. I often do this to seal the wood before applying a finish, however I've found that when using a polyurethane finish (like what is going on the neck) it's not necessary to seal the wood as the poly does a good job of sealing it. So my reason for using shellac on this neck was more for the amber color that it adds to the wood. It also makes the curly maple "pop".
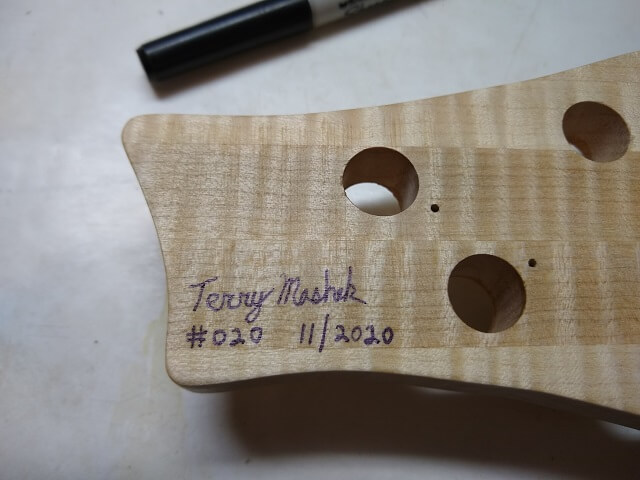
Before I started applying the polyurethane I signed, numbered and dated the instrument. Because I'm not completely done I took a guess at the date. Sometimes my dates are a little off because of this, but on this instrument I actually did complete it in November of 2020.
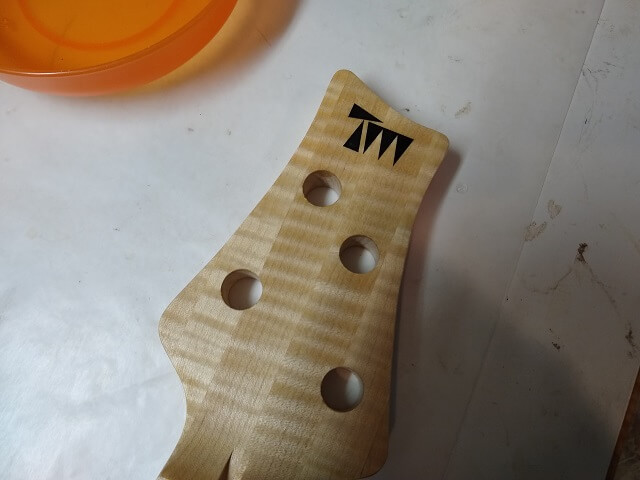
On the front of the headstock, I applied my logo using a waterslide decal. Spraying oil-based poly over waterslide decals is tricky, as the poly wants to make the decal bubble. In fact, many people on the internet just tell you not to even try.
The method I've found that works is to first make sure the decal is good and dry. After I added the decal I gave the neck at least a full 24 hours to let the the water evaporate. Then I sprayed and incredibly light mist coat over the decal. When I say "incredibly light" I mean it. My hand moves extremely quickly across the headstock as I spray, and I keep the can at least a full foot away. The amount of finish left on the headstock is so little that it's difficult to see. Even that little amount makes the decal start to bubble just a little, but after the poly dries it smooths out again.
I then let that mist coat sit for at least a half an hour, then I repeat. I do about a dozen of these mist coats, waiting between each one. Eventually, I have a solid layer of poly over the decal with no bubbling. After that, I have no problem spraying thicker coats of poly over the headstock.
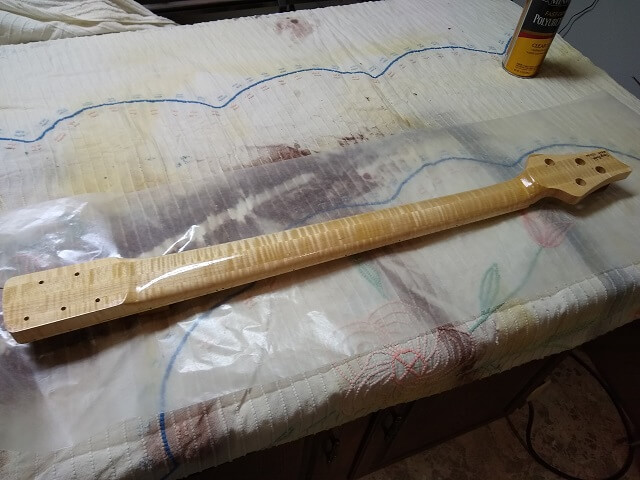
I experimented with a different finishing schedule on this neck, that turned out extremely well. I would spray three medium coats of poly on one side of the neck, waiting about two hours between each coat. Then I would wait three full days for the poly to dry, after which I would level sand the neck with 400 grit sandpaper. Then I repeated the whole process a second time and waited three more days. Then I repeated the process a third time, but skipped the level sanding after my final coats were applied.
Once the poly had dried, I was left with the most slippery neck I've ever felt. It's almost too slippery, if that is possible. Seriously, it feels like silk. This is now going to be my method for finishing satin necks from now on.

I flipped the neck over and repeated the above finishing process to the back of the neck. The sides of the neck wound up getting 18 coats of poly because they also got sprayed when I did the front, but that's OK. You can't tell that the finish is thicker there, and that's the part of the neck that gets a lot of wear anyway so it doesn't hurt to have some extra protection.
In this picture it looks like I'm using gloss poly. I'm not. It's satin, but I had just sprayed a coat so it's still wet.
Finishing is a really long process, with a lot of waiting between coats and waiting for things to dry. Well, at least proper finishing is a long process. You can do a quick finish on an instrument, but frankly it winds up looking like a quick finish. My methods feel like they take forever and are very tedious, but I pride myself in the fact that once I'm done most people can't believe I built the instrument in my basement.
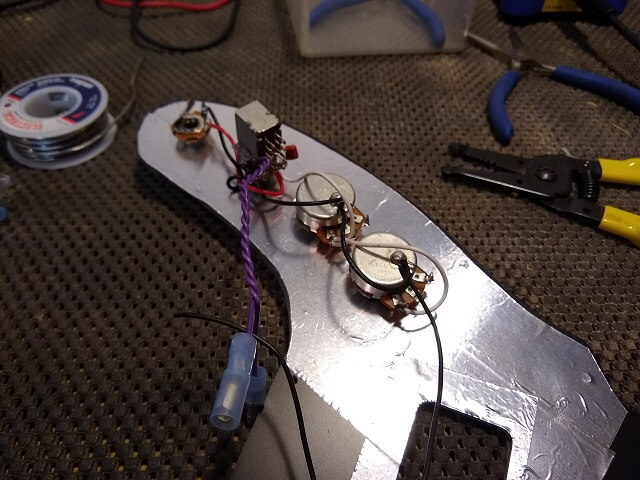
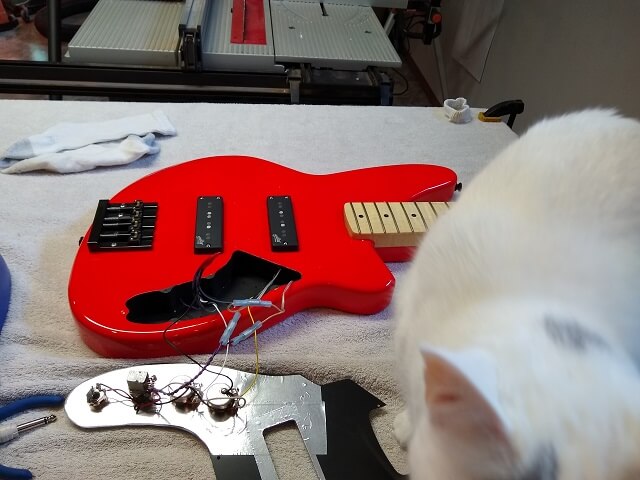
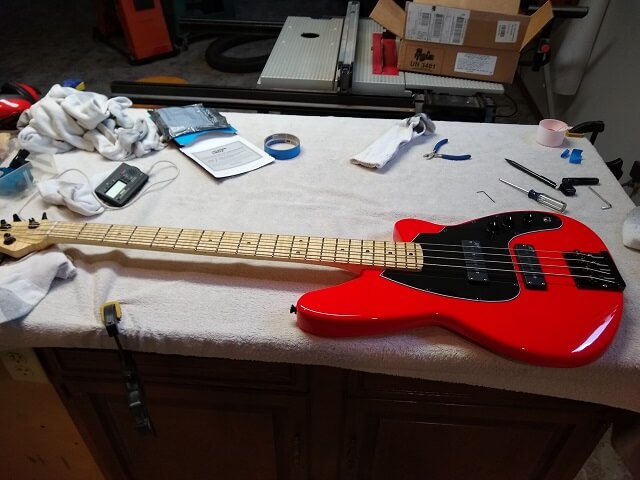
Because this instrument has the controls mounted on a pickguard, one of the things I could work on while waiting for the finish to dry is to solder up most of the controls.
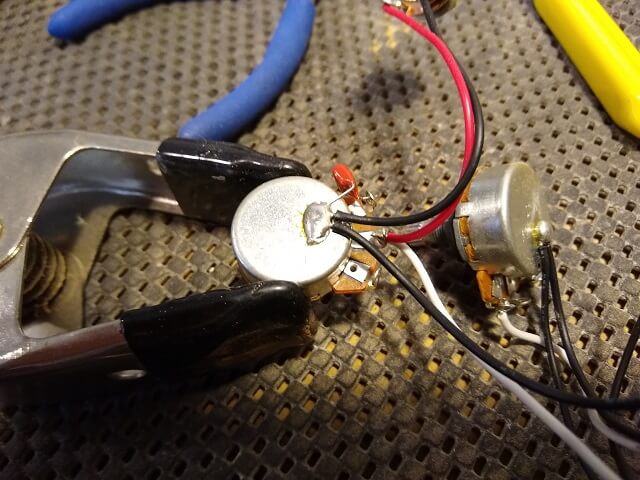
The pickup wires, bridge ground wire and LED wires couldn't be hooked up yet, but I at least got all of the other wiring done and ready to go. The purple wires with the quick disconnects on them are part of the LED on/off circuit.
After nearly three weeks of sitting it was time to go back to the body and level sand and buff the lacquer. When wet sanding lacquer you need to be careful not to let water get into the screw holes, as it can soak into the bare wood and cause the wood to expand. This in turn causes the lacquer finish to crack, and also causes me to have a really bad day.
I had heard about a trick to avoid this problem, so I decided to give it a try on this instrument: before I started sanding I filled all of the holes with wax. The person I had gotten the tip from used bees wax, but I didn't have any of that around. Instead I decided to use furniture paste wax. It worked pretty well, however after a few days the wax dried out and hardened and would start to fall out of the holes. I'll definitely use this idea again in the future, but I'll probably go out and get myself some bees wax that will stay more flexible.
In this photo you can see how "orange peeled" the lacquer finish is before I started sanding. The sanding process will remove this bumpy texture and make the surface glass smooth.
I started level sanding the instrument with 800 grit sandpaper. Water with a drop of dish soap was used to lubricate the paper. It is important to work in small sections and dip the paper in the water often to keep the paper clean, and wipe the slurry off the spot where you've just been sanding. If you start getting little nubs of dried finish on the paper and keep sanding with it, you'll sand deeper scratches into the finish. Change the water dish often, as it quickly gets cloudy with finish.
This finish sanding is the most tedious part of building an instrument and as I've said before, the tenacity to stick with it and do it right is what separates the hacks from the pros. Any shortcuts during this process makes the final result look like you took shortcuts.
Eventually I had the entire body level sanded. I knew I was done because the entire instrument had an evenly hazy appearance. There were no more shiny "dots" that would appear when holding the body up in the light. These dots can look the size of the tip of a pin and it's tempting to say "good enough" and leave them, but once the instrument is buffed those little dots turn into craters that draw your eyes to them. It's best to take the time to get rid of them now.
I then continued to wet sand the body with 1000, 1500 and 2000 grit papers. It took a couple of hours with each grit to make sure I had everything adequately addressed. It's not much fun, but it's more fun than looking at flaws in the finished instrument and spending the rest of your life wishing you'd taken that extra time to do it right.
As if the process wasn't tedious, it's also a bit disheartening to see the shiny lacquer turn into a milky haze. I've been doing this for more than 15 years, and I still have moments where I think I've wrecked the instrument by sanding it. The more you sand, the more it seems like you're heading in the wrong direction as the instrument looks worse and worse. You have to have faith, however, as this will all change after buffing.
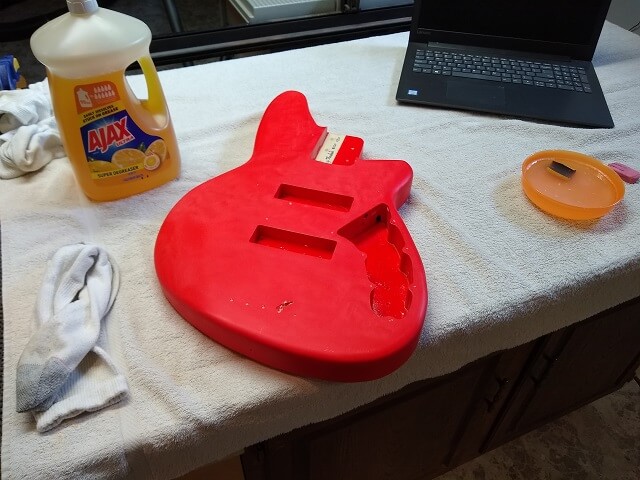
I gave the instrument a good cleaning with naptha between grits to make sure I got all of the sanding dust removed.
Once I'd worked through all the grits the body was ready to buff. However, I wanted to let the finish dry off really well first, so I hung it up for a day.
Have I mentioned the finishing takes forever? Maybe I've said that once or fifty times? When building an instrument if you add up all the hours I spend from beginning to end, the middle point is usually where I begin spraying the finish. It takes just as long if not longer to apply the finish as it does to construct the instrument. And that's only counting labor hours, not all the time I sit around waiting for things to dry and cure.
At last it was time to buff. This is the one part of applying a finish that is enjoyable, because the instrument transforms quickly and gives you a real sense of accomplishment. That hazy milky finish starts to disappear (along with my apprehension) and it gets replaced with a deep shine. I didn't get any photos, but I used my normal setup of foam polishing pads chucked into my drill press set at it's lowest speed.
I buffed using medium compound, fine compound and then swirl remover. It is important to clean the instrument really well between compounds to make sure there isn't any of the coarser polish left hanging around. Also, I hope it's obvious that you should use a separate pad for each polish. I mark the backs of the pad so in the future that pad is only ever used for that one polish grit.
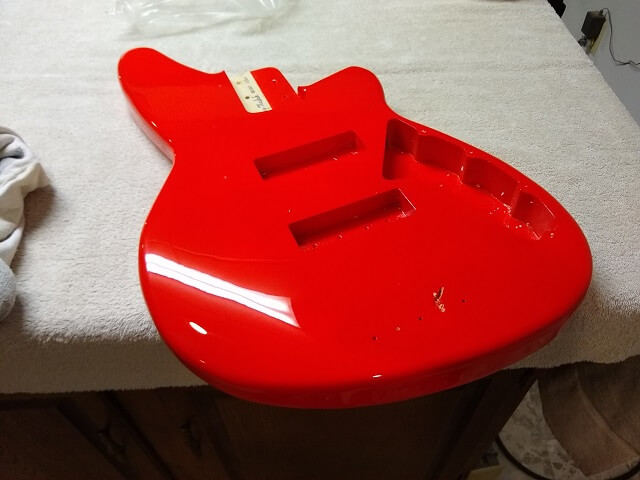
Once the buffing is complete the reward for all that spraying and sanding is an instrument that looks like a mirror. Once of these days I'm going to take a photo that adequately demonstrates how shiny things are after buffing.
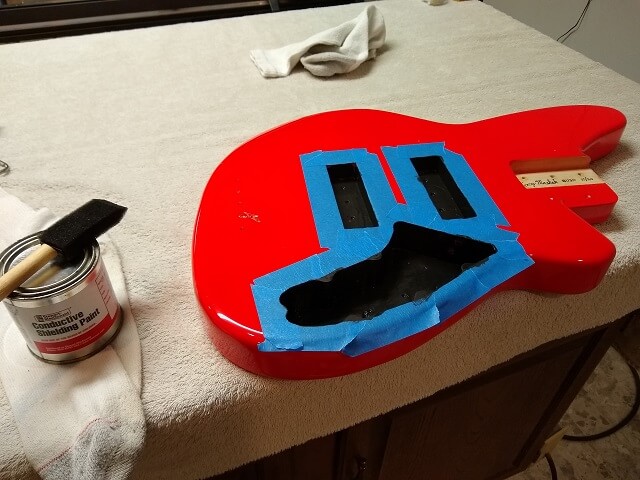
I spent a few days applying shielding paint to the control and pickup cavities. The instructions on the can said to apply three coats, waiting 24 hours between each coat. So that's what I did.
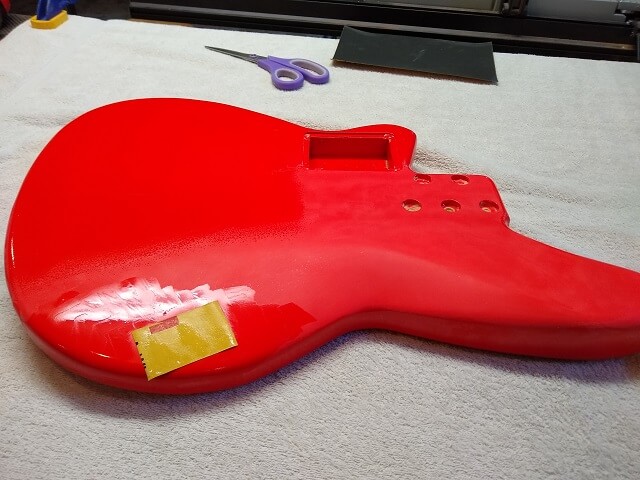
I did run into one small issue that I'd never encountered before: after removing the blue painters tape it looked like the adhesive had left a bit of residue on the finish. I started to try and wipe it off when I realized it wasn't adhesive residue, but the tape had actually left witness marks in the finish. Oh no! I've never had that happen before. I did run into one small issue that I'd never encountered before: after removing the blue painters tape it looked like the adhesive had left a bit of residue on the finish. I started to try and wipe it off when I realized it wasn't adhesive residue, but the tape had actually left witness marks in the finish. Oh no! I've never had that happen before.
Thankfully, with a bit of fine polish on a rag I was able to buff out about 90% these witness marks. I can still see just a little bit of them in the finish, but only because I know where they are. I highly doubt anyone else would be able to tell. So note to self: no longer put blue painters tape on a nitro finish.
Now I could begin installing some hardware, which is a lot more fun. I began by attaching the tuning machines, including the Hipshot detuner.

I hadn't tested the LEDs since before I glued the fretboard to the neck. I crimped on the quick disconnects onto the wires and hooked them up. Much to my relief, they still worked.
The bridge was screwed into place. Don't forget to add the ground wire!
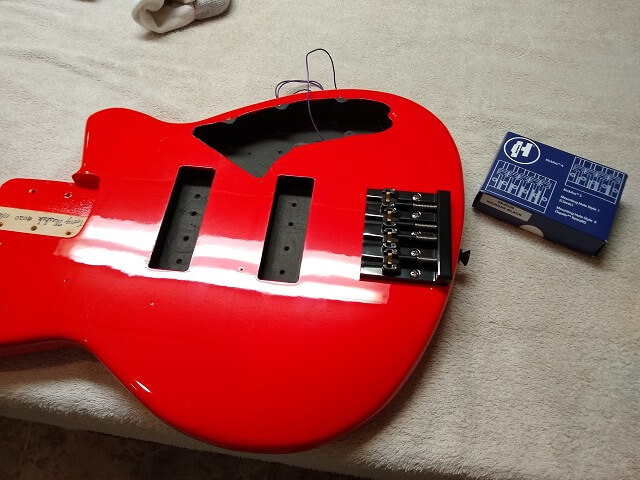
And the neck was attached and screwed into place. This was a little trickier because I had to route the LED wire through the body hole. With all five screws tightened down the neck joint feels very solid.
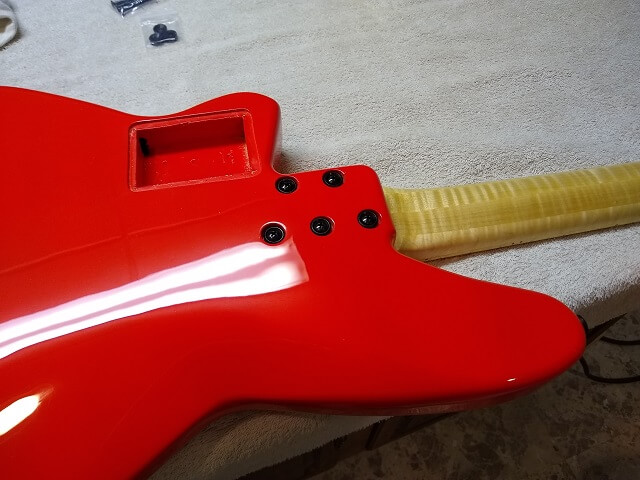
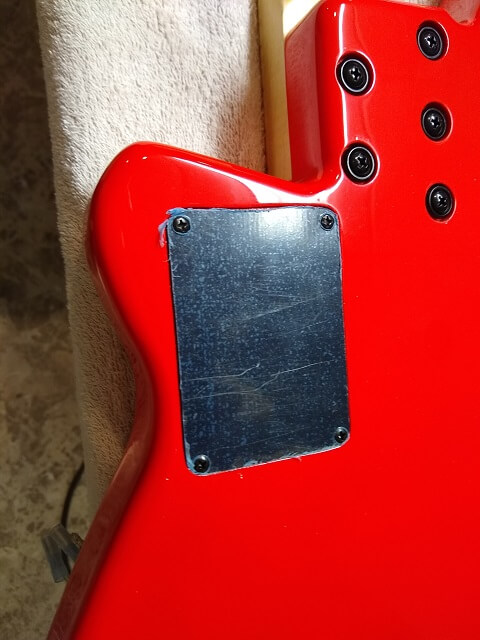
The LED battery box was installed into the cavity on the back of the instrument. I padded it with a little bit of foam just to prevent any rattling. Then I screwed the cover in place. The protective plastic was still on the cover in this photo. I left the plastic on until the instrument was finished. No sense risking scratching it up in the meantime.
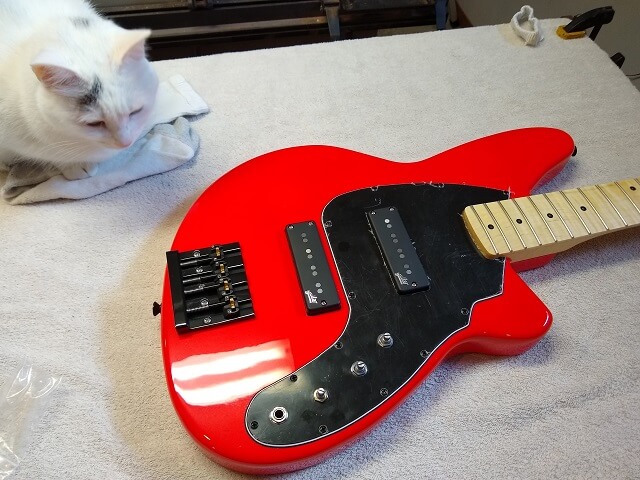
The pickups were installed. I used strips of foam rubber to hold them at the correct height. The foam will compress and allow for some adjustment, acting kind of like a spring.

Now I could finish soldering the electronics. For some reason, whenever I pull out my soldering iron Spot the cat picks this opportunity to get in my face for attention. Something about a cat and an 800 degree soldering iron seems like a bad combination.
With the electronics done and tested to make sure everything's working, I screwed the pickguard in place.
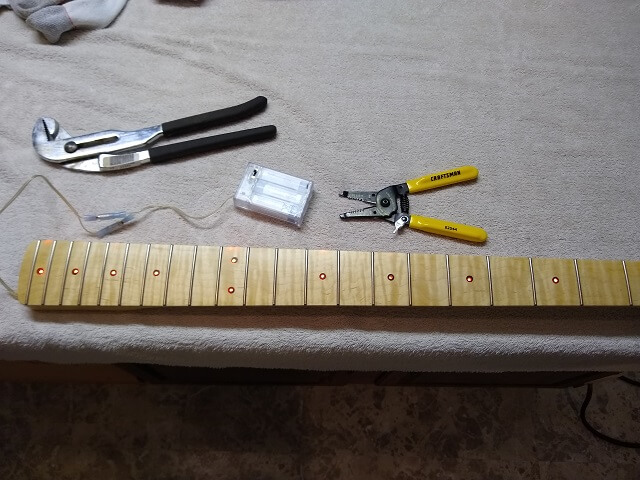
Now the 2nd most tedious part of building an instrument: the fretwork. It's just slightly less tedious than applying the finish. I used a set of junk strings and strung the bass up, then adjusted the truss rod to completely straighten the neck. While under tension I used my sanding bar to level the frets.
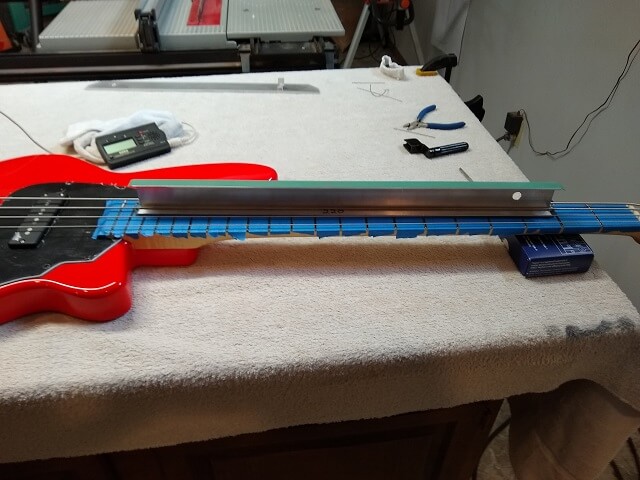
Then I removed the strings and recrowned and polished each fret. I watch YouTube videos of people who can do a complete level, crown and polish in an hour. It's closer to four hours for me, if not longer. Thankfully I have a TV in my shop so I can keep an eye on a ball game while I'm working, which makes it a little less painful.

After the fretwork was done I put the junk strings back on the instrument and made a new nut out of a bone blank. Again, there are people who can make a nut in half an hour. I'm not one of those people. I think it took me about 2.5 hours to shape it, cut the slots and really dial in the perfect height on each string.
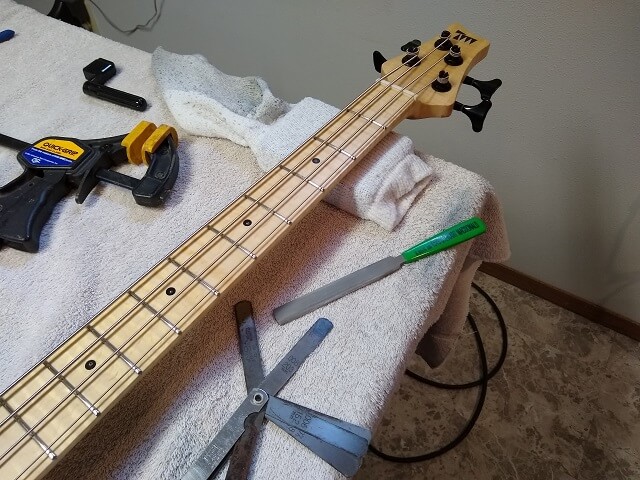
When the nut was finished, I removed the junk strings and put on a fresh set of D'Addarios. Then it was just a matter of doing a standard setup: truss rod adjustment, string height, intonation and pickup heights (in that order.)
The final step was to remove the protective plastic from the pickguard and put the knobs on the pots. This instrument is done!
This is as far as this instrument has come so far. Check back soon for more updates! Return to the main page for this instrument.
Return To The Main Music Gallery
This page last updated on 11/17/2020