


Generally, installing hardware is the last step in building a guitar as you don't want to try and apply finish around the pickups, knobs, etc. However, on this guitar I did do some modification to the hardware while I was still building the body, so I'll cover that here.
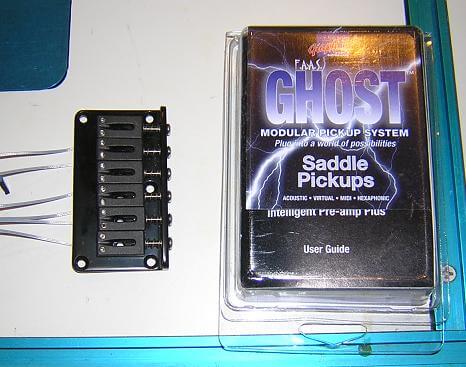
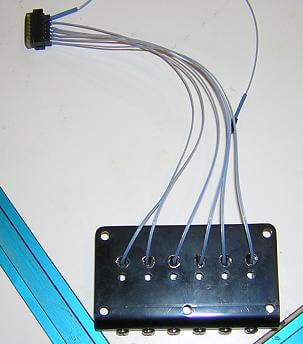
The wires for the piezo bridge come out of the bottom of the string saddles. Traditionally, they are run forward (towards the neck) and either into the bridge pickup cavity, or under a pickguard if the guitar has one. I personally don't feel that this is a very good looking solution, so I decided to modify the bridge in order to make a more "stealth" installation. On the bridge plate under the areas for each saddle I drilled a hole large enough to pass the end of the pickup wire through.
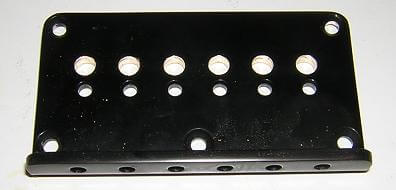
Then, I passed each wire through the saddle's respective hole and installed the saddle. Once the bridge is screwed to the body, the piezo system should be nearly invisible.
I have ordered the pickups for this guitar from a custom pickup maker named Lindy Fralin. These pickups are all hand made, and get raving reviews from all who use them. I ordered a 5% overwound P-90 for the bridge, and a 5% underwound P-90 for the neck. The rest of the hardware installation will happen once the guitar is through the finishing stage.
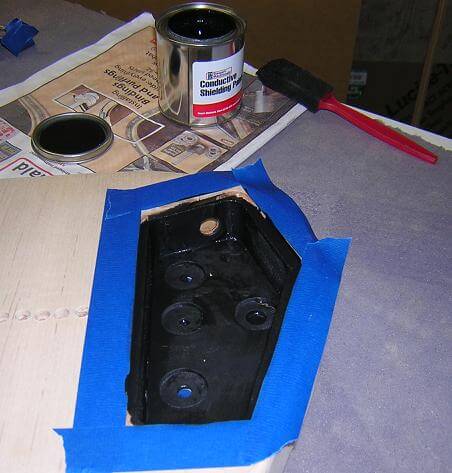
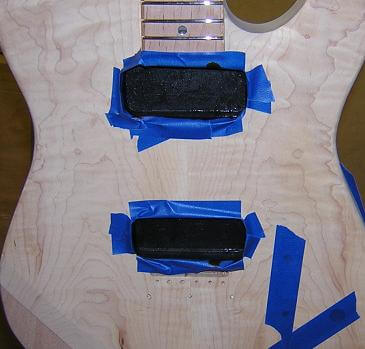
P-90s are notoriously noisy pickups, which is part of their charm; it's the price you pay for the great tone they produce. They tend to produce a lot of 60-cycle hum, especially when turned 90 degrees from an offending noise source. To help reduce this noise, I wanted to sheild the control and pickup cavities. I used shielding paint to do this. Two coats on the cavities should suffice.
The finish on this guitar will be Tru-Oil, which should give decent protection while letting the wood's natural color and texture through. It is a very thin finish, which meant that I had to spend a great deal of time sanding and sanding to make sure all of the surfaces were defect-free. To begin, I put a heavy coat of Tru-Oil on the guitar and let it soak into the wood for a few minutes, then removed the excess with a rag.
There's not much that can be seen during the finishing process, so I apologize for the lack of pictures over the course of the two weeks it took to apply the finish. After the initial coats had dried for 24 hours, I then filled the grain on the mahogany by wet-sanding with the Tru-Oil to create a slurry of oil and sawdust that would get imbedded in the pores. The excess would be wiped off with a rag (across the grain) and the guitar would be left to dry for 24 hours. Then I'd repeat the process until the grain was mostly filled. I stopped before the grain was completely filled in order to let some of the wood's "character" show through. I didn't worry about grain filling the maple, as maple is a very-tight grained wood and generally doesn't need filling.
After the grain filling had dried completely, I spent more time sanding and making sure everything looked good. I sanded the guitar all the way up to 2000 grit, until it was nearly shiny. Then I started applying finish coats of the Tru-oil, gently roughing up the guitar with 0000 steel wool between each coat. The thinner the Tru-Oil is applied, the glossier and better looking it is. Tru-Oil doesn't build like lacquer or poly, so the final finish is very thin and really enhances the "wood" feel of the instrument. It doesn't feel like you're holding a piece of plastic, like some guitar finishes produce.
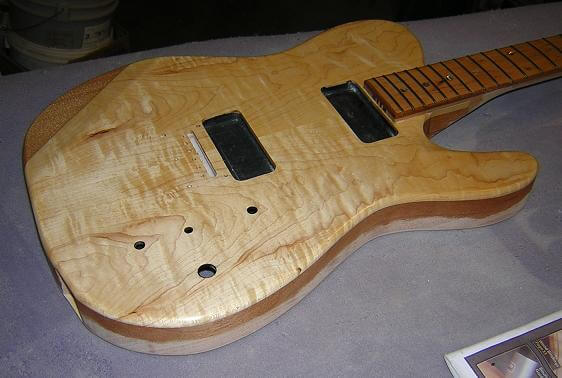
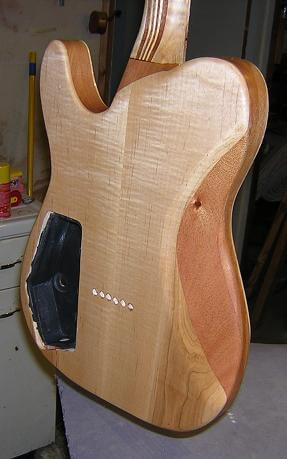
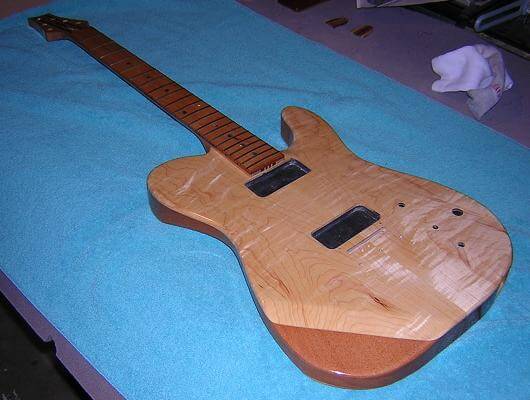
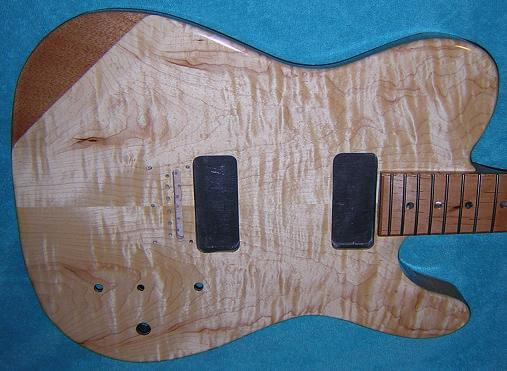
I applied about 7 coats to the guitar. Here's the final shots of the completed finish. I really like how the Tru-Oil made the maple "pop" and enhanced the figuring. The top especially is just a really neat piece of wood. God did a good job on that one!

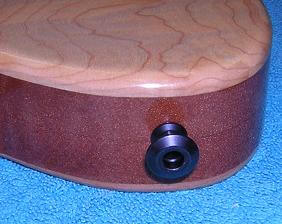
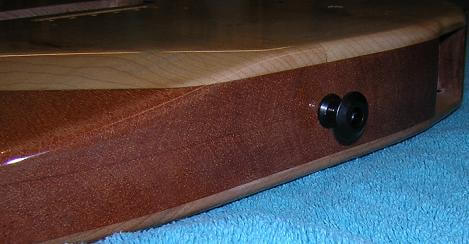
With the finish applied, we can start installing the hardware and setting up the guitar. First, I installed strap-locks on the guitar to keep it from falling off the strap when Paul's demonstrating his virtuosity.
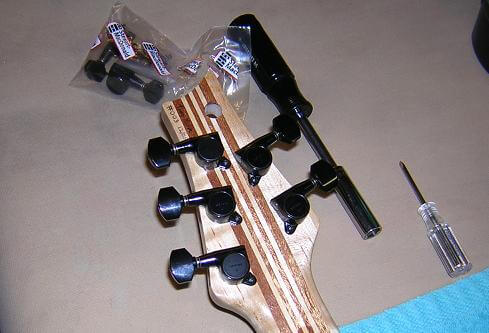
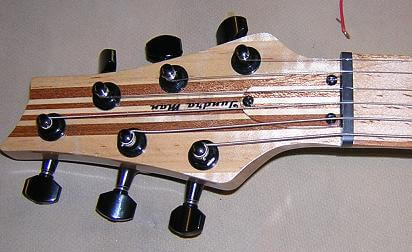
The tuning machines are installed. Actually, I just installed five of them for the time being, as I'm using the top hole to hang the guitar up when I'm not working on it. I'll install the last tuner when I string it up.
The frets had been installed before we applied the finish, so now it was time to make them playable. They were leveled using a file, then recrowned. The fret ends were rounded over to make them play smoother and not catch Paul's finger (or mine, for that matter!) Masking tape was applied over the guitar to keep the metal shavings from messing up the finish.
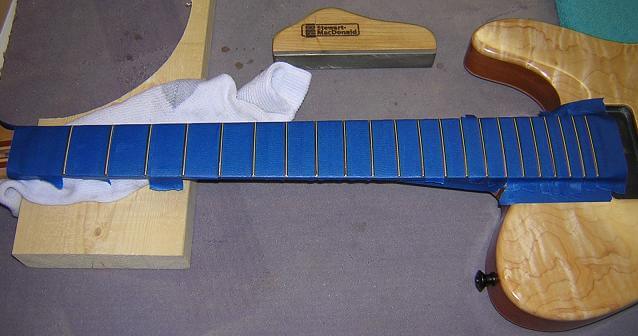
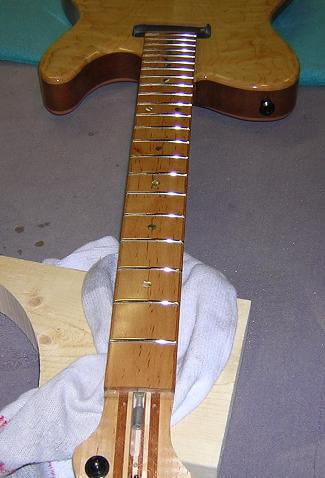
Once the fretwork was completed, I give them a good polish with Mother's metal polish (that I use on my motorcycle.) This makes them really shine.
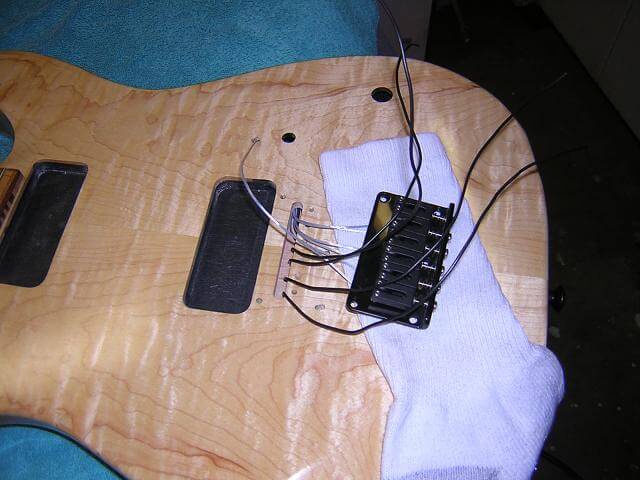
The bridge was installed, being careful to run the wires from the piezo pickups into the control cavity. Also, because the saddles on this guitar are graphite, which isn't electrically conductive, I had to ground the strings using a different method. You can see in this photo the wires that run through the cavity under the bridge. These wires attach to the string ferrels in the back in order to give the strings a ground reference.
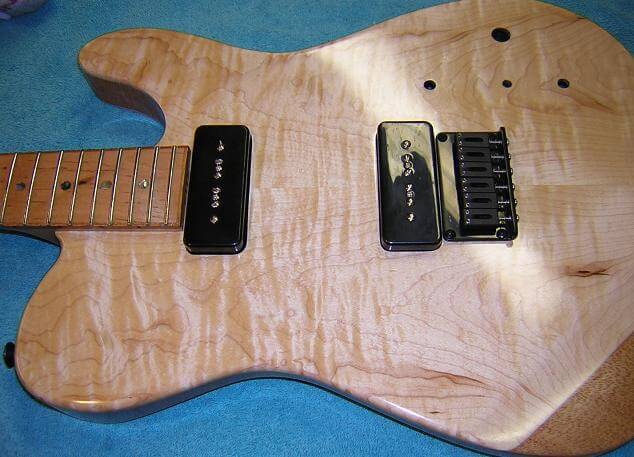
Next, we install the pickups. I like to leave enough slack in the wire where I can pop the pickup out later if I need to tweak something. You can't see that in this picture, I'm just saying it because I was thinking it.
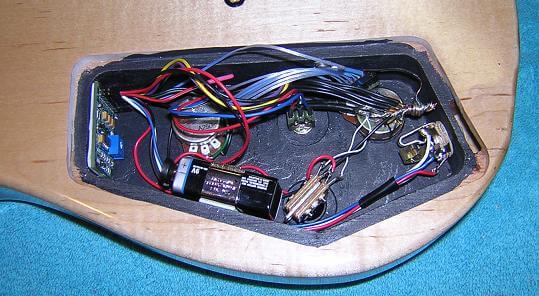
With the piezo and magnectic pickups installed, it's now time to wire everything up. The two volume pots were installed, along with two three-way switches. The small three way switch selects the magnetic or piezo output (or both). A stereo jack sends the signals to their respective amplification devices. The Graphtech Ghost pickup system includes a preamplifier that comes on a circuit board. That was attached to the control cavity wall via some double-sided tape. The 9 volt batter to power the preamp was also installed. There's a lot of wiring in this little cavity, and it took me a couple tries to get it right.
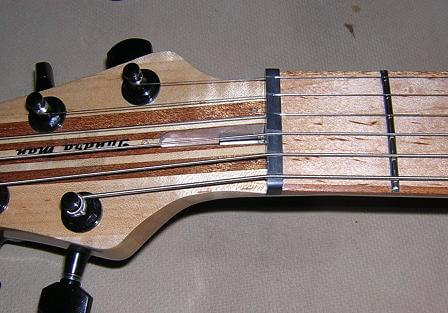
Now it was time to install strings and cut the nut slots. Cutting the nut is an art to itself. I went very slowly to get the slots deep enough to make playing in the first few frets easy, but not to deep that the open strings would rattle.
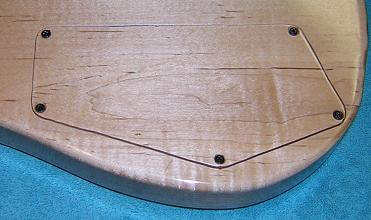
With everything pretty much done, the last items to finish are installing the control cavity cover and truss-rod adjustment cover.
And there you have it: the construction process is complete!
Return to the main page for Paul's guitar.
Or go back to the assembly page.
Return To The Main Music Gallery
This page last updated on 06/28/2018