


Guitars are traditionally built using only the finest, highest grade woods. There is certainly something to be said about using only the best materials, especially if you're building an acoustic instrument. Making a handmade guitar is so labor intensive, that the material cost, even when using high-end material, is the smaller portion of a builder's expense. There is some debate as to how much tone is influenced by the wood, and how much is due to the quality of the builder. Bob Taylor's Pallet Guitar comes to mind as an example. With an electric guitar, the lines get yet blurrier so in some people's opinion the use of top-end wood is even less important. Generally, though, luthiers don't skimp when it comes to wood except on the worst of budget instruments.
This being my first guitar, however, I was hesitant to purchase AAAAA material and risk making a beginner's mistake that would ruin a good piece of wood. However, I didn't want to stoop to the level of plywood either, as early on I owned a couple of plywood instruments and they stunk. (Yet again, Danelectro makes plywood guitars and they rock, so go figure.) Looking in guitar supply catalogs, wood is easily available in ready-to-use sizes and all sorts of exotic flavors. Unfortunately the prices leave one trying to catch their breath.
I decided to see what was available at (gasp) my local home centers. My son and I traveled to Home Depot where they have a good selection of maple. Digging through the bin, I came across a nice piece with some great flame figuring to it, which would work well for the maple part of my neck. I wanted a nice piece of maple that I could resaw and bookmatch for the top of the body as well. My body size dictated that it would have to be a piece of 1x8 at least 20" long. For whatever reason, Home Depot's maple over 6" wide is made up of glued-up pieces with veneer faces. Not what would be desirable for my bookmatched top.
So, with my piece of neck maple in hand (actually sticking out the car window as my truck had a flat tire at the time), we wandered down the street to Menards. Here they have both Maple and Mahogany available. The mahogany was easy. I picked out a piece sufficient to do the neck laminations, and then picked out a piece large enough from which to create my body stock. The 1x8 maple in this store is often also made up of glued up pieces, but without the veneer facing. (I did consider doing a bookmatched basketball court style top, but decided against it.) Digging through the pile, however, did yield some full 8" wide boards. Some of the stock was absolutely attrocious, which you would only use for a painted piece (and if you're going to paint it, why waste your money on maple?) I did finally come across a piece that was clear, pleasingly grained and even had a little bit of figuring. Slightly larger than what I needed, but I can always use extra.
I had guesstimated my body and neck blank wood bought from a guitar supplier would have been in the $200 range once you factored in shipping. By shopping the home centers, I got a slightly lower grade of wood, but perfectly adequate for my needs and only spent $40. In addition, this got me enough wood for one guitar body, two maple tops, two necks and some material to cut the peghead veneer. So I've already obtained most of the wood for my next guitar!
Now, the above wood prices do not count the fingerboard wood. I'm not aware of any home center stocking ebony or rosewood, although if I wanted a maple fingerboard I probably could have found adequate stock. So, I purchased an ebony fingerboard from Stewart McDonald. For an extra $12, I got the fingerboard pre-slotted and radiused, as doing this process takes a good deal of precision and some specialized tools, so it was easier to have them do it for me.
Some would argue that because I bought my fingerboard pre-slotted, that I'm "cheating" in some way by not making the entire guitar myself. Well, any supplies you buy are prepared to a point. Unless you cut down the tree yourself, some of the woodwork has been done for you already. I don't know of anyone who purchases raw ore and casts their own tuners. My point is, in every project you have to draw the line at some level where you accept materials being finished. I drew my line just after the slotted fingerboard.
Enough of the description of how I buy wood. It's time to glue up the rough stock. First, I started with the neck (or necks, as I had enough wood to make two blanks so I went ahead and made them both.) I wanted a neck laminated out of several pieces to give it strenth and rigidity. By buying flatsawn stock, then gluing them together face to face, I was effectively able to create a quartersawn laminated neck which should be very stable. For decoration (and strength) I wanted alternating layers of different colored wood. cut lengths of wood for the two necks so that one would have three layers of maple and two mahogany, and the other would be the opposite.
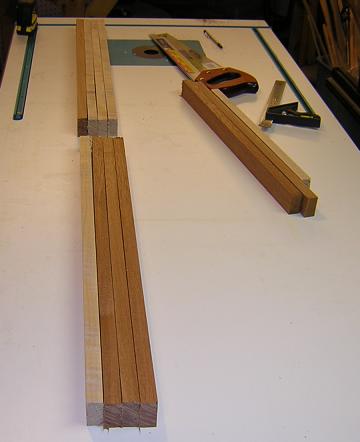
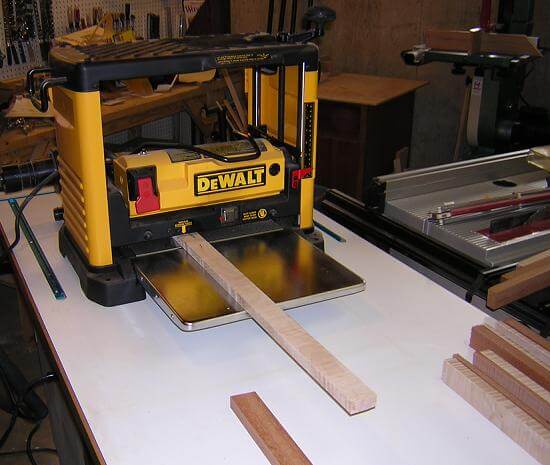
The contrasting layers of wood only needed to be 1/4" thick. Rather than planing two 4/4 pieces down to 1/4", I resawed the one piece of wood into two (roughly) 3/8" wide strips.
The center strip of wood only needed to be 1/2" wide, and the 1/4" pieces were still too thick after resawing, so I drug out the planer and planed the pieces down. I used a caliper to ensure the widths were exact.
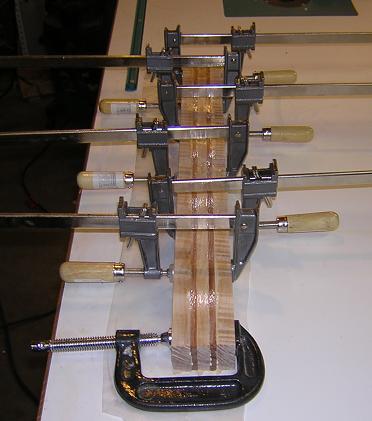
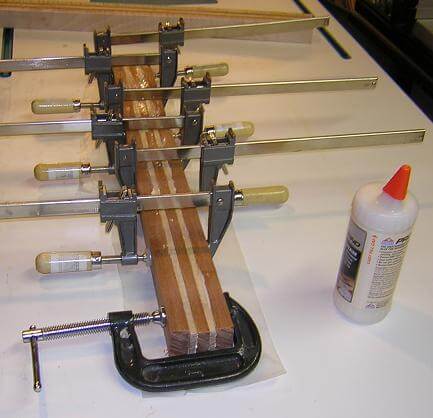
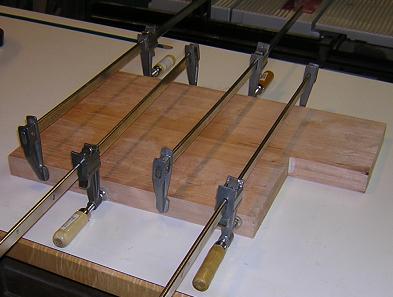
Once the neck pieces were planed, it was time to glue them up. Used plenty of glue and clamps so that I wouldn't have any issues down the road with the joinery.
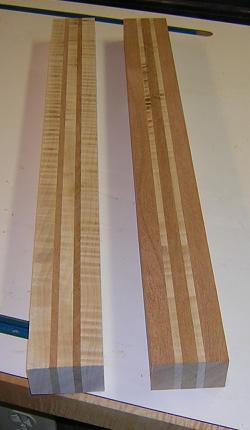
After the glue had dried, the pieces were cut to final length and the front and backs were sawn flush. The neck blanks were ready!
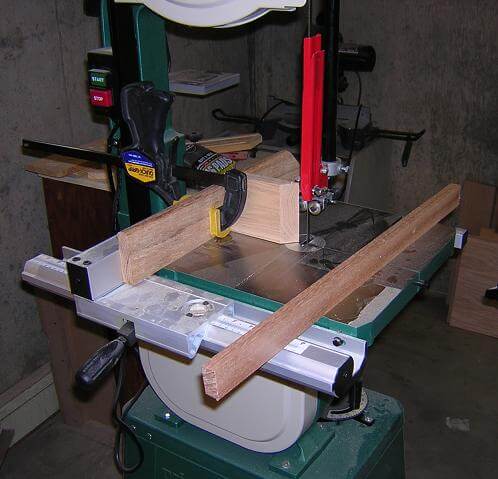
My attention turned to the body blank. I wanted the top to be a bookmatched piece of maple. I had never done bookmatching before, and actually only had my band saw for about a month at this time. I began by marking my stock for length and drawing a line down the edge that I could follow while resawing the board.
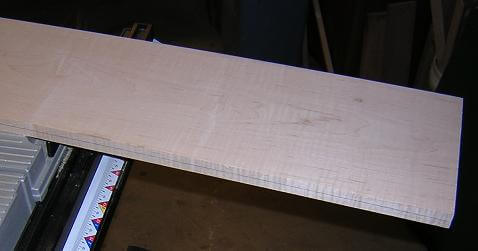
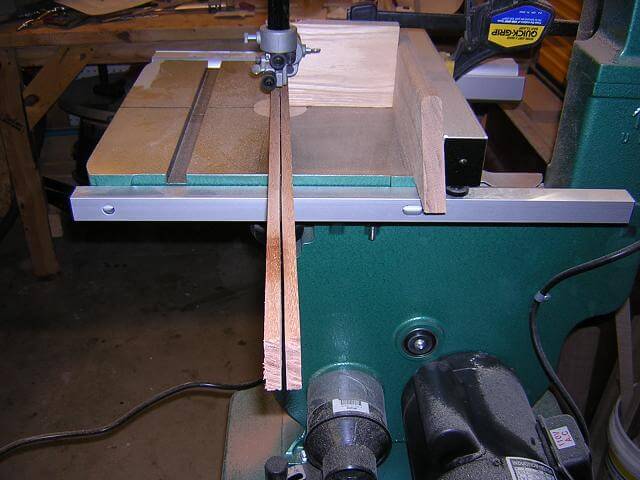
Here's where I made my first (big) mistake: rather than waiting until I had purchased a good 3 TPI 1/2" bandsaw blade suitable for resawing, I decided to try and make due with the stock 7 tpi 3/8" blade that came with the saw. The picture below is the result of my haste and actually makes the completed cut look a lot better than it really was:
Well, this "kind" of worked. I was able to split a 8" wide 20" long piece of maple into two pieces. However, because I used the wrong blade, the cut was terribly slow (least of my problems), horribly rough (see the picture) and worst of all, had drifted so that one side of each piece was close to 3/8" thick, but the other side was closer to 3/16". My original intent was after resawing the board to plane each side to 1/4" to give me a nice, thick maple top, but with parts of the board already thinner than this pre-planing it wasn't going to work with this board.
I was left with a couple options: either throw away what I had, purchase the right blade and resaw the remaining chunk of maple (that I would have otherwise used as a top for another guitar) or try and salvage the piece by planing it down just enough to remove the bandsaw scratches (which is a understated term in this case, they were canyons!) and go with a thinner top than I had originally intended.
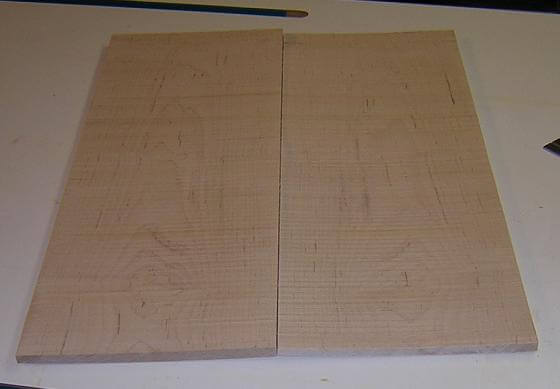
Because I'm cheap and I hate to see good wood go to waste, I decided to try and salvage the maple top. The body binding should hide the fact that the top wasn't a full 1/4". So, once again I drug out the planer and went to work. The thinness of the stock and the fact that it had some figuring made planing a chore. I had to take extremely light cuts to ensure the stock didn't tear out. Even with this precaution I did get a little tear-out, but nothing I couldn't address later with some filler. Once I had the maple planed, the two pieces were only 1/8" thick. In addition, I had cut out so much of the inside of the board that the bookmatching wasn't very close any more, and also the "B" face of the board had a brown streak that I managed to expose from the inside. Looking at my pattern, I figured out that by orienting the board carefully, I could place the brown streak so that most of it is cut off as waste, and what is visible is only on the bottom horn. Not something that Bob Taylor would settle for (but I've seen some Gibsons that have settled for less!), but I decided that it was good enough for my first instrument. At some point you just have to accept that things are good enough, and on my first guitar this was good enough.
My original intent was to plane the mahogany down to 1 1/4" which would make the final thickness of the guitar 1 1/2" once the maple cap was glued on. Well, with the maple cap winding up only 1/8" thick, I had to stop planing the mahogany at 1 3/8". Again, not what I had originally intended, but it will work, especially once the binding is installed.
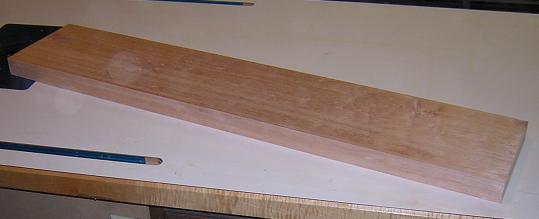
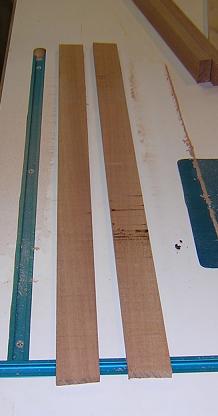
I then cut my mahogany into two pieces (20" and 16") and edge glued them together. As a contrast to everything else that was going wrong with the maple, the mahogany glue up was the smoothest, best aligned glue up I've ever accomplished!
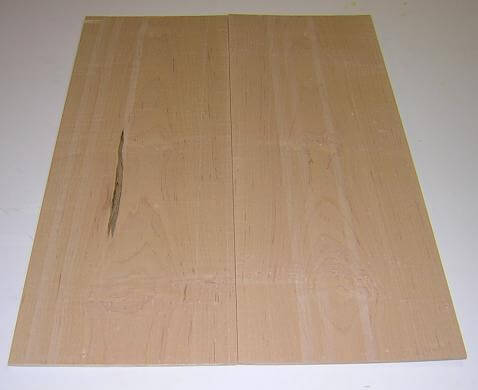
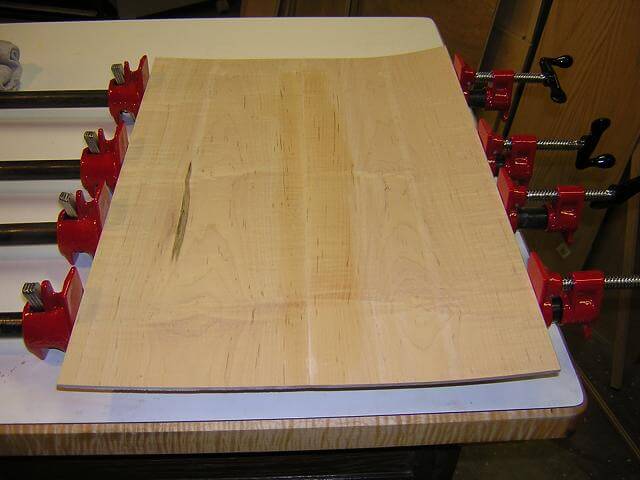
While the mahogany was cooking in the clamps, I ran into my next horror. The thinly planed maple was starting to warp. Arrrgh! Probably the best approach at this point would be to chuck the maple and start over with a new piece, but I had already glued up my mahogany which was planed to 1 3/8". With the two pieces glued together, they were too wide to fit through my planer, so if I tried to cap it with 1/4" maple the body would wind up thicker than I wanted. I decided that I would have to salvage my maple top. I carefully edge glued the top pieces together. I wound up with a large "U" shaped piece of wood, but with the lowest point being the middle it would allow me to easily flatten it when I clamp it to the mahogany. By the way, the darker area down the middle of the board isn't the wood coloring, just a slightly damp area where I ran a wet rag to clean up some of the glue squeeze-out.
I had heard of people running into problems when gluing a warped piece to a body blank where it causes the body blank to warp as well, but these instances were with 1/4" wood and thicker. The 1/8" maple piece was fairly pliable, so I gambled (we'll see in the future) that it wouldn't warp the mahogany base. I started by giving the mahogany a good coating of glue, lining up the center lines of the mahogany and maple blanks and clamping them. Then I set two bags of cement mix on top of the blank to hold it down, and finished by clamping the sides with clamps and cauls.
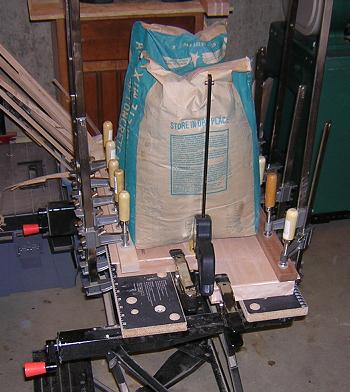
I let it sit in the clamps a full 24 hours, and when the glue was dry, it seemed pretty stable. So, my stock is finally ready to go!
With the stock ready, it's time to build the neck.
Not sure how we got this far? Return to the planning stage.
Return To The Main Music Gallery
This page last updated on 06/28/2018