


With the majority of the guitar body shaping completed, it was now time to install the binding. For those of you out of the luthier loop, binding is merely a strip of some sort (usually plastic, but sometimes wood or other materials) glued into the edge of the guitar. Headstocks and fretboards are also commonly bound, along with the "F" holes on archtop guitars. The reason for binding is primarily asthetic, although on fretboards it does affect the way the neck feels and also can help control moisture absorption into the wood. Usually, though, it's used as decoration. On my guitar, I'll be binding the body and fretboard. The fretboard binding was covered on the page where I built the fretboard, and was a different process compared to the way I'm doing it on the body, so I'll cover it in detail here.
The binding I'm using is a cream-colored PVC plastic. It's approximately 3/16" wide and 1/4" high. The general process of installing body-binding is to cut a channel around the outside of the guitar to hold the binding, glue it in slightly proud of the guitar's surface, then scrape the binding even with the body.
There are several methods for routing the channel to mount the binding. I suppose one could cut the entire channel with a chisel, but they would have to have a lot more patience and talent than I have. The most common methods of routing the channel is to use a hand-held router with a rabbet cutting bit, or also popular is a Dremel-type router with an edge guide. Both of these methods involved purchasing some equipment I don't have (a 3/16" rabbeting bit or an edge guide for my Dremel) and seeing as I had already spend enough on this guitar, I didn't want to purchase any more tools unless it was absolutely necessary.
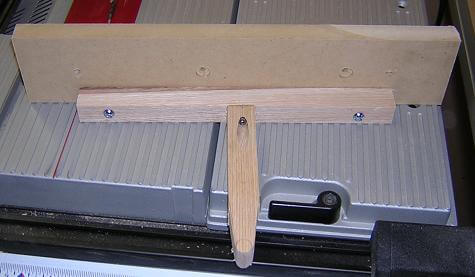
So, I came up with a method of cutting the channel using a straight cutting router bit (1/2"), my router table, and a jig I designed using pieces from my scrap bucket. More or less, it consists of a rub arm that covers most of the bit, but allows a little portion to be exposed to cut the channel. The arm is long enough to give clearance around all of the body parts. This arm mounts to my router table fence, which allows me to adjust the depth of cut. Here are the pictures of this jig and a demonstration of it's use on a piece of scrap:
With the jig and router bit adjusted to make the proper depth and height of cut, I proceeded to rout the binding channel on the guitar body. Making the jig took longer than actually cutting the binding channel.
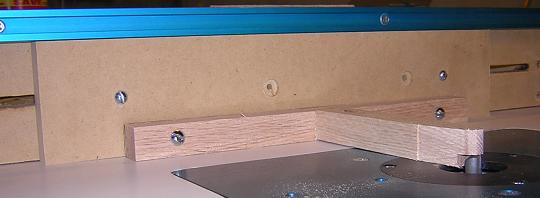
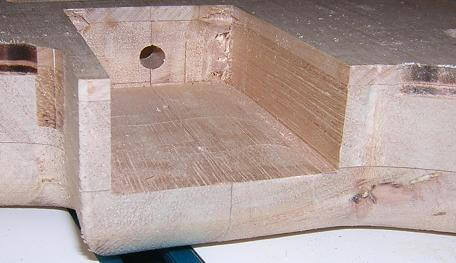
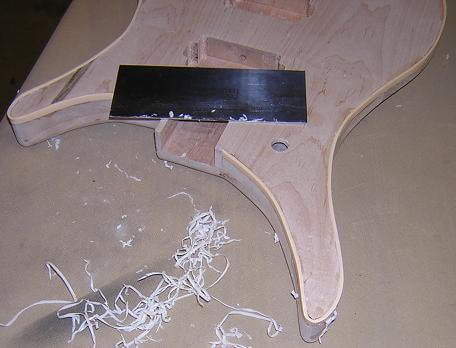
One of the areas I had to be careful with when cutting the channel was around the neck pocket. I didn't want the binding to extend into this area. To accomodate this, I stopped the routing just a little short of the neck pocket, then cleaned up the edge of the cut with a chisel. Here's a photo of where I stopped routing:
Now that the channel was ready, it was "simply" a matter of gluing in the binding. I used a special binding glue I got from Stewart MacDonald (the same place where I ordered the binding material.) This glue worked pretty well for me, but I have heard others complain about it not sticking properly. One of the recommendations was to scuff up the body-side of the binding with 80 grit sandpaper prior to gluing in order to give the glue something on to which to grab. I did this, and didn't have any holding problems. It is farily easy to glue your fingers to the body when gluing in the binding (don't ask how I know) but thankfully skin separates a little easier with this cement than it does from CA (super-glue). I must say, though, that this stuff is a pain to apply, as it likes to drip everywhere but the place you want to put it!
Probably the trickiest part of the binding was the sharp corners on the two horns. The PVC is farily flexible up to about a two inch radius, but if you try and force it to conform to a sharper curve it will crack and break. To allow these sharper curves, you need to heat the binding up to soften the plastic and allow it to be bent.
On the musical instrument maker's forum, many people recommend using a hair dryer to heat the PVC. I tried this method with my wife's hair dryer, but found it didn't put out enough heat to melt the plastic (cheap Wal-Mart piece of junk!) Makes my wife's hair look nice, though, so I guess I shouldn't complain.
I had also read about someone dipping the binding in boiling water to soften it up, so this was my next attempt. I'm happy to report that it did soften the binding and allow it to easily bend. I am unhappy to report that it was near-impossible to get the bend in the right spot. I would heat the PVC, bend it, then hold it up to the guitar to discover (yet again) that the bend wasn't in the right place and wasn't the right shape. I also discovered that the binding will allow you to bend the same spot about 10 time before it finally breaks. Arrrgh!
Others had reported luck with a heat gun (like what people use to strip paint.) I didn't have access to one of those, so I decided to improvise with a blow-torch. I had to be real careful to heat the PVC slowly and to not set the guitar on fire, but this actually worked. I was able to bend the binding around the sharp horns.
The rest of the gluing process was farily straighforward. I'd put glue in about 3" of the channel, press the binding into place, then use strips of masking tape to hold it until the glue dried. The glue would actually set up rather quickly, which is why I had to keep the glue sections small.
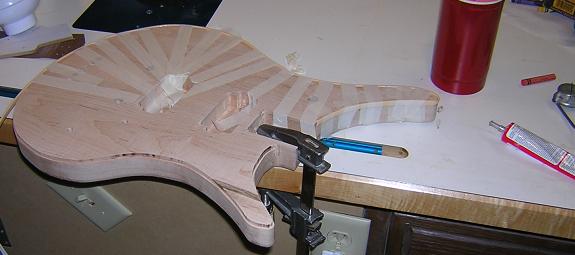
There was one spot on the lower horn where there was a gap and required re-gluing.

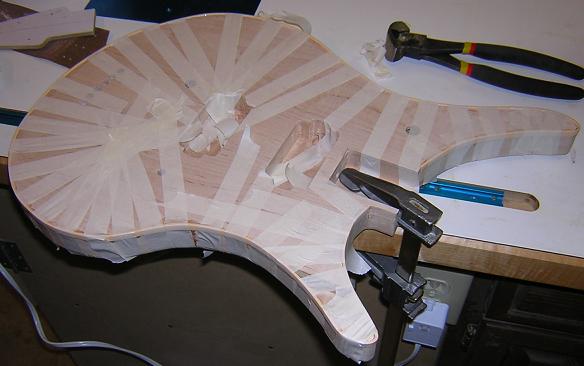
After the binding had dried a few hours, I removed the tape. The binding looked terrible at this point, as it sat proud of both the top and sides of the guitar, and there was a lot of glue squeeze-out and drippings all over the place. This picture actually makes it look better than it was.
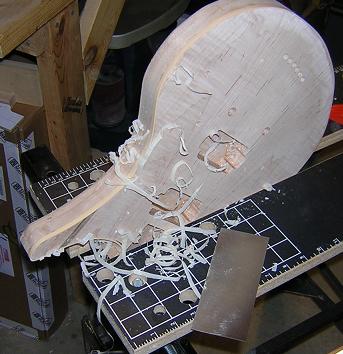
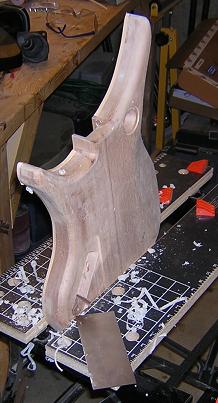
To bring the binding flush with the body top and sides, I used a cabinet scraper. This was a painstakingly long and tedious process, but truth be known, it was rather enjoyable. I had never used a scraper before starting this guitar, and the feeling of it sliding through the PVC and slowly peeling razor-thin strips off the binding was very rewarding. To scrape the sides, I clamped the body in my Workmate vise. Scraping the binding sure makes a mess, though!

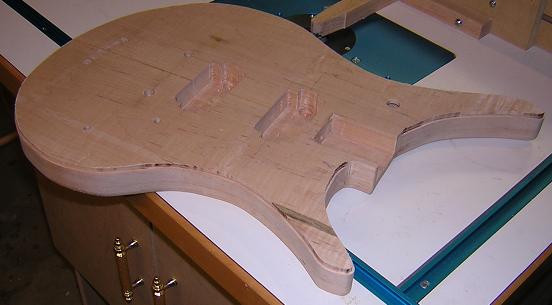
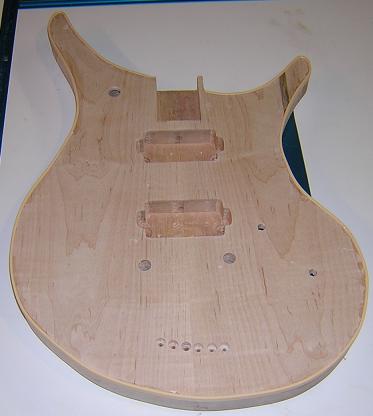
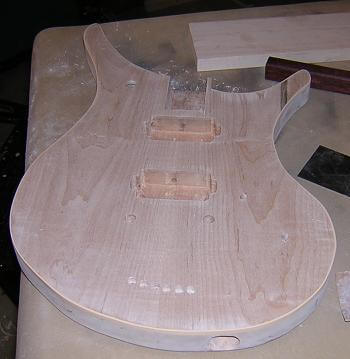
After several hours of painstaking scraping and sanding, the binding was completed!
Now that the body is ready, we've got a place to put the neck and fretboard. On to the final construction!
If you missed how we got to this point, you can go back to where we shaped the body.
Return To The Main Music Gallery
This page last updated on 06/28/2018