


We're on the home stretch now!
With the basic neck construction completed and the fretboard ready to go, the next step is to attach the fretboard to the neck. Prior to doing this step, the truss-rod must be installed. There's not a lot to this process other than slipping it in to the channel, as it's not fastened to the neck; it just sits free in the channel where it can move around as needed. One of the things that I'd read about is that the truss rod should be lubricated prior to installation, as (obviously) this can't be done after the fact. I shot both ends with some WD-40 and moved the screw to work the lubricant into the threads. Then I made sure I removed tension on the rod prior to installation.
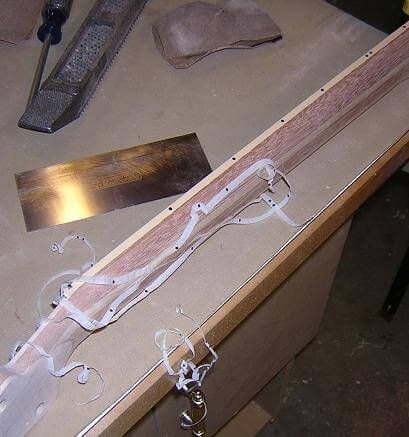
The truss rod I bought comes wrapped in PVC to keep it from rattling inside the neck, but the manufacturer also recommended that some silicone be placed in the neck channel to further dampen the rod. I put a spot of silicone where the top and bottom of the rod will sit, along with a couple spots in the middle of the neck.

Then I simply slid the truss-rod into place and wiped off any silicone that squeezed out of the channel.

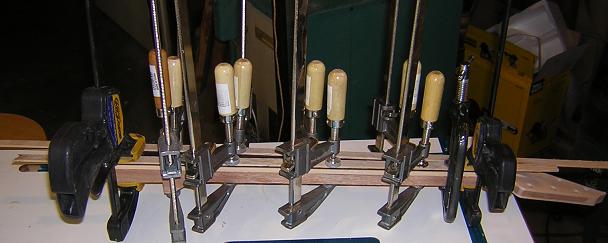
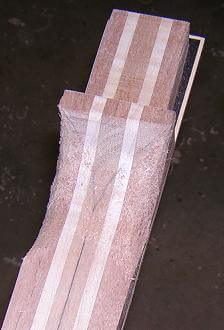
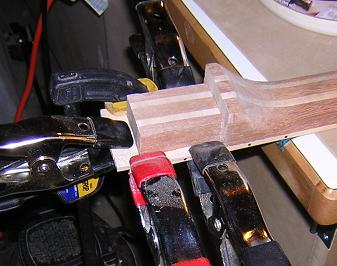
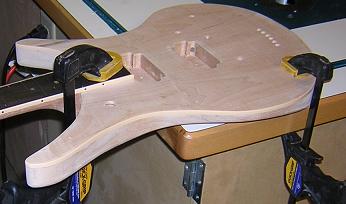
Now it was time to glue the fretboard to the neck. I had previously marked where the nut location should be positioned, so I made sure that this line was visible on the sides of the neck. Also, I knew that the shoulder of the neck tenon is located on the 18th fret, so I had that as a reference as well. Using my fingers, I smeared a generous amount of wood glue on the neck, then carefully set the fretboard into place making sure to align the nut with the mark on the neck, and also to center the board. Then I clamped the fretboard with firm but not ridiculous pressure, as I wanted to make sure I didn't get over-zealous and squeeze all of the glue out of the joint. Also, I placed two strips of scrap oak on the fretboard to keep the clamps from marring all my hard work.
I had heard of people having problems with the board sliding around in the glue and being difficult to keep in position when clamping. Some people drive a small brad into the neck and cut the head off so it can be used to help keep the fretboard in position. I was feeling daring (or lazy; you pick) so I decided to just see how it went without the brad. I used a quick clamp to hold the nut end of the board in position, then used another quick clamp on the body end after making sure everything was properly aligned. After that, I filled in the center parts of the neck with clamps, until I had an even amount of squeeze out all around the fretboard. I went ahead and wiped up this excess glue to save me the trouble of trying to remove it after it had dried rock-hard.
After the neck had cooked in the clamps for about eight hours, I removed them to inspect my work. Overall I was happy with the way it had turned out; the width of the fingerboard was a hair wider than I'd intended (or the neck was a hair narrower) so the binding sat proud enough of the neck that it left a small ridge that you could feel when running your hand over it. This could easily be leveled with a scraper, but I decided that I'd wait to do this after I'd carved the neck. In any event, I'm ready to move on.
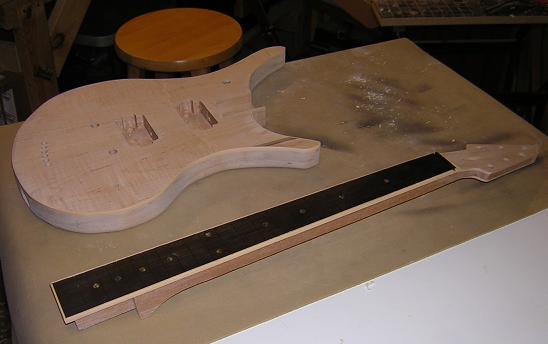
Carving the neck was yet another part of this whole endeavor I was nervous about. Prior to starting the guitar, there were several construction activities that had me concerned, as I hadn't done anything similar in any of the other woodworking projects I had completed previously. I had done enough woodworking to know how to make things nice and square. Carving a neck, though, was the exact opposite of making things nice and square. In addition, the neck had to be carved towards the end of the construction phase, where a fatal error would result in the negating of quite a bit of work. I was aprehensive, but was prodded on by another luthier newbie over on the Musical Instrument Maker's Forum. He also was nervous about carving his first neck, but found it went much smoother than he had anticipated. His advice to me was to "don't worry about it and just go ahead and carve the thing." Sound advice. As I pleasantly discovered, it really wasn't too bad and actually turned out to be a lot of fun! I just made sure to go slow and take my time. In Melvyn Hiscock's wisdom, "you can always go back and remove more wood, but adding it back proves to be a challenge!"
I began by marking some layout lines. First, I drew a center line down the length of the neck. If I didn't carve away the center line, the neck would remain at the proper depth and I wouldn't have to worry about exposing the truss rod (one of my fears.) Next, I drew in the areas where I wanted the neck profile to begin behind the headstock, and end down at the heel. I just drew these by eye, erasing a couple of times until it looked "right". The heel end really wasn't too critical, as it will get blended into the body after the neck is glued to the body.
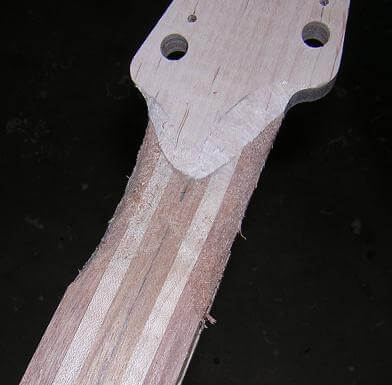
Then I used a curved surform to carve the headstock transition into the neck. As you can see, the surform is effective but leaves a crude cut. That's why the invented sandpaper!
I did the same on the heel. Again, much of this part will get carved away when I join the neck to the body, so it's not imperative that I get it perfect.
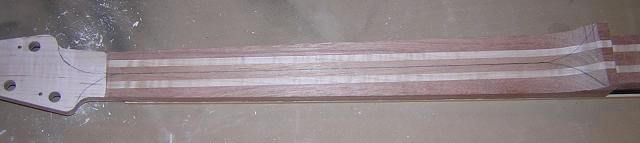
With the two ends carved, I switched to a flat blade on the surform and joined the two points. I took my time and tried to get the profile nice and even, matching on both sides of the neck.
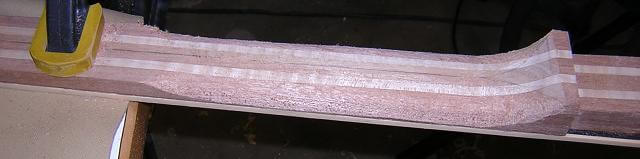
Once the rough carving was done, the neck profile was visible, but looking pretty rugged.
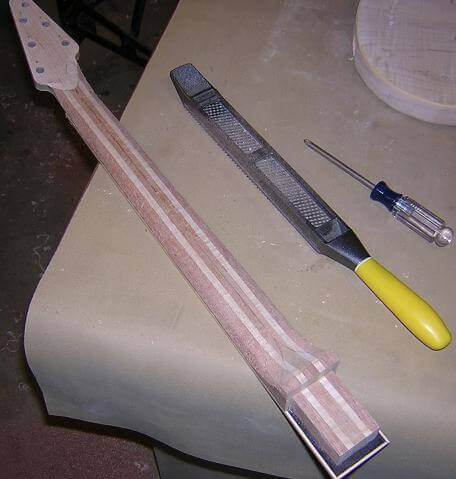
I switched to sandpaper. I smoothed out the surform scratches with 80 grit, then moved on to 100, 150 and finally 220 grit paper. Once I got to the 220 grit, I would occasionally run into spots where I found a surform gouge I'd missed, and I'd have to return to the 80 grit in that spot. All this hand carving and sanding did work up a sweat, but it was very satisfying to see the block of wood actually start to look like a guitar neck!
That evening I had band practice. I mention this only because it lends itself to an important discovery I made: while carving and sanding the neck as described above, I found out that your hand develops a "memory". That is, I would carve and sand and tweak the neck until it felt right in the shop and thought I was done. After playing my Hamer for a couple hours that evening, I went back and felt the neck that I had carved. The neck that I thought was profiled well now felt too flat on the back side. I spent some more time sanding and tweaking until it felt correct. Then, the next day after I got home from playing for a few more hours on Sunday morning, I felt the neck again. It was better, but there was a spot towards the middle (thumb side) that felt like the radius in that spot was a little too tight and I had to return to sanding again to get this corrected. So my point (and discovery) is that when carving a neck, it's important to have a reference you can use to compare. It's really amazing how that neck that felt perfectly round can suddenly feel lopsided after playing another neck for a bit. It's also amazing to see how little wood you actually need to remove at this point to change the feel of the neck! Less than a minute with 80 grit sandpaper easily fixed these small issues.
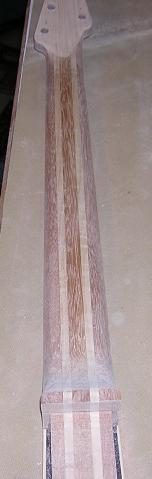
With the profile complete, I took my scraper and leveled the bindings with the side of the neck. This also removed a couple little nicks I'd put in the binding when I misjudged with the surform.
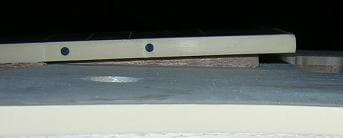
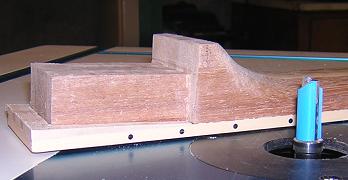
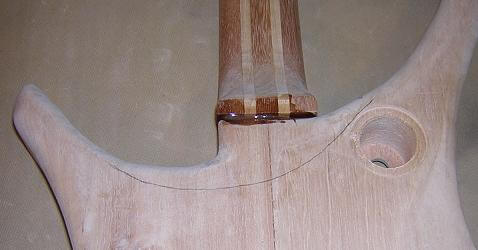
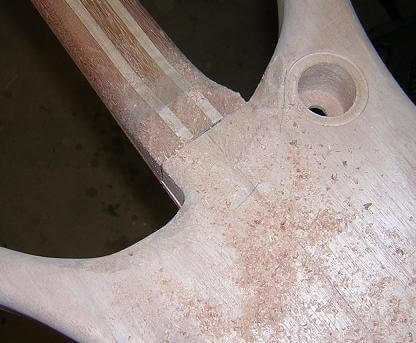
I was getting very close to the point where I could join the neck to the guitar! One little detail I still had to address was the gap between the bottom of the fretboard and the top of the guitar that is the (intentional) result of the angle of the neck tenon. You can see this gap in the photo below. On carved-top guitars (i.e. the Les Paul,) this gap is often dealt with by angling the top of the body back to match the fretboard angle. The body angle is blended in with the arch of the guitar and most guitarists don't even realize that some of these guitars have a neck angle of up to four degrees! The neck angle on this guitar is half that amount, at two degrees.
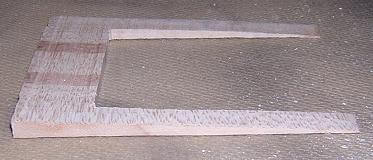
With the flat top I'm using on this guitar, though, angling the top of the guitar wasn't an option. So the other way to deal with this gap was to make a piece of filler wood that will bridge the area under the fretboard. I had a piece of scrap laminated maple left over from my previous neck attempt that was already cut at a two degree wedge, so I decided to use this scrap piece as the maple should blend better with the maple top versus making a wedge out of mahogany. I drew the outline of the neck tenon onto the wedge, and cut it out on the scroll saw.
Then, I glued this wedge to the underside of the fretboard.
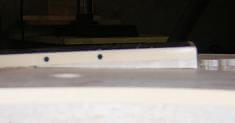
The wedged piece was wider and longer than the fretboard, so I cut it flush with the binding using a pattern bit in the router table.
So now, the gap has been filled. Sorry this shot is out of focus.
It's finally time to bring the two main pieces of the guitar together, in what will (hopefully) be a happy marriage of two distinct elements of the construction. As I have mentioned several times already, the neck-to-body join is the most important joint on the guitar. If this joint fails (saw it happen once on a friend's guitar!) you will (best case) have a guitar that is impossible to keep in tune because the neck is moving around in the socket, or (worst case) a guitar that folds in half due to the string tension pulling the joint apart (which is what happened to the guitar I mentioned. My buddy was a bit stressed!) Needless to say, I didn't want that joint to fail, and this desire was one of the reasons I scrapped the first neck as I wasn't satisfied with fit of the neck joint.
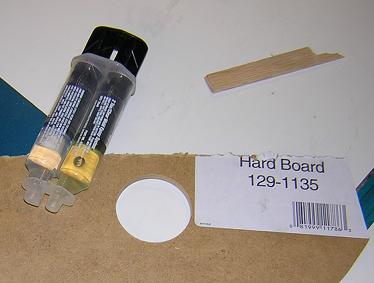
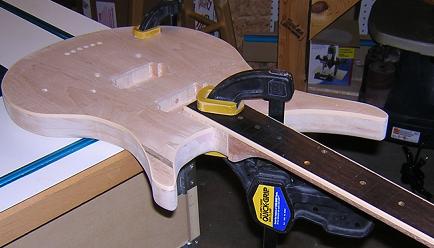
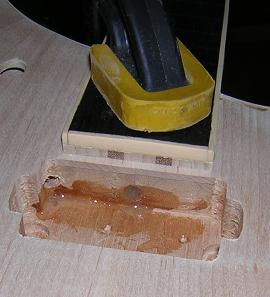
This time around, however, the neck joint fit well; not overly tight, but with no slop that would allow movement after gluing. I have used wood glue to hold together many, many joints, and haven't had any failures in joints that were properly fitted. All evidence suggests that a join with wood glue will be stronger than the wood itself. I had no reason to believe that wood glue wouldn't be more than adequate to hold this joint together. So, with all of that knowledge, I decided to set aside my bottle of wood glue and join the neck to the body using epoxy. Color me paranoid, but I was going to ensure that this joint was not going to fail! I mixed up a batch on a scrap piece of hardboard, and used a scrap of wood to spread the glue into the neck socket.
Hopefully nothing would happen down the road that would make me want to attempt neck removal, as by using epoxy it just wasn't going to happen. Truth be told, even with wood glue it would be difficult to remove the neck without destroying the guitar, so this in my opinion was a minor risk. Just to be safe, I did a dry run of the clamping to make sure I wouldn't have any surpises within the 5 minute open time of the epoxy. Feeling satisfied that I'd dotted all my "i"s and crossed my "t"s, I mixed up a batch of epoxy (slow cure kind, which is stronger.) Most epoxy failures that I'd read about were probably due to inadequate mixing, so I watched the clock and mixed for a good minute and a half. This left me three and a half minutes to coat the joint and clamp everything up. Not much time, so I'm glad I'd done the dry run. Everything went together smooth, and I got the join together with a minute to spare!
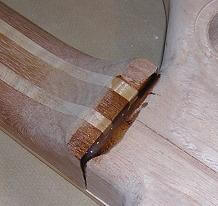
Looking at the hole in the top pickup cavity that I'd used to drill the wire channel, I can see glue oozing out. This was reassuring, as it meant that the wood join was nice and tight and the epoxy was looking for a place to go as the pieces were drawn together.
The next day, after the epoxy had cured I removed the clamps and inspected the work. A little bit of glue squeeze-out, but not too bad. The best part was that at this point, for the first time, I could actually hold the guitar and get an idea for the way it will feel and balance! What a rush! I'm definitely starting to feel a sense of accomplishment!
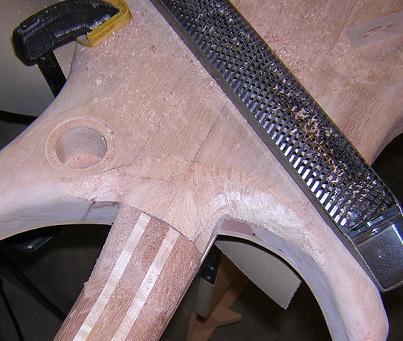
Now it was time to blend the back of the neck with the body. As I'd mentioned on a previous page, when I had rounded over the back edge of the body I accidentally rounded over the portion right behind the neck. Oops. The result of this mistake can be seen in this photo, compounded with the glue squeeze out making the whole thing look like a mess:
The joint can still be blended together to cover this mistake, but it means that I'll have to carve away a bit more wood than I had originally intended. More valuable knowledge to store away for the next guitar!
Like the carving the neck, I began by free-handing in a pencil line to use as a guide in the carving. On the top horn, I had to be careful not to carve into the pickup switch cavity. This might make the upper-side of the neck profile a little sharper than the lower, but the lower profile will be the one that actually will provide the upper-fret access.
I began the carving process, again using a surform. I would switch between round and flat blades as I worked on various parts of the join.
I continued shaping. This took a little while, and I had to be careful not to accidentally gouge the other parts of the body and neck as I was using the surform. I did have a couple little nicks I had to sand out where I slipped.
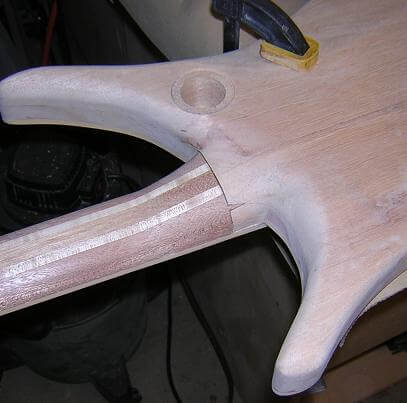
And like the neck profile, once I was pretty close to the shape I wanted, I switched over to sandpaper. I started with 60 grit, and moved up through 220. This process took quite a while, as the shape was fairly intricate and I would continue to find things I wanted to tweak. Finally, after a couple hours of carving and sanding, I was satisfied with how the transition looked, and more importantly, how it felt. The epoxy left a very visible glue line that makes it look like there's a ridge at that point, but you can't feel the transition at all with your fingers; it turned out very smooth. Also, in the photo below you can see a corner where I accidentally sanded into a little bit of the neck tenon. This shouldn't be enough to weaken the joint, and is just a small cosmetic flaw. Few people will probably ever notice it, but I will always know it's there!
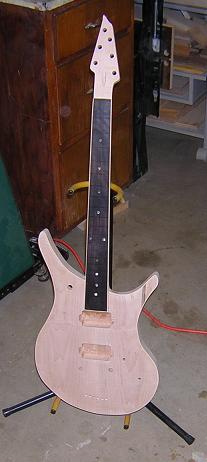
So here we are! The construction phase of the guitar is completed. The remaining steps are to install the frets, apply the finish, then add the hardware and wiring. The end is in sight!
Follow me over to the page where I install the frets.
Not sure how we got to this point? Go back to the body binding page.
Return To The Main Music Gallery
This page last updated on 06/28/2018