


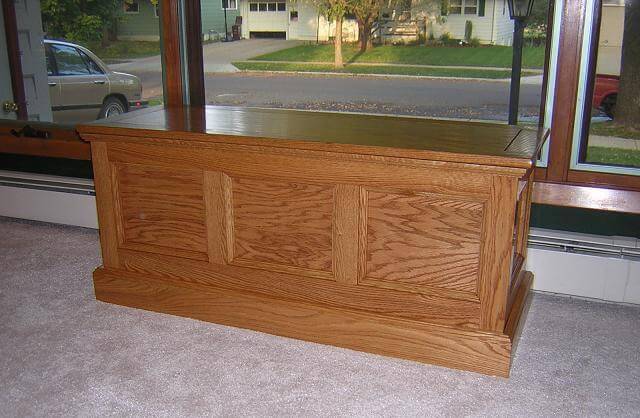
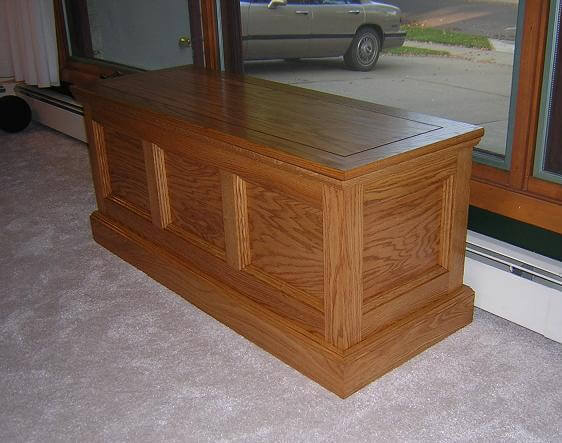
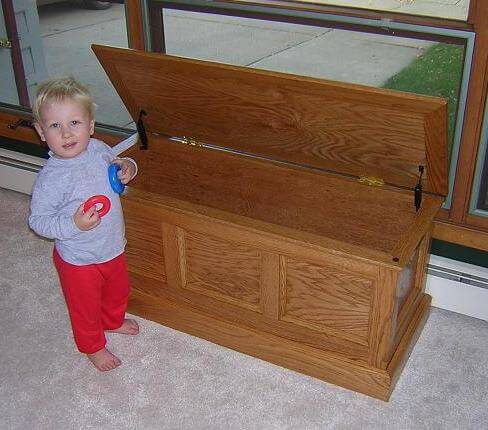
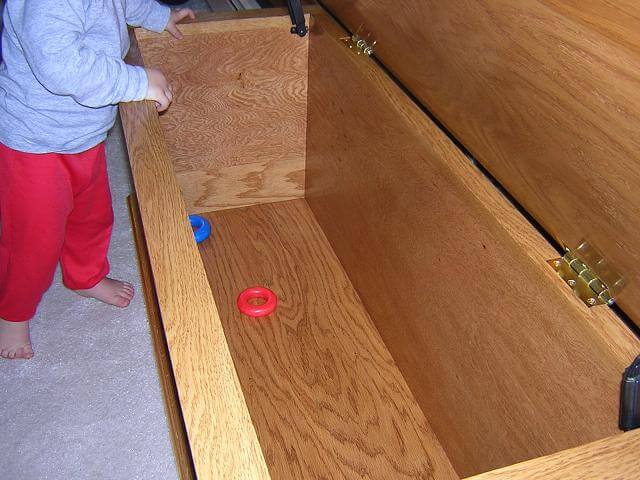
Since the day my son (Tundra Boy) had been born, I had been planning on building a toy box to help us reign in some of the toys strewn about the house. A year and a half later, this project finally came to the top in my project queue, so it was time. I had thought about doing a traditional, painted toy box for his bedroom, but then decided instead to build more of an heirloom piece that we could keep in the living room. My thought was that if I design it correctly, we can use it as a window seat/storage chest when my son outgrows it's use as a toy box.
I had searched for plans for a box I liked, and came across a couple that looked promising, but none that were exactly what I was looking for. A recent copy of Woodsmith had a painted window seat with an overall look that I liked, but some structural elements for which I didn't care. I also wasn't interested in painting the piece, so this design would need some other modifications as well. A while back Woodsmith had plans for a blanket chest that also had elements that I liked. This chest, however, had sculptured feet and two drawers in the bottom, and while it would look great in a bedroom, I wasn't convinced it would look right in my living room.
In the end, I wound up combining the ideas from the two boxes, along with some of my own design ideas and elements, to come up with this blended design.

For those who are interested, I've documented the entire construction process. Because the description of the construction is quite lengthy and image intensive, I have broken it up into sections, displayed in the order they were completed.
I don't have pictures of the finishing process, as frankly, it's pretty boring. The finish on the toy box started with a base of Minwax Ipswitch Pine stain (yes, I know I used pine stain on oak, but it matches the rest of my furniture.) The protective layer was made up of six coats of Minwax Semi-Gloss poly thinned 50% with mineral spirits, to make a wiping varnish. Between each coat, the project was rubbed down with 0000 steel wool, gone over with a magnet (to pick up the bits of steel wool left behind), then tacked down with a clean cloth. Finishing this way is slower and more tedious, but I've gotten very good results using this method.
Click here to view the construction process, beginning with cutting down the sheet goods.
Return To The Main Wood Gallery
This page last updated on 06/28/2018