


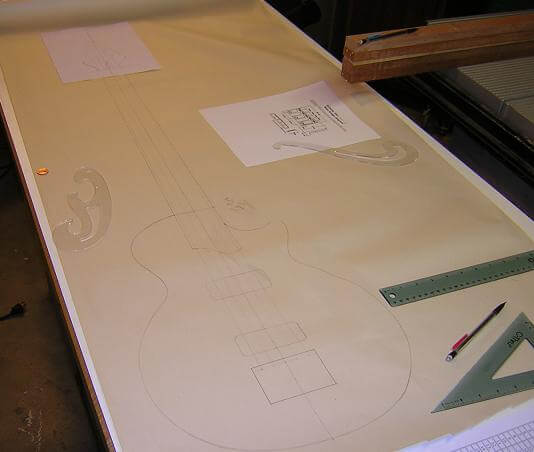
All endeavors (well, most sucessful endeavors) begin with a plan. If I'm creating an instrument that I've never built before, I like to draw up a full-sized picture to help me work out any "problem areas" ahead of time. It's a lot easier to erase a line and redraw than it is to re-cut a piece of wood. Also, guitars don't crumple up as well when you completely botch them!
To begin, Ed wanted his bass to be a modified version of the traditional "Les Paul" shape. I thought a good starting point would be to trace my Les Paul onto a large piece of paper to use as a reference point. I pulled my Les Paul out of mothballs (I really should sell this thing as I rarely ever play it, but it's just so darn pretty!) and set it on a large piece of paper. Then I traced around the shape to give me a starting point.
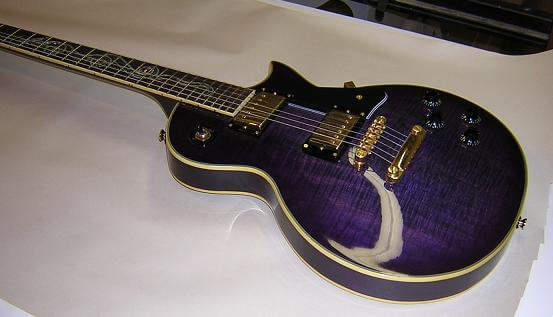
Once that was done, I put the Paul back in the case (where I won't see it for probably another year) and started to modify the shape. I enlarged the body slightly to make the "look" flow a little better with the long bass neck. Making the body larger also will help the balance of the instrument. The drawing helped me work out the positioning and taper of the neck as well.
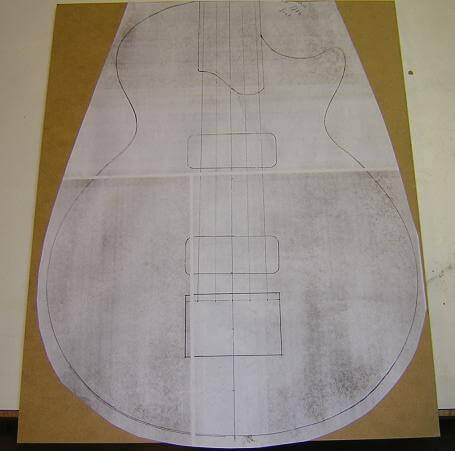
With the basic design complete, it was time to create a template from which I can cut the body. I photocopied the original drawing, then pasted it to a piece of 1/4" hardboard.
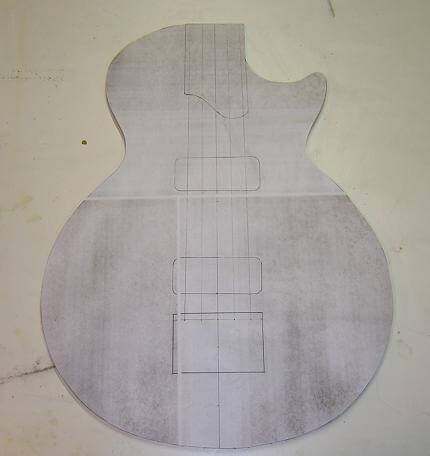
I cut the template out on the scroll saw, then sanded the edges to make everything smooth. I could now use this template as a pattern for the bass.
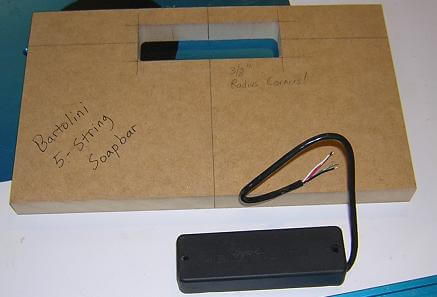
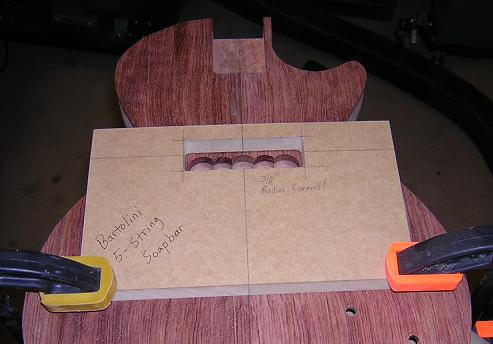
As long as I was making templates, I also needed to make one for the Bartolini pickups as I had never used this pickup model previously. I cut it out from 3/4" MDF.
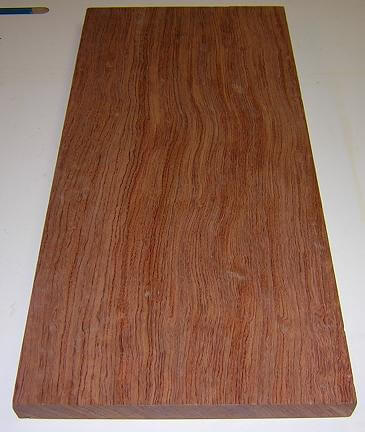
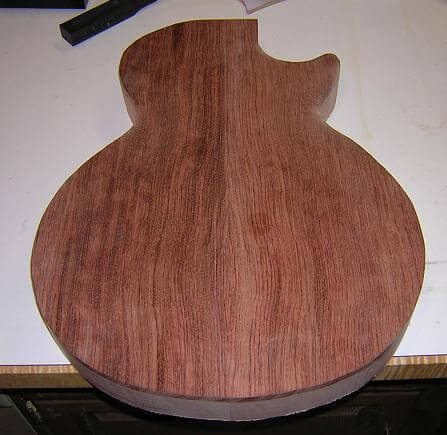
Here's a picture of the piece of bubinga that would be made into the top of the bass. This is the first time I've used bubinga. It is a very pretty, but very heavy and dense wood. My tools would audibly complain when cutting through this stuff. I can only imagine how heavy an entire bubinga guitar would weigh!
Tops of guitars look very good when the wood is bookmatched, so I cut the piece of bubinga in half down it's thickness. Here's the two bookmatched pieces of bubinga sitting next to each other after they were planed to remove the bandsaw scratches.

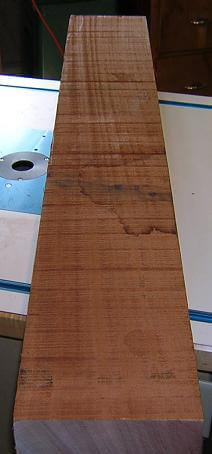
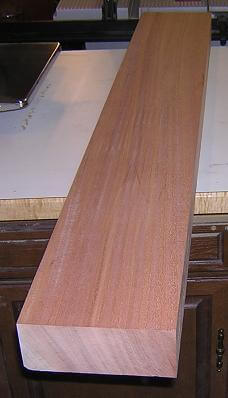
The bulk of the body of the bass will be made from mahogany. I started with a (very) rough slab of mahogany that would take a lot of massaging to get it to usable shape.
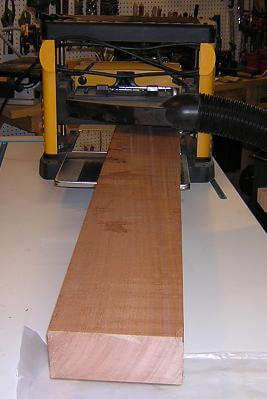
The first thing that needed to be done was to plane the surfaces of the slab so that they were nice and clean. The orignal saw scratches were very deep, so I ended up having to remove more than an 1/8" of wood from each side of the billet until everything was smooth and straight.
After the planing and jointing of the edges, here's the cleaned up piece of mahogany. Who would have thought there was this beautiful wood hiding under those saw marks and stains?
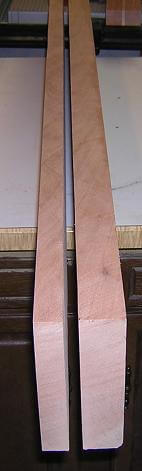
The piece of mahogany started out at about 3" thick. After cleaning it up, it was 2 3/4" thick, which was still too thick for the bass body. I cut the piece in two on the band saw and cleaned up the blade marks with the planer, until I had a piece that was the correct thickness. The smaller piece will be set aside and used for another project, someday. I've got a big stack of "someday" wood, and someday I need to build some guitars from it.
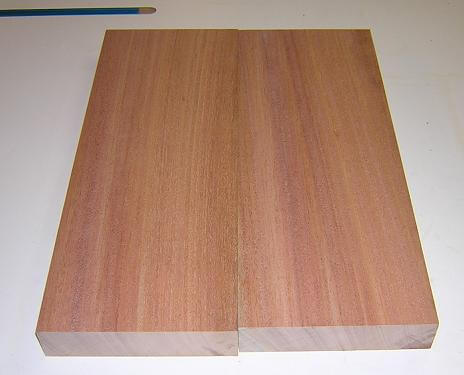
The mahogany blank will be made up from two pieces, glued on the center line. I cut the board to length and flipped it around until I found the best looking orientation for the join.
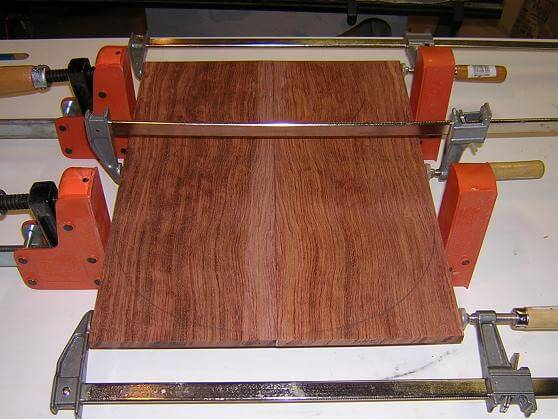
Now that I had the pieces for the final body blank cut and planed, it was time to join them together. First I glued the bubinga top together.
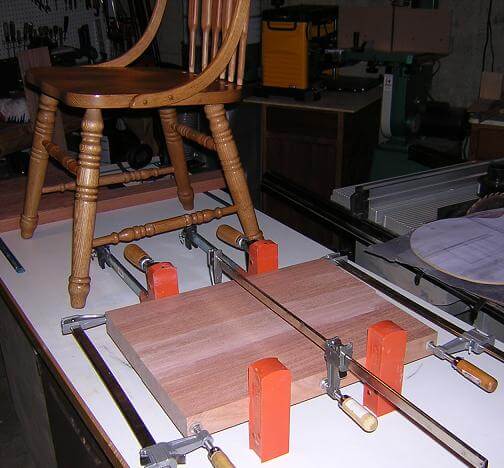
Next, I glued together the mahogany body pieces. The chair in the photo is from a local AIDS hospice, and is in the shop because I'm repairing it for them.
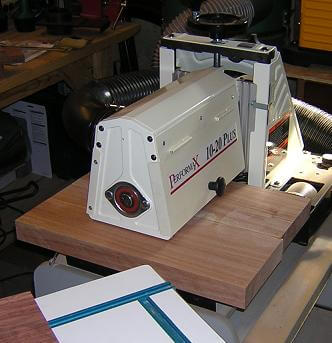
After the two body pieces are glued together, they need to be sanded to remove the slight ridge that always forms at the joint line, as exactly lining up the two pieces across the entire width is pretty much an impossibility. Previously I always turned to a random orbit sander for this job, but with this project I got to break out my newest toy: a drum sander. This allows the sanding of large pieces (up to 20" wide) and will get them dead flat without the humps and dips that a ROS usually leaves. I love the smell of new tools in the morning!
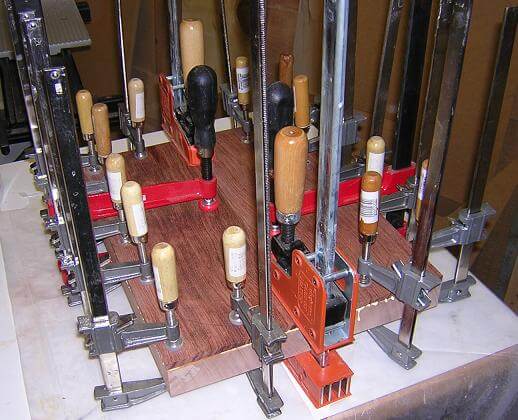
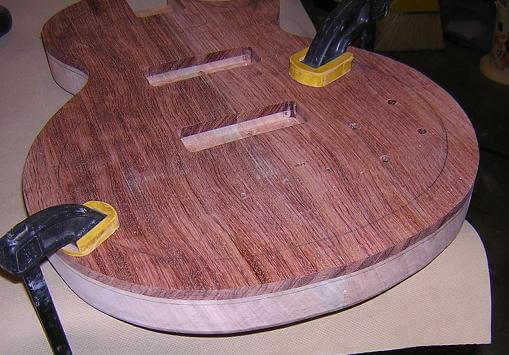
With both the mahogany and the bubinga sanded flat, it was time to glue them together. As the photo suggests, I like to clamp the bejeebers out of things. Sometimes panels like this will not be held tight in the center areas, so I used some extra-throat clamps to make sure I got the middle held tightly as well.
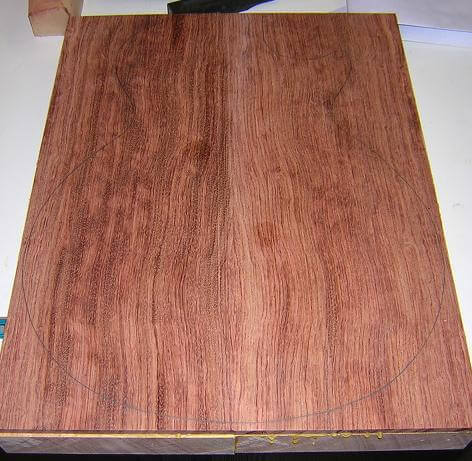
After the glue had dried and the clamps were put away, I took my hardboard template and drew the shape onto the body blank. One of the challenges when working with dark woods like this bubinga is the difficulty at times to see the pencil marks.
I cut the body out on the band saw, trying to stay slightly outside the pencil line. Here's the rough body shape, prior to cleaning up all of the anomalies.
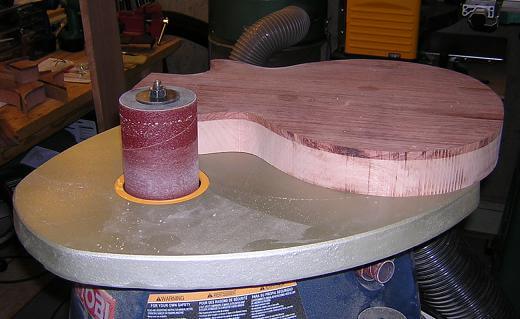
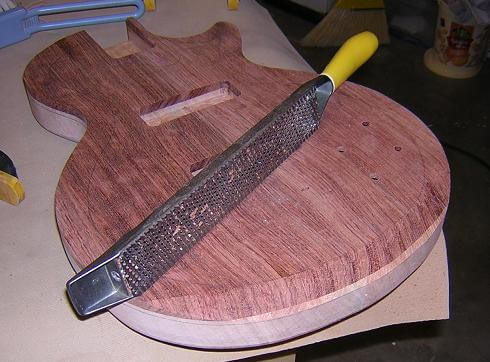
The band saw leaves lots of scratches and marks in the cut, which is one of the reasons I don't just cut the body to final width. By cutting oversized and then sanding up to my marked line, not only is the final shape more accurate, it also removes the saw marks. The oscillating spindle sander is a great tool for doing work like this.
With the edge sanding complete, the body is starting to look like a guitar.

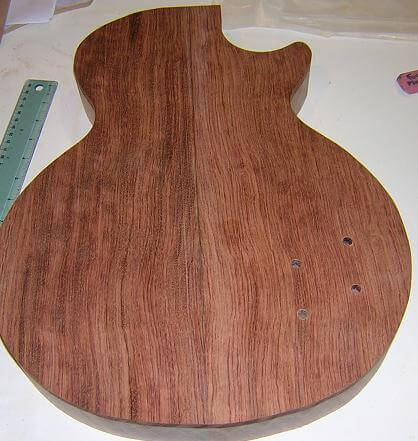
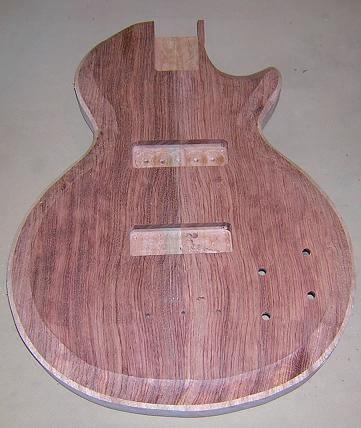
Next on the list was to drill the holes for the controls. Because Ed wanted two volumes and two tones, I decided to use the "standard" Les Paul control placement. So, I dug out my Les Paul and measured where the knobs were located. Much to my dismay, I found out whoever drilled the holes on my guitar must've been a blind man who just got off a marathon session on the Tilt-A-Whirl. They weren't aligned in any coherent manor, with one of the knobs being at least 1/4" off-center. Funny I've never noticed that goof before this point, but then again how often to you take a micrometer to your guitar?
So, I put the Les Paul away again and just worked out the control placement on my own in the "spirit" of a Les Paul. I worked for a while trying to determine placement where they'll be easily accessible, but not get in the way. Here's a picture after the control holes were drilled.
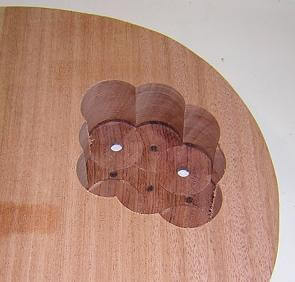
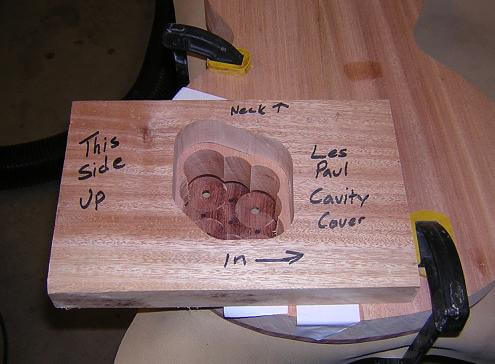
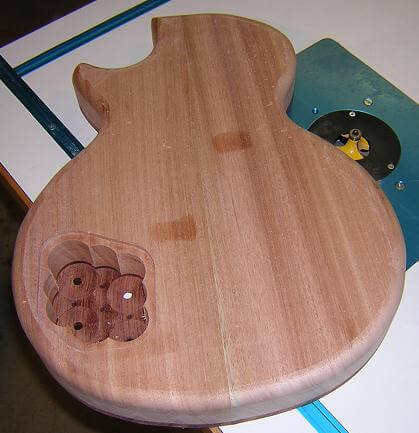
Of course, those controls for which the holes were drilled need a place to live, so I made one by drilling a series of holes in the back to create a cavity. By using the drill press to create the cavity, the walls of the aren't as straight as they turn out with a router. Due to the 2" body depth, however, I was going to have to do some magic to get a router to go deep enough, so I settled on "wavy" walls. The cover plate will hide this area anyway.
Speaking of the cover plate, they usually aren't just screwed proud into the back of the guitar. Instead, they're inset so the edges are flush. This keeps them from snagging on the player's clothing and generally being a nuisance. In addition, having the control cavity flush mounted looks a lot better.
I made a router jig to cut the recess for the cover plate, and attached it to the body with some double stick tape. I like to use a couple of clamps as well to give me some extra insurance; few things stink more than having your jig move around on you while you're routing. Notice all the instructions I write on my jig. You don't want to know why I've had to start doing that. Old age is a bummer.
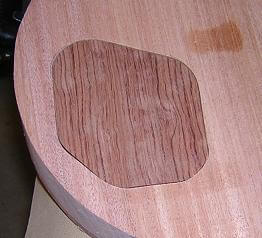
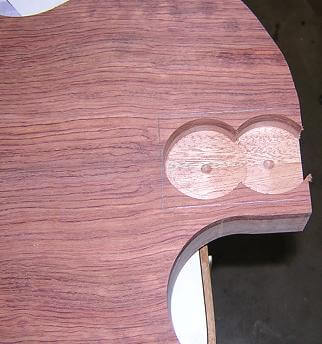
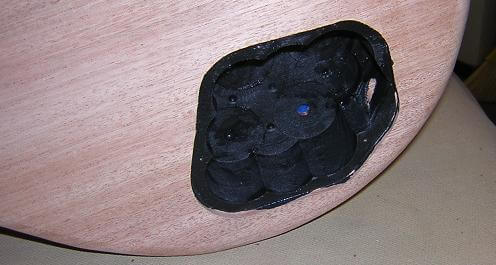
The front of the guitar body and headstock will showcase the bubinga. I couldn't bear to see a small chunk of that beautiful wood sitting in the scrap bucket, so I decided that I'd make the control cavity cover from bubinga as well. Often times I like to "hide" the cavity cover by making it as unassuming as possible, but with the bubinga I decided to showcase it. In any event, I think it looks a lot better than the black plastic covers that most instruments have.
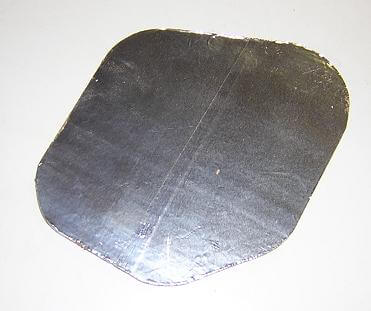
While I had the cover in hand, I went ahead and put some metal foil tape on the back side. This will help sheild the electronics. Later on, I'll hit the rest of the control cavity with sheilding paint. Foil tape is easier on the flat covers, however, so that's what I use.
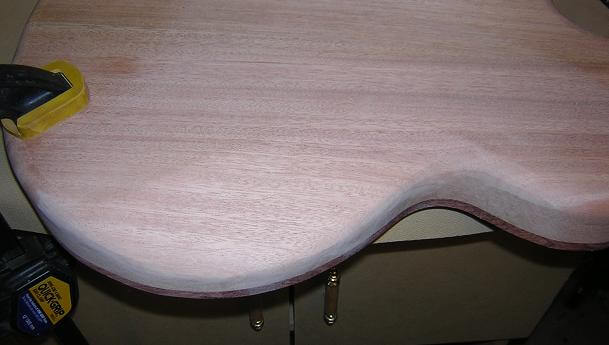
As long as I was working on the back side of the body, I went ahead and treated the edge. Ed wanted a nice round look to the back, so I used a 1/2" roundover bit in the router table.
Here's a picture of the entire backside after being rounded over.
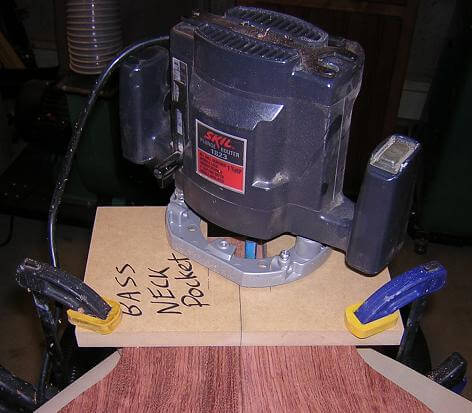
Now it was time to work on the front. This being a set-neck guitar (ummm, I mean bass) we needed a pocket in which the neck tenon will sit. When routing out huge quantities of wood, I prefer to drill out a majority of the waste at the drill press to make life easier for my old cruddy router.
Then, I mounted a neck pocket jig in place and routed away.
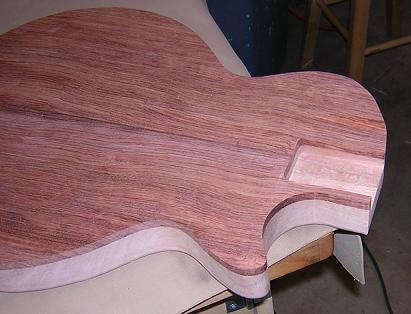
Here's the completed neck pocket.
Next, it was time to rout the pickup cavities. I did the same as the neck pocket and drilled out a majority of the wood. This bubinga is tough stuff! The reason the one hole isn't completely drilled yet is that I ran out both of my drill batteries just drilling these ten holes. The bubinga is like drilling through rock. After my batteries charged up again, I finished drilling the last hole.
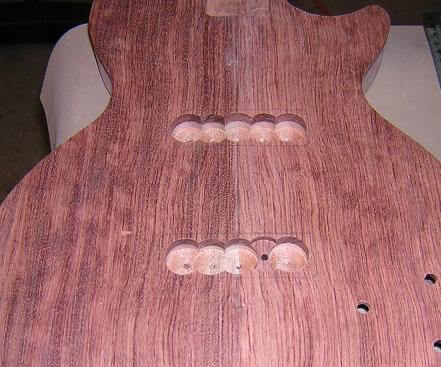
Again, I attached the routing jig with double-sided tape and a couple of clamps, and routed both pickup cavities to proper depth and size.
Here's a shot of the finished cavities. I still need to clean up a couple areas with a sharp chisel.
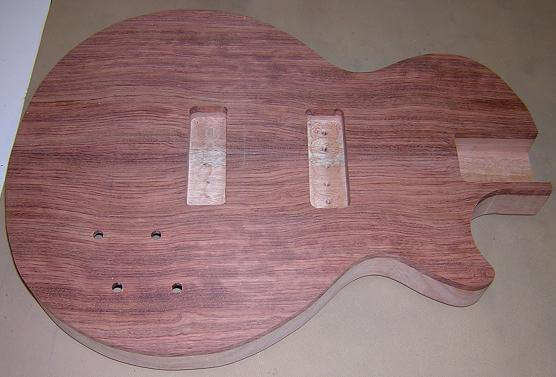
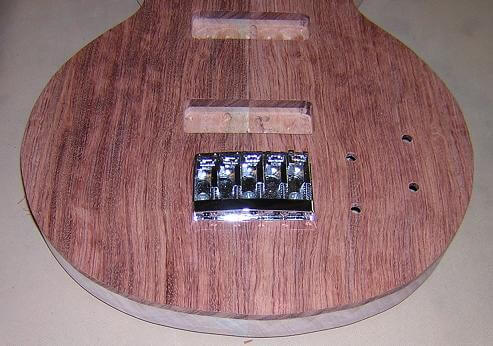
Now it was time to mount the holes for the bass bridge. After carefully measuring and locating where the bridge should sit, I marked and drilled the three holes that will hold the bridge to the top. Here's a picture where I was test-mounting the bridge after drilling the holes.
This guitar will have my famous Cheese-Belly cutout. (My cutout is famous, not my Cheese-Belly. Well, maybe my cutout isn't famous. Anyway...) I started by marking the guitar where I will remove wood to form the cutout.

Next, to remove a lot of wood quickly, I used my angle grinder with an Excalibur blade in it. This blade is kind of like a chain-saw blade. It's very aggressive and makes a huge mess all over the shop, but it makes quick work of roughing out cutaways like this. You just have to be careful not to cut too deep, as the blade will easily go straight through the body like hot knife through butter. It would be a bad time to sneeze.
With the cavity roughed out, I turned to my microplanes to fine tune the cutaway.
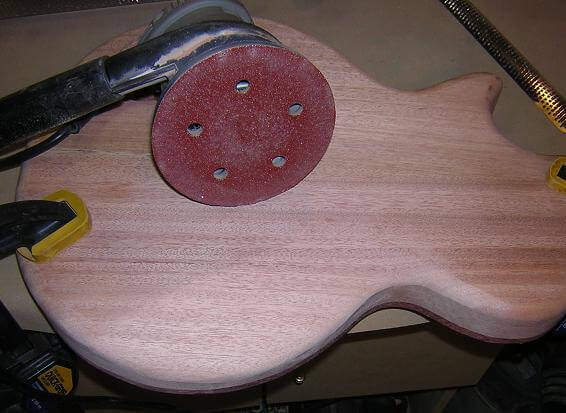
After the microplanes, I switched to sandpaper to smooth everything out and remove any gouges left by the microplanes.
And here's the finished Cheese-Belly cutout.
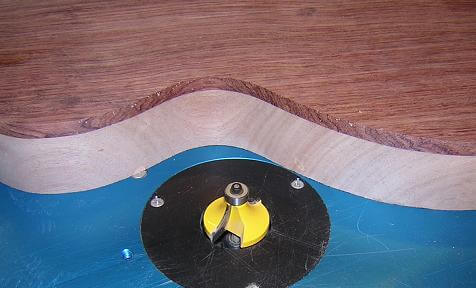
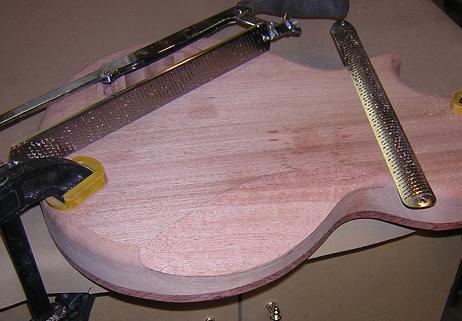
Now was the part of the build I was really unsure about. This was the first time I've done a chamferred edge. Ideally, one would just use a chamfer bit in the router table. For this guitar, though, I wanted the carve to extend 1" on the top and 1/2" down the side of the body (which would make a 22 1/2 degree angle, if my math skills are still sharp.) I was unable to find a router bit this large, and even if I did I'll bet my puny little router wouldn't swing it. So, I resorted to carving the chamfer by hand. I began by marking a line 1" in on the top, and 1/2" down on the sides.
Next, I went to town carving. That bubinga is like carving rock! First I tried using my microplanes, but they weren't aggressive enough to bite through the bubinga; they'd just slide across it rather than digging in. So, I turned to my old surform. With a lot of sweat and a few blisters, this would cut through the bubinga. I worked in sections. Here you can see where I've started the carving on the lower part of the body.
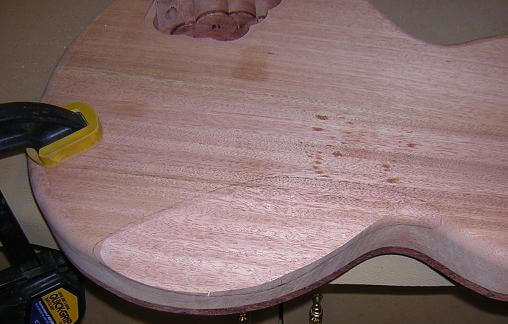
After I worked all the way around the body, it really made the guitar look different! My wife even commented how good it looked, and this was prior to sanding out the gouges left by the surform. I especially like how it makes the mahogany look like faux binding around the edge of the carve. Very cool. Here's a picture of the rough carve prior to any sanding.
My hands were hurting from all the carving, so I decided to take a break and work on something different. I figured this would be a good opportunity to paint the control cavities with sheilding paint.
Apart from some sanding, the body is now finished. Let's move on to where we build the neck.
Return To The Main Music Gallery
This page last updated on 06/28/2018