


This guitar will be my own take on a Fender Telecaster, but with so many modifications I couldn't in good concience call it a Tele. My current plans are as follows:
Poplar Body, with sculpted heel, drop top, beer belly cutaway and bottom horn cutaway.
Laminated maple and mahogany neck.
Maple fretboard. 24 3/4" scale length.
Tune-o-matic bridge and tailpiece.
P-90 pickups, using a blend pot rather than traditional switching.
More or less this will be a cross between a Fender Telecaster and a Gibson Les Paul Jr. The LP Jr may be one of the coolest sounding guitars ever made. Unfortunately, in my opinion, it also may be one of the ugliest. I've never cared for the double-cutaway Jr body. On the other hand, ever since I sold my Telecaster back in 1992, I've missed it dearly. So I decided to see what I could do to make these two great guitars into one, along with a few other little ingredients thrown in for good measure.
Remember the old Reese's commercial? "Hey, you got Telecaster in my Les Paul Jr!" "Well, you got Les Paul Jr in my Telecaster!"...
I've already been through the construction process in exhaustive detail when I built my first guitar. For this one, I'm just going to post pictures of the highlights and leave the descriptions somewhat sparse, except for the times when I'm doing something new or covering something that I didn't do on the first guitar. Hopefully this will cut down on the tedium for those of you who just like to check out what's been happening lately.
I began by laminating up the neck blank, and gluing the body blank together. I did this back in December 2004, then set them both aside for three months to season. That way if the wood was going to do something ugly (warp, twist, stick it's tongue out at me, etc.) it would probably do it prior to me having it in an instrument.
The neck blank is laminated from seven layers of maple and mahogany.
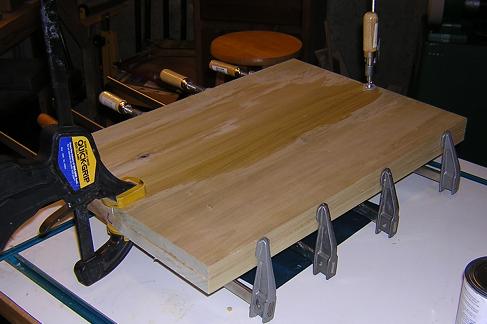
The body blank is poplar laminated up to 1 1/2" thick by 14" wide by 24" long. The darker spot is where I wiped up the glue squeeze-out with a wet rag.
On my last guitar, I purchased a fingerboard pre-slotted and radiused. For this guitar, I'm going to make my own from scratch. Why, you ask? Why do I even build a guitar when I can go buy one? I don't know; apparently because I can.
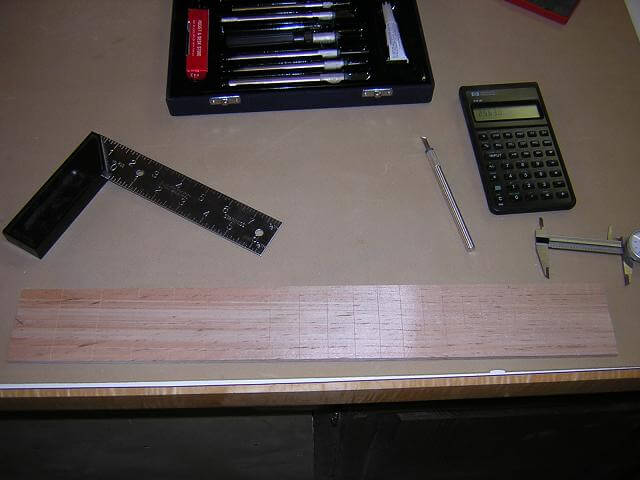
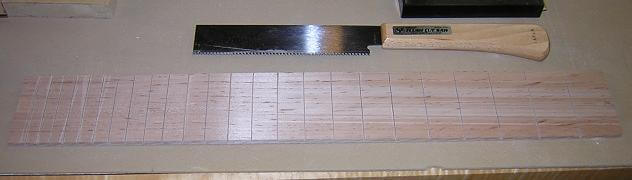
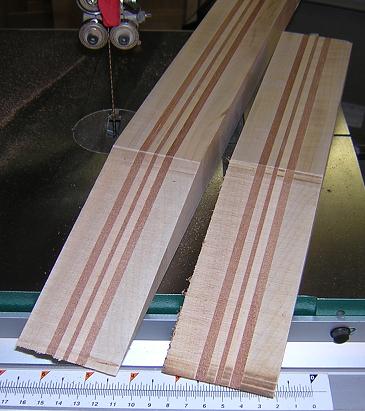
I picked up a really cool piece of maple at Home Depot that had some neat grain and spalting in it, which I was able to cut into six fingerboards. For my first attempt at a scratch built board, I decided to use the least interesting piece so if I messed up I wouldn't have ruined the nicest board on my first try (something I learned the hard way with my first guitar neck.)
I began by calculating where the frets should be located, and scribing a line with an x-acto knife in the proper places (I'm doing a 24 3/4" scale here.)
With the positions marked, I got out my trusty Harbor Freight saw that I picked up expressly for this purpose. I found out about this saw over on the MIMF. It works great for cutting fret slots because the kerf is .023 wide, which is exactly the width of the fret tang. I simply lined up the saw on my knife mark, and began sawing until I reached a the right depth (I marked the side of the board to be sure.)
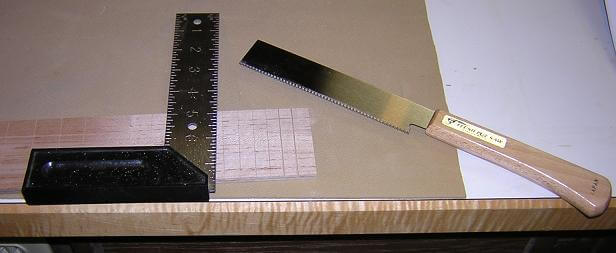
I kept cutting slots until the board was complete. For those of you who are hyper-observant, you will notice that this board has 24 frets. I'm planning on only using 22 of them. I started cutting slots at 24 frets so that my first couple cuts were on practice frets I was going to discard anyway; that way if I messed them up I wasn't out anything.
To make the basic body shape, I found a front view picture of a Telecaster that I liked, and blew it up to actual size (it got kind of blurry, but that's OK.) Then I glued that picture to a piece of 1/4" hardboard and cut it out at the scroll saw. I then placed the template on the body blank (making sure to line up the center line on the blank's glue line) and traced the outline.
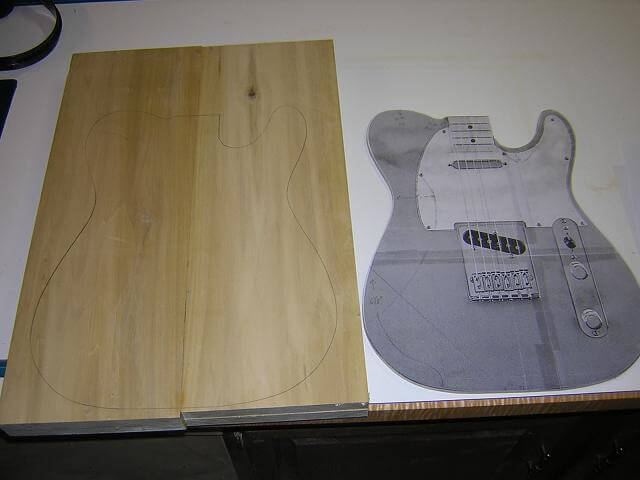
I cut the body out on the band saw, making sure not to cut into the line I had drawn.
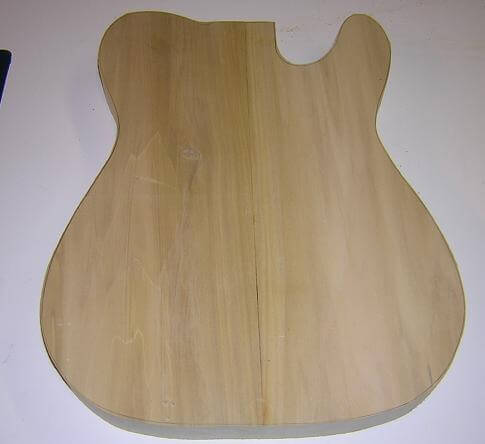
In the same way I did my last guitar, I then used double-sided tape to attach the template to the guitar body, and trimmed it flush with a pattern-cutting router bit. Now I had my guitar body exact to the template.
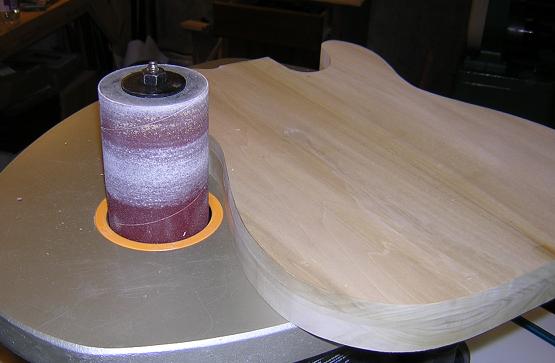
The router left a few little rough spots, especially when going through the end grain. I cleaned these up on the spindle sander.
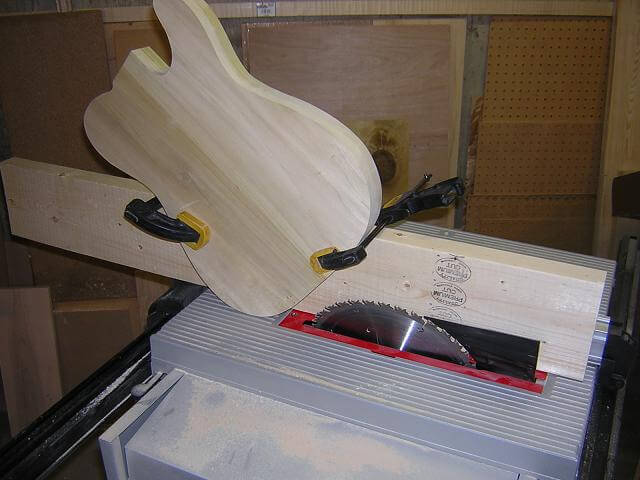
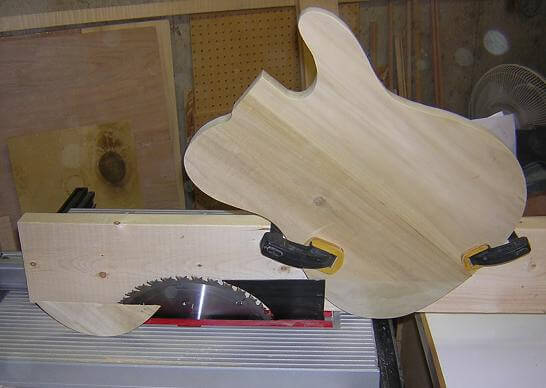
Here's something I didn't do on my last guitar: I wanted this guitar to have a "drop top", similar to a Stratocaster, where your right hand isn't forced to lay across a sharp corner. I cut this at the table saw by tilting my blade to 15 degrees. I clamped the body in the correct position to a scrap piece of 2x6. The 2x6 gives a flat edge to run along the saw table.
With everything set up, I just turned the saw on and pushed it through. Easy as pie. Mmmm.. pie.
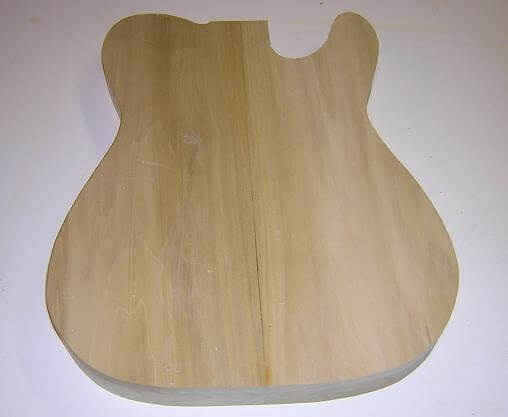
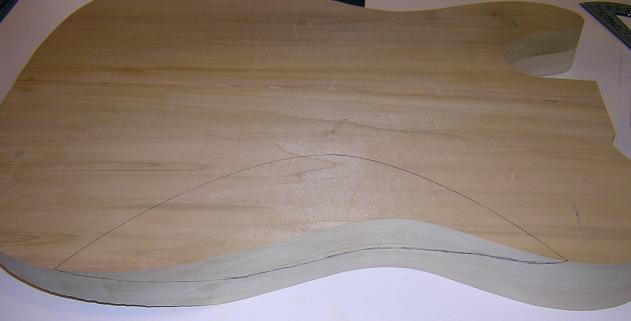
Here's a close up of the drop top. It still needs a little sanding, but came out a lot smoother than if I'd used a surform or some other carving tool. You can see I made my angle a little more agressive than Fender's. Just 'cause I like it that way.

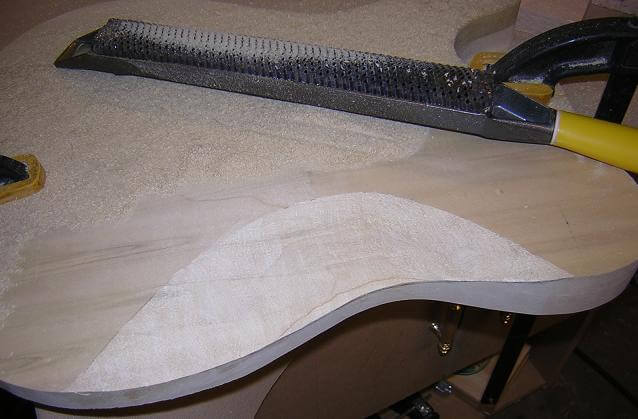
This guitar, like my last one, was going to have a "comfort contour" in the back. This is also sometimes referred to as a "beer-belly cutout" although in my case it would more accurately be described as a "cheese-belly cutout." I also want to discredit those of you who on my last guitar suggested I just glue a piece of sandpaper on my gut and go to town for a custom fit. I began by taking a pencil and marking the cutout. No science here, I just sketched until it looked "right."
There wasn't any easy way to cut this on the table saw, so I pulled out my trusty friend the surform. I simply carved away the wood that shouldn't be there, until I reached my layout lines. Then I spent some time sanding to make everything smooth. It took about 30 minutes from start to finish, and worked up a good sweat, but I've found this is one of the funnest parts of building a guitar; the carving.
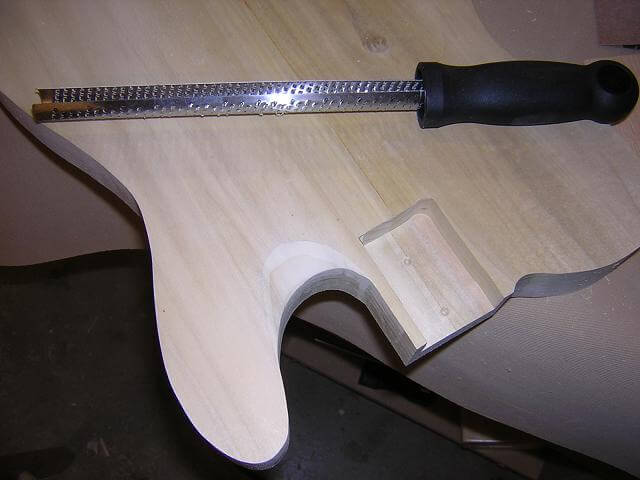
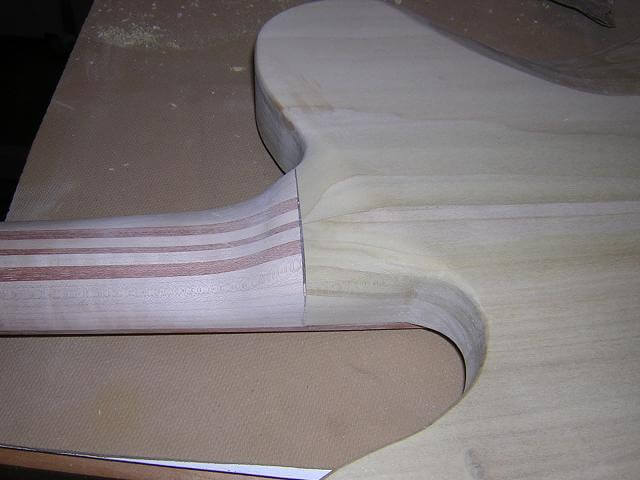
To increase upper fret access, and just because I thought it would be cool, I carved a recess around the lower horn, ala Paul Reed Smith. For this, I used my new round micro-plane. This is a lot like a surform, but has tiny raser sharp knives sticking out from around it. These things are the bee's knees; it cuts so much smoother than a surform. Barely any effort was needed to shave away wood. It still left a rough surface which required sanding, but I noticed I had a lot less sweat on my brow when I'm done. I'm going to have to upgrade my regular surform to a microplane as well.
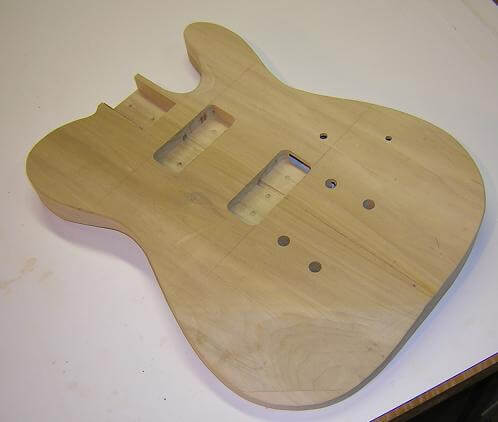
Here you can see where I've marked the top for the pickup holes. I've also drilled the holes for the controls. You can see here and in the previous picture where I'd cut the pocket for the neck tenon. My router jig slipped while cutting this pocket, so one side isn't perfectly straight. I'll have to adjust my neck tenon to make up for this.
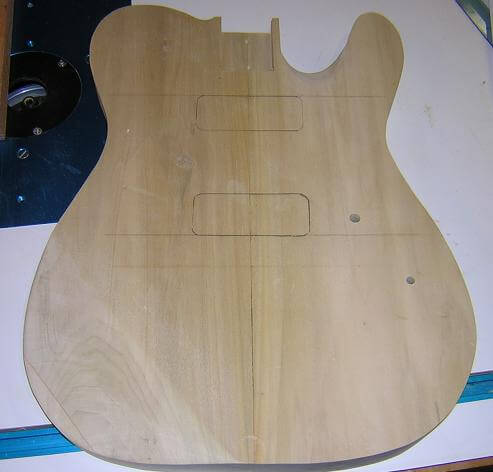
This shot was taken after I drilled the holes for the bridge and tailpiece.

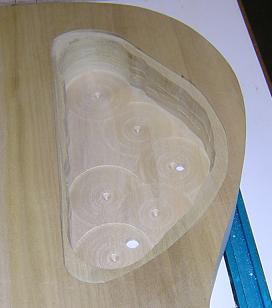
Here's the control cavity on the back of the guitar. The majority of the wood was plowed out on the drill press with a forstner bit, then the remainder was removed with a router. If you look closely, you can see the two holes for the controls. I made the cavity on the large side, as this will give plenty of room for the electronics if I ever want to change them in the future (seeing as I'm kind of doing a prototype with the blend pot and no volume.) In addition, the big cavity lightened up the body of which I'm always a fan. Color me a heretic, but I don't think weight necessarily equate to a good sounding guitar; there are too many other factors. I've heard plenty of good sounding guitars that didn't break your back, and plenty of heavy guitars that had a terrible sound. I prefer one that doesn't make me cry by the end of a gig because my shoulder is hurting.
I now turned my attention to the neck. The first thing to do (in my opinion) after prepping the neck blank is to cut the scarf joint. I think doing it in any other order is asking for a heartbreak. Take it from one who's been heartbroken and has a ruined neck hanging on the shop wall as a reminder of his humanity. I had toyed around with the idea of building a special jig to cut scarf joints on the table saw, but finally decided just to do it freehand on the band saw. Now that I've cut a few, it works pretty well. By the way, if you're wondering what a scarf joint is, it's what forms the headstock angle on guitars that use an angled headstock. More or less it's an extremely low angle (in my case 12 degrees) miter joint.
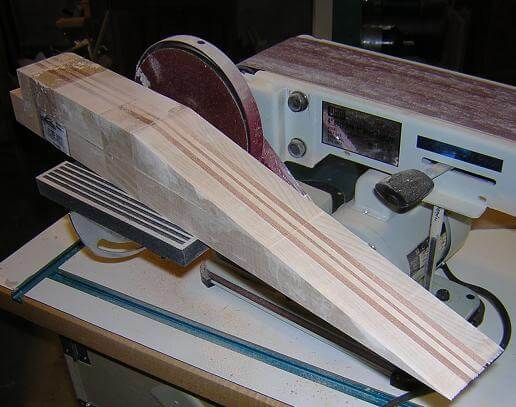
The band saw (or about any saw, for that matter) does leave the cut a bit too rough for gluing, so sanding is required before putting the joint together. A trick I picked up from Melvyn Hiscock's book is to tape the two pieces together, and sand/plane them both smooth. By taping them together, you can be sure that the angle is dead-on. I used my belt sander to sand the joint (although in the picture below it looks like I'm using the disc; I just set the workpiece there for the picture.)
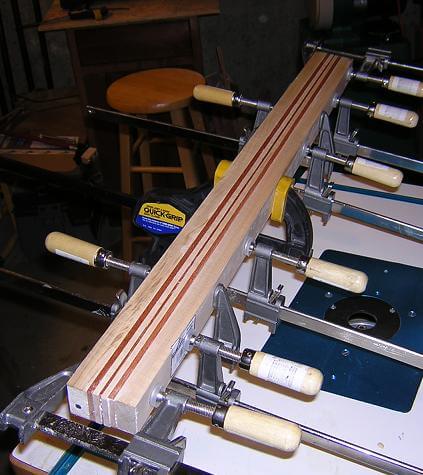
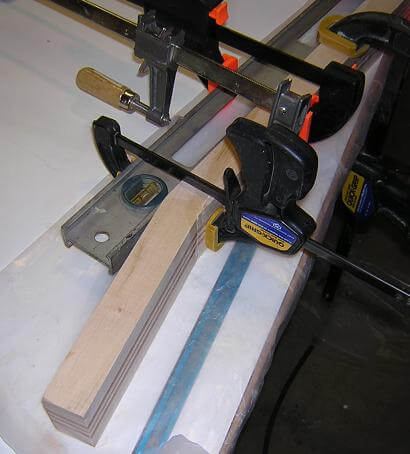
With the two pieces sanded, it was time to glue the joint together in order to form the headstock angle. After completing my first guitar, I had received a very helpful e-mail from Dushlan Custom Guitars with some pictures of a scarf joint jig he uses. Once again, I thought about making a jig like his, but I decided to improvise and encorporate the functionality of his jig, without building one. (If you haven't noticed by now, I tend to prefer building projects rather than jigs whenever possible. Some people really like building jigs, but I'm not among them. When I do build jigs, they're usually quick and dirty.)
So, what I did was lay down a piece of waxed paper on my work bench (keeps glue from sticking.) Then on the face of the neck, I clamped a straight edge which in my case was my 24" aluminum level. I applied glue to the bottom side of the headstock piece, then wedged it in place and secured it with a couple of clamps. The level kept the piece from sliding too far up on the neck, and the low angle of the wedge made the headstock piece stay in place when I clamped it. With the neck being on it's side and still 1 1/2" wide, the workbench kept the two pieces aligned. Overall, it worked pretty well.
When the glue had dried, the neck needed just a little bit of light sanding and the scarf joint was done.

At this point, I didn't get any pictures of the next few steps in the neck construction, but I'll quickly summarize them: the next thing I did was to rout out the channel for the truss rod. After that, I cut the angled tenon (2 degrees) for the neck pocket. The angled neck tenon is probably the trickiest cut on the guitar. With that done, I cut the back of the neck and headstock to width and sanded it smooth. I attached my headstock template to the neck with double-stick tape, rough cut the headstock shape on the band saw, then trimmed it flush with a pattern cutting bit on the router. I also rough-tapered the neck on the band saw.
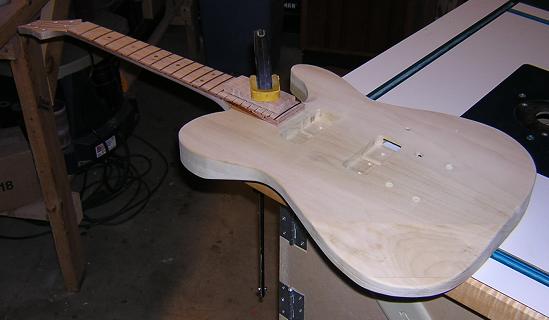
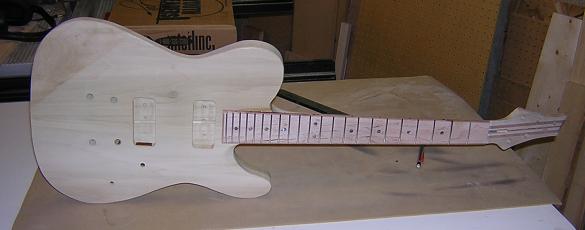
It was at this point that I realized I hadn't taken any pictures in a while (for those of you still awake, I'm sorry) so I snapped a few shots of the test fitting of the neck tenon. The joint is nice and tight, which makes for a good sounding guitar. In fact, without glue you can pick up the neck and the body will stay attached!
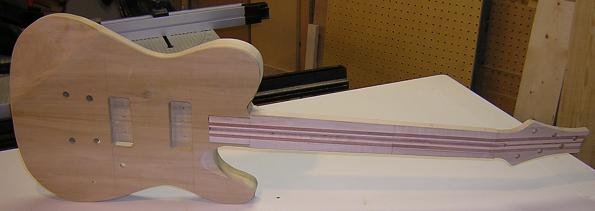
This is an exciting point in the construction of the guitar, because you can actually get a glimpse of what the final product is going to look like, and pick it up and kind of see how it will feel to play.
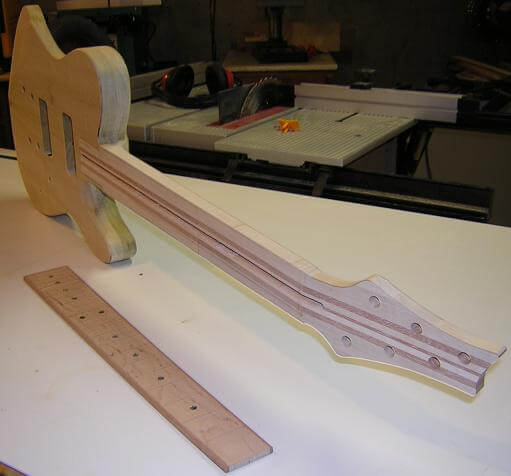
What can I say, the Telecaster is a classic shape. Leo did it right on that one.
While I was working on the neck, I also was working on the fretboard. I first attempted to do some fancy inlay work (black dots and my initials at the 12th fret) using black epoxy. I discovered that the black epoxy bled into the grain of the wood, and made the edges of the inlay look kind of blurry. After completing the inlays, I decided I wasn't happy with them, so I scrapped the fretboard and started over.
I slotted this fretboard the same way as the one above. I then drilled holes for the dot inlays and glued in abalone dots (rather than the black epoxy method.) I tapered the fretboard using my jig (yes, I made a jig!) that I created for the last guitar. I had to make sure to taper the fretboard smaller than the finished width to accomodate the binding. I made some binding strips out of mahogany, and glued them to the tapered fretboard. Finally, I drilled and glued in the side dot material. Here's the completed fretboard. I think the grain is prettier on this one versus the original fretboard shown above.

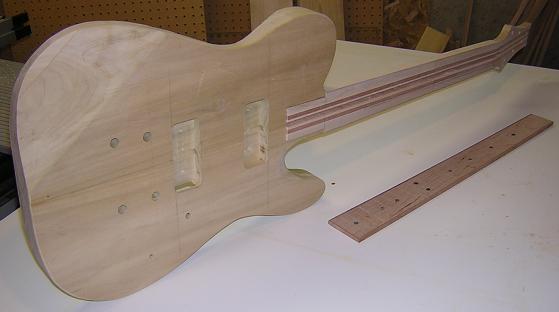
At some point during this process, I finished up a few little details and pronounced the body "done." If you look closely, you can see the hole from the control cavity into the bridge post hole that will hold the ground wire. Also, I routed the control cavity into the hole for the bridge pickup. This will be where the wires pass-through.
For this guitar, I tried a different method of matching the neck taper to the fretboard that I picked up over at the MIMF forums. Instead of tapering both the fretboard and the neck, then trying to align the two during glue-up and hope that they match, I only rough tapered the neck. The fretboard was tapered and bound to final width above. So, I glued the fretboard to the rough neck. When the glue was dry, I removed the clamps and put a flush-trim bit in the router table. Using this bit, I cut the final neck taper exactly flush with the fretboard. It worked very well, and I'm going to use this method from now on.

Now comes one of the more nerve-wracking but funnest parts of building a guitar: carving the neck. As I discovered on my last guitar, this has an aura of mystique attached to it that apparently only exists for those who have never made the attempt. It really isn't that hard and is very enjoyable. My wife watched as I worked on it and marveled at my abilities, yet I have no abilities. It's really not an exact science, you just remove any wood that doesn't make the neck feel like a neck. Maybe I should shut up about how easy it is and just make people believe I'm some sort of carving maestro. That would only work for anyone who doesn't really know me; I flunked Play-Doh in kindergarten.
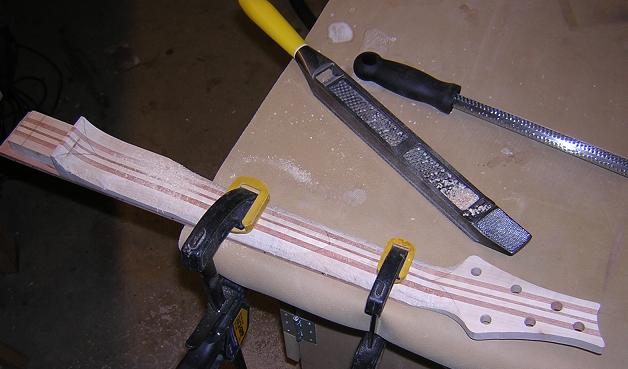
My carving process begins with me drawing a center line down the back of the neck, and sketching the transitions to the headstock and heel at either end. Next, I draw a line on each side of the neck about 1/16th of an inch from where the fretboard attaches. As long as I leave both of these lines visible when carving, I don't have to worry about getting the neck too deep and hitting the truss-rod channel, or cutting the neck too narrow and gouging out the fretboard. I then started at the headstock end and shaped the transition using my round micro-plane. With that completed, I then took my flat surform (haven't upgraded it to a flat micro-plane yet) and began shaping the profile. I just worked my way down to the heel, then went back to the round micro-plane to shape the heel transition.
Once the rough shaping was done, I switched to sandpaper. I started with a strip of 60 grit, wrapped it over the neck and sanded back and forth (ala shoe-shining.) Sanding this way meant I was going across the grain, but the neck was already so rough from the surform that the scratches weren't an issue at this point. This method of sanding helped quite a bit to even out the neck shape. Then I switched to sanding with the grain to remove the remaining gouges.
I took the neck out into the sunlight where I was able to better see the little divots and craters left from the surform, and circled them all with a pencil. Then I went back to the shop and sanded each area with the 60 grit until they were gone. After that I switched to 100 grit, then worked up through 220 grit to make the neck nice and smooth.

At this point I sanded the radius profile into the face of the fretboard. I don't have any pics, but frankly there's not much to see. The radius is fairly subtle and you probably couldn't see it very clearly in pictures. I would just look like a sanding block on the fretboard.
As I stated above, I wanted a compound radius fretboard starting at 10" at the nut, and tapering to 16" at the heel. To accomplish this, I began by sanding the entire fretboard with the 16" radius block. I drew a center line down the fretboard, and when that line began to fade from sanding, I knew the fretboard had the radius completely sanded into it. I then marked the 3/4 mark from the nut to the heel, re-drew my center line, and sanded the top 3/4 of the board with the 14" block. I then repeated the process with 1/2 of the board and the 12" sanding block, then the last 1/4" of the board with the 10" block. This gave me the compound radius fretboard I wanted.
As a bonus, the radius sanding leveled my fret inlays. It was a lot easier to do inlays this way rather than inlaying into a pre-radiused board and trying to sand the inlays level without changing the radius of the fretboard.
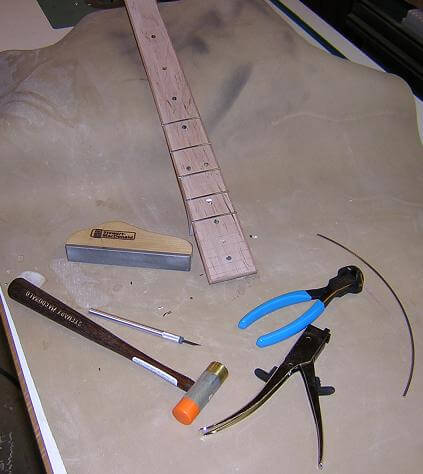
To deviate from how I did the previous guitar, I wanted to try installing the frets prior to attaching the neck to the body. This would avoid some of the clearance issues I ran into when fretting the body end of the neck. Here's a picture of me starting the fretting process.
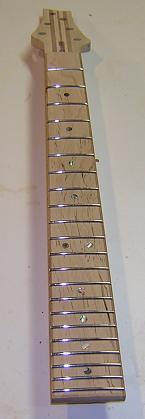
I finished installing the frets. I'll wait to level and crown them after the guitar finish has been sprayed.
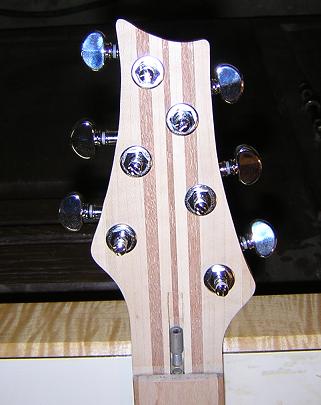
I test fit the tuning keys and marked and drilled the holes for the screws that keep them from rotating.
With the neck completed, it was now time to glue it to the body. I used epoxy. I placed a scrap piece of plywood on the neck to protect the fretboard, and used a clamp underneath the edge of the workbench to hold it in place. The neck pocket was pretty tight, so I didn't need a lot of clamping pressure to hold it together.
With the glue dry, I could now carve the neck heel. I've document the whole heel carving process here!
The guitar is now ready to have a finish applied!
Rather than describing the finising process on this page, I have done a detailed tutorial on how I sprayed the lacquer finish on this guitar. You can read all the details here.
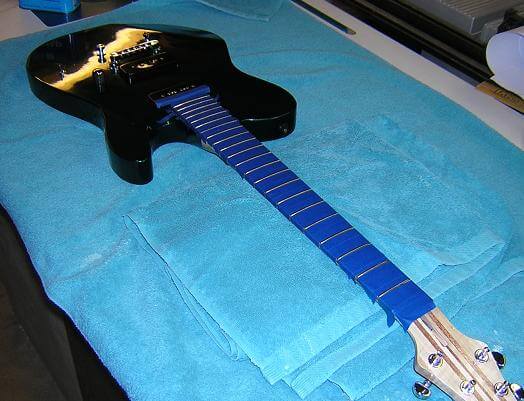
Finally, all that was left to do was to install the hardware, level and finish the fretwork, install the nut and string it up. Here's a picture I snapped while I was doing the fretwork; the blue painter's tape protects the fretboard from the metal shavings and polishing compound.
With a little adjustment, she was ready to play! And that's exactly what happened. I finished the guitar at approximately 2:15 PM, then drove an hour and a half to Orange City, IA where David from Remedy Drive played the guitar on stage at 7:30 PM. Talk about a man of faith! I hadn't played it more than 5 minutes myself, and certainly hadn't had time to debug it. David was daring enough to play it in front of several thousand people. In fact, the first time he plugged it in was on-stage!
Click here to go to the finished pictures.
Return To The Main Music Gallery
This page last updated on 06/28/2018