


So you've worked hard constructing your instrument. It's the epitome of perfection. The beautiful grain of the wood is only surpassed by the precision joinery... or if you're like everyone else, there are some glitches here and there that we're planning on fixing in the next one we build. In any event, we've progressed to one of the final steps before we actually convert these assorted blocks of material into an instrument: we need to apply a finish.
Any guitar, be it a quickie plywood job to an intricate, detailed piece of art, needs a good finish to make it complete. A guitar may play like a dream and sound like Thor's hammer, but if it has a terrible finish it'll get regulated to studio work where nobody will ever see the horror of its appearance. The flip side, a guitar may play like garbage or have a tone that would make Will Rogers punch a nun, but if it is finished beautifully we'll put up with its shortcomings because it looks so good! Don't ask me why most guitar players are vain this way; we need our guitar to look great. I'm the same way. The focus of this article, however, isn't to discuss the sociological makeup of the average guitarist. Instead, I'll just assume that we want our guitar to look great and give a tutorial on applying a finish that will achieve this goal.
Finishing is a complex art. It takes lots of practice before one learns the "ins and outs" of how to apply a good finish. To make matters worse, depending on the type of finish you want to apply (polyurathane, lacquer, oil, etc.) the skills needed vary quite a bit. This is why many people (not just guitar builders) find a finishing method they're satisfied with and can apply reasonably successfully, and then use that method almost exclusively.
This being said, it is not impossible for the beginner to produce decent results their first time around. All it takes is a little instruction (hopefully, that's what I'm accomplishing here), decent quality materials and some patient work. I would strongly recommend practicing on a scrap piece of wood before commiting your guitar to your first finishing attempt. If you mess up a wood scrap, it's easy enough to pitch it and try again. If you mess up a guitar on which you've spent hours and hours of construction time, it causes much more heartbreak when you discover that the finish isn't everything you've dreamed it was, or worse yet, so bad that you have to spend hours more sanding it down and starting over.
Keep in mind, I'm no finishing "expert". I've done enough finishes to get to the point where I'm pretty satisfied with my results. However, I don't claim to know every last detail about applying finishes. I know what seems to work for me. My main goal for this page isn't to bestow every bit of finishing knowledge known to man, but rather to show you the steps that an amateur can take to acheive good results. Perhaps it's not so much to demonstrate how it's done, but to demonstrate that it can be done by an average Joe without overly specialized equipment.
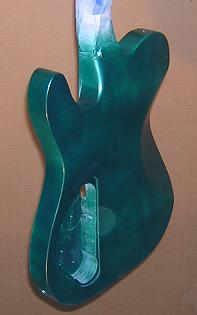
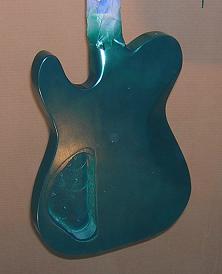
For this tutorial, I'm going to focus on applying a basic lacquer finish. I will be painting the body of the guitar an opaque (solid) color, and the neck will be sprayed clear. Applying a tinted translucent (see-through) finish takes different procedures that I'm not going to cover in this article.
While it is certainly easier to get good results with an air compressor and spray equipment, not everyone has access to these items. Purchasing them merely to paint one or two guitars would not be very cost effective. Borrowing or renting them is also an option, but again if you're just doing a guitar or two it may not be worth the hassle. Some may scoff at what I'm about to say, but it is possible to get a good finish job using spray cans. It may take a little more work at the end, but with care it can be done. To prove this point, I'm going to use spray cans in this example, even though I do own an air compressor and spray gun.
Now, I don't recommend going out to Wal-Mart and buying their 99 cent cans of enamel paint. If you do paint your guitar with this stuff, do me a favor and don't mention to anyone that you followed my instructions, as I probably don't want the good Tundra name associated with the results you're likely to get. There is a big difference in quality between the cheap spray paint and the good stuff. Unfortunately there's also a big price difference (about 6 or 7 bucks per can), but for the relative few number of cans we need it's not too bad. I've had good luck with the Plasti-Kote brand of paints found in the automotive section at Wal-Mart. They usually have a decent selection of colors. Another option is to go to an auto-body supply store. They have every color you could ever want, and they will mix the paint and put it in spray cans for you. The only downside is usually you have to buy at least a pint of paint at a time, so you may wind up purchasing more paint than you need.
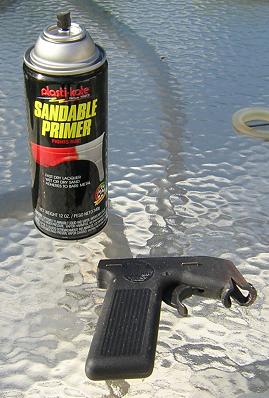
Whatever spray paint you buy, make sure you get laquer! Enamel paint will probably not cure hard enough to buff out at the end of the process. If you're doing a solid color, I'd also recommend getting the same brand of primer and clear as the the color coats. That way there's a much better chance the different paints will be compatible.
Here's a basic list of materials you're going to need. There may be more things you need depending on what comes up later, but this list should get you in the ballpark. You can always buy more than what you need and return what you don't use (be honest, don't shoot a little bit out of a spray can and return it.)
Sandpaper: 100, 150, 220, 320, 400, 1000, 1500 and 2000 grit (for grits above 320, get wet/dry paper.)
Sanding block (a small block of wood will suffice.)
Rubber sanding mat or old, soft towels.
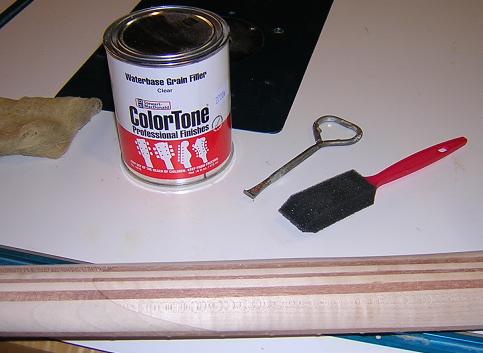
Grain filler
Tack cloths
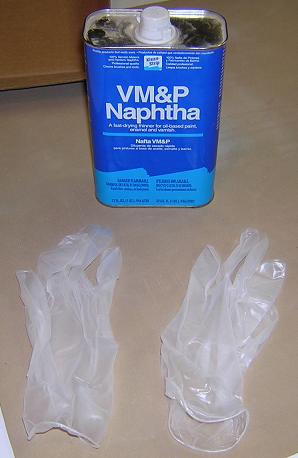
Naphtha (solvent available in the paint section of your local home center.)
Blue painter's masking tape
Old newspapers
Old clothes hangars (for suspending the guitar while working on it.)
1 can primer (opaque finishes only)
1 can colored lacquer (opaque finishes only)
2 cans clear lacquer
Spray can handle (optional, but nice.)
Glazing spot putty (opaque finishes only)
Bondo (opaque finishes, only needed if you've got a major boo-boo to fix)
Soft cotton rags (I like old socks, but please wash them first!)
Rubbing compound
Car wax (make sure it contains no silicone!)
Step 1 - Surface Preparation
So, let's get to it. Got your instrument? Good! The first (and undoubtedly the most important) step in finishing a guitar is prep work. The smoother the surface and the fewer flaws, then the better the final outcome will be. It's real easy to rush through the dull part of the job (prep work) in order to get to the fun part (spraying) but if you do, you'll regret it later. I've never finished a project and thought to myself, "I wish I hadn't spent so much time sanding." Quite actually, it's usually the other way around as the shinier and glossier you get the finish, the more surface flaws will jump out at you. Quality finishes always require quality prep work. There isn't a finish in the world that will cover up flawed and rushed prep work.
Are you getting the idea that you shouldn't take shortcuts in the prep work? Good! Let's move on...
We begin with sanding. Not an extremely glamourous way to start the process, but very necessary. I like to start with 100 grit. There may be spots here and there that need something a little more agressive, like 80 or 60; hopefully not the whole guitar, though! The goal is to remove scratches, sand out small dents, smooth transitions at glue joints, etc. On large flat surfaces, I use a sanding block. On curved surfaces, I just use my hands with the sandpaper folded up.
Now as we're sanding the guitar, we're more than likely to find some spots that are too large to remove by sanding. Usually these are gouges from tools or where we bumped the instrument against something while working on it. Of course, it's always most advisable to work in a manner that doesn't cause these irregularities, but hey, it happens. In these cases we have to use some sort of filler. I like to find all the spots that need filling and repair them at the same time. When I find a spot, I'll circle it with a pencil so I can recall it later. Once I've sanded the whole guitar, then I'll go back and address the circled areas.
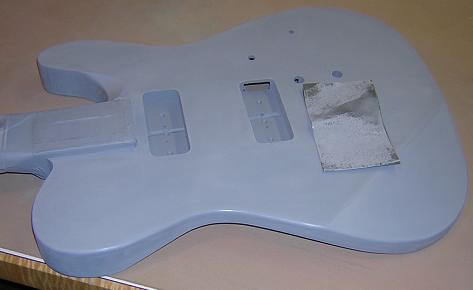
If the guitar is going to be painted a solid color, filling defects is relatively easy. The auto-body fillers you can find at Wal-Mart work great for this. For deep holes, the traditional "Bondo" style filler is used. Most of the scratches and divots (hopefully) are small enough that the "spot glazing putty" that comes in a tube can be used. Just follow the directions on the product to fill the holes. In the case of the guitar used in this example, I used the Bondo to fill in a spot where I started to drill the output jack hole in the wrong place (no, I'm not perfect) but for everything else I just used the glazing putty.
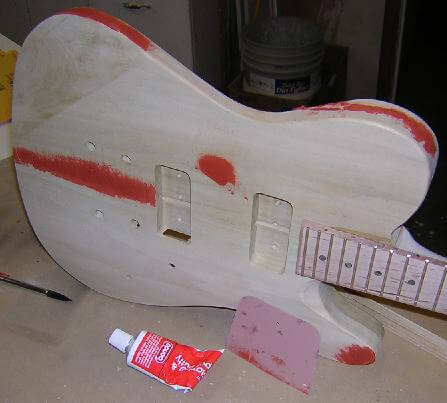
If the guitar is going to be given a clear finish, then filling in voids gets trickier. It's very difficult to make the fill-in completely undetectable, but I have done a passable job by softening the edges of the void with sandpaper, then using clear epoxy to fill in the void. Once it's sanded flat, you can still somewhat see the void, but at least the surface is now even with the rest of the guitar. I wouldn't recommend this for filling huge holes (i.e. my output jack fiasco mentioned above) and in those cases, I would probably try to fill in the hole with wood in some way.
Back to sanding with the 100 grit. If you had to do any hole filling then you want to sand that area to match the surrounding wood. Ideally, you'll get those areas to the point where you just see the filler within the outline of the scratch. Don't sand too much though; depending on the type of filler used, it is often softer than the surrounding wood so it's easy to sand a divot right back into the filler. Sanding blocks are especially useful for avoiding this problem, but if you're sanding on a curve you'll just have to be real careful.
By the way, one of those rubber sanding mats come in real handy at this point, as it cushions the back side of the workpiece while you're working on the other side. You don't want to be sweating away on one side and inadvertantly causing dents and scratches on the other, especially if you've already sanded that side! If you don't have a rubber sanding mat, an old soft towel or blanket would work as well. Just don't use your wife's (or husband's, for that matter) good linens. It doesn't matter how nice your guitar looks if the guest towels are trashed.
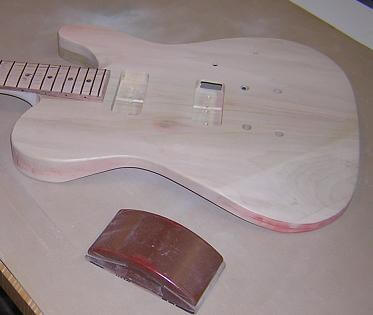
Once the entire instrument has been sanded with 100 grit and is nice and smooth, we get to do it again. A few more times, actually. This is where it gets real easy to give up and say "good enough", but don't do it. Don't stop until it truly is "good enough". You'll hate yourself later if you do.
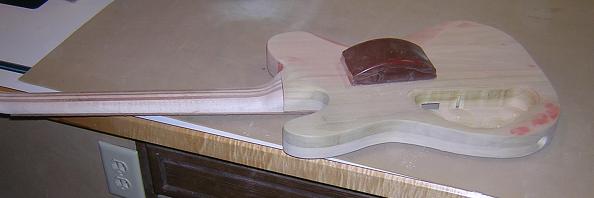
Move on to 150 grit paper. Then 220, then 320. If you find any holes/gouges/scratches that you missed earlier, step back and fill it using your filling method of preference. Then go through all the sandpaper grits in that area to bring it up to par with the rest of the guitar. Did you knock the guitar against the workbench while sanding? Go back and address the area to make sure any dents are fixed. This is where you start to really handle the project with kid gloves, as you don't want to be the major hinderance to your own progress!
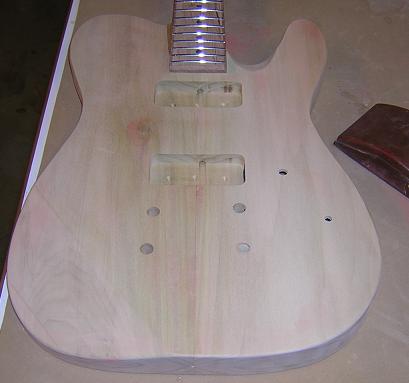
Now, the guitar is sanded. We're ready to paint, right? Wrong! We have a few more things we need to do. First, if your guitar used an open grained wood (i.e. mahogany, walnut, ash, etc.) then we need to fill the grain. Frankly, I'm a fan of filling the grain on all woods as I've found even maple and poplar which are fairly tight grained will occasionally have areas where the grain is open enough to show through. As an added bonus, many of the grain fillers also do an adequate job of sealing the wood which helps deal with the heartache of the wood rejecting the laquer.
If you're not using grain filler, then it's a really good idea to use some other form of sealer before shooting lacquer. Shellac is a good choice, and often gives the wood a pleasing amber hue. If the guitar is going to be painted opaque, then primer is usually adequate. Note that I haven't had much luck shooting clear lacquer directly onto unfinished wood; the lacquer doesn't seem to adhere to the wood evenly, and instead pools in areas so you get spots with no finish, and others with runs. A seal coat of some form helps prevent this from happening.
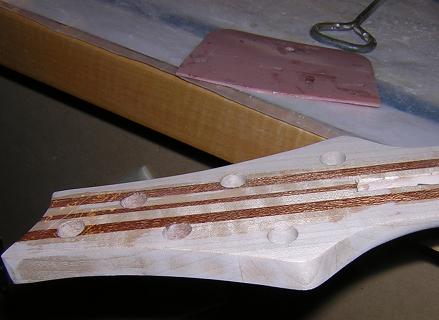
The filler I've been using is a water based filler I got from Stew Mac. Frankly, I'm not overly impressed with its performance, but I haven't yet found anything better and I've got a can of this to use up before I can experiment with a different brand. The general technique is to work in small sections. Brush on the filler in the direction of the grain, wait until it starts to set up (the can says 5 minutes, but I've had better luck waiting around 20 to 30) then use a scraper to pull across the grain at a 45 degree angle and remove the excess filler. The instructions say to "be careful not to pull the filler out of the grain." If you've figured out how exactly to pull that off, let me know. Sand the filled area with 320 grit sandpaper before applying another coat. Maple and poplar generally need only a coat or two of the filler, but woods with open grain require 3 or 4.
Once the "grain filling" coats have been applied, I give the entire neck of the guitar (which I'm finishing clear) a light sealer. This way, I've (hopefully) got the filler built up in the pores of the grain, and the entire surface sealed. Once the final coat is dry, sand the whole guitar again with 320. Just make sure you don't accidentally sand through to bare wood, which can be tricky to judge because the sealer is clear.
By the way, the instructions on the filler I'm using say to wait 24 hours before applying a topcoat of finish. Check your can. Also, it's a good idea to make sure the product you're using is compatible with lacquer topcoats. Better to find out before you start using it, rather than after!
Now we're almost ready to paint (I use the term "paint" as a generic one in this procedure for applying any sort of finish.) Paint doesn't adhere to dust very well, so we want to take our tack cloth and wipe the guitar down real well to make sure all of the dust has been removed. Make sure you get it out of the control cavities, pickup holes, etc. Next, with the dust removed we want to remove any waxes, oils, fingerprints, etc. With a lint free cloth, wipe the instrument down liberally with naphtha. Once you do this, take care not to touch the instrument with your bare hands as you'll put fingerprints right back onto it. From this point on, I handle the guitar only while wearing rubber/latex gloves (clean your gloves with the naptha as well.)
I have a nail in the ceiling of my shop, and I bent a coat hangar. This gives me a good place to hang the guitar when I'm waiting for things to dry (i.e. naphtha) or wiping it down with a tack cloth.
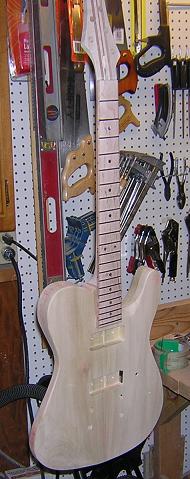
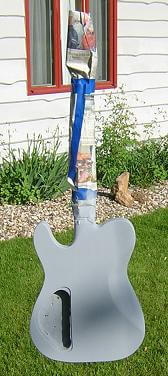
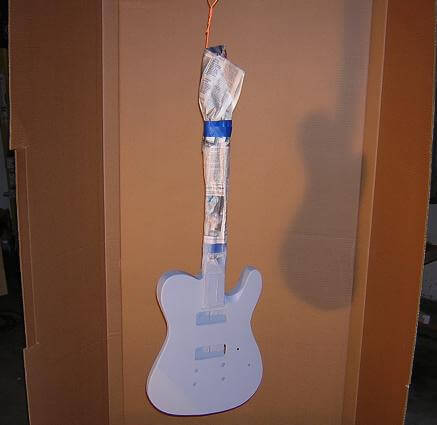
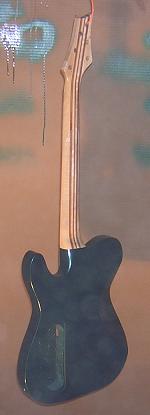
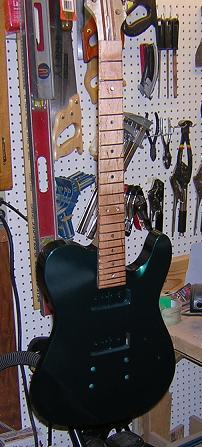
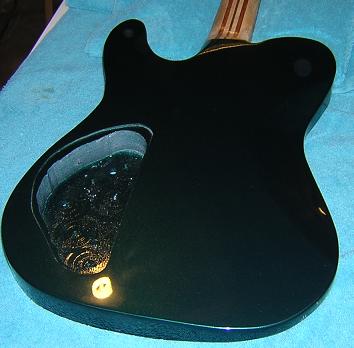
On a guitar, there's almost always something we don't want finished. At the minimum, we want to mask off the fingerboard if we're not spraying it (i.e. rosewood or ebony boards.) On this guitar, I wanted the neck and headstock to just have a clear coat, so I used tape to define the line where the color will end. I then used tape and newspaper to mask off the rest of the neck and fingerboard.
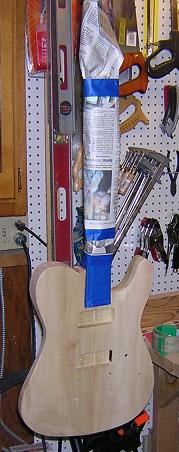
Before we actually spray any finish, we need a few things. First, we need a method to suspend the guitar. As mentioned above, I've found that bending a clothes hangar and hooking the guitar through the tuner hole works pretty well. In the past I tried a hook on the end of a string, but discovered what happens when the string breaks. Also, the string allows the guitar to spin from the pressure of the paint hitting the guitar, which is also undesireable.
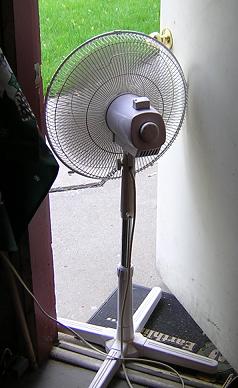
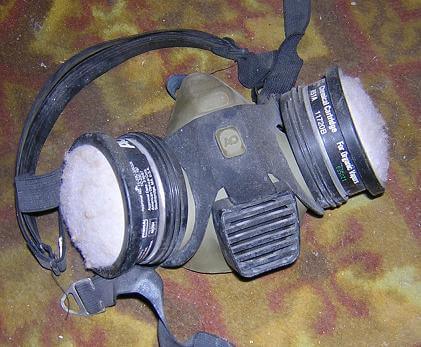
Next, we need a place to spray. If the weather is nice (above 60, low humidity, no wind) I like to spray outside as there's a lot less chance I'm going to poison myself with fumes. If the weather isn't coorperating, or it just won't work in your situation, then find a place indoors with really good ventilation. The lacquer fumes at best will kill a mess of brain cells and at worse could kill you if they build up enough, and they will build up. Wear a respirator (a paper mask is not a respirator). Set a fan in the window/door. Get out of the area between coats. Make sure you survive the guitar building experience with your playing abilities intact! Your best bet is to find a place outside if at all possible. Even if spraying outside, a respirator is a good idea.
At this point, if you're doing a clear finish then you can go ahead and jump down to step 2. If you're doing an opaque finish, or combination opaque/clear finish (like I'm doing on this guitar) then we've got more prep work to do.
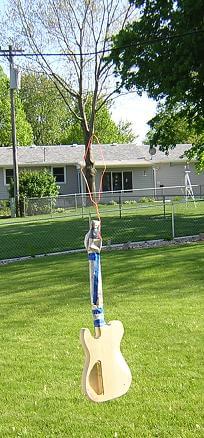
Now it's time to actually spray some paint, but because we're just doing primer at this point, I'm still calling this the "prep stage." I used a couple of bent clothes hangars to hang my guitar on an unused cable TV wire that is strung across my back yard. A tree branch or clothes line would also work. Don't use electrical wires to hang your guitar!
I shook the can of primer real good for a couple minutes, and attached a spray can trigger to it. This little device makes spraying from cans a lot more comfortable and controllable. While spraying, about every 30 seconds I'd stop and shake the can for a few seconds to make sure the paint was mixed well.
Now I started to paint. The best technique is to start spraying with the paint not hitting the guitar, then move the can across the area to be painted, and stop spraying once the paint isn't hitting the guitar on the other side. Some cans of paint will "spit" a little when starting and/or stopping, and painting this way avoids the splatters from winding up on your guitar. The trick when painting is to move slow enough to make the paint look "wet" but not so slow that the paint runs. It's a speed that takes a little practice to get right.
Make a pass, then pause to gauge whether the paint is too thick or thin. If it's too thin, make another pass in that section. If it looks too thick, move to another part of the guitar for a minute to let that section dry before going back to paint the surrounding area. This will help avoid accidentally getting the paint too thick and causing a run.
Paint all the sides of the guitar with an even coat. Pay particular attention to edges, as it's easy to not get the paint thick enough in these areas. Don't worry if there are areas you can still sort of see through; we'll get those in the next pass.
After applying a coat, wait five minutes. Then apply another coat and wait, then apply a third coat. If you did it right, there shouldn't be any thin spots left. Now let the guitar dry for an hour.
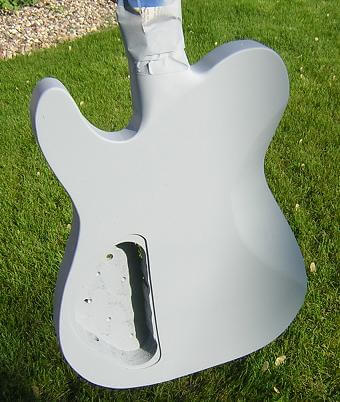
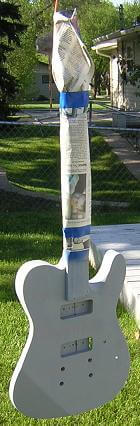
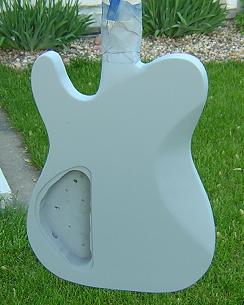
Once the primer has dried, we go back to sanding only this time we're using 400 grit. The primer will have sort of a rough surface. Our goal is to make it silky smooth.
Now, if you're anything like me, a few spots have now shown up where things aren't as smooth as they should be. This isn't uncommon, as often times small defects in the wood surface will blend in with the grain, making them very difficult to see. Once you get an even coat of primer on the surface, they will then jump out at you. We'll want to fix them now, as they will really jump out at you once the guitar is shiny.
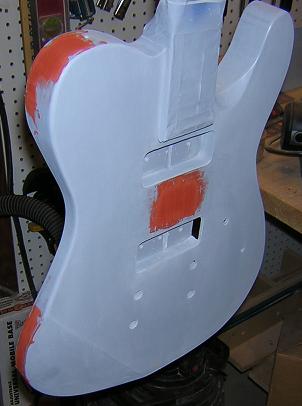
We can go back to our glazing compound to fill in the troublesome spots. I'm giving you the benefit of the doubt that any void in the surface that would be larger than what glazing compound will handle would have already been addressed prior to the first round of priming. Fill the spots and sand everything smooth. In the midst of this process, if you happen to sand through the primer to the wood, don't panic; it will easily be covered with the next application of primer.
Once the guitar is smooth and the newly found voids have been filled, it's time to shoot primer again. Just repeat the process above, although unless you really got agressive with the sandpaper, probably two coats will suffice. Wait another hour.

Please tell me you got all of the surface imperfections addressed. If you didn't, you'll have to keep repeating the above process until the surface of your guitar is flawless. Just think of Moses leading the Israelites around the mountain. If they messed up, God make them take another lap. But, like the Israelites, with each additional lap you learn the importance of striving to do things right the first time!
Now we'll sand the guitar again with 400 grit sandpaper in preparation for the color coats. Be very careful not to sand through to the wood this time (if you did so before.) All nice and smooth? No visual imperfections anywhere? Good! Now it's time to apply the final finish.
Step 2 - Spraying The Final Finish
This is the fun part of the whole process, especially if you're spraying color. This is where you can actually see progress take place.
Find a place to spray, as described above. In my case, I prefer to spray outdoors. However, on the day I had earmarked to finish this guitar we were having 30-40 mph steady winds (not unusual here in South Dakota, in fact I'd call this "breezy" as compared to normal!). Spraying in high wind is an exercise in futility. It was too bad, because outside of the wind it was sunny, about 78 degrees with low humidity. Perfect in every other aspect.
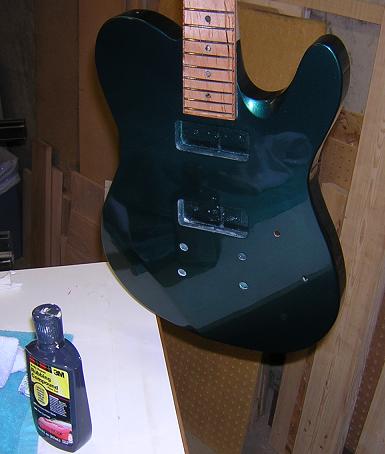
So, I decided to spray in my garage. First I removed all the vehicles, or anything else that I didn't want to risk having overspray hit. I suspended my guitar from a rafter, and used a large piece of cardboard set behind it to help control the overspray. I also propped the entry door open and placed a fan in the doorway blowing out to help dissipate the fumes.
In this situation you want to be very sure to wear a respirator, because even with the fan in the doorway you could see the paint suspended in the air! Some of the pictures below look a little cloudy; it's not the camera! The garage actually got cloudy from the lacquer fumes. You really don't want to breathe this stuff, as you'll take a trip without leaving the farm.
As mentioned above, lacquer (or any other finish) doesn't stick to dust very well, so I tacked down the guitar a final time. I also hit it again with naphtha to make sure all the fingerprints were gone.
I took a can of color coat and shook it real well. Then I began spraying, using the same method described in the primer section above. Just remember to make passes slow enough to make the paint appear wet, but fast enough that you're not causing runs. Give the guitar a nice even coat. Don't worry if you can see a little bit of the primer bleeding through the first coat. We'll cover that with subsequent coats.
At this point, we wait five minutes. I go inside the house and remove my respirator mask to make sure I'm getting fresh air. I set an oven timer to remind me when it's time for the next coat.
Three or four color coats should be adequate. In my case, I did four. Don't forget the five minute break between coats. After the last color coat, we wait an hour before starting to apply the clear coats.
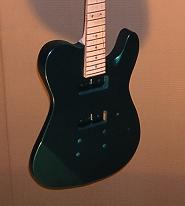
In my case, I was leaving the neck natural (with just clear laquer on it.) So prior to spraying the clear coat, I wanted to remove the newspaper and tape that was protecting the neck. The trick in removing the tape is to do it in a way that gives a crisp line, and doesn't peel away any of the color coat. I've found two things that really help: first, before pulling the tape I lightly run an x-acto knife along the edge of the tape to cut through the laquer. Second, you don't want to wait too long after spraying your final color coat, as if the paint gets too hard it will tend to flake and lift when the tape is removed. I wait about 15-20 minutes after the last color coat, then remove the tape.
Before I began shooting the clear coats, I went over the neck with more naphtha, as the newspaper had left some black ink smudges where I'd handled the guitar. Be careful not to get naphtha on the freshly coated paint. Naphtha usually doesn't remove paint, but because it can be used as a thinner you don't want to risk it with paint that hasn't cured yet.
Now that the hour has passed, we began shooting clear coats. The first coat is a light mist coat over the whole instrument. Don't worry about getting it on too thick; we're just trying to get a base coat of clear to bond with the color coats. Now we wait our usual five more minutes. You can see that the garage is really starting to get foggy from the lacquer fumes at this point!
Next, we apply our regular coats of clear over the whole instrument. Again, we follow the same schedule and use the same techniques as above. On this guitar I did six coats of clear, five minutes apart. You may have to adjust the spraying speed slightly, as for some reason the clear coat seems to want to run a bit easier than the color coats.
After the last clear coat has been applied, let it dry for another hour.
Now comes probably the hardest part of the whole process: we have to wait at least two weeks before messing with the guitar. Hang it somewhere warm and dry and forget about it. We can't continue with the process until the lacquer has fully cured. Usually two weeks is sufficient. Don't try to rush things and continue on too soon, or you may get to learn how to strip a guitar of finish and start over! After two weeks, hopefully the guitar is ready for the next step, but if you smell it (no, I'm not kidding) and it still smells like lacquer, then the finish hasn't cured so you'd better wait until the smell goes away. Sometimes it takes three to four weeks, but usually that's in low temperature or high humidity situations.
Step 3 - Making It Shiny
Is the finish cured? Good! Now we can move on.
Perhaps at this point you're looking at the guitar thinking, "well that doesn't look too bad. Maybe I could just call it good and install the hardware." Don't! We're just a few (well, probably about 6 to 8) hours work from taking that "pretty shiny" paint job and turning it into a mirror.
A word of warning, however: things have to get worse before they get better. As we follow these next steps, we're going to take a guitar that looks halfway decent, and turn it into a hideous looking piece of garbage. Don't panic; this is just the first step. Once we do that, we then can take the next step and turn that pig into a piece of art.
The first thing we want to do is to sand the guitar (what? I thought we did that already!) Go back to your sanding pad or towels, and place the guitar in a solid place where it's comfortable to work; you're going to be here a while. In this case I switched to some old towels because they aborb spilled water better.
We're going to start with 1000 grit wet/dry paper. Dribble a few drops of water on a section of the guitar, and begin sanding. Don't get too much water on the guitar, as if it manages to somehow soak into the wood, the wood will expand and crack the finish. Don't ask me how I know this. The reason we use water is that it helps keep the pores of the sandpaper clean. If we didn't use water, we'd be changing our sandpaper every 30 seconds.
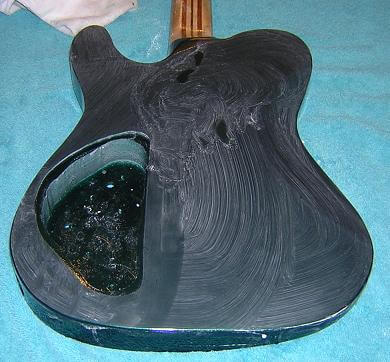
Work in small sections, sanding until the surface of the paint has an even cloudy look. If you can still see pinhole sized portions of the color poking through under the cloudy surface then you need to keep sanding. We want a perfectly smooth, uniformly cloudy surface. Use a soft cloth to frequently wipe away the water and sanding residue so that you can check your progress. You want to sand just enough to level the surface, but no more. Sand the whole guitar, or at least a large area. It's probably more efficient to sand the whole guitar, but I tend to do one section at a time as it breaks up the monotony.
In the picture below, you can see on the left how the unsanded paint has an "orange peel" type surface. This is what we're trying to remove. The sanded area to the right has the uniform, hazy color we're looking for. Sand until you see the little spots of unsanded finish are no longer poking through.
If while sanding, you see the water turning the color of the guitar, or see your wiping cloth picking up pigment in the water residue, STOP SANDING THIS AREA! You have cut through the clear coat! The paint is probably still salvagable if you immediately stop sanding in that area, although you may see a difference in the "depth" of the paint in this spot when we're done, depending on how soon you discovered that you sanded through the clear. If you keep going and burn through the color coat to primer or (gasp) bare wood, then this becomes much more difficult to fix. So go slow and just take enough of the clear coat off to level the paint. Be especially careful around edges, as I mentioned before the paint will be much thinner in those areas and therefore, much easier to sand through.
Believe it or not, if you've done this step correctly it'll look like you've ruined your paint job, as the guitar will have a milky haze only hinting at the beautiful color that it had only a short time ago. However, if you feel the guitar it will feel silky smooth; this is what we're after. The goal of sanding is to remove the little tiny high-spots in the paint so that instead of being like the peel of an orange, it's closer to the peel of an apple. How's that for an analogy?
Once you've gone over the guitar with 1000 grit, repeat the process with 1500 and then 2000 grit papers. This shouldn't take as much sanding, as the 1000 grit did the bulk of the leveling work.

Now my attention turns to sanding the neck. It's a little more difficult here to make sure we don't burn through the lacquer, as there's no color coat to watch for on your rag. Go slow and be careful. Because I'm using a maple fretboard that's been sprayed with laquer, I have to sand between the frets. Very tedious, but necessary. One helpful hint is to mark your place with a scrap of tape. It's difficult to tell by eye which spaces between frets have been sanded and which haven't.


Got the whole guitar sanded and looking like colored milk? Good! Now we're ready to take the last step and turn the guitar into a mirror!
Put away your sandpaper and break out the rubbing compound. Get a clean soft cloth (cotton or terrycloth works well), put a dab of rubbing compound on the cloth and start rubbing. Use small circular motions, with a fair amount of hand pressure. Work in small sections. The cloth will turn a blackish color and develop a burnished looking area where you've been rubbing, so keep turning the cloth so that you're working with clean fabric. After you rub a section, take another clean cloth and wipe away the excess rubbing compound, and buff the area. As you buff, you should start to see a phenomenal shine develop. This is what we're after!

Rub down the whole guitar in this manner. Be careful to get the excess rubbing compound out of corners and cavities, as when it dries it will turn bright white and make your guitar look bad. Naphtha will remove any dried rubbing compound from the crevices.
After you've rubbed down the entire guitar, if you want to take it to the next level you can repeat the process with swirl-mark remover. More or less this is just a finer grit rubbing compound. After you finish with the swirl-mark remover, your guitar will be so shiny it'll look wet. Because my guitar was looking pretty good (and I was getting pretty tired!), I stopped with the rubbing compound.
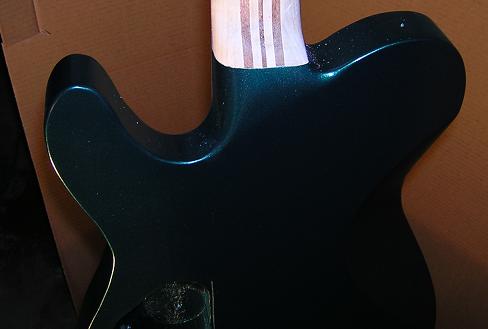
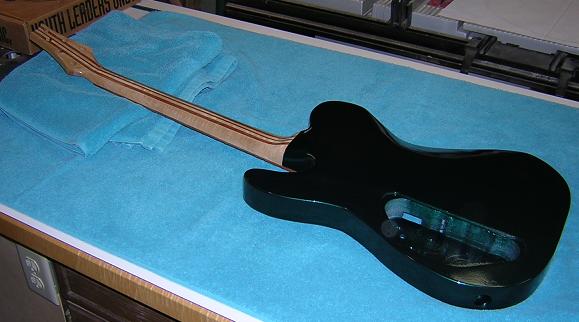
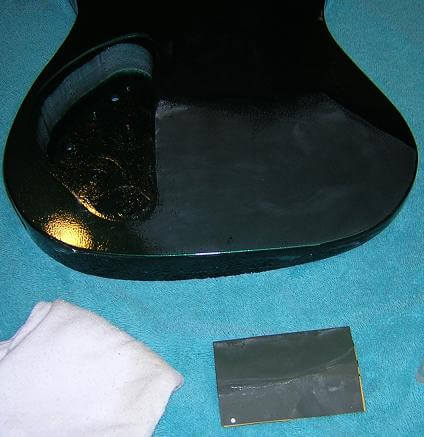
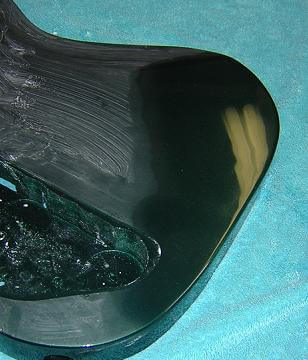
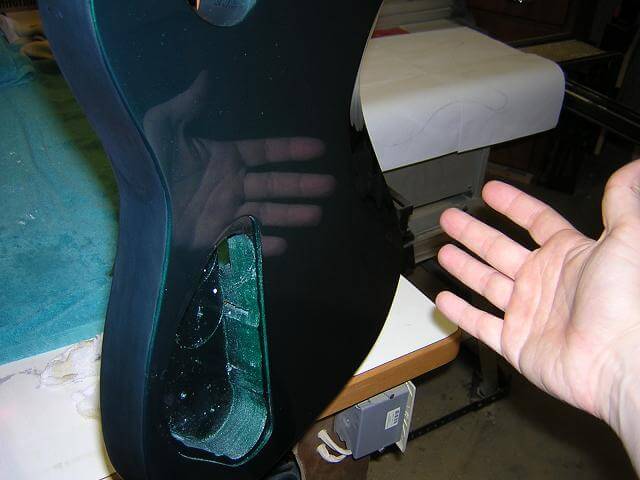
It's sometimes difficult in pictures to demonstrate how shiny a finish is; that's why I like this picture. I stuck my hand out (why does it look so fat?) while taking the shot to demonstrate just how shiny the finish has become after sanding and rubbing. It literally has become a mirror; I could comb my hair in the reflection if I didn't have better things to do.
Finally, polish the guitar with a good paste wax. I recommend using non-silicon wax, as if you ever have to do any repair/refinish work, the silicon will make you curse life.
So there we have it. A beautiful finish done at home with spray cans. Few people can believe that this level of quality can be achieved via rattle cans, but with the right preparation and a little care, one can achieve professional results.

Return To The Main Music Gallery
This page last updated on 09/07/2018