


Any guitar project starts with wood. Three years ago when the Tundra Boy was working at Menards and had positive cash flow, he went on an exotic wood purchasing spree. The wood was exotic, not the purchasing spree. Anyway, he spent several paychecks to purchase all of the wood used in this project.
There's nothing wrong with buying super fancy wood if that's what a person wants. Myself, I'm more of a middle class wood guy. I find the law of diminishing returns comes into play very quickly with the fancier pieces of lumber. I usually purchase material that is nice looking, but maybe not 5A grade. I find that by doing this I can get 80% of the look for only 20% of the price. That makes me cry a lot less when I accidentally slip with the saw and turn that lumber into firewood.
But, it's his money and his project so he can buy and use the wood that he wants. After the lumber was purchased, he wound up quitting his job. With no income, that meant he had to put this project on hold. This had the secondary benefit of letting the wood acclimate in the shop for almost three years.
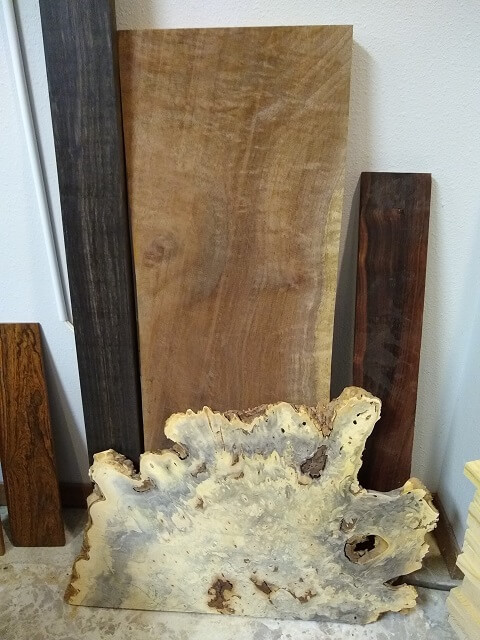
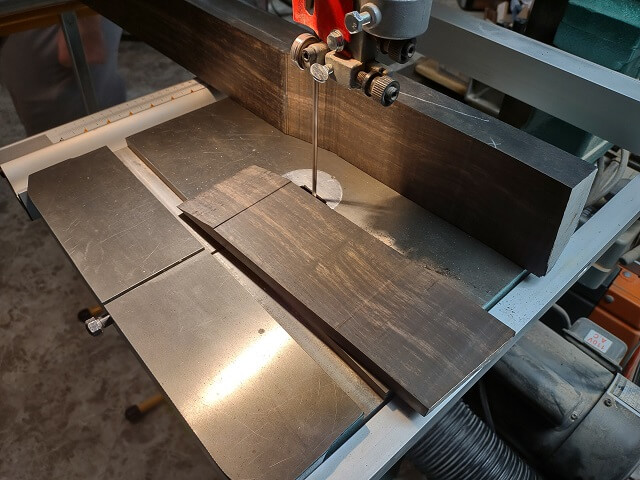
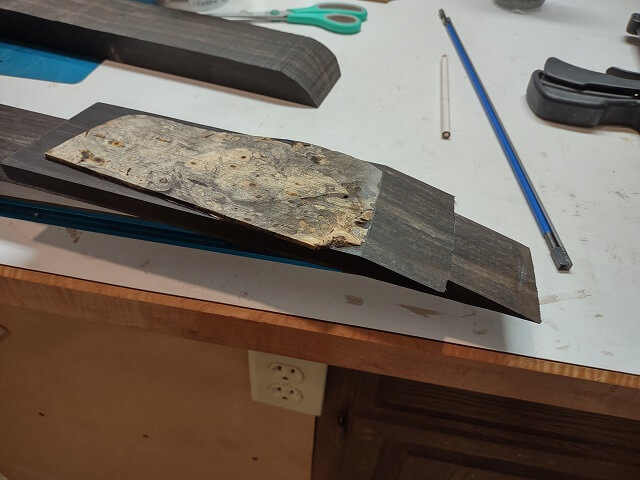
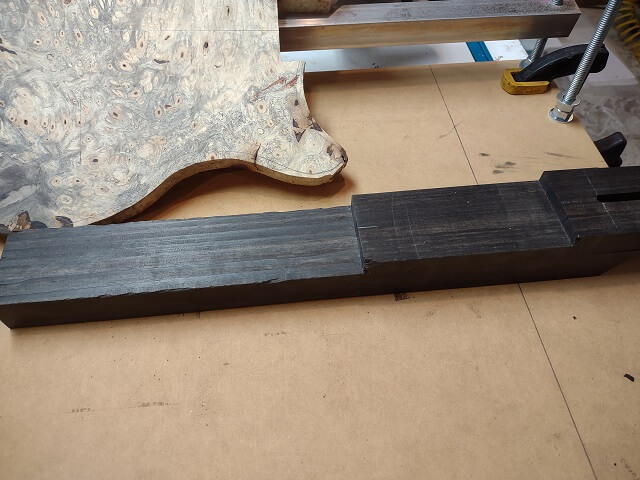
So here's most of the material used in this guitar. There's a solid piece of Gabon ebony that will be the guitar neck, a chunk of figured claro walnut to be used as the body wings, a Brazilian rosewood board that will become the fretboard, and in the front is a piece of buckeye burl that will be used on the top. That piece of bocote on the left side of the picture was left over from his six string bass project and won't be used in this project.
Anyway, once his income resumed, he was able to also start back on this guitar project.
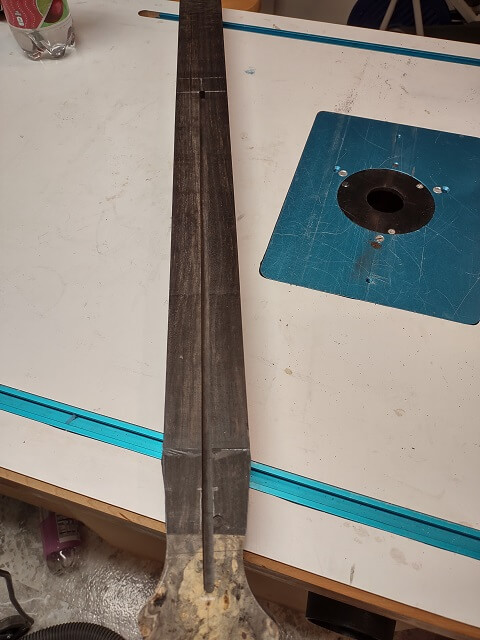
The Tundra Boy wanted this guitar to have a neck-through design made from solid ebony. I actually tried to talk him out of this idea, because of the weight. Ebony is an extremely heavy wood. In fact ebony is one of the few types of wood that is so heavy it won't float. An ebony neck-through guitar has the potential to weigh a ton.
Despite my attempts to persuade him otherwise, the Tundra Boy was steadfast in his vision. Once his mind is made up there's pretty much no moving him. Therefore, this guitar is going to have a solid ebony neck.
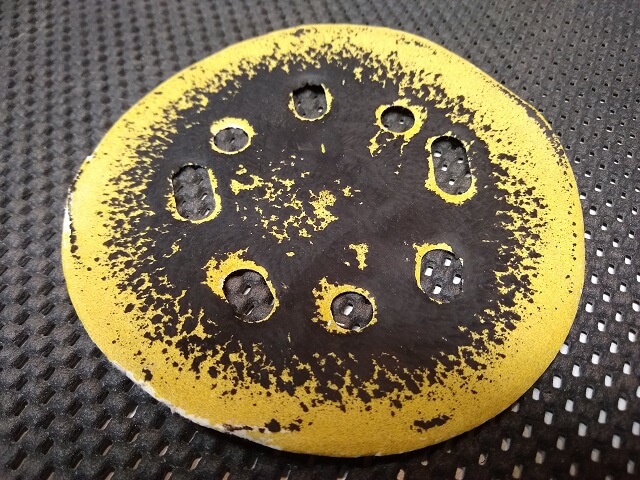
His ebony board was coated in what looked to be a wax-like substance. I know it's common to coat the ends of a board in wax to help prevent cracking as the board dries, but this was the whole board. It felt like a giant black candle. Or maybe a crayon. Either way the first thing that needed to be done was to remove the wax. The fastest way to do this was to just sand it off.
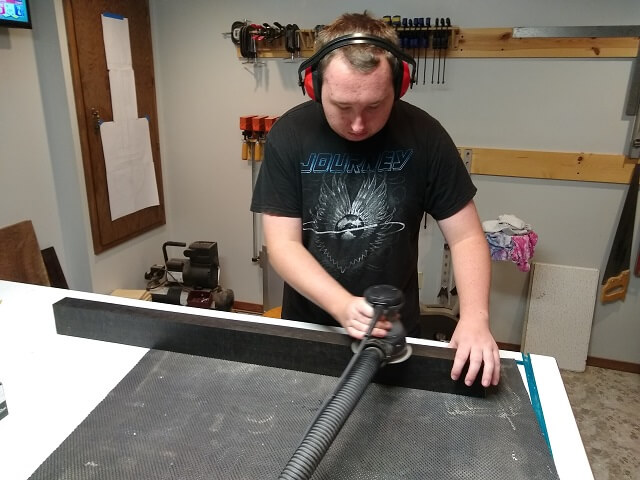
He discovered the wax clogs sandpaper in a very effective manner. It took several sanding disks to get all the wax off.
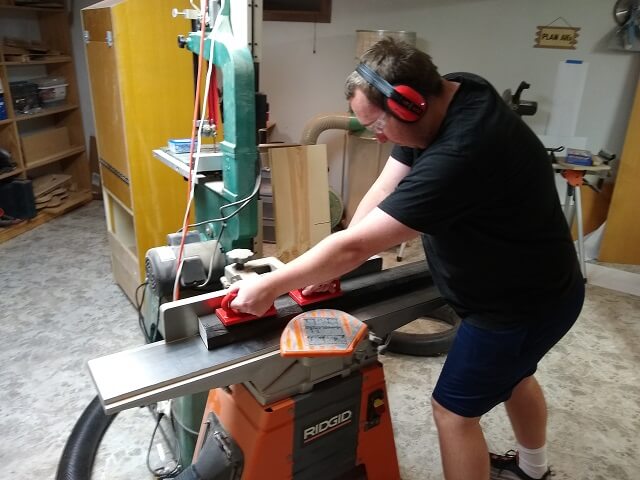
Next, the face of the guitar neck was jointed straight. This gives a perfectly flat reference point from which the rest of the neck can be formed.
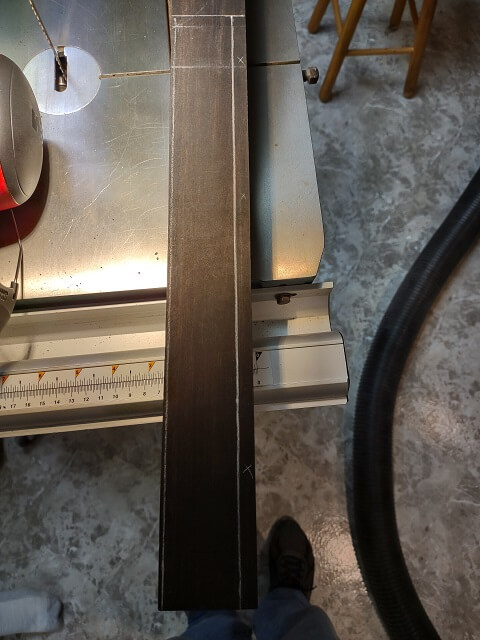
The Tundra Boy and I then spent an evening planning out the neck blank. Because ebony is such an expensive and increasingly rare wood, we didn't want to just hack the board up. If planned carefully we thought that in addition to the neck for this guitar, it would also be possible to get two or three fretboards from the wood,. Here's the Tundra Boy with a protractor marking the headstock angle cut.
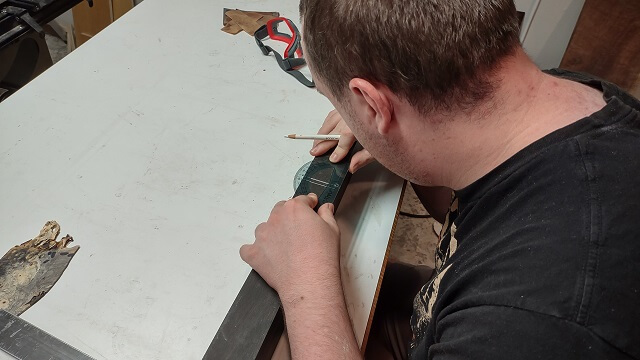
Regular lead pencil on ebony is nearly impossible to see. The Tundra Boy used a white colored pencil to mark the cut lines. This was much easier to see, but also less exact as the colored pencil wouldn't sharpen to a fine point very well. I would joke that it was like trying to draw accurate lines with a crayon.
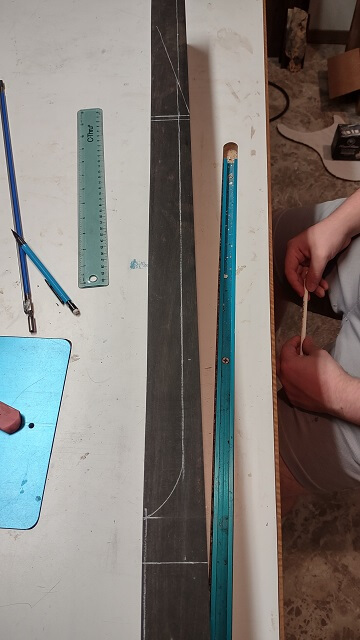
Here's the initial layout of the cut lines. Later this same day I would awaken in the middle of the night realizing we made a severe miscalculation, so these lines wound up moving slightly.
I tend to have trouble sleeping when working on projects, but more so when helping the Tundra Boy build a project. If I mess up one of my own projects, I'm disappointed. But if the Tundra Boy messes up a project, I'm double-disappointed. Once for him, and once for me knowing I didn't prevent the problem, or worse yet, that I was the cause of the problem. So I often find myself laying in bed awake repeatedly mulling over the details of a project rather than sleeping.
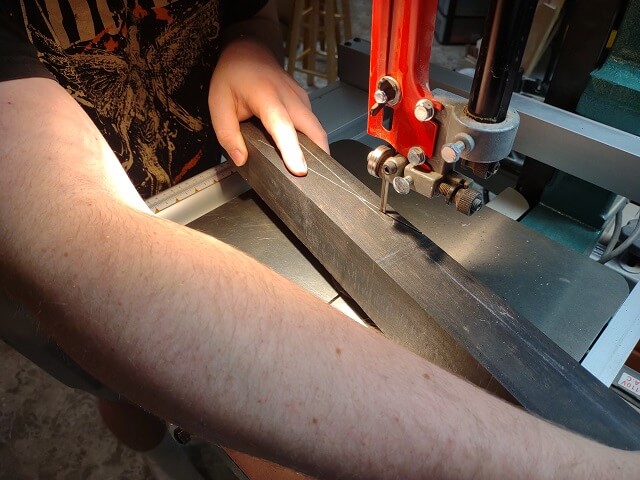
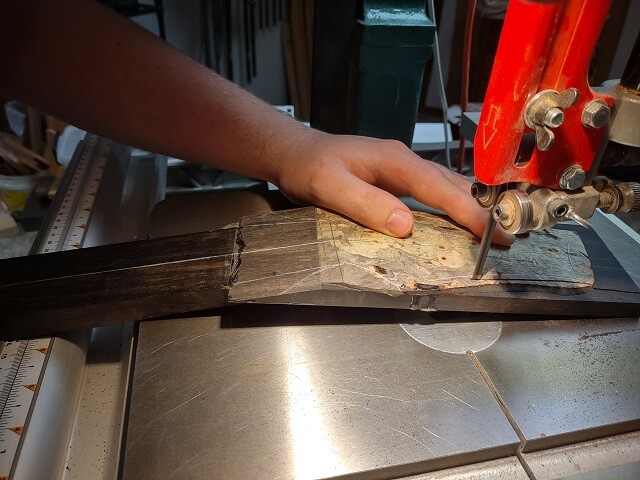
The Tundra Boy wanted this guitar to have an angled headstock with a scarf joint. This required a 12° cut, which he did on the bandsaw. He only cut as far as the final thickness of the neck, then shut the band saw off and pulled the blade out of the kerf. The rest of the neck blank in this area will be removed for the above-mentioned fretboards, so there wasn't any benefit to cutting further into the blank.
The headstock will be 5/8" thick. 1/8" of this thickness will be made up of a buckeye burl laminate, so a piece of ebony 1/2" thick was cut from the neck blank. This will be the larger portion of the headstock.
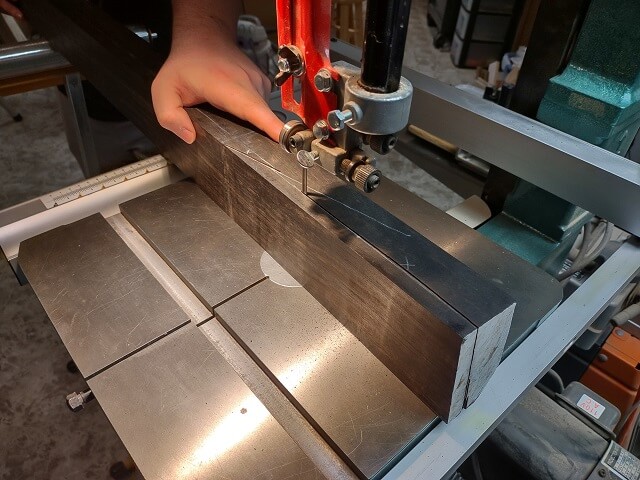
Here is the headstock piece after being cut free from the neck blank.
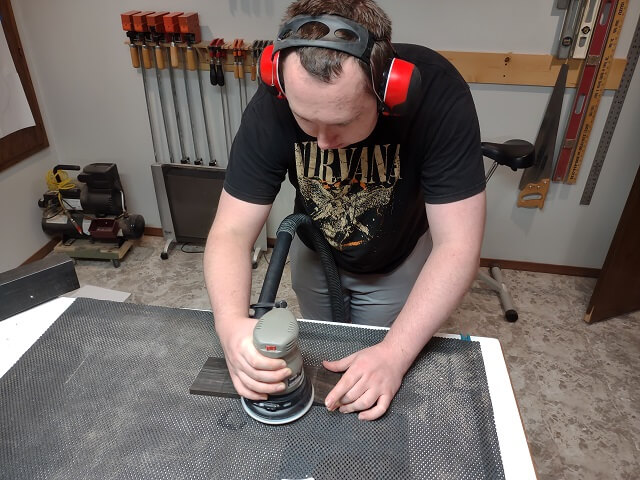
The headstock piece was cut slightly thicker than needed, so once the bandsaw scratches were removed it would be at the final desired size. The bandsaw scratches were removed using the drum sander.
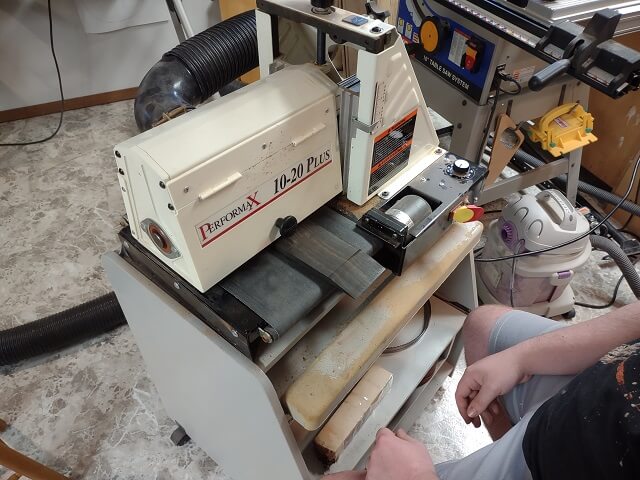
Of course, the 80 grit paper on the drum sander left plenty of scratches as well, so those marks were removed with the ROS. Sandpaper by design creates scratches, so the goal as you work through the grit sizes is to leave smaller and smaller scratches until they're too small to notice.
The Tundra Boy mixed up a little bit of epoxy, and glued the buckeye veneer to the face side of the headstock piece. A scrap chunk of MDF was used as a clamping caul to keep the clamps from denting the soft buckeye wood. He also put a piece of waxed paper between the buckeye and the MDF just to make sure any glue squeeze out didn't permanently affix the MDF to the headstock piece.
Once the epoxy dried, the clamps were removed. A piece of the veneer was left sticking out over the scarf joint area. The Tundra Boy used a flush cut saw to trim this piece off and run the scarf joint angle up onto the veneer.
The back of the neck could now be trimmed to rough thickness. This was done at the band saw. As already mentioned multiple times, in the future the scrap piece will likely become two or three ebony fretboards.
Next, the neck blank was trimmed to the same width as the widest part of the fretboard, which is about 2.25". The easiest way to accomplish this cut is to use the tablesaw.
With the neck blank cut down to size, it was time to work on the scarf joint. The typical way I've always done this is to tape the two pieces (headstock and neck blank) together so that the angle of the scarf joint lines up across the two pieces, then I use the belt sander to smooth them out and remove any slight irregularities caused by the band saw. Here's the Tundra Boy doing this.

The results looked good, as you can see in the picture below. Unfortunately, once the Tundra Boy started doing a trial run on the clamping, it became apparent that the two mating surfaces were not anywhere near flat. Putting an angle reader on the joint showed that the angle varied across the joint, and that the joint angle was closer to 16° rather than 12°.
The steeper angle was unfortunate, but livable. The real issue was how the glue joint wouldn't be tight due to the unevenness of the wood. Trying to glue pieces together that aren't flat, especially on a glue joint that's under stress like this one, is a recipe for disappointment. The more we looked at it the more unsatisfied we became with the situation.
We stepped back and pondered the situation. What we think happened was when sanding across the joint, the weight of the ebony neck made it difficult to keep the face of the joint flat against the sander surface.
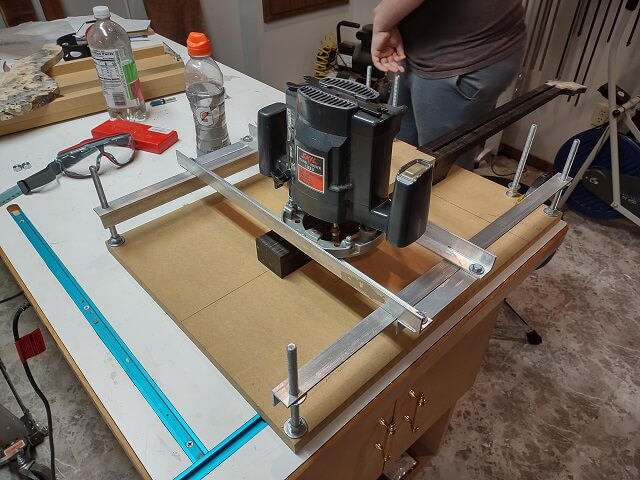
In the end, how it happened was less important than how to fix it. The Tundra Boy wasn't confident in his ability to try again and sand the joint smooth. We pondered the situation for over an hour, and thought of several possible options for rectifying the problem. We finally settled on building a jig that would hold a router at the proper angle. Plus, building a jig would be useful for smoothing the scarf joint on future guitars.
I spent an hour building a simple jig. Once the jig was ready to use, we thought we were home free.
We then discovered that due to the nature of the neck, the angle, and the kind of jig I made, clamping everything together to use the jig was problematic. We spent more than an hour and a half trying to figure out the best way to get everything fastened down for routing. It was a lot more challenging than what we expected. We came up with a whole bunch of ideas, but most of them wouldn't work for one reason or another.
Eventually, we settled on putting a thick board between two sawhorses, and clamping everything to it. The reason we used the board instead of the workbench was because it allowed better positioning of clamps on the underside of the neck. The workbench edge didn't stick out far enough to let a clamp reach the center parts of the neck and jig.
By the way, the board we used between the sawhorses was a thick piece of rare figured ash the Tundra Boy had recently purchased for a future project. He was apprehensive about using such an expensive piece of wood as a makeshift clamping bench, but it was flat and was the thickest piece of lumber we had available in the needed length. I assured him that we wouldn't mar the board, so he reluctantly agreed.
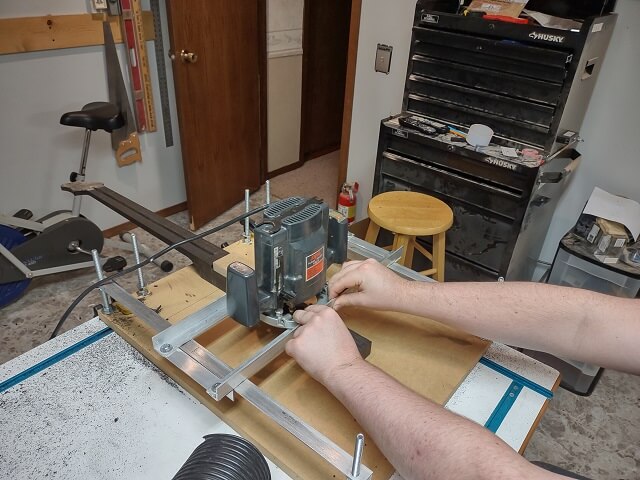
It was a bit of a kludge, but we finally got everything positioned and fastened correctly to allow the Tundra Boy to start routing. No, I take that back. It wasn't a bit of a kludge, it was a full-fledged kludgefest.
He went slow. No need to rush this part of the process. You don't want to make a mistake when trying to fix a mistake and turn a bad problem worse.
Much to our relief, the jig worked. The angle was straight and even. It took (literally) about 10 seconds of hand sanding with a block to remove the little marks left by the router.
Clamping everything up for gluing, we were much more satisfied with the way the pieces fit together. The joint was nice and tight. There were no visible gaps like there were during the previous attempt. I was much more confident that this joint would be strong.
After the epoxy had cured, the headstock seemed to be firmly attached to the neck. The Tundra Boy even tested it by trying to pull the pieces loose. The whole scarf joint fixing process sucked up over five hours of time, but at least in the end it was successful.
My hope was that the difficulties were behind us, and now we would have smooth sailing.

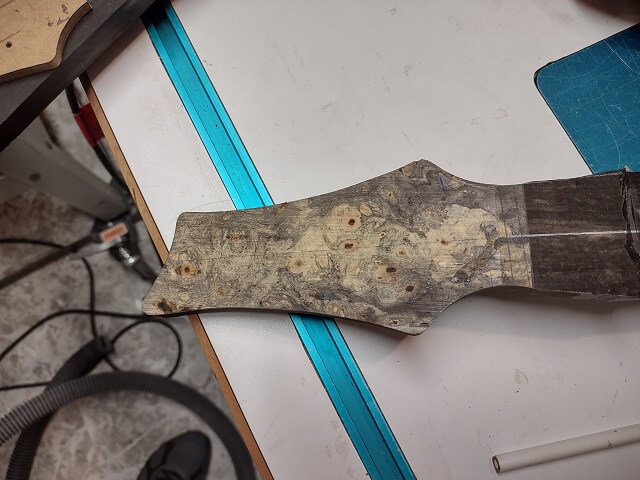
Next on the docket was to shape the headstock. The shape was traced onto the headstock face using my template, taking care to get it lined up with the center line on the neck. Then the Tundra Boy rough cut the headstock shape on the bandsaw, making sure to stay outside the lines. The bandsaw isn't accurate enough to smoothly cut out an intricate headstock shape, so at this point he's just removing the larger portions of wood.
To get the headstock exactly to the line, the Tundra Boy used the oscillating spindle sander. This process also removes the rough edges left by the band saw. The tricky part is, there's nothing to stop you from sanding past your line, and it's easy to make the edges a little wavy instead of smooth curves.
The Tundra Boy has done this before, with varying degrees of success. On his first guitar he sanded his headstock right to the line. On his second guitar, in the middle of sanding he decided to tweak the headstock shape and started to improvise. Then he discovered how fast things can get out of hand once the sander starts removing too much material.
By the way, despite what it looks like in this picture, the headstock isn't magically floating above the sanding table. To mitigate the headstock angle, the Tundra Boy taped a piece of scrap wood to the bottom of the headstock. That's what the headstock is actually resting on, it's just hidden from view in this picture.
He was a little nervous going into the sanding process this time around. In his words before he started, "I'm one for two." However, he took his time and stayed true to his marked shape, and it all turned out great. Now he's two for three.
It was time to route the channel for the truss rod. Because ebony is such a stiff wood, we were concerned that a truss rod may struggle to move the neck, especially if carbon fiber strips were used. The Tundra Boy decided to omit the usual carbon fiber strips. This hopefully will reduce the stiffness of the neck enough to let the truss rod do its job. It had the added bonus of making the neck routing simpler. Plus he didn't have to purchase $20 worth of carbon fiber strips.
This being the third guitar I've helped the Tundra Boy build, I'm trying to increase his skill set. One of the things I'm doing this time around is letting him do much more of the setup work before each operation. With the previous instruments, I would mostly get the tool configured and adjusted, then let him actually run the tool. With this instrument I'm also letting him do most of the setup work as well, and just trying to give him verbal guidance. It's part of the "teach a man to fish" mentality. I'm sure from his vantage point it looks more like, "Dad sure is lazy."
"If you give a man a fire, he'll be warm for a day. If you set a man on fire, he'll be warm for the rest of his life." - The Tundra Man
As a mentor, it's tricky. When watching the Tundra Boy struggle with getting a tool configured, it's extremely tempting to just push him out of the way and do it myself.

I have to constantly tell myself that he has to learn, and that I had to go through the same process when I started woodworking. I'll also catch myself doing things that I should have the Tundra Boy doing, that I just started to do myself without thinking.
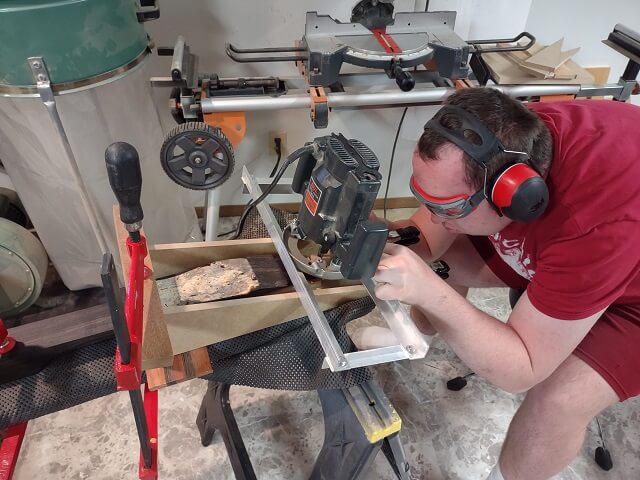
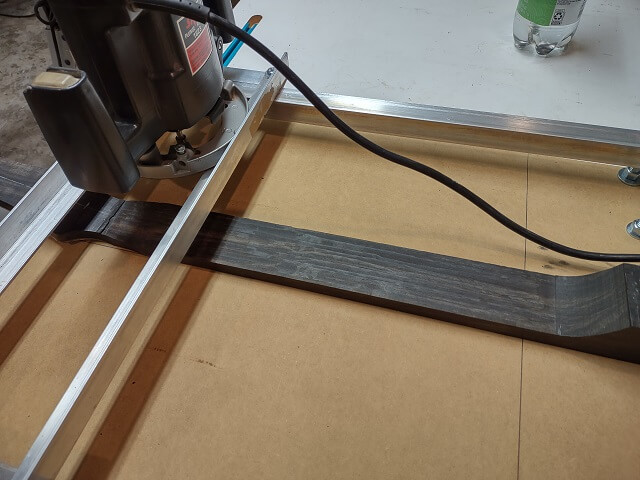
So anyway, here's the Tundra Boy installing the bit into the router that will route the truss rod channel.

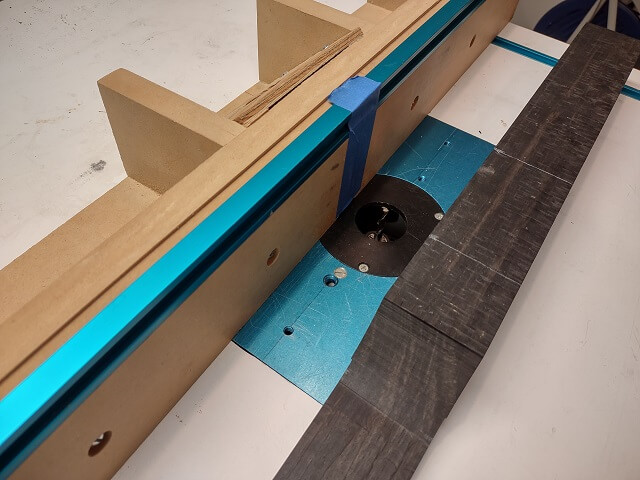
The easiest way I've found to route truss rod channels is with my router table. You don't have to try and balance the router on the narrow face of the neck, and you don't have wood chips spraying into your face and all over the shop. To me, using a router table gives me a much greater feeling of control. The downside is, you have to route the channel "blind" as the bit is cutting the underside of the wood where you can't see it.
Another downside to table routing occurs because the truss rod channel is a "stop cut" on both ends. That means that the routed channel won't extend to an edge of the wood on either side where the bit can enter and exit. The channel will "stop" before the edge of the wood is encountered. That means that to get the router bit into the wood, the router first needs to be turned on, then the wood is carefully set down in place on top of the spinning bit. With a plunge router, the opposite happens where the bit is lowered into the wood. Doing a plunge stop cut on a router table can be tricky, and unfortunately is needed for the truss rod rout.
Because the router bit can't be seen while cutting, in order to know where the bit is located while routing we put a piece of tape on the router fence and then carefully marked lines on the tape indicating the edges of the bit sides. Then two marks were made on the back side of the neck indicating where the channel ends should be located. While routing, the workpiece will be moved in one direction until the line on the neck lines up with the line on the fence tape. Then the direction of the workpiece is reversed and it is moved until the line on the other end of the neck lines up with the other line on the fence tape.
One side note, when routing it is generally desired to move the workpiece against the direction of the spinning bit. Moving in the same direction is called a "climb cut" and can be dangerous because the spinning of the bit will want to push the workpiece in the same direction the wood is already moving. The speed of the wood movement will want to accelerate. In extreme cases the workpiece can be quickly thrown out of the hands of the woodworker. And when things happen really fast in woodworking, the chance of injury rises exponentially.
With this truss rod channel cut we're moving the workpiece in both directions. Why is this OK? It works for this type of cut because all sides of the router bit are surrounded by wood. The side of the bit trying to push the wood in one direction is counteracted by the opposite side of the bit trying to push the wood in the other direction. The two forces cancel each other out. So it works for this particular application.
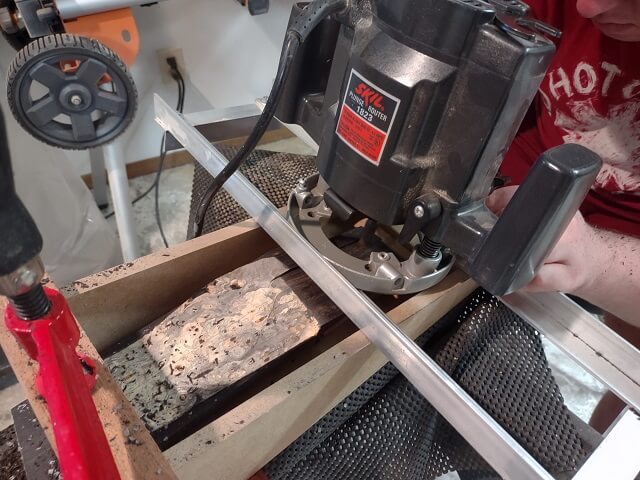
Another small hurdle we had to overcome was the headstock was already shaped. Usually when building a guitar I'll wait until after the truss rod channel is cut before I add the width of the headstock. In an effort to use the rare and expensive ebony wood as efficiently as possible, we changed the order of things with this guitar. So the wider headstock was already attached, which meant we couldn't just run the side of the neck directly up against the router fence, as the protruding side of the headstock wouldn't allow it.
To overcome this small hurdle, a piece of scrap wood was taped to the side of the neck. Coincidentally, this scrap piece was an offcut left over from the neck of the Tundra Boy's first guitar. This moved the neck farther from the router fence and allowed the headstock to clear. Of course, the width of this piece of scrap needed to be accounted for when setting the distance of the fence from the bit, in order to ensure the routed channel was perfectly centered in the neck.
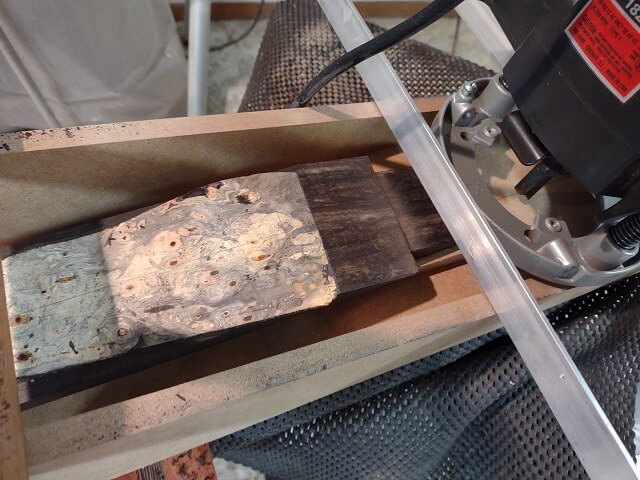
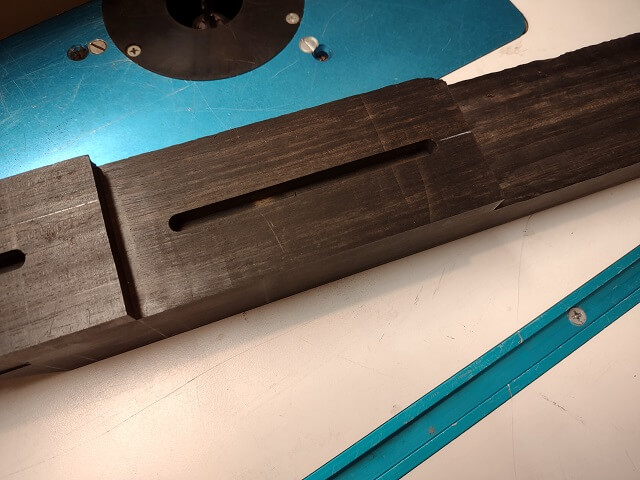
Ebony is an abrasive wood and will dull tools quickly. My 1/4" solid carbide router bit is an expensive bit. This wasn't a good combination. In order to reduce the strain (and hopefully wear) on the bit, multiple cuts were done rather than routing the channel to full depth in one pass. The router bit was only raised 1/16" at a time between cuts. Six different times the bit was raised slightly and then the channel was routed again at the new depth, until the final depth of 3/8" was finally reached. Slow and tedious wins the race.
Overall the operation was a success. The piece of scrap wood fell off a couple of times between cuts, which I believe is due to the oils in the ebony keeping the tape from sticking.
Also, as mentioned above, plunge cutting on a router table is tricky. At the end of one of the passes, the Tundra Boy turned off the router. As the bit was spinning down, he pulled the workpiece straight up off the spinning bit. Then in a moment of inattentiveness (we all have them) he dropped the workpiece back down on the spinning bit. This mistake created a small round cut in the face of the neck.
The good news is, the place where the mistake happened will be completely covered once the fretboard is glued in place. It was shallow enough that the glue will fill it, so there wasn't a need to worry about repairing it.
The adjustment barrel on the end of the truss rod is slightly wider than the rest of the rod. This is annoying. The end of the truss rod channel where the adjustment barrel will sit needed to be enlarged. This was done using chisels. The Tundra Boy hasn't developed much chisel experience yet, and gained a new respect for the old school woodworkers who had to do everything by hand.
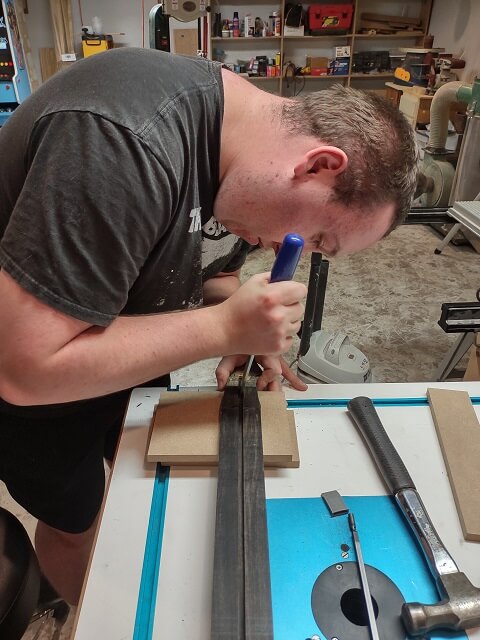
After a few minutes of chiseling and a bunch of test fittings, the truss rod was now fitting in the slot very nicely.
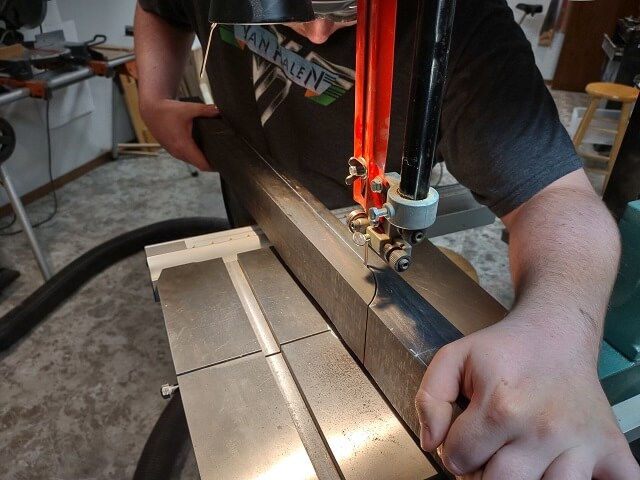
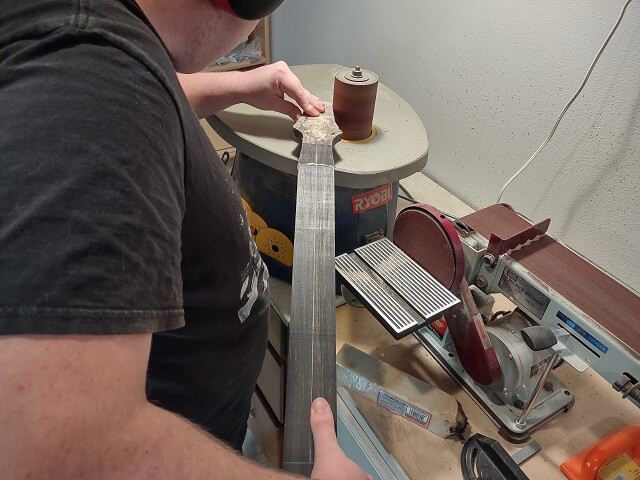
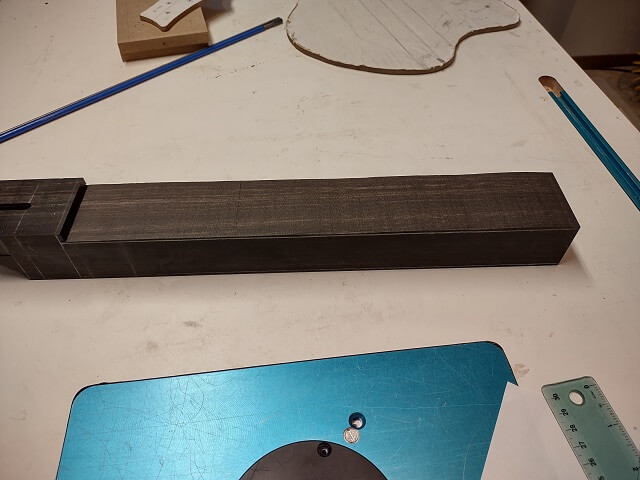
The back of the neck had been cut out using the bandsaw, and wasn't very accurate. There was a ton of bandsaw scratches, and there were areas thicker than others. To make the neck the correct depth and uniformly straight, the Tundra Boy used my router sled.
Because the thickness of the neck varies as you move up and down the neck, the angle on the sled was carefully adjusted. You can't see it here, but the body end of the sled is set about 1/8" higher than the headstock end.
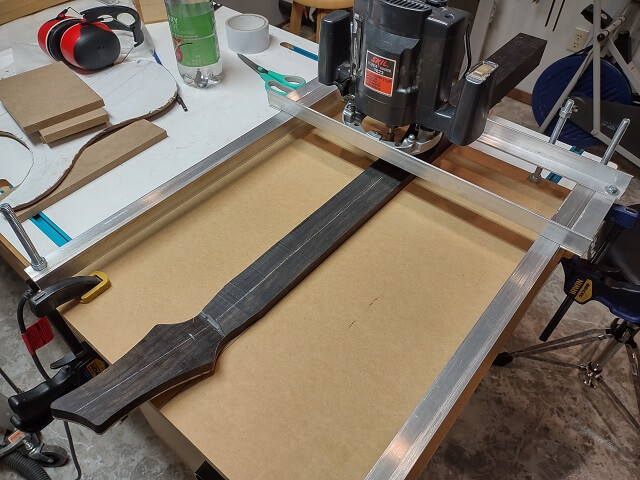
After routing, the neck had a smooth thickness transition from the headstock down to the body. The router bit left a few minor marks, but those will easily get removed during the neck shaping/sanding process.
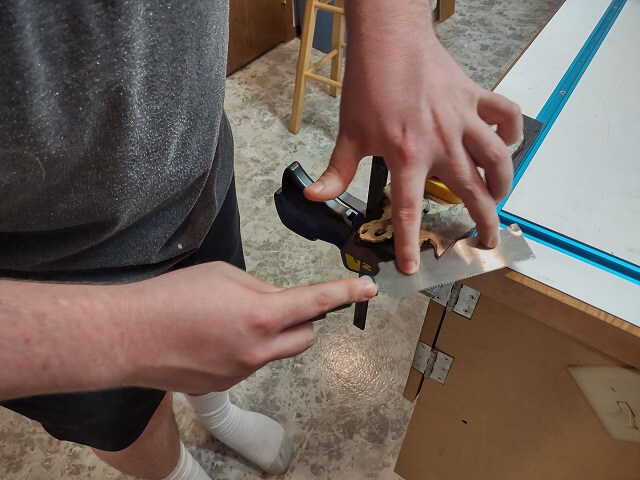
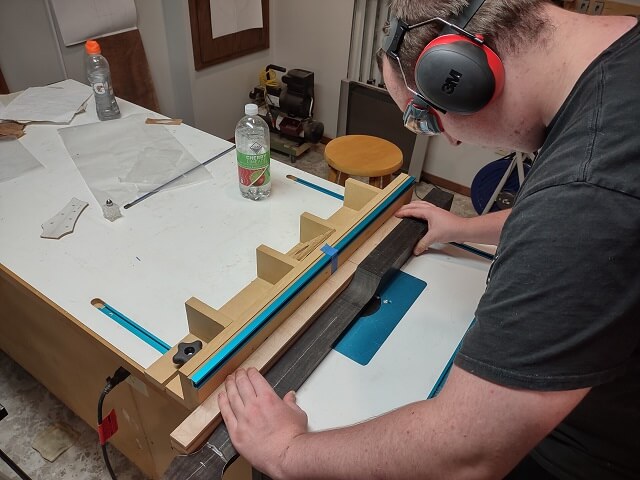
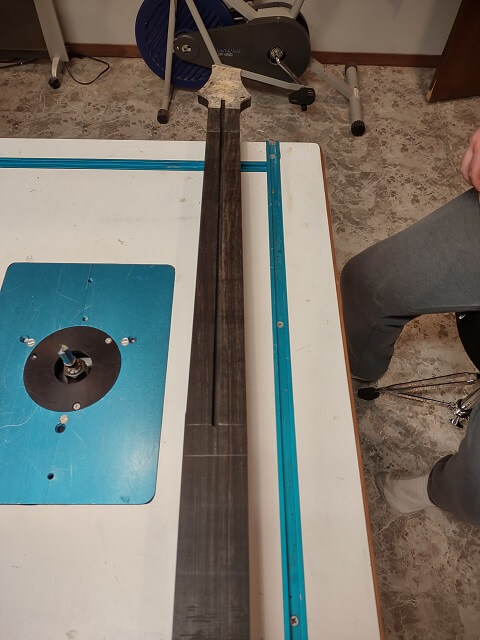
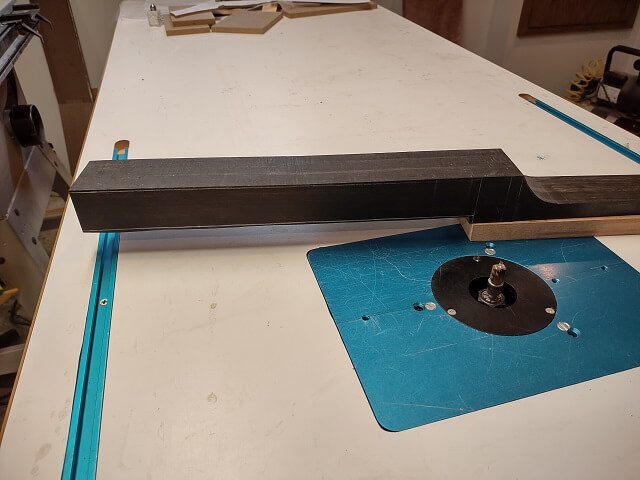
The sides of the neck taper from 1 11/16" wide at the nut, to 2 1/4" wide at the body. The Tundra Boy began the tapering process by using the bandsaw to remove most of the excess wood. Because pencil lines in ebony are difficult to see, he taped a jointed piece of MDF wood on the line. This gave him a very obvious visual as to where the line was located. As long as he didn't touch the blade to the MDF guide, he knew he was staying outside the line.

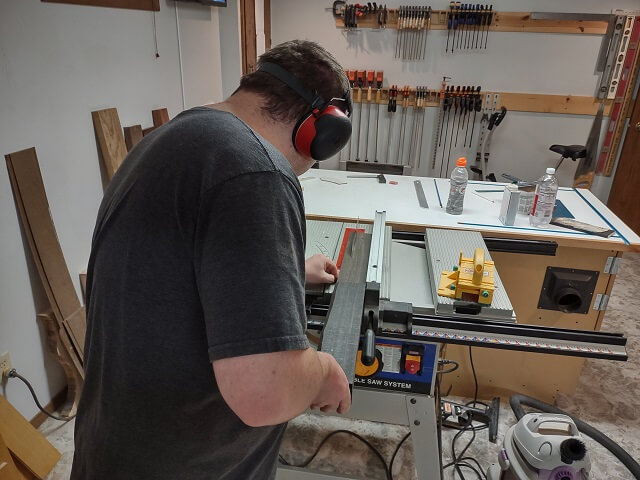
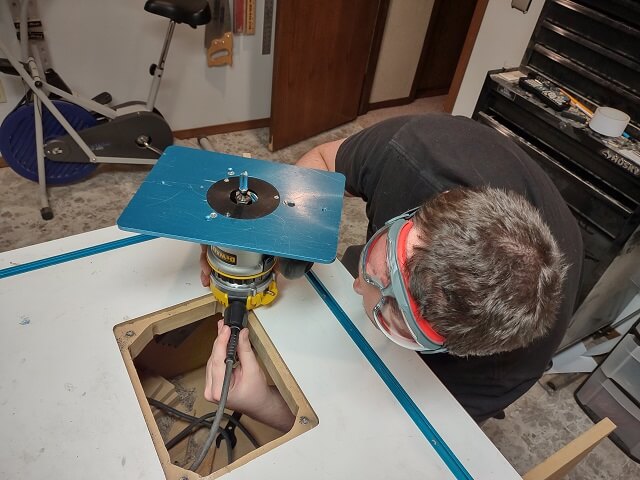
Tapering the neck exactly to the lines would be done at the router table with a flush cutting bit. As the Tundra Boy was setting up the router for the cut, he found himself in an awkward position trying to get the power cord connected to the router.
It was one of those situations where you think, "I'll quick do this awkward thing," and it doesn't happen quickly. Once it is finally done you realize in the same amount of time it took you could have done it the un-awkward way 10 times. He struggled for almost a minute, as I laughed about the situation and had time to snap this picture. I guess I could have offered to help, but that would have taken the fun out of it.
The same jointed board taped on the line was then used to guide the flush-cut but on the router.
Having spinning bits like this sticking up out of the router table always scares me. I guess it's good that I'm scared, as that means I'm exercising extreme caution around them. Certain amounts of fear are healthy.
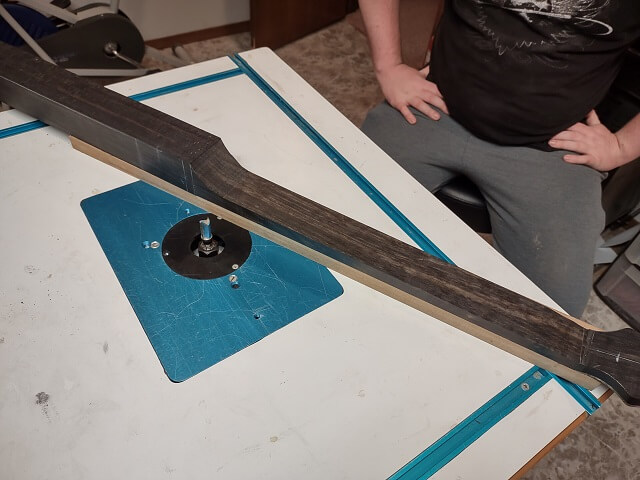
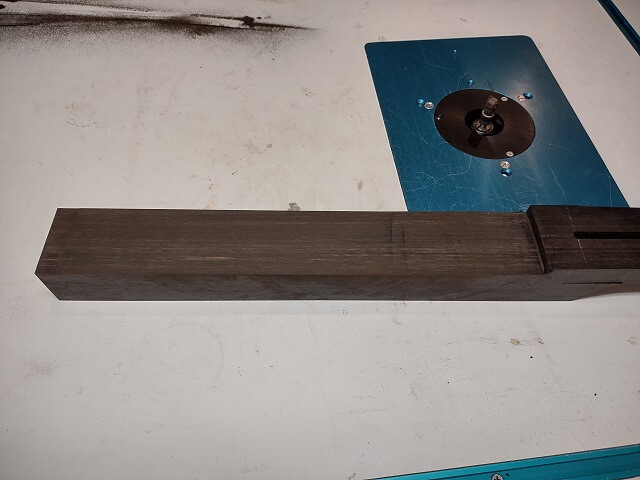
The routing went smooth and no phalanges were lost. The neck was now tapered. Although, in this picture you can't really tell. Just to be clear, I mean that you can't really tell that the neck was tapered, not that no phalanges were lost.
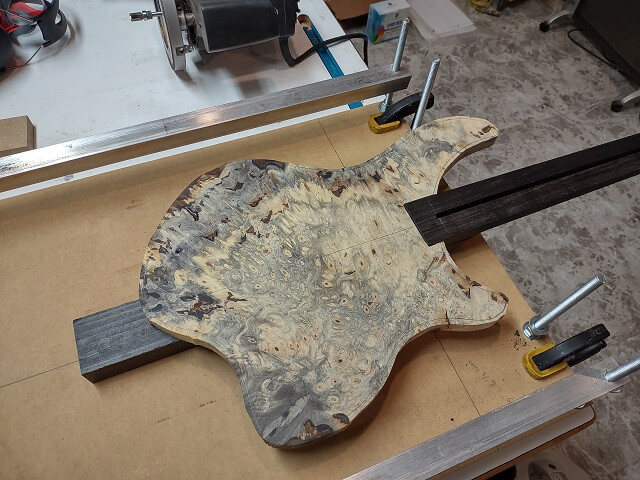
Now it was time to focus on the body end of the neck blank. The top is going to fit over the neck blank in a complicated puzzle form. It's really hard to explain, but I'll try.
The buckeye top that will be attached is a full 3/4" thick (well, technically 11/16" thick.) The Tundra Boy wants to use the full thickness of the buckeye top, as he will be carving the top and wants enough wood so that the carve will not go through the top and expose the walnut underneath. However, we noted that the buckeye is an extremely soft and light piece of wood. The buckeye wood itself will not contribute much to the strength and rigidity of the instrument.
In order to maximize the amount of ebony left in the neck and reduce the chances of the guitar folding in half once it's strung up, we decided that a portion of the underside of the buckeye top, in the middle where no carving will happen, will be reduced to only 1/4" thick. The ebony neck blank will then have to be sized accordingly so it all fits together.
Like I said, it's hard to explain. Hopefully as you see the pictures it will all make more sense.
The face of the neck blank (where the fretboard will get attached) will sit 1/8" proud of the buckeye top. The routed portion of the buckeye top will be 1/4" thick. This meant that the first recess on the neck blank needed to be 3/8". Lines were marked accordingly. The "X"s indicate the portion of wood to be removed.
Ebony is tough on cutting tools. In order to preserve my router bit, save time, and reduce the amount of black sawdust generated, most of the waste was removed at the bandsaw.

Here's the first "step" of the recess after the band saw.
A router was then used to bring the recess to exact depth. A piece of MDF was taped exactly on the line where the fretboard will end, and the bearing on the router bit will cut that "ledge" in the precise spot. The Tundra Boy then very slowly used the router to mill away the remaining ebony.
Here is the completed recess. This is just the first step (literally and figuratively.) This recess will extend 5 3/8" from the end of the fretboard, then a second recess will be cut.
To make the second recess in the neck, we decided to use a different method. The way we routed the first recess was a little "iffy" from a safety standpoint. Not that it was really dangerous, but any time there's a large chunk of router bit sticking up and spinning at 20,000 RPM, I get a little nervous. This second recess would have meant even more of the router bit would be exposed. No thanks.
We pulled out my router thicknessing jig. This would allow a bit more control over the situation (pun somewhat intended.) We carefully set it up, using double-sided tape to hold everything in place.
Rather than hogging off 1/2" of wood in one pass, the Tundra Boy did it in three different stints, each time lowering the bit slightly until the final pass where it was at full depth. The final pass had to be pretty precise, so we took some time to get the router bit at the perfect height. I am not joking when I say our final few tweaks to the router depth were done using a business card as a spacer to adjust the router depth gauge. Like I said, we wanted things to be precise.
The process was successful. And it made a huge mess. Ebony chips were flung all over the shop, and even out the door into the hallway.
Then the Tundra Boy and I both had a "duh" moment. We had routed away 1/2" of ebony and turned it into chips in the dust collector bag. Neither one of us thought of cutting away the majority of the recess at the bandsaw which would have reduced the amount of routing, saved wear and tear on the bit, and preserved a piece of ebony that could be used for something else.
Just a few days prior, when routing the first recess, we did cut away extra wood via the bandsaw. I had even thought about it during my "lay awake at night worrying about the project" sessions. But on this evening we both managed to space it off. Oops.
Speaking of the router bit, after we were done I noticed some odd marks on the piece of MDF that was taped to the neck top to serve as a "stop" for the end of the recess. The only thing that should have touched this piece of MDF should have been the guide bearing on the router. I inspected the router bit and discovered that the guide bearing was completely seized, and wouldn't turn. That explains the marks.
It's possible to replace just the guide bearing on a router bit. However, that requires the collar to be removed, and I discovered the allen head set screw on the collar of this bit was completely stripped. Double whammy. So this bit went in the trash bin, and a replacement was ordered. I decided to spend a little more money (actually, about twice as much) and replace the MLCS bit with a Whiteside. I use these pattern cutting bits frequently so having a premium quality bit would be worth the extra $13. MLCS bits are a good bit for the money, but Whiteside is a professional bit.
So here's the two-step recess we made at the body-end of the neck blank. You can see a little bit of chip-out on the edges of the ebony from the router. This will all be concealed once the top and body wings are glued in place, so it shouldn't cause any issues.
Of course, what really matters is how well the top fits. Much to our relief, the fit was perfect. There were no visible gaps. When it comes time to glue the neck to the top, it should be a good strong joint.
You will notice the body partially done in the above two photos. Construction on the different pieces of the instrument happen simultaneously. However the details on building the body can be found on the dedicated page for that piece.
Although we were quite a way from the point where we route the pickup cavities, one extremely important thing that needs to be considered early is a way to get the pickup wires into the control cavity. On some instruments it's easy to wait until everything is routed, then just drill an angled hole from the pickup cavity to the control cavity using a long "aircraft" drill bit. With one-piece bodies that aren't utilizing a pickguard, this is pretty much the only option.
For this guitar, the control cavity would be rather small and located a distance from the neck pickup. Also, single coil pickups are designed to have the wire exit straight out of the center of the bottom edge. It would be difficult to drill diagonally from this point of the pickup cavities.
The good news is, because this guitar has a separate top, it's fairly easy to route a wire channel prior to gluing the top in place. Then later on when the pickup and/or control cavities are routed, the wiring channel will be exposed.
The only caveat to this approach is care must be taken not to get glue in the wire channel when attaching the top. If the channel fills with glue and gets blocked, then it pretty much becomes worthless.
I have a trick to avoid this situation: before gluing the top in place, I put a plastic drinking straw in the wire channel. This will prevent glue from blocking the channel and will form a "conduit". When routing the pickup cavities, the plastic drinking straw won't damage the router bit.
This also gave us an excuse to go to McDonalds and order shakes. The Tundra Boy needed a straw for his guitar, and it's an established fact that McDonalds has the best straws around. They're a full 1/4" in diameter. I got strawberry, and the Tundra Boy got chocolate. The shake itself was a little "meh", but not so much I didn't drink it. The ice cream was a little runny.

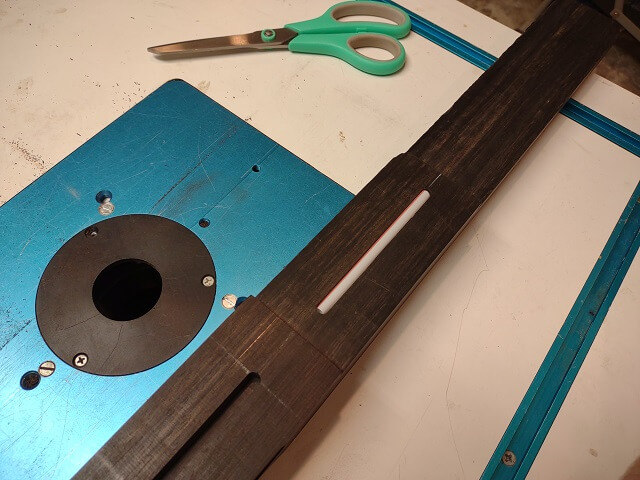
With our bellies full and our straws obtained (and washed after the shake was consumed) we set forth to route the channel. This was a simple straight route down the center of the neck. The wire from the neck and middle pickups will pass down to the bridge pickup location, then from there the wires for all three pickups will get sent to the control cavity.
Setting up for the wire channel route was very similar to how the route for the truss rod was made. Even the same bit was used. A bit of care was taken to mark the start and end points on the back of the neck, and corresponding marks on the router fence indicating the edges of the router bit.
A plunge cut was made and the channel was routed. The route was completed in two passes, each plowing out about 1/8" of depth of wood. Here is the completed wire channel route.
The Tundra Boy used scissors to trim his shake straw to length, then set the straw in place. Friction held the straw in place, and he just left it there so he wouldn't forget later to put the straw in the channel. I put my straw in inventory to use on a future project, which annoyed the Tundra Boy. He would have preferred I discarded it, then when I needed a straw we could go get more shakes.
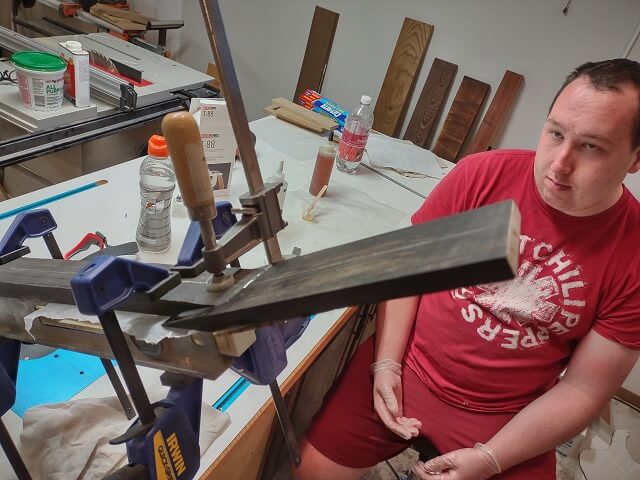
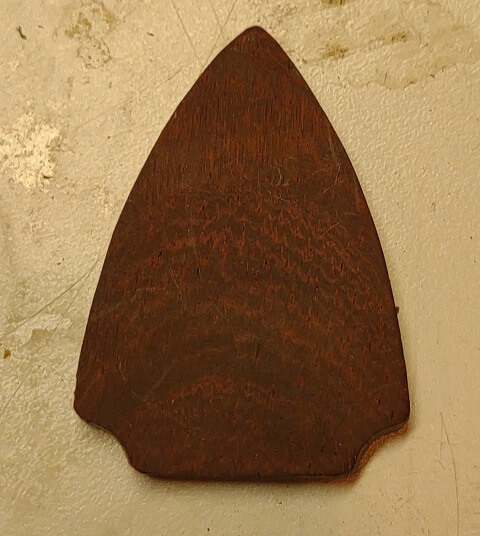
One evening I had a church meeting. When I got home, the Tundra Boy had been in the shop for a couple of hours. He used that time to make this pretty cool truss rod cover out of some of the Brazilian rosewood scrap from the fretboard. He didn't take any pictures of the construction process, but here's the (almost) finished result. All that's left to do on it is to drill a hole for the screw. Sorry, my photo turned out a little dark:
With the neck completed, you can see how he built the fretboard.
Return To The Main Music Gallery
This page last updated on 04/02/2024