


With the guitar construction complete, it was now time to apply a finish. Admittedly this is where woodworking projects (guitar or otherwise) often get bogged down. Once completed, having a nice finish applied is very satisfying. Unfortunately the actual process of applying the finish can be dull and tedious. The Tundra Boy shares this sentiment with me.
Some people enjoy refinishing furniture as a hobby. The process of removing old finish, sanding and applying new finish is enjoyable to them. That's fine for them, but that's not me. To me, constructing the guitar is where the fun is, and applying the finish is a necessary evil.
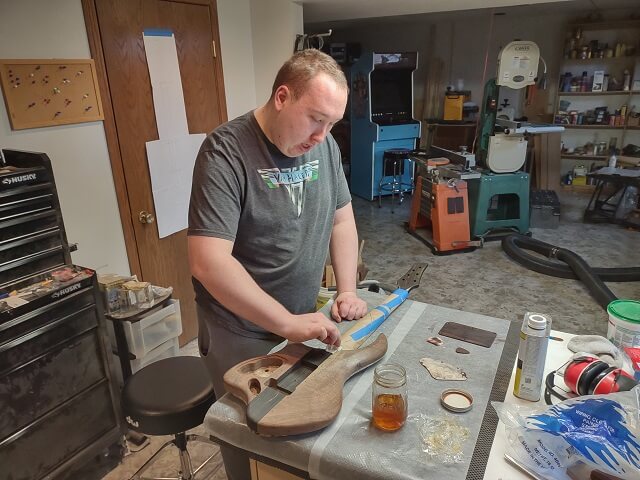
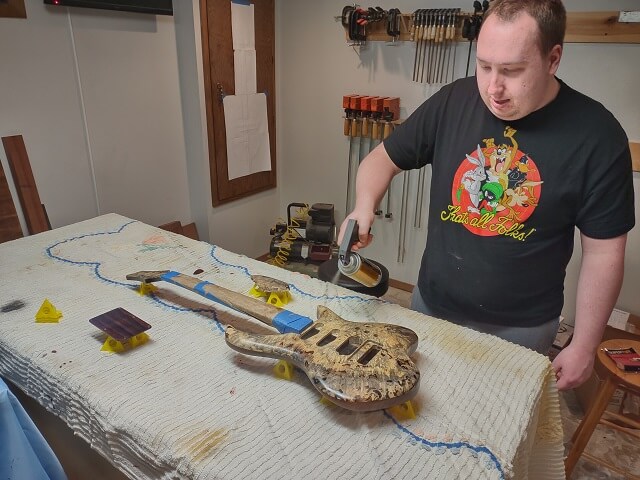
So it was time to embrace the evil and apply a finish. The Tundra Boy spent several days sending the entire guitar. Meanwhile, I mixed up a thin cut of shellac flakes.
The ebony neck on this guitar is going to remain unfinished. You can get away with this with ebony, as the wood is oily and the oil forms a natural (albeit slight) protective coat. Also, one of the purposes for a coat of finish on a guitar neck is to keep the dirt from the player's hand from turning the wood black over time; with ebony, the wood is already black so it's not an issue.
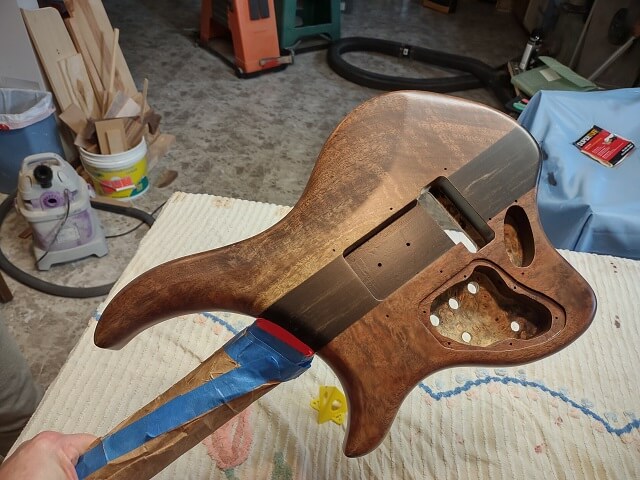
To keep finish materials from getting onto the back of the neck, the neck was wrapped in brown paper and tape. Then the Tundra Boy put down a couple coats of shellac. Shellac is used for several reasons.
First, the shellac forms a barrier coat to try and prevent any finish adhesion problems. There's an old saying that "shellac sticks to everything, and everything sticks to shellac." If there's a compatibility problem between the wood and the finish, a layer of shellac between them should mitigate the problem. On this guitar, the Tundra Boy is using ebony and rosewood, both of which tend to be very oily. The hope was that shellac will keep the oil in the wood from spoiling the finish.
Second, the shellac should help the grain filler from soaking into the wood, rather than filling up the wood pores as intended. Shellac is a lot faster and easier to apply than grain filler, so we let the wood soak up the shellac first. Once the wood is saturated with dried shellac, it is more likely that the filler will sit on top of the wood instead of seeping down into the wood.
Third, shellac brings out the color of the wood. By applying a layer of shellac first, it will sit under the clear wood filler and let the character of the wood show through. Admittedly, it's a very subtle difference. However, the shellac is so easy and fast to apply it's worth it.
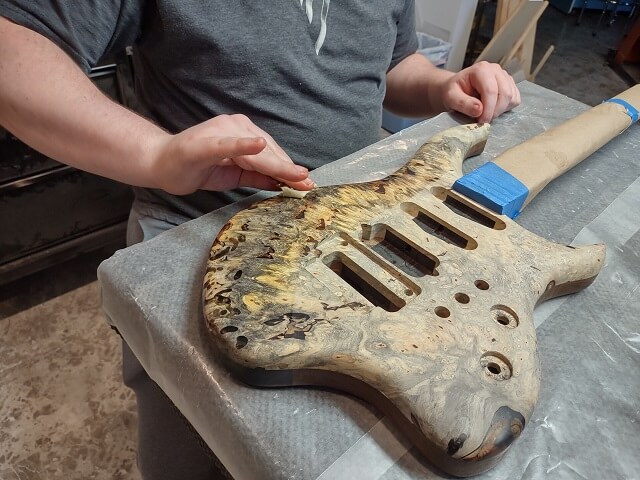
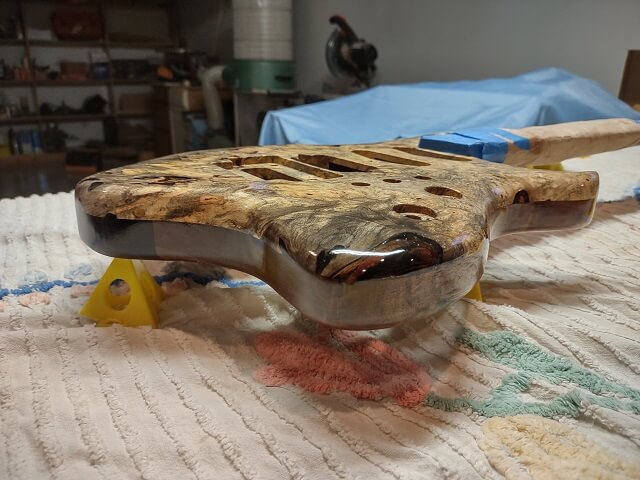
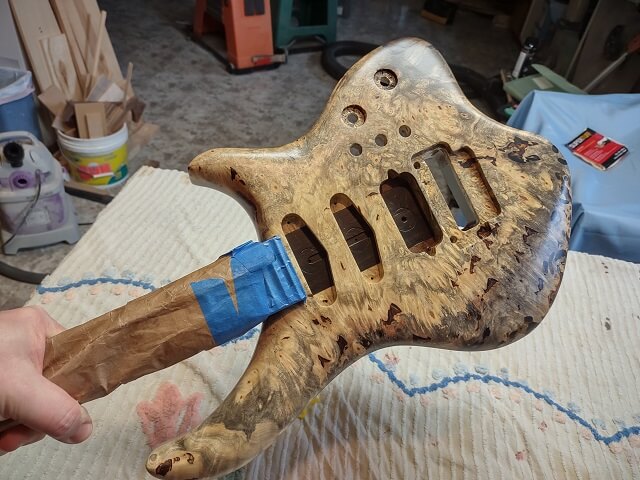
As the Tundra Boy wiped the shellac onto the buckeye burl top, you can see how it really brings out the character of the wood.
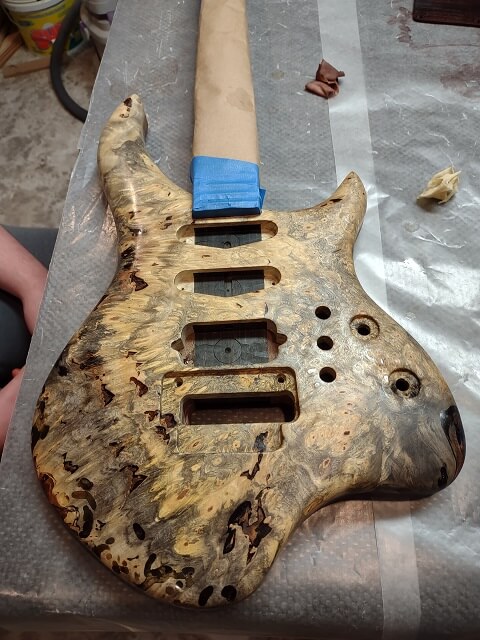
Here is the entire guitar top with a coat of shellac on it. The shellac really reveals how stunning this piece of wood is.
With the shellac applied, it was time to fill the grain. There are plenty of other pages on my web site where I rant about the pain of the grain filling process. So rather than rehashing all that again, I'll just say that it's not much fun.
I've tried many grain filling products and techniques over the years with varying degrees of success and satisfaction. None of them worked well enough for me to endorse them as the best way to go. As we were approaching the finishing stage on this guitar, the Tundra Boy pointed out that my previous container of grain filler (CrystaLac brand) was almost empty. I really hadn't been overly happy with that product, so I was hesitant to buy another full container of it.
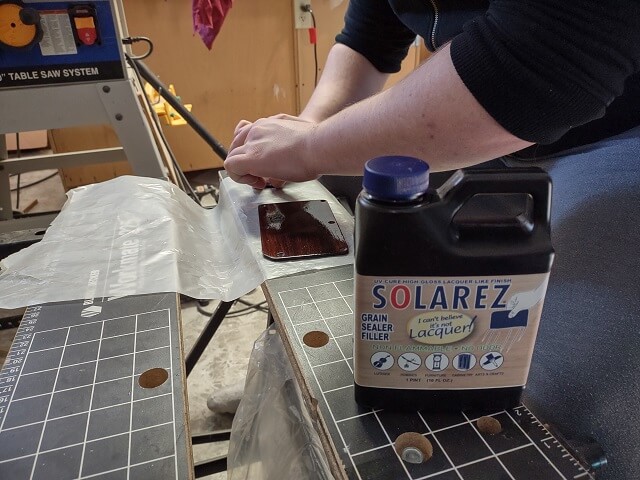
As I was researching grain filling options yet again, I came across a newer product called "Solarez." This stuff seemed promising, albeit expensive. I watched some YouTube product demonstration videos, and decided it was worth a try. I had used plenty of other products that I didn't like, so what's one more, right?
I had two major beefs with the CrystaLac grain filler I had been using in the past: first, after applying a coat it took several days or more to dry. And second, even after drying, when trying to sand the product it would clog up sandpaper way too quickly. A brand new piece of sandpaper would be starting to clog within 10 seconds.
The Solarez claimed to not suffer from either of these problems. First, it was cured by UV light exposure rather than evaporative time. And second, once cured it claimed to sand well. Of course every wood filler product claims it "sands well." I remained skeptical until I tried it for myself, but I was willing to give it a shot. I purchased a pint of it.
The first thing we needed was a sunny day. Solarez cures by exposure to UV rays, which means you can't grain fill at night or on an overcast day without purchasing a special (and expensive) UV light. Out of curiosity I did try an experiment with a light therapy lamp we had sitting around, but that didn't generate the correct UV wavelength to cure the product. Thankfully, temperature doesn't matter so even though it was February, we just had to wait for a sunny Saturday.
I have a window near my workbench. Solarez warns against trying to use the product near a window, as the sunlight can cure the product before it is fully applied, or even worse, cure the product inside the bottle (although that's probably unlikely with the dark bottle.) To be safe, we moved to a section of the shop out of direct sunlight.
Application is pretty straightforward. Just spread a thin coat over the surface of the wood and work it into the pores. I had seen the use of a coffee filter as a recommended way to spread the product, as it doesn't soak up a lot of the filler and also doesn't leave stray fibers. Several thin coats work best rather than globbing on one thick coat.
Due to how expensive the stuff is ($50 a pint at the time of this writing), a little goes a long way. We would try and just pour a small dot of the stuff onto the wood or the coffee filter. However, for some reason the Solarez comes out of the container surprisingly fast. We spilled the stuff multiple times. I probably dumped $15 worth of the container on the floor.
Not knowing what to expect, the Tundra Boy started small with the tremolo cavity cover, and the truss rod cover. He worked a thin coat into the wood pores, then took them outside and held them in the sun for three minutes. I don't know if it takes three full minutes, but that's how long we used when curing just to be sure. In this photo you can see the pieces sitting on another board for easier transport rather than just holding them in his hands.
After three minutes the Solarez was dry to the touch, but felt just a little tacky. From the videos I had seen, this is normal. The true test of whether or not the product was cured was if it turns to white powder when sanding. We took the pieces inside and held our breath.
Much to our delight, the stuff sanded just as well as advertised. This had the potential of being a "game changer" in the world of grain filling. The fact that after three minutes the filler was cured enough to sand really sped up the whole process. That's way faster than three days.
The Tundra Boy continued on grain filling the rest of the instrument. The buckeye burl top (and headstock) did not have an open grain, so it didn't require filling. Not having to grain fill the top half of the body also helped speed up this step in the guitar building process.
He would do a section of the guitar, then take it outside for three minutes and point that section at the sun. Then he would level sand that section he had just filled, and repeat. We figured out that three thin coats were enough to fill the grain on this guitar, although a couple of times we spilled and laid the stuff on kind of thick, so those sections only took two coats. We did determine that three thin coats were easier to sand than two thick coats.
The Tundra Boy completed grain filling over the course of a couple of days. He probably could have finished completely in one day, but decided to break up the tedium of filling and sanding. In any event, grain filling on this guitar went much faster than any previous guitar. In two partial days of work the entire guitar was grain filled.
So after using the Solarez product, would I use it again? Yes. It's not perfect, but no product is. Overall, however, it seemed to be very satisfactory. Here are my pros and cons:
Pros: Easy to apply by wiping on. Cures in three minutes. Easy to sand without clogging sandpaper. Doesn't have a real odor unless you stick your nose right in the bottle. Seems to impart a pleasing color (versus some fillers that make the wood look "dead".)
Cons: Expensive. Spills easy. Have to wait for a sunny day to use it.
After the grain filling was done, the Tundra Boy put another layer of shellac on the instrument. This was both for color reasons, and to put a barrier between the Solarez and the polyurethane finish he was going to use. I wasn't aware of any incompatibility issues, but it was cheap insurance.
The Tundra Boy likes satin finishes on his instruments. This is another area where we differ, as I love a nice glossy finish. However, this is his guitar so he gets to pick what he wants. For satin finishes, probably the easiest one to apply is spray can polyurethane.
Normally we like to spray this stuff out in the garage. However, it was February and a little too cold for the poly to cure outside. We also didn't feel like waiting three months until the outside weather was conducive. So we decided to put up with the fumes and spray inside my shop.
Here's a picture of the wet poly on the buckeye burl. It will turn satin once it dries. I used this photo as a demonstration of how good that burl would look under a nice glossy finish, but the Tundra Boy was unmoved.
The finish schedule we use with spray poly is three coats, each two hours apart. Then wait for three days to let the finish cure, and level-sand the finish with 400 grit paper. Then this process is repeated two more times (omitting the level sanding after the last coats of poly.) I've found following this schedule produces a glass smooth finish.
Because the Tundra Boy was spraying the guitar while it was resting horizontally, he actually would alternate sides between each spraying session. This effectively doubled the length of time it took to apply the finish. All in all, it was about two weeks from spraying the first coat of finish until the last coat was sprayed.
He let the finish cure for a couple of days, and then the guitar was ready to continue the build process. Here's a picture of the back of the body with the finish completed.
Likewise, here's a picture of the front of the body with the finish completed. This picture really demonstrates how stunning looking the piece of buckeye burl was. It almost doesn't look like wood.
Next up was the fretwork. The Tundra Boy started by adjusting the neck so it was as flat as possible. We were a bit worried about how much the ebony would resist the truss rod (which is why carbon fiber reinforcement strips weren't installed.) Much to our surprise and pleasure, the neck adjusted very nicely. It only needed about 1/4 of a turn of the truss rod to get it very flat.
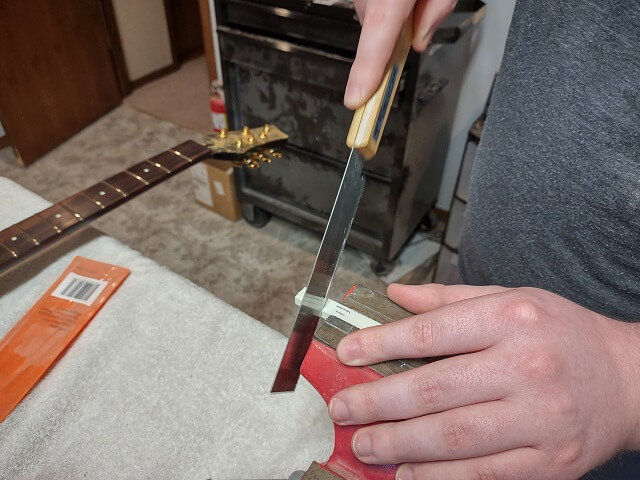
A sanding beam was used to level all of the fret tops so they were all the same height. We noticed that either the first fret was installed a little low, or frets 2, 3 and 4 were installed a little high. Quite a bit of material had to be sanded off frets 2, 3 and 4 before the sanding beam hit the first fret. The Tundra Boy found this a bit distressing. It turned out OK in the end, but probably meant down the road that these frets wouldn't survive a releveling.

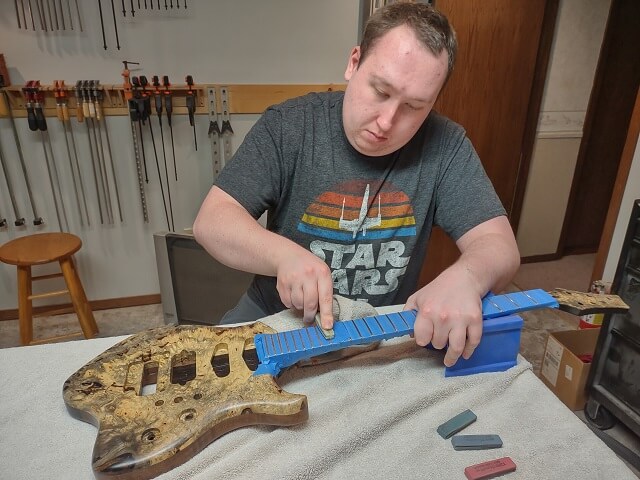
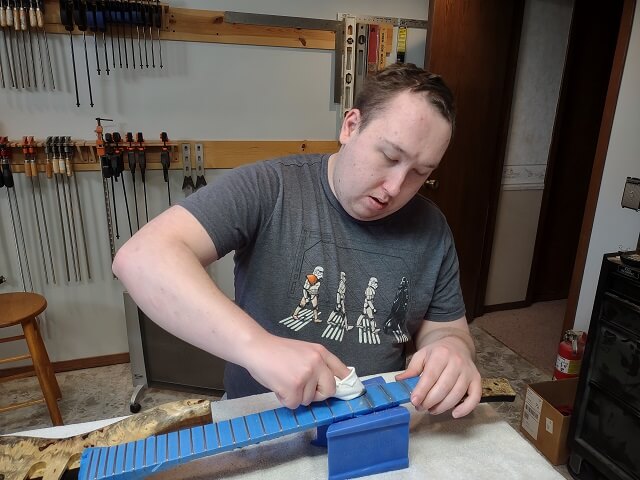
Once the frets were level with each other, the tops of the frets now had flat spots on them. The Tundra Boy used a fret file to re-crown all of the frets.
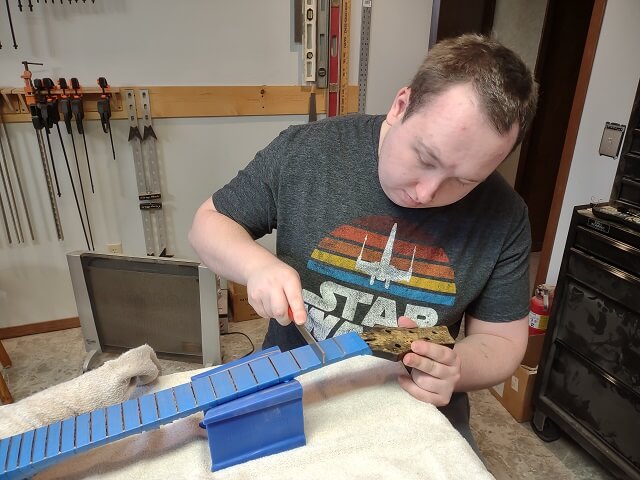
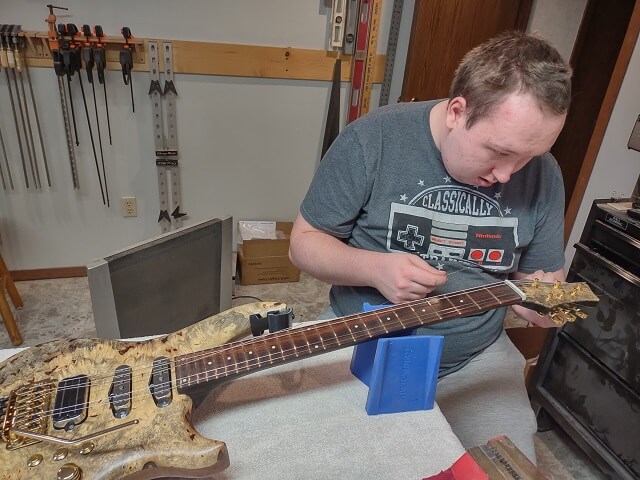
After the frets again had a nice round top on them, the Tundra Boy used fret "erasers" to remove the scratches left from the fret file. These erasers are just rubber blocks with sanding grit embedded in them. He would start with the 220 grit and work his way through the erasers ending with an 8000 grit block.
Finally, the frets were scratch free. The process is capped off by polishing them with chrome polish to make them gleam. Then the protective tape could be removed.
The Tundra Boy is not a fan of fretwork. He was very thankful when it was finally done.
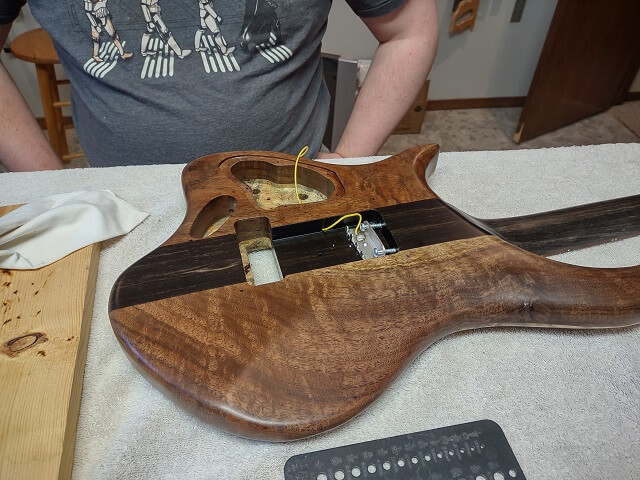
Next, we decided to install the tremolo claw spring in the cavity on the back of the guitar. A ground wire got soldered to the claw, and the claw was screwed in place.
We were very concerned about screwing things into the ebony, as it is a very, very hard wood. The last thing we wanted was to break a screw off, or strip a screw head trying to force the screw into the ebony. So the Tundra Boy did two things to help: the pilot holes for the screws were drilled slightly larger than they would be in other types of wood, and the threads on the screws were lubricated with Chapstick before they were screwed in place.
These two things helped. The screws went in tight, but they went in and nothing broke.
Unfortunately, a few days later we discovered that when installing the Hipshot Tremsetter this tremolo claw spring needed to be removed and replaced with the special claws that came with the Tremsetter. So this was a bit of wasted effort.
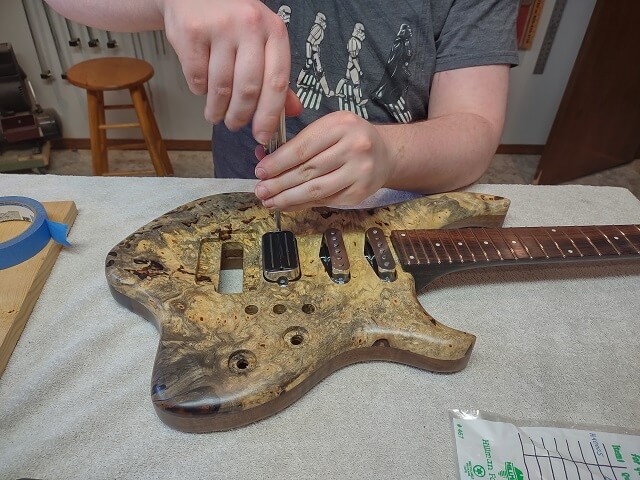
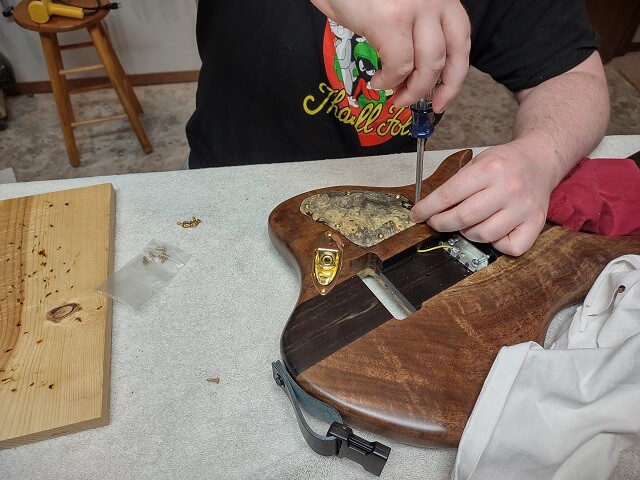
The pickups were then screwed in place. Care was taken to route the wires down into the control cavity. Because the pickups were direct mounted to the wood, dense foam was placed under them to bring the pickups to the correct height. Later after the strings were installed we would tweak the pickup heights precisely, so for now the Tundra Boy just eyeballed it.
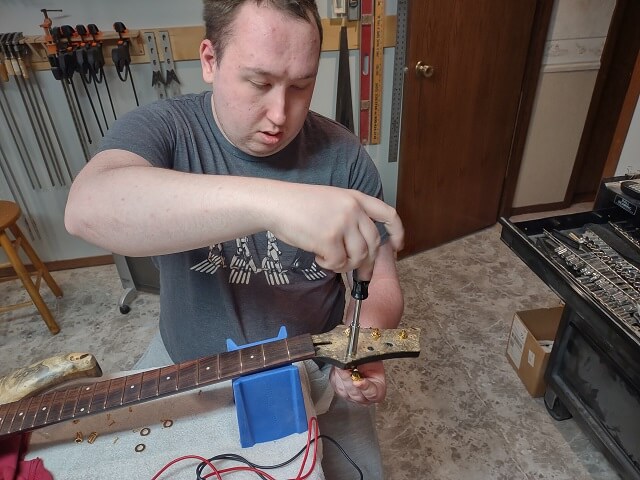
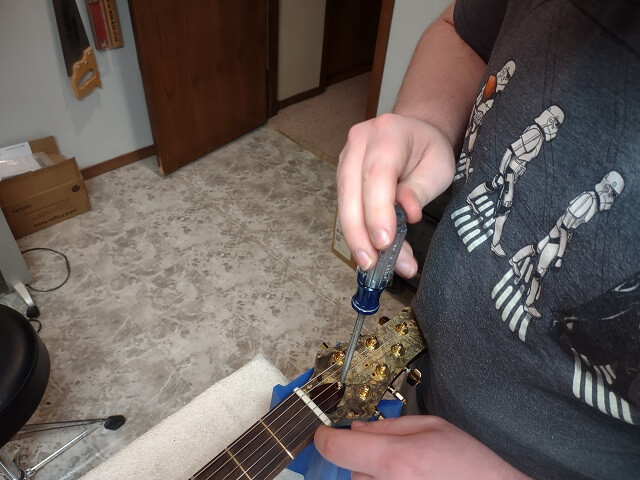
The tuning machines were installed. When the holes were drilled we didn't have the exact size drill bit needed, so they were just a little small. The Tundra Boy used a hand reamer to open the holes up just enough to let the tuners slide into place. Also, great care was taken on the back side getting the tiny tuner screws installed in the hard ebony. More oversized drilling and chapstick.
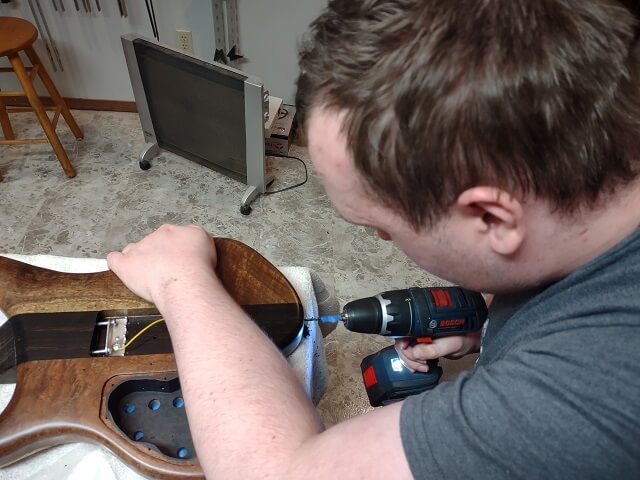
The Tundra Boy is using the same Dimarzio Cliplock strap system he is using on his other instruments. This means the strap "pigtails" are screwed directly to the guitar body rather than using traditional strap buttons. Here he is drilling the holes for the screws to hold the strap system to the guitar.
Now it was time for wiring. The Tundra Boy had very specific requirements for the wiring on this guitar: he wanted master volume and tone knobs. He wanted to be able to select any combination of pickups, including all three at the same time. He wanted a switch to coil tap the humbucker. He also wanted a switch to put the two single coil pickups in series (by default they would be wired in parallel.)
That was a lot of requirements for a very small control cavity. To accomplish all of this in the smallest possible footprint, we decided to use three individual switches to control the pickups, along with volume and tone knobs with push-pull switches on them.
The next challenge was to figure out where all the wires would go to make this monstrosity work. I spent some time sketching out a wiring diagram on a piece of paper. This was not a trivial diagram.
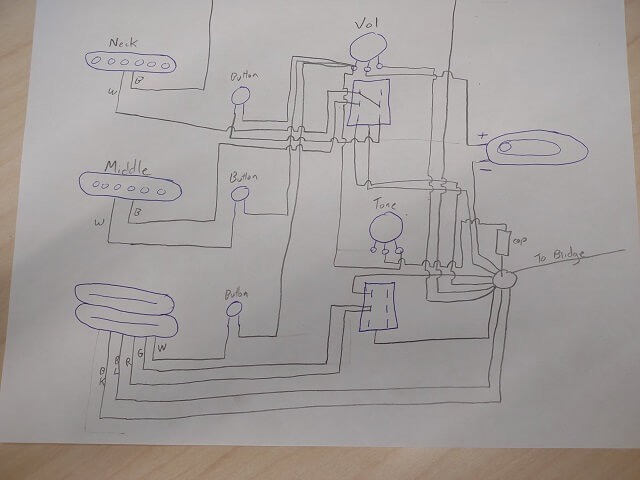
The Tundra Boy proceeded to cut and solder wires together. To make sure that no wires were missed, as he would complete each wire I would highlight the wire on the diagram. Once the whole diagram was yellow, then we knew he was done.
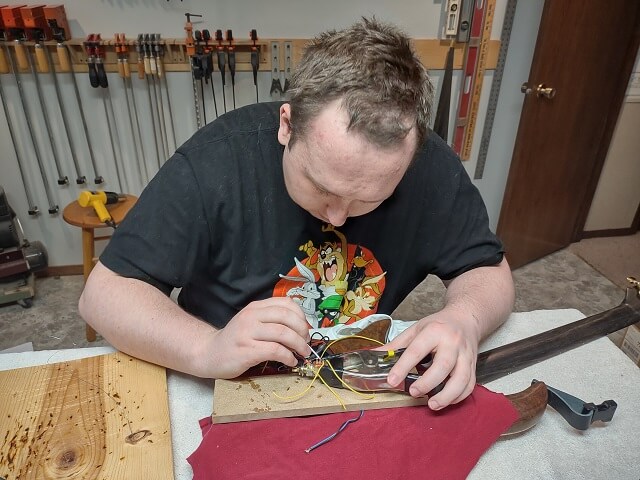
It took a couple evenings of soldering, but he finally got them all connected. The controls were mounted in place, and the wiring was tucked into the cavity. It wasn't a very neat wiring job, but we conceded that there was so much going on that it was impossible to make it neat. It was functional (or so we thought) and that's what mattered.
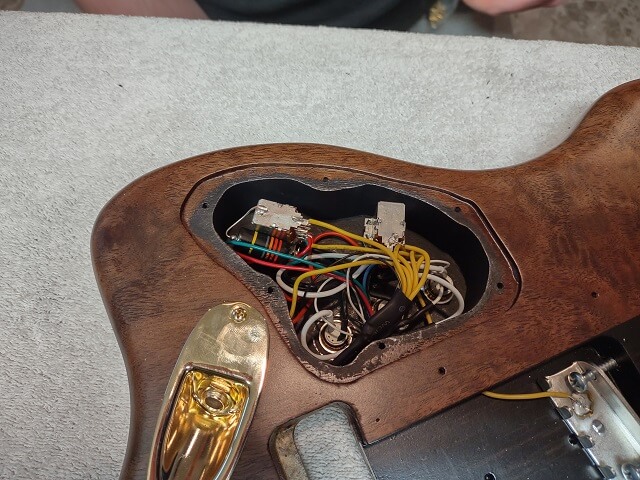
Once all the wiring was hooked up, we did some testing. That's when we discovered that the push-pull pot on the tone knob wouldn't push or pull. Either the switch was defective, or more likely, it got overheated when soldering the capacitor to the switch housing and seized up internally.
Well, nuts. I didn't have another push-pull pot sitting around, so the Tundra Boy had to order a replacement. This switch controlled the coil tap on the humbucker. The electronics were usable, it just didn't have every feature until the push-pull pot was replaced. For the time being, the Tundra Boy screwed the control cavity cover in place and we moved on.
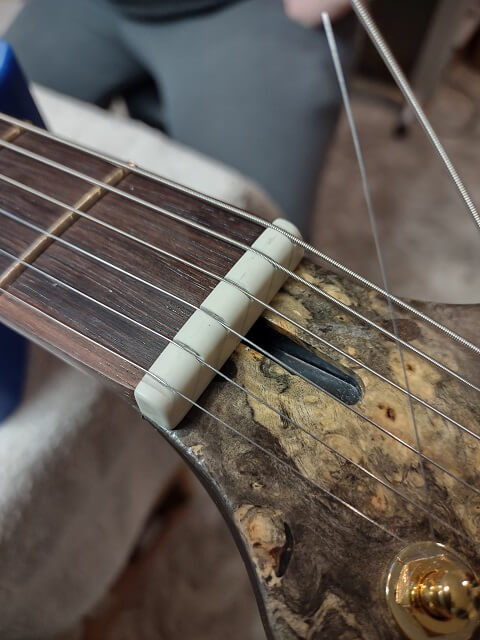
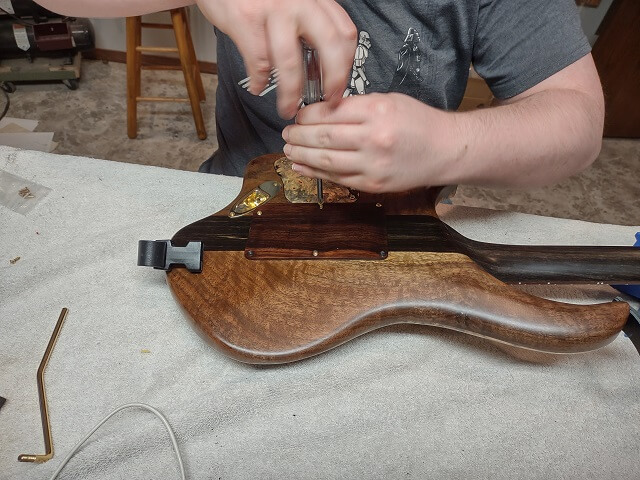
Now it was time to fit the nut. For this guitar the Tundra Boy is using a Tusq nut, which is a synthetic material meant to simulate ivory. The nut blanks come oversized, so the first order of business was to cut it to the proper width.
Then, over the next three days the Tundra Boy descended into nut hell. His very first guitar used a Floyd Rose locking nut, so he didn't have to build a nut for that instrument. When shaping and filing the nut for his second guitar, everything went perfect. I think this lulled him into a false sense of security.
When making the nut for this guitar he would mark the lines for the nut slots, and begin cutting a slot. Then he would discover that he drifted during cutting and the slot wasn't in the proper place. So he would have to use CA glue and baking soda to fill the slot back up. Once the glue was dry, he would sand the nut blank back to shape, and try again. Over and over.
I explained that shaping and filing a nut is as much of an art as a science. It's a skill that gets developed over time. When building my first seven or eight guitars I would buy three nut blanks, knowing there was a good chance I was going to wreck one or two of them. These days I just buy bone blanks in bulk and keep them on hand. After 20+ guitars, most of the time I can get a nut made using just one blank, but I'll still occasionally wreck one.
I think he wound up effectively filling and reslotting each string about three times. He was completely frustrated, but eventually he wound up with a satisfactory nut. In this photo you can see some of the remnants of the filled slots that were in the wrong place.
Once the nut was done, the rest of the guitar "set up" could be completed. The truss rod was adjusted. The bridge height/action was adjusted. The intonation was adjusted. The pickup heights were adjusted. Finally the guitar was tuned to pitch for the final time.
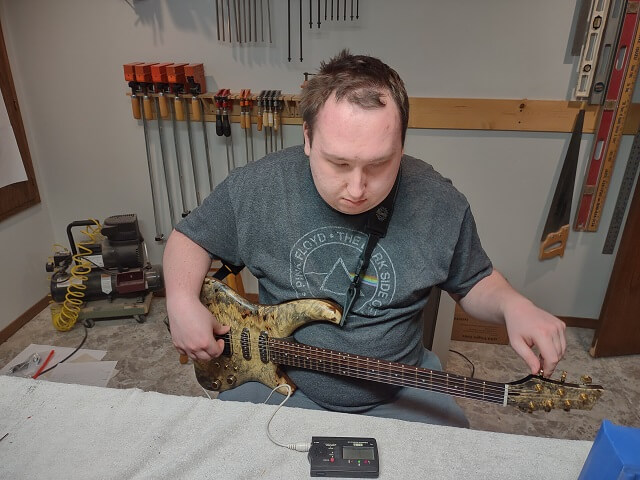
The Tundra Boy then played the guitar for a while to flesh out any issues. A couple of problems did rear their heads during this process.
First, he noticed that the humbucker was out of phase with the two single coil pickups. They all sounded fine on their own, but when the humbucker was paired with one (or both) of the single coils, the sound got very thin.
The second problem was more troubling. The more he played the guitar, the less the volume pot worked correctly. It started out just fine. After a while it would cut out if you pressed on it. After more playing it wouldn't work at full volume, just at half volume. Eventually it stopped working altogether and the guitar went silent.
Knowing we would be tearing the control cavity apart after his replacement push-pull pot arrived, we opted to press on with other activities in the interim.
The Tundra Boy had purchased a Hipshot Tremsetter for this guitar. This is a device that gets installed in the rear tremolo spring cavity, and ensures that the tremolo always returns to the exact same position. He wanted this stability as he changes guitar tunings frequently, and setting up the tremolo each time is a major pain in the wazoo.
So speaking of pains in the wazoo, we installed the Tremsetter. I would carefully read the instruction steps multiple times, then we would think about them and discuss them, and then finally we would proceed with the step. I remarked that the instructions would be better if they were about twice as long, and included a lot more pictures.
The directions were full of long sentences with lots of information jammed in a single statement. A few times the next sentence would change the action of the previous sentence. More than once the Tundra Boy and I made a joking reference to the scene from MASH where they're following the instructions a sentence at a time to diffuse a bomb.
It was a very tedious and confusing install, but we eventually were successful.
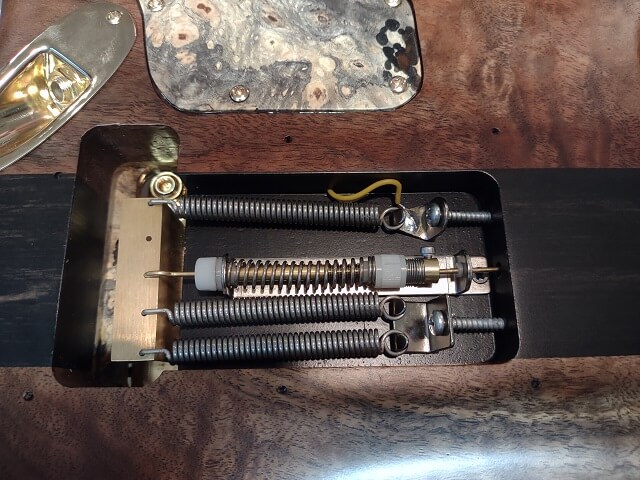
The Tremsetter worked, with the side effect of a stiffer tremolo arm. The rear control cavity cover was screwed in place.
Normally I save the truss rod cover as the very last thing that's done on an instrument. It's almost a ceremony to finally screw the cover in place and pronounce the guitar "done." With this guitar, we were still waiting for the replacement push-pull pot to arrive, and still had some wiring gremlins to figure out. But rather than waiting, the Tundra Boy went ahead and installed the truss rod cover.
When the new push-pull pot arrived, we opened up the control cavity cover and dove back into the wiring.
The pot replacement was straightforward. The Tundra Boy just unsoldered each wire off the old pot and soldered it onto the same spot on the new pot. Care was taken not to get the switch too hot, and after each wire was connected he would test the pot to make sure it would still push and pull.
The out of phase pickups were a little more confusing. We double checked the wiring against the manufacturer's color codes to make sure we didn't have any of the pickups wired up backwards; they were all correct. Eventually we determined that Bill Lawrence pickups by default come wired backwards from Dimarzio. The solution was to reverse the hot and ground wires on the humbucker, which then put this pickup into phase with the Dimarzios. We could have also chosen to leave the humbucker as-is and swap the wiring on the single coils, but it was less work to reverse the humbucker.
The volume cutting out was the biggest mystery. I noticed that when the pot was fully screwed into place it wouldn't work, but once the mounting nut was loosened a little the guitar came to life. This told me that something was grounding out. After pulling the pot out of the cavity, we could see that the "hot" lug on the pot had gotten bent down, and when the pot was fully screwed in place it would touch the shielding paint in the control cavity.
I'm not sure why it ever worked, but it obviously did for a short period of time. The fix was simple once it was found: the lug on the pot was bent back into place so it couldn't touch anything else. Then the pot was reinstalled, the control cavity cover screwed back into place, and the guitar was officially done!
The Tundra Boy put the completed guitar through its paces and made sure that everything was now working as intended.

The following Sunday morning I played the guitar while leading worship at church. The Tundra Boy would have played it, but he was back behind the drum kit that day.
Click here to return to the main page for this instrument.
Return To The Main Music Gallery
This page last updated on 04/02/2024