


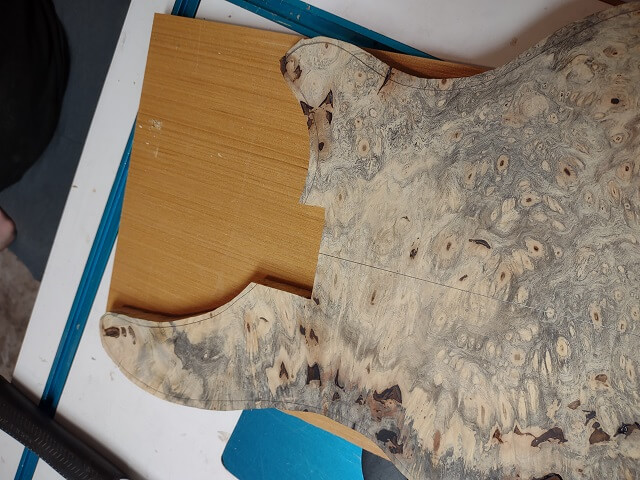
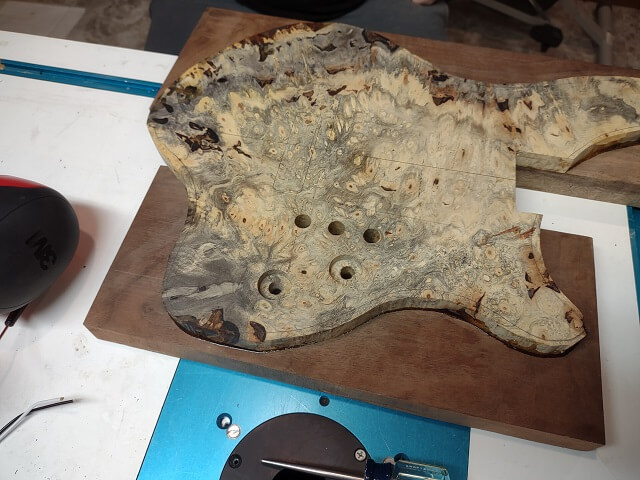
The obvious focal point of the guitar body is the extremely striking piece of buckeye burl that was 3/4" thick. The Tundra Boy wanted his guitar to have a one-piece top. The piece was a decent size, but barely large enough that, if oriented just right, the Tundra Boy could fit his body template onto it.
This stunning piece of wood was a Christmas present from his grandfather, from about three years prior. The Tundra Boy had seen this chunk of lumber on eBay, and was lusting after it. Christmas was approaching, so his grandfather decided to purchase it for him as a gift. It sat in the shop for a long time before the Tundra Boy had the resources to obtain all the other materials needed for the guitar. The good news is, while waiting the wood had plenty of time to acclimate.
Myself, if this were my instrument I would have probably resawn the buckeye burl into 1/4" thicknesses and bookmatched the pieces. But that's not what the Tundra Boy wanted, and this is his guitar. There's nothing wrong with doing what he did, just personal preference.
Buckeye burl is an extremely soft wood. In an effort to make the wood a little harder so it was less likely to dent and/or chip, we thought it would be a good idea to soak the wood with thin CA glue. The Tundra Boy discovered how much of an eye irritant CA glue is when spread across a large area.
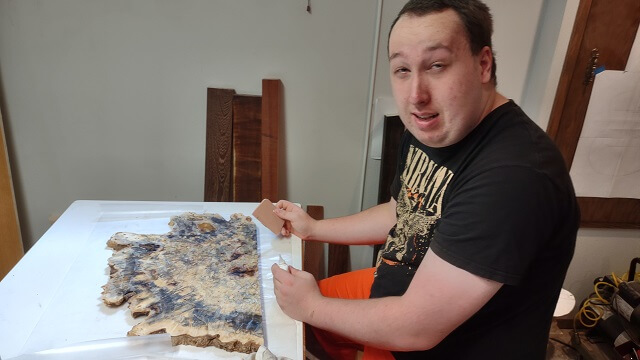
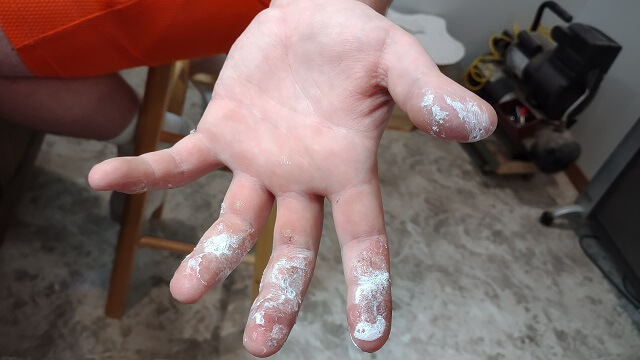
In addition to the watering eyes, he also discovered that the glue bottle was leaking. So not only was the buckeye burl soaked in CA, so was his hand.
Buckeye burl, while pretty, is full of flaws. The flaws are actually what contribute to the beauty. However, the flaws also make it difficult to get a smooth surface, which is usually what is desired on a guitar body. There were a whole bunch of holes all across the wood.
Most noticeable was a giant knot hole. The material from inside the knot was missing when the Tundra Boy first received the board, so he couldn't just glue it back in place. There wasn't a way to position the body on the buckeye burl in a way to completely avoid the hole, so he needed to fill this hole with something.
Epoxy would do the job, but regular construction epoxy is an opaque amber color. That works for small holes, but probably wouldn't look good in this large hole. I suggested dying the epoxy black, but the Tundra Boy didn't like that idea. He wanted it to be filled clear, so you could see down into the void.
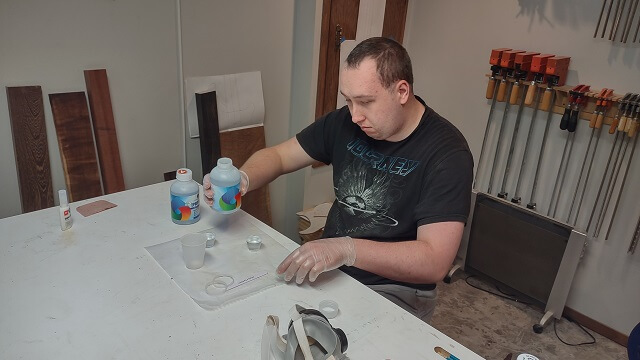
To facilitate this, he bought some clear epoxy resin intended just for this purpose. This stuff is designed to fill voids, not bubble and remain completely clear. Like typical epoxy, it comes in two parts: a resin and a catalyst (hardener). Having not used this product before, we spent some time reading the instructions. We also weren't sure how much of it would be needed. He bought a quart, and in hindsight I think a pint would have been plenty. I guess the Tundra Boy has enough to do another guitar or two in the future.
The two parts are mixed at a 1:1 ratio, which makes it easy. To reduce bubbling, we soaked the bottles in warm water for a while. Once warm, the open time of the filler was estimated to be about 30 minutes. 5 minutes of that time was spent stirring the mixture thoroughly. He didn't want any unmixed material spoiling the fill.
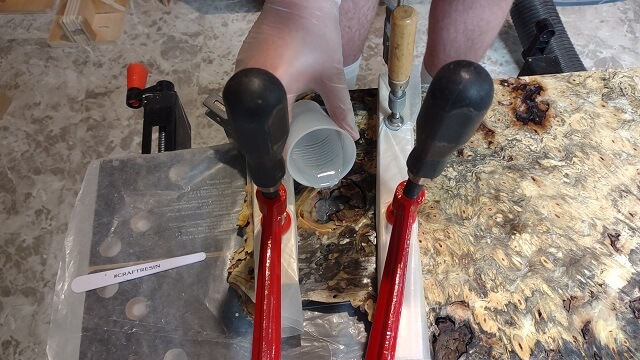
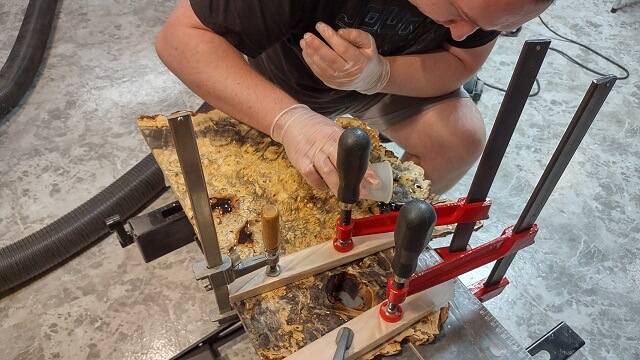
Wax paper was spread on the bench, then the buckeye burl was firmly clamped down. The hope was the wax paper will prevent the buckeye burl from getting glued to the work bench top. The clamping cauls were also wrapped in wax paper for the same reason.
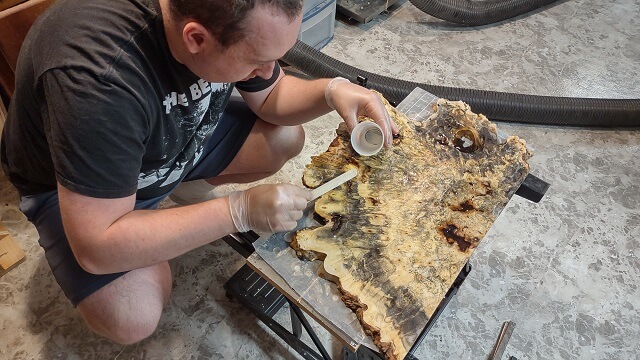
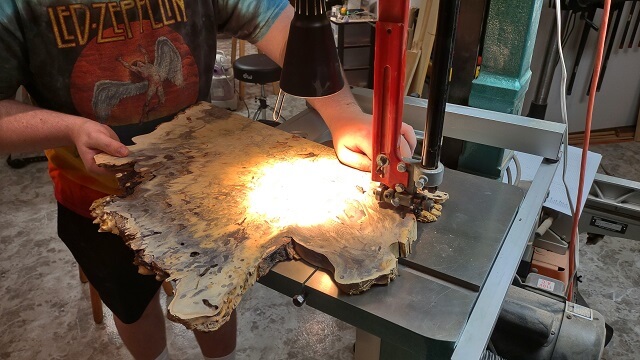
The Tundra Boy poured the resin into the hole. This was done in three different steps. He would add about 1/4" of resin, then wait 5 minutes or so for any bubbles to work their way out. Lightly warming the poured area with a heat gun helped the bubbles pop. Then he would pour another 1/4" of material. After the third pour the hole was completely full.
With the big knot hole full, there was still mixed resin material left in the cup. The Tundra Boy used this to fill some of the other holes in the buckeye burl.
The resin hardened in about a day. Normally full cure is reached in 72 hours, but because of the thickness of the hole being filled, the Tundra Boy waited a full week to ensure the curing was complete. One thing we noticed was due to how clear the resin was, it still looked quite wet even though it was fully dry.
It took several sessions to get all of the depressions in the wood filled. Some of that was due to the sheer number of defects that needed filling, so it was easy to miss them. The other was due to some defects being extremely deep under the surface. These defects would initially appear to be level right after pouring, but would slowly soak up the epoxy during curing which would leave a depression.
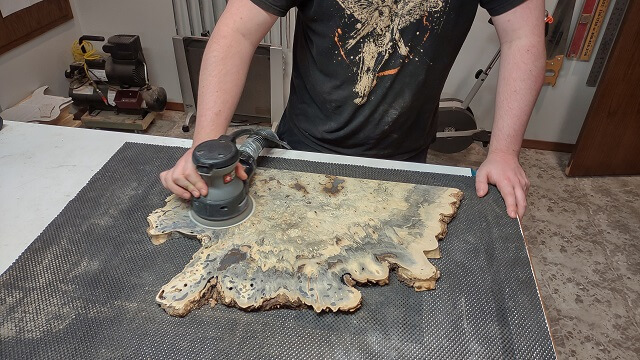
Once the epoxy was cured, the Tundra Boy then sanded everything smooth on one side of the buckeye burl. This was the side that was face down during resin filling. It only had a few high spots where some resin had dripped through the holes.
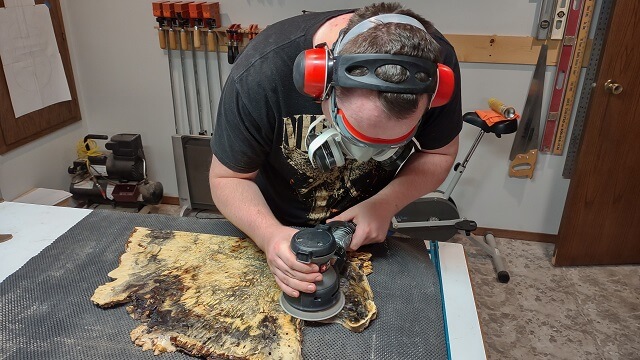
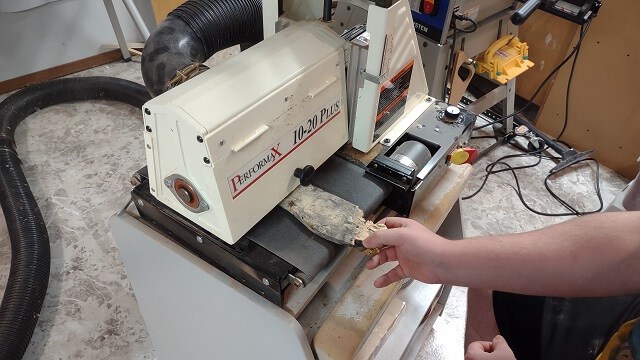
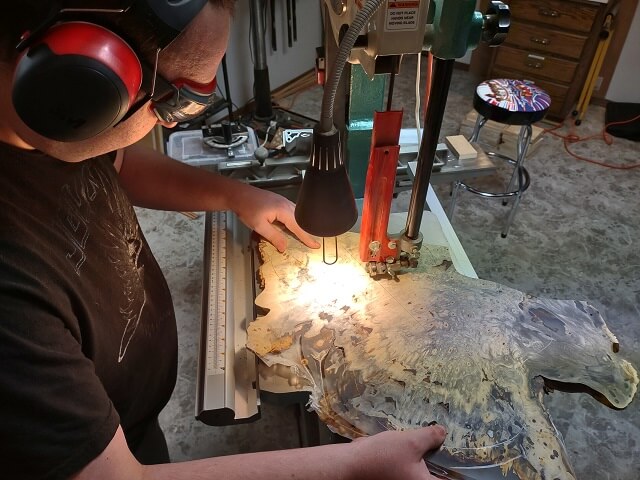
The other side of the buckeye (the side facing up during resin filling) was much more uneven and needed more aggressive sanding. For this side the Tundra Boy used the drum sander to smooth out the epoxy. To keep the sandpaper from clogging, he went slow. Many passes were made, lowering the sanding drum about 1/64" with each pass. Also, because the piece was too wide to fit under the drum in one pass, the workpiece was rotated 180° and run back through the sander at each height setting.
The drum sander uses 80 grit paper and leaves lots of sanding scratches. The Tundra Boy then went back to the ROS with 100 grit and then 150 grit paper to remove these scratches.

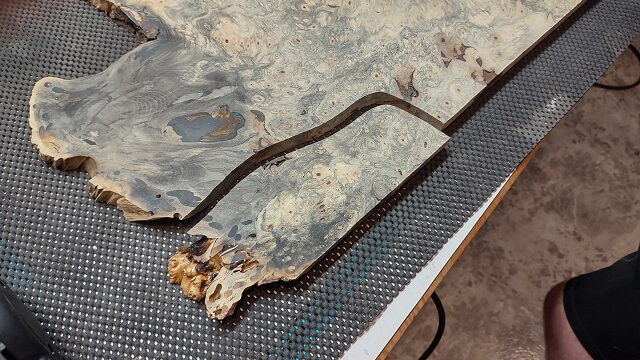
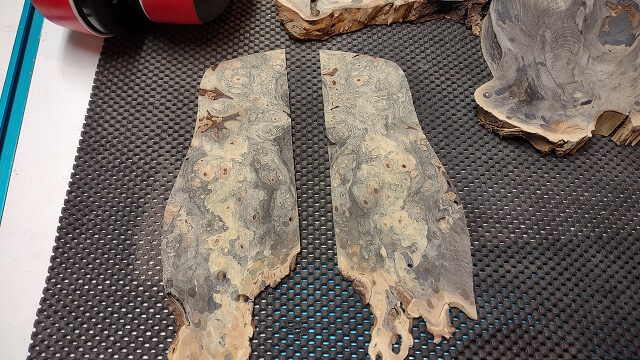
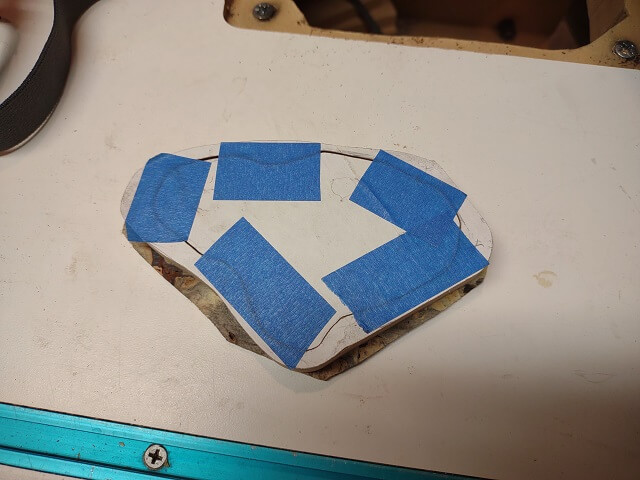
The buckeye burl was filled enough for the Tundra Boy to take a slight detour. He wanted 1/8" veneers of buckeye burl to use on the front and back of the headstock. He positioned the body template on the wood and figured out where it would best fit (the piece was just small enough that the fit was extremely tight.) From there he was able to determine a section large enough to make headstock veneers. He marked out that section and then cut it out at the bandsaw.
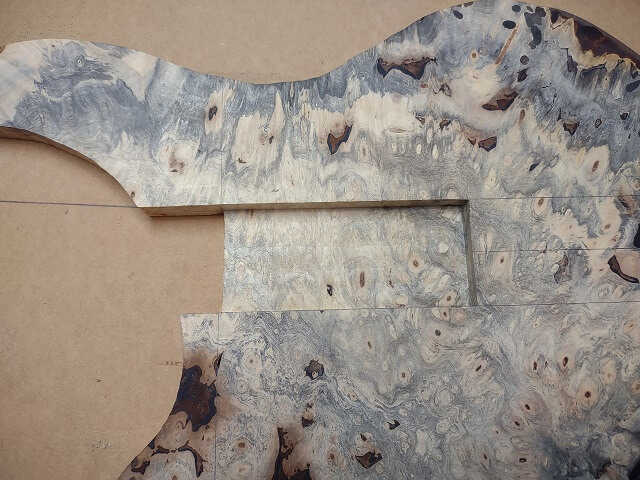
Here you can see the section cut out for the headstock overlay. It was cut oversize to the headstock shape so he has some wiggle room later on when gluing it to the neck.
The headstock veneers only needed to be 1/8" thick, and the buckeye was about 3/4" thick. That meant with some careful resawing, three veneers could be produced. Two would be used for this project, and one would be set aside for a (yet unknown) future project.
The resaw was done on the band saw using the resawing jig I had recently made (see the fretboard page for more information about this jig.) This was the second time we had used this jig and it works much, much better than my old resaw fence. Also, we didn't bother changing the blade on the bandsaw to my Woodslicer resaw blade. The buckeye burl is so soft it resaws like butter.
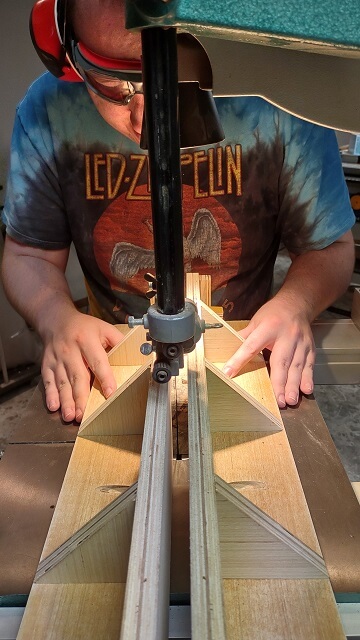
After resawing, the pieces had a lot of sawblade marks and were about 3/16" thick. The drum sander was used to remove the blade marks and bring the final veneer thickness down to 1/8".
Here are two of the headstock veneers that the Tundra Boy had planned to use. A few days later he made a slight change in his plans. He decided not to add a veneer to the back of the headstock. The front would still have a veneer, but the back of the headstock would be left as plain ebony. It's weird writing the words "plain ebony" as ebony as an exotic wood is rarely considered "plain."
He later decided to use the piece of buckeye veneer that would have been on the back of the headstock as the control cavity cover for the guitar. So it wouldn't go to waste.
As mentioned above a couple of times, this piece of buckeye burl was just barely big enough to use as a one-piece top. The Tundra Boy realized that one side of the body would hang over the live edge of the buckeye by about 1/16". We decided it would be best to use the resin to bring that live edge flush with the top.
However, had the Tundra Boy just poured resin on the live edge, it would have just flowed off the edge and made a mess on the workbench instead of leveling the buckeye. So we scratched our heads for a few minutes.
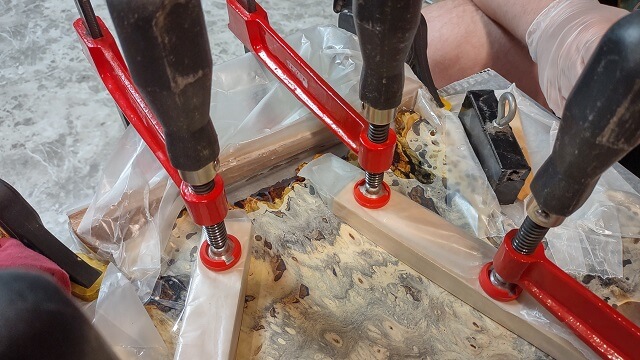
I came up with a completely rinky-dink solution to the problem. I built a crude "dam" out of wood, clamps and wax paper to make a cavity around the live edge. It didn't matter what it looked like, it only had to keep the resin in place long enough to harden and fill the wood. The Tundra Boy poured the resin in and, much to our surprise, it worked. The resin stayed in place. The picture really doesn't portray how redneck this whole contraption looked in real life.
Overall, I've been very impressed with the "Craft Resin" brand epoxy resin used for this project. It is pretty easy to mix at a 1:1 ratio. It is more liquid than regular epoxy, which means it's easy to pour and self-levels well. It gives plenty of open time (30-40 minutes) to get it mixed up and poured onto the workpiece. It doesn't seem to have trouble with bubbles and if we do see any right after pouring, lightly hitting the area with a heat gun makes them rise to the surface and pop. And once cured, the resin is completely clear like you're looking through a piece of glass. If you're interested in using it for your project, you can buy it at Amazon here. Note this isn't an affiliate link. I get no financial compensation if you buy any. I'm just trying to help fellow woodworkers.
Another nice thing about this resin is that it comes in a variety of sizes. Many other resins of this type only came in quantities of a gallon or more. This particular brand was available in smaller sizes. The Tundra Boy had plenty left over from the quart bottle he bought. I don't know what he would have done with the excess if he had been forced to buy a gallon of the stuff.
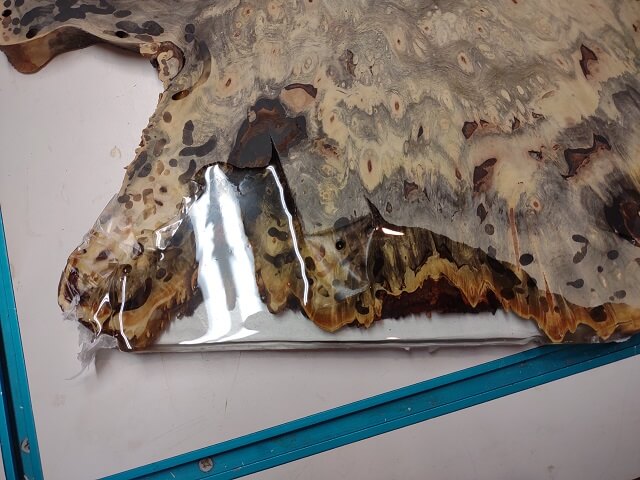
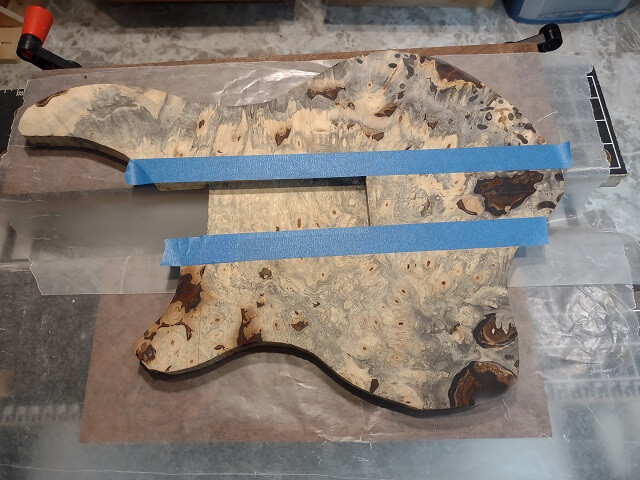
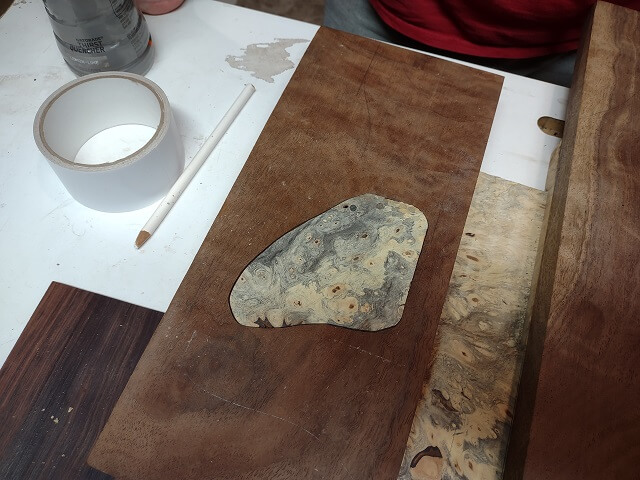
Because of the thickness of the area to be filled, we let the buckeye sit in the wax paper dam for a week to make sure it was fully cured. Here's a picture of the filled live edge. You can really see how clear this resin is once dry. Ignore the little bits of tape and wax paper still stuck to the resin. Those are in areas that will get removed once the body shape is cut. As mentioned, the Tundra Boy only needed about 1/16" of resin along the edge. To get that little bit of resin on the edge he had to fill a large area.
There were still a few spots in the buckeye that may need more filling, but the Tundra Boy decided to wait on those. There were multiple reasons for deciding to wait. The voids may wind up in areas that are routed, cut or carved away. Some of the little holes actually went all the way through the wood, and until the wood was glued to something solid the resin would just leak out the bottom. Also, with the carving that was going to happen it was likely that additional holes and/or voids would be exposed, and he would prefer to just deal with them all at once.
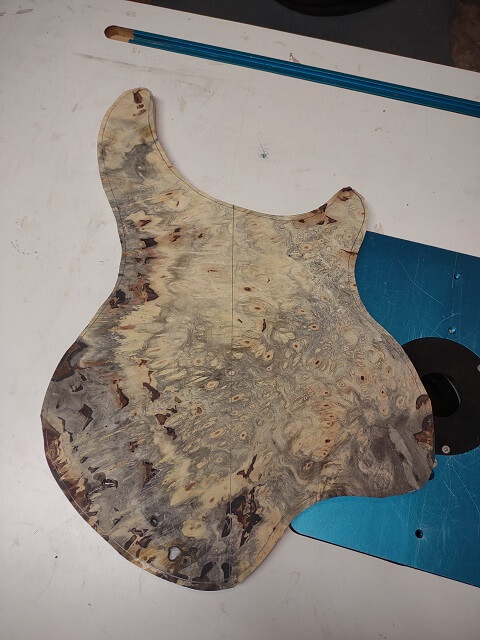
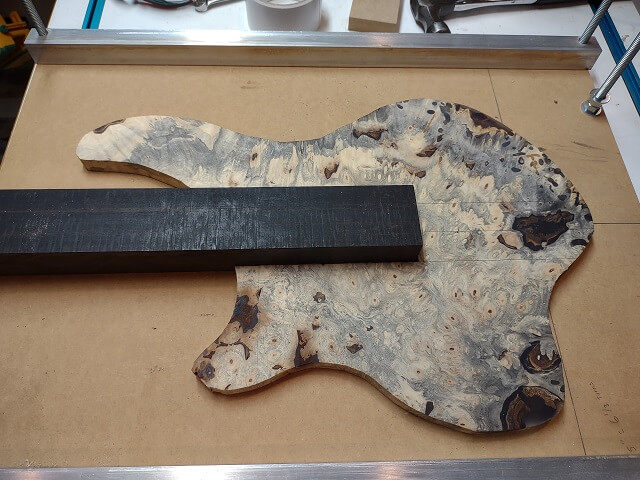
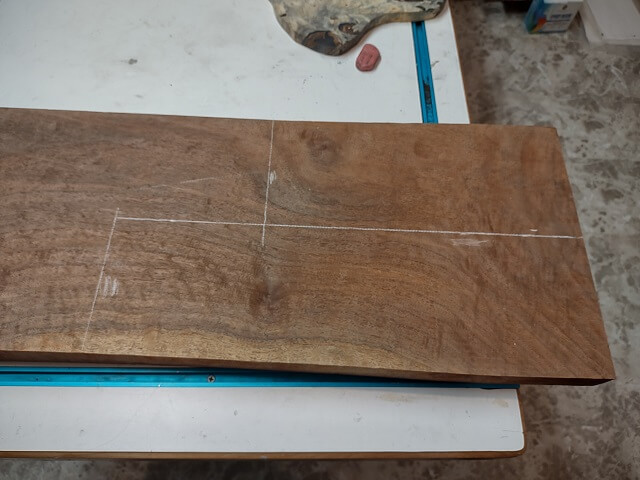
Now it was time to cut the rough shape of the guitar in the top wood. At this point the goal was just to get the piece close to the final size so a center line could be marked. The final sizing won't happen until the top is glued to the claro walnut body wings, then both pieces will be shaped at the same time. The Tundra Boy used the bandsaw to cut out the body shape, staying well outside his marked line.
Here is the top with the shape roughed out. You can see the center line that was drawn on the wood. Also, in this picture one can see how little of the large resin-filled voids actually made it onto the final workpiece. There was just a little bit along the edges. Unfortunately you can't just fill a little bit of a hole, so the entirety of the holes needed to be filled even though just a sliver of the edge of them was needed.
As an aside, after the Tundra Boy cut out the top, I picked up one of the pieces of cured resin that had been cut away and examined it. I thought maybe the resin by itself (not surrounded by wood) would be a little brittle but I was amazed at how strong it was. It took a lot of strength to break the resin, and thicker pieces I couldn't break at all. It was much stronger than the wood. I was initially a little worried how durable the resin would be, but I then realized my fears were unfounded.
The next thing to do was to cut the neck pocket. The one-piece top needed to sit down on the recessed body end of the neck blank, with the upper portion wrapping around the fretboard on each side. We wanted that joint to be as tight as possible, both for strength and aesthetics.
I laid awake for several nights trying to figure out how we would accurately mark and cut this neck pocket. In the end, I wasted a lot of mental energy as shortly before we got to this point I realized that several years ago I had built a neck pocket routing jig, and it would be perfect for this application.
Most of the scrap wood inside the neck pocket was removed at the scroll saw, to reduce the amount of wood the router needed to remove. Because the pocket needed to be cut all the way through the top, the top was taped to a piece of scrap wood to lift it up. Then the top was placed into the jig and everything was carefully adjusted.
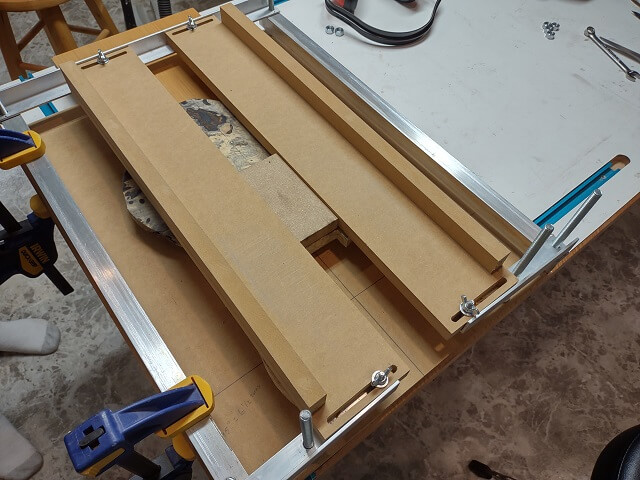
In the end it was about a half an hour of setup for about 10 seconds of routing. This wasn't a big neck pocket, and most of the wood had already been removed. The actual routing went very quickly.
A round router bit can't cut 90° corners, so the corners of the neck pocket were squared off with a chisel.
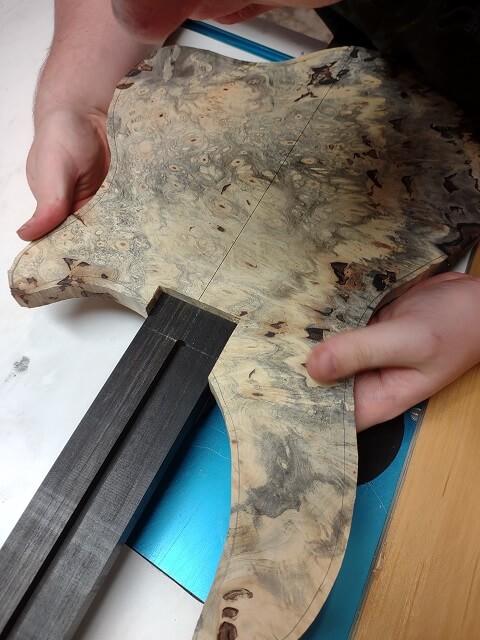
Here's the test fit of the neck pocket. Eventually it will sit much lower on the neck blank, but we could at least get an idea of how the two pieces will meet up. The end results were very accurate, so I think we were successful.
Next, we needed to create a recess in which the thicker portion of the neck will sit. Once again, we turned to my neck pocket routing jig, as this route is effectively a really big neck pocket. It's just on the underside of the top instead of the face-side.
After about a half hour of setup, along with some spirited debate about the best way to handle things, we finally had the jig ready to go. We took extra time to make sure the jig was centered on the body, and that the pocket would be a snug fit against the neck.
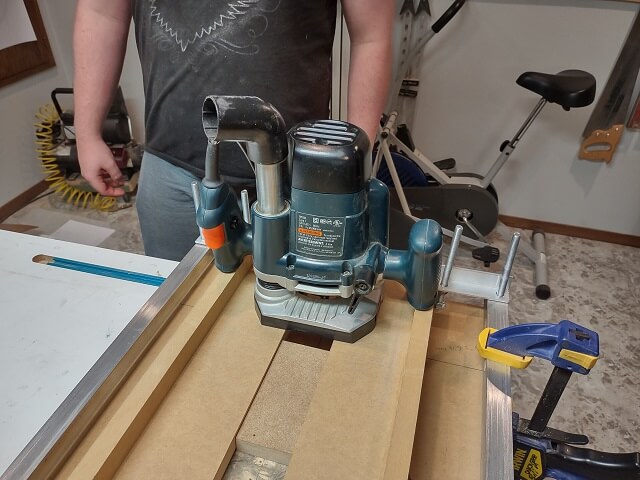
This pocket was going to be 1/2" deep. I didn't feel comfortable hogging out that much wood in one pass, so we opted to make two passes, each taking out 1/4" of wood. One thing we discovered after getting everything ready to go was that my 1 1/4" pattern cutting bit was too long to make the initial shallower pass, as the bearing would ride higher than the guide fence. However, my 1/2" pattern cutting bit was too short, as it wouldn't reach full depth.
So, the Tundra Boy wound up using two different bits for each of the two passes. The first shallower cut was done with the 1/2" pattern cutting bit. The second full-depth cut was done with the 1 1/4" pattern cutting bit. That slowed the operation down slightly, but in the end he was successful in routing the pocket.
Like with the neck pocket, we needed square ends to the route. A few minutes with chisels took care of the round pocket corners.
I know that I pulled out my phone and took a couple pictures of the setup and routing process, but later when I looked at my phone they were nowhere to be found. So all you get is a picture of the finished route.
It doesn't matter how nice the route looks if it doesn't fit. The moment of truth came as we set the neck into the pocket to test the fit. To our relief, it was about perfect. It was tight enough that the two pieces would stay connected via a press-fit, but not so tight that it took a great deal of force to press the two pieces together, or pull them back apart.
Note that in the following picture, the neck isn't sitting in its final position. Once everything is done the neck will go all the way through to the end of the body. We just set the end of the neck down to make sure the routed pocket was the correct width of the neck blank.
Now it was time to start working on the pieces of claro walnut, which will become the "wings" of the body. On most neck through guitars the wings can be seen from both the front and back. On this guitar, the wings will only be seen from the back, as the one-piece top will cover the entire front.
The slab of walnut the Tundra Boy bought was large enough to make wings for two guitars. In order to be most efficient with the wood, the Tundra Boy spent a couple of minutes marking how things should be cut apart. We quickly realized that this piece of wood was anything but straight. It was 11 1/2" wide at one end, 11 1/4" wide in the middle, and 11 3/4" wide at the other end.
The Tundra Boy started at the band saw by cutting the blank lengthwise down the middle (or reasonably close to the middle, due to the varying width mentioned above.) I didn't get a picture of this part of the process. Originally he was going to do a "stop" cut where he would cut to the end of the marked pieces, turn off the band saw, and then carefully back the blade out of the cut. By doing this he could preserve a larger chunk of uncut wood for future projects.
However, the board had another idea. The Tundra Boy finished the cut to the end of his marked line, then turned off the saw. That's when I noticed that the kerf (the little bit of the wood removed by the saw blade) had closed at the end of the board where he started the cut. This board must have some internal stress going on that caused the two sides of the board to close up on each other again.
This isn't unusual. Normally in this situation I can pull the two sides apart enough to free the blade. However, this board wasn't going to budge. Neither the Tundra Boy nor I had enough strength to make the board move, let alone widen far enough to release the saw blade.
I then attempted to pound some wood wedges in between the two sides to force them apart. All that happened was bits of the wedges and the walnut were chipped away, but the saw kerf wouldn't open up.
At this point we accepted the fact that, unless we wanted the board to sit in the bandsaw permanently, the only direction the blade would go was forward. A center line was marked to the end of the board, and the Tundra Boy finished the cut all the way through. That means rather than one big wide chunk of claro walnut to be used in the future, he will have two thinner pieces. The good news is they should be wide enough to make more body wings for another instrument, if that's what he chooses to do with them.
Unfortunately, I didn't snap a photo of the bandsaw process. We were too busy trying to figure out what to do to free the board from the blade, so I didn't think about it until later.
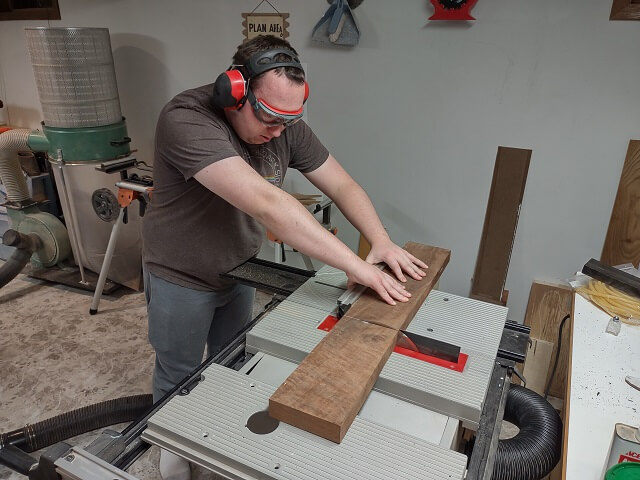
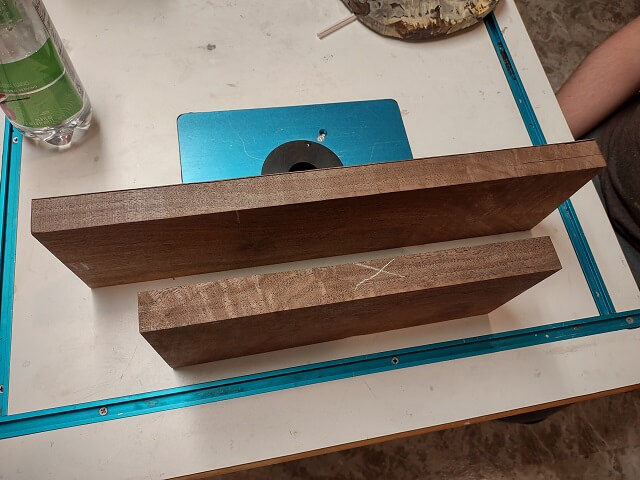
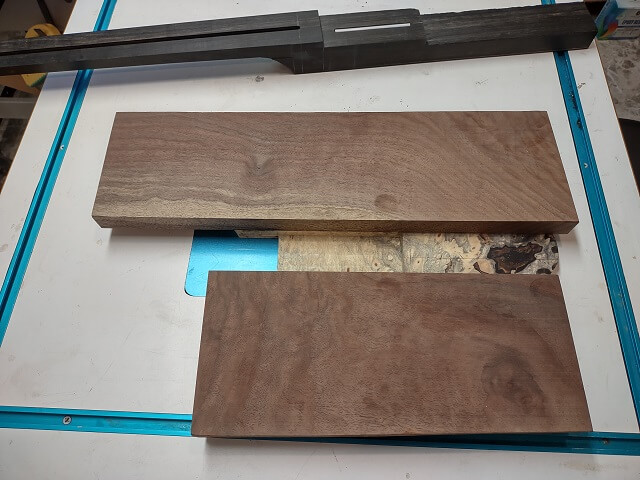
These two long pieces of walnut then needed to be cut shorter. They were too long to do the crosscut in the band saw, so the Tundra Boy used the table saw.
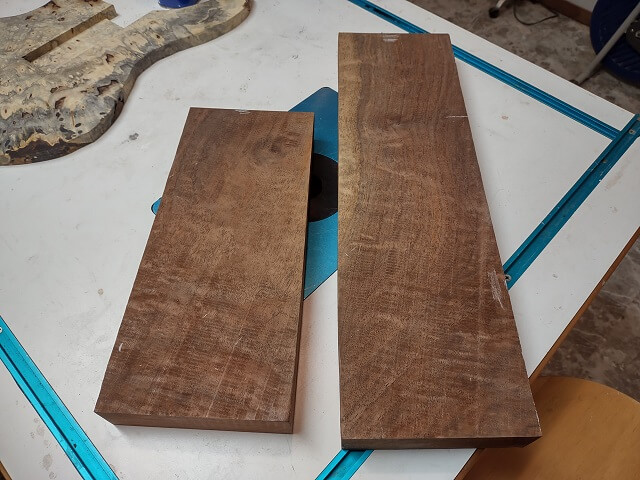
Here are the two body wing pieces after trimming them to more usable sizes.
The edges of this piece of walnut were anything but straight. In fact, we noticed that the line the Tundra Boy cut freehand on the band saw turned out straighter than the edges on the board. To get a nice straight edge on the pieces, the Tundra Boy ran them through the jointer.
Next, the body wings had to be thinned. The board was a full 8/4 in thickness (1 3/4" inches), and we needed it thinned to 1 1/16". Rather than planing or sanding off 1/2" of useable wood, we opted to cut off most of it at the band saw. Then we could plane or sand to final thickness from there, and have some extra wood that could be used for other purposes.
We installed the resaw blade in the band saw, and got the resaw jigs set up. As the Tundra Boy began cutting, he was only about 1/4" in when something felt wrong to him. He wisely turned off the saw and investigated. We noticed that the roller support stand used to keep the resaw jig and workpiece from tilting in an unbalanced state had lowered itself.
That was weird. We reset it to the proper height, then before the cut was started noticed it was low again. I cranked the knob to tighten the height adjustment as much as I could (hurt my hand even) but it was still easy to move the stand up and down. Apparently my support stand had reached end of life.
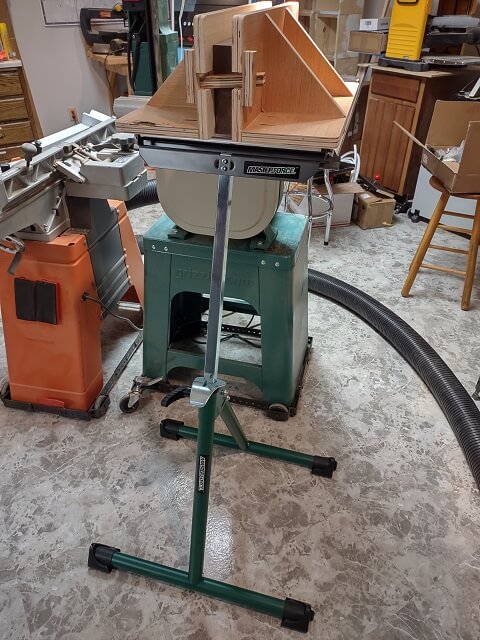
Rather than trying to force the issue, we opted to stop for the evening, and then the next day after I got home from work we could go out and buy a replacement support stand.
The next day after I got home from work, true to my word, we went out and bought a replacement support stand. I selected one that had a rotating top that provided three different options. In addition to a roller, like my old stand had, it also offered a ball top option and a fixed support option. It looked pretty keen.
We got it home and started to assemble the stand. Overall we liked the features. The rotating top looked handy. There is a quick release for setting the height. Rather than a knob to tighten the stand, it has a lever. It seemed to fold and unfold much easier than my old stand.
We were about two thirds through the assembly process when we attached the two feet to the legs, and noticed that they weren't parallel. And it wasn't a "slightly off OCD" misalignment. The ends of the feet on one side were about four inches closer than the ends of the feet on the other side. The obvious visual aspect was annoying, but I could live with it as long as the stand was functional.
Unfortunately, it was not functional; the same issue that caused the feet to not align also caused the stand to not sit level on the floor. It would noticeably rock back and forth with only three feet touching at a time. The bottom of one of the stand legs had not been cut properly and was out of alignment. I even tried a little "persuasion" in an attempt to bend the feets back into alignment. It made the problem slightly better, but there was still quite a bit of rocking that would happen. After a minute of pondering, I realized that this misalignment would drive me batty every time I wanted to use the tool.
We decided to unassemble and box the stand up again, and return it to Menards. I was worried that exchanging it for another stand of the same model would result in the same problem. At the same time, I liked the features of this stand. I decided I would make one exchange attempt. If the replacement stand had the same issue, then I would return it for a refund and buy a stand from a different manufacturer.
We drove back to Menards and exchanged the stand for a new one. The girl behind the counter was happy to make the swap. However, observing her actions as we were leaving the store, we strongly suspect that she taped the box of the defective stand back up and returned to the shelf. We had made it very clear that the stand had a manufacturing issue that made it unusable. Some other poor sucker may wind up in the same situation we found ourselves in.
Much to my relief, the feet of the replacement stand were parallel, and it stood on the floor without wobbling. As a bonus, because I had been through the whole assembly process already, I put the replacement stand together in record time.
The new roller stand was put in place, and was successful at holding the resaw jig without drooping.
24 hours after starting the resaw process, the Tundra Boy finally was able to complete the resawing operation on the body wings.
We calculated that, in their final form, the body wings needed to be 1 1/16" thick. To give a little "wiggle room" the body wings were resawn to 1 1/8" thick.
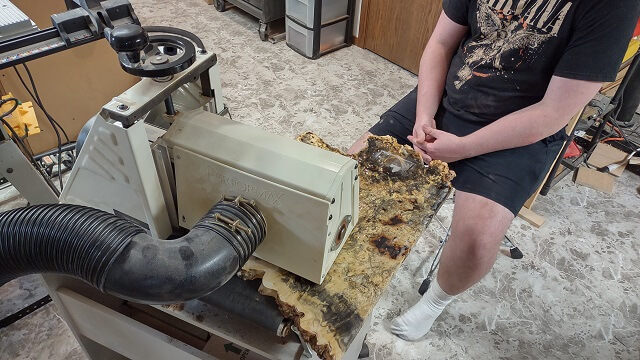
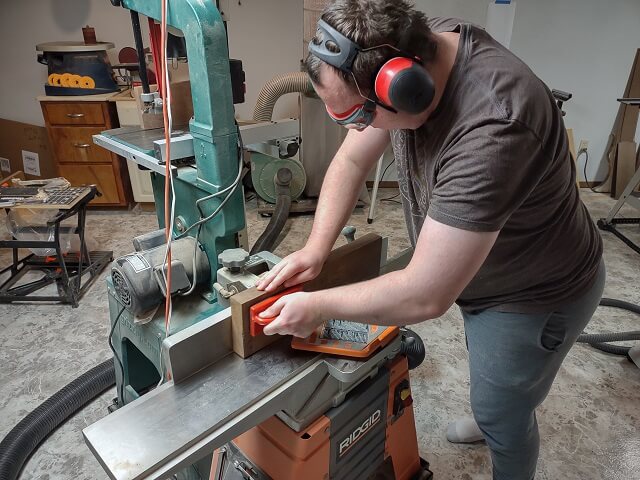
To bring the body wings to their final thickness, the drum sander was used. The planer would have been faster, but the Tundra Boy was concerned with tear-out. Claro walnut has a lot of figuring, and planers tend to grab figured wood and rip out little chunks. The drum sander is slow, but is the safest option when using figured wood.

The combination of 80 grit paper and sanding in straight lines means the drum sander leaves some noticeable scratches on the wood. The Tundra Boy removed these using the ROS and 120 grit paper. You can also see my old roller stand in the background waiting to get taken out to the trash.

We're doing something different with this instrument. Normally I would glue the body wings to the neck blank, then later glue the top in place. With the aggressive horns of this guitar's body shape, doing things in this order would create a few hurdles when trying to cut and carve the body. The neck tends to get in the way of the tools.
To avoid this pitfall, we decided to switch things up. The body wings would be glued in place to the underside of the top. Then the shaping and carving of the guitar horns can be done without the neck getting in the way. Then later, the neck can be glued in place.
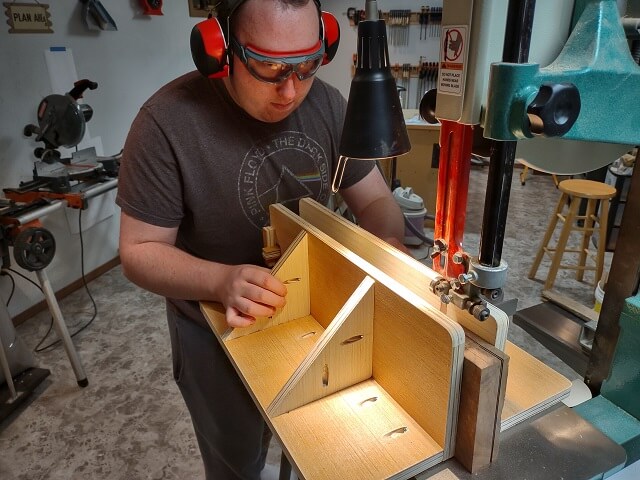
Accurately gluing the wings to the underside of the top piece makes it much more difficult to keep things perfectly aligned. We decided to put the neck in place, clamp everything together, then pull the neck out before the glue sets.
Obviously, we don't want the glue to set up with the neck in place. The easiest way to accomplish this is not to have too much glue near the neck pocket. To keep glue out of this area, a couple of pieces of tape were placed on either side of the neck pocket. Then glue was spread on the outside wing area of the top. Before placing the body wings in place, the tape was removed. The hope is that as things were tightened down in the clamps, glue would squeeze into the area that had been taped off, but little glue would travel farther than that and into the neck area.
The epoxy glue was spread, the neck was set in place, then the body wings were set down on the glue. Two clamps were run crosswise to keep the body wings tight against the neck. Then, the body wings were clamped to the top.
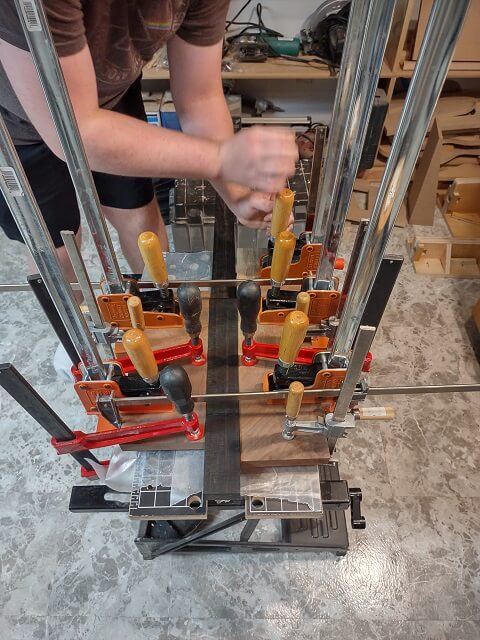
The epoxy we were using had about 30 minutes of open time before it "kicks." This turned out to be plenty of time. Once we were satisfied that the wings were securely fastened to the top, the two crosswise clamps were removed, and the neck was popped free of the assembly. There was just a touch of squeeze out on the neck and in the pocket, but this was easily cleaned up with a rag. Our taping efforts appeared successful.
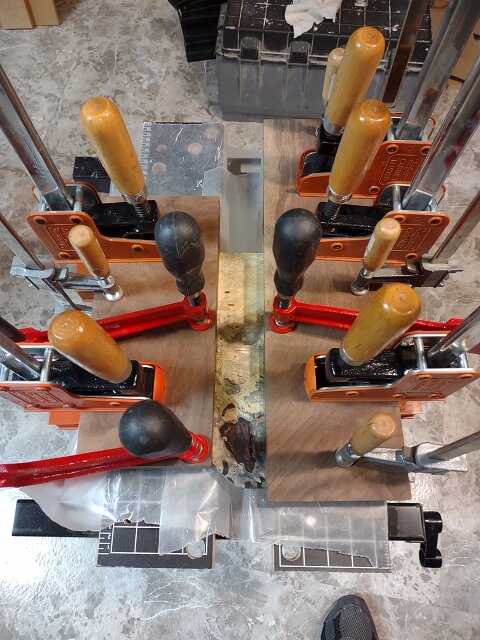
About twenty four hours later we unclamped the body. Everything looked good.
Of course, the true test would be if the neck fits tight in the pocket and there were no gaps between it and the wings. The test fitting showed that everything fit together well. Whew!
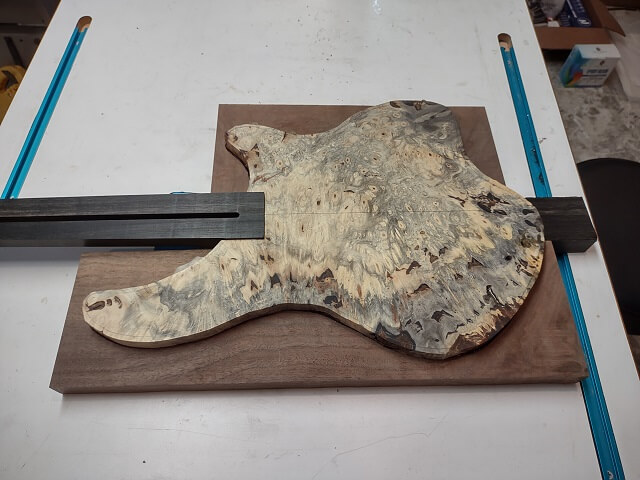

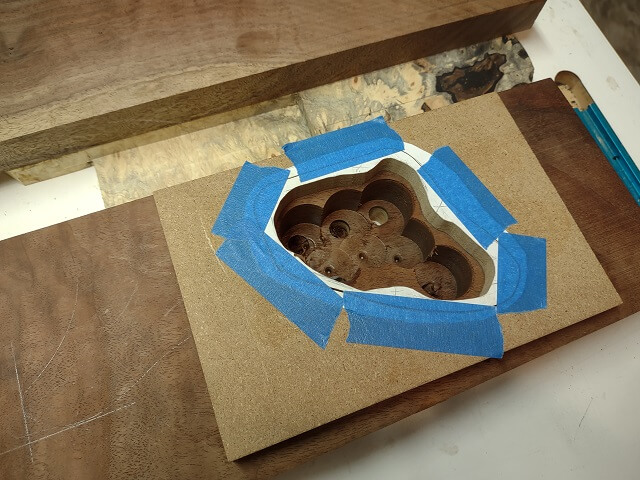
Before cutting out the body and starting to carve the top, we decided that it would be easier to route the control cavity. The reasoning was that the larger uncut body blank would make more flat space to affix the router template.
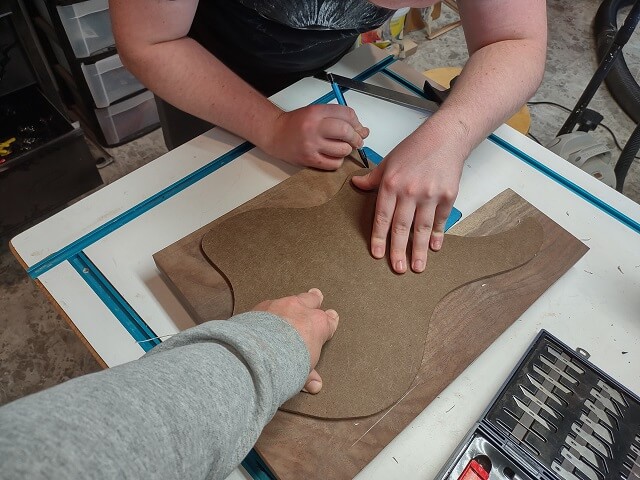
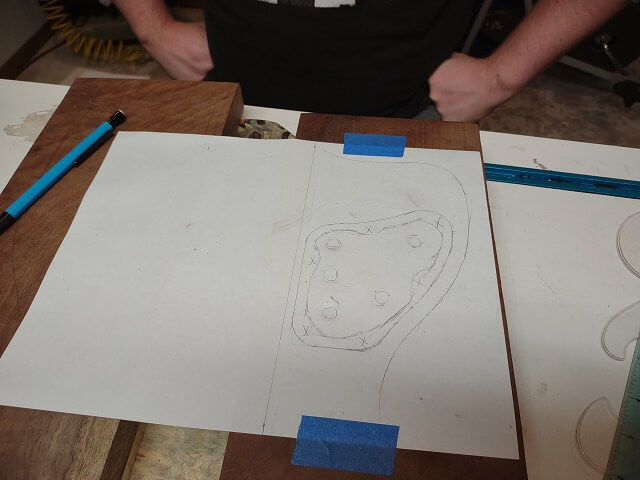
However, that meant that the outline of the body shape had to be accurately transferred from the front of the instrument to the back. We spent a few minutes carefully measuring and making marks, then set the template upside down on the back and traced the outline. In this picture my left hand is helping to hold the template in place as the Tundra Boy traced the outline. Where's my other hand? Not between two pillows.
The easiest way to determine where the control cavity needs to be located, along with its shape, is to mark the location of the controls. And the easiest way to accurately get the control locations transferred to the back of the instrument was to drill the control holes in the front, all the way through to the back of the guitar.
However, before any controls could be drilled, the controls to be used needed to be finalized. The Tundra Boy had a list of things he knew he wanted with his guitar wiring/controls:
Three pickups: two single coils and a humbucker.
A single master volume knob.
A single master tone knob.
The ability to select each pickup by itself.
The ability to select all combinations of pickup pairs (neck-middle, middle-bridge, and neck-bridge.)
The ability to select all three pickups simultaneously.
The ability to coil-tap the humbucker for a single coil sound.
The ability to select either series or parallel wiring for the neck and middle pickups.
Although it wasn't very exciting, I recommended we pause and come up with a wiring schematic or at least a plan for how we would accomplish all of these goals simultaneously. The last thing I wanted to do was to drill holes for controls that we later find out won't work. We had spirited discussion for about two hours.
When planning out the guitar, the Tundra Boy had thought about a bunch of switching options. As he went back and forth between ideas, he purchased parts. However, he still wasn't yet sold on any specific control layout.
He was leaning towards a 5-way rotary selector switch, two push-pull pots for volume/ tone and switching, and another toggle switch. To determine if this layout was feasible, I started pinning out the rotary switch with my multimeter to figure out how we could pull it off.
The more I thought about this configuration, the less I liked it. I'm not a big fan of rotary pickup selectors to begin with, so I'm sure that was biasing my opinion. To me, using the rotary selector with three additional switches just didn't feel intuitive to use. It caused duplicate settings where different combinations of switches would produce the same pickup selection.
I lobbied that instead of the five way selector, he use three on-off push buttons for pickup selection. The Tundra Boy had already purchased these buttons earlier when he was exploring control possibilities. Using the button would eliminate the need for the mini-toggle switch altogether. The three buttons would be more intuitive to use, and you could visually see what was selected, unlike a rotary switch. There wouldn't be any redundant switch settings. Overall it just seemed like a cleaner design.
I don't think I had to lobby very hard to convince the Tundra Boy. He seemed to be OK with using the pushbuttons instead of the rotary switch. The question became moot a few minutes later when I noticed that the rotary switch would have been too deep to fit in his control cavity.
More time was spent with the Tundra Boy deciding where exactly the controls should be located on the guitar front. He finally came up with a satisfactory layout he could live with.
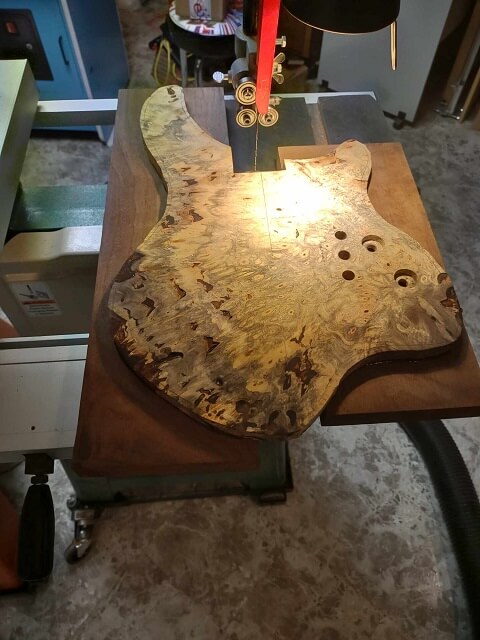
Because this guitar is going to have a carved top, and control pots don't take well to mounting on non-parallel surfaces, the knobs would be recessed slightly into the body. This will allow the knob to sit on a flat surface, and the area around the knobs could be contoured. The Tundra Boy started by drilling the recesses for the knobs. The knobs are 3/4" in diameter, so 7/8" recesses were drilled.
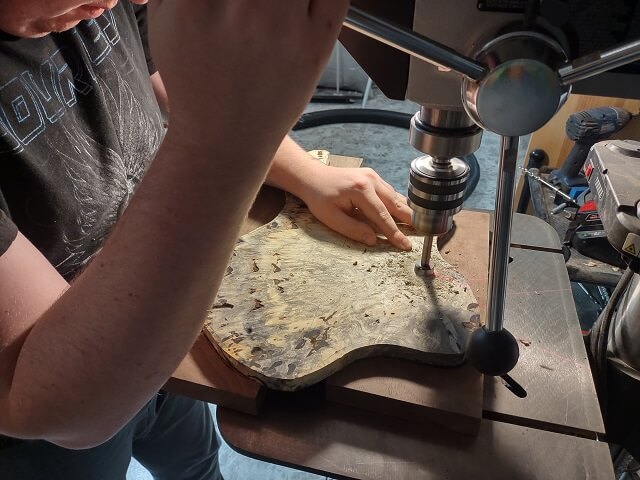
Next, he drilled from the center of the recesses through to the back of the instrument with a 3/8" bit. This is the size of the potentiometer shafts.
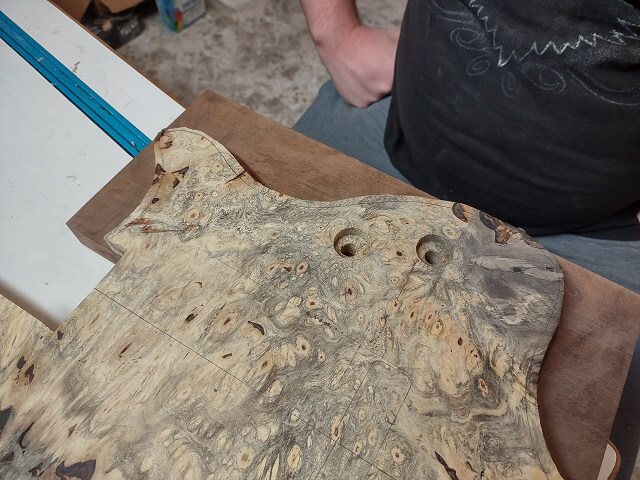
Well, one of the holes was centered in the recess. The other one was noticeably off-center. Thought was given to attempt to enlarge the recess to re-center the hole. That seemed like an endeavor fraught with difficulty, and also would leave very large recesses. Plus the other recess would also have to be enlarged to match.
Instead, we opted to fill the hole with epoxy, then come back the next day and re-drill the hole in the proper location. These photos were taken before the hole was filled and redrilled. I didn't get a picture of the Tundra Boy pouring epoxy into the hole.
During the re-drilling, extreme care was taken to make sure that this time the bit was centered. Then the Tundra Boy drilled the new hole at a painfully slow rate, in order to keep the bit from being drawn into the previous hole filled with epoxy. This was especially crucial when starting the drilling process on the new hole. Re-centering a drill bit on a previously drilled hole is extremely difficult to do.
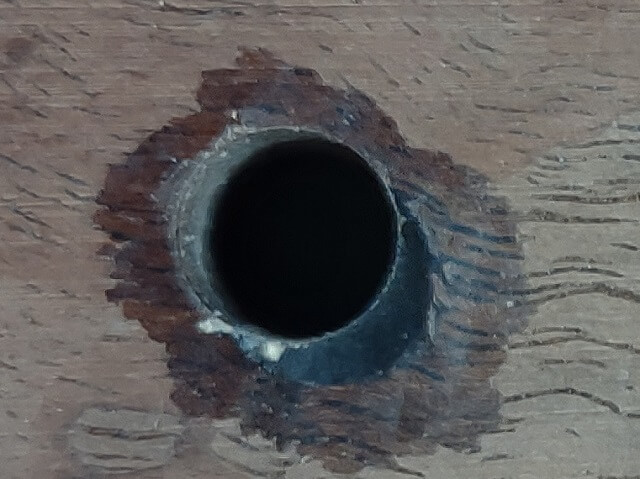
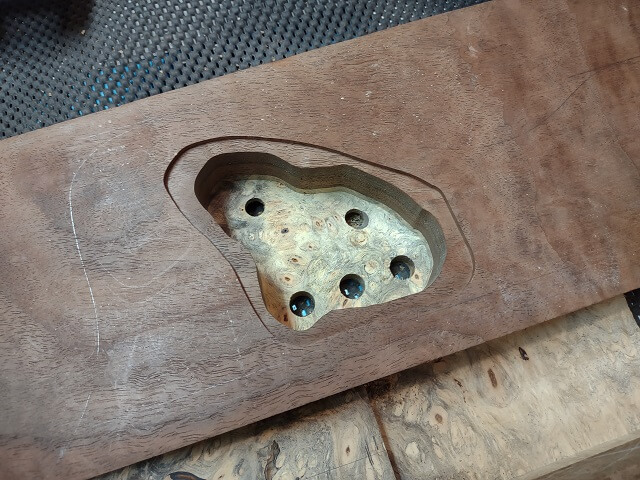
Here is the back side of the hole after it was filled with epoxy and redrilled. You can clearly see that the original hole wound up at least 1/8" off center. On the front side of the instrument the knob will cover the repair. On the back side, all of the evidence of the repair will get routed away when the control cavity is formed.
The three pickup selector switch holes were drilled. These selectors needed a 15/32 hole. This isn't a size available in most drill bit sets. Thankfully I had this weird sized bit in my box of random drill bits I have needed over the years for other projects.
With the holes drilled, the Tundra Boy could now design a control cavity. Because he (and I) build custom instruments, almost every control cavity is different from guitar to guitar. It's a bit of a bummer that the design work and creation of a routing template has to be done every single time, but I guess that's the nature of making unique instruments that you can't find in the store.
To design the cavity, the Tundra Boy taped a piece of paper to the back of the instrument. The body lines, control positions and other markings were transferred onto the paper so he had reference lines he could use. Then he spent about an hour coming up with a design that he liked. It needed to work aesthetically, and also work with his control layout. Once he was satisfied, he cut it out and glued it to a piece of 1/2" MDF that will become the routing template.
When I got home from work the next evening, I was going through my normal post-work routine when I heard a weird noise. It sounded like a faint rumbling. I went from room to room on the main floor, but couldn't figure out where the sound was coming from. Finally I realized what I heard was the scroll saw down in the shop. The Tundra Boy had already started for the evening by cutting out the control cavity template with the scroll saw.
One of the nice things about using a scroll saw is that it allows "inside" cuts. By drilling a small hole in the workpiece, and unhooking one end of the blade from the saw, the blade can be passed through the piece and then reattached. This allows the cut to start in the middle of the workpiece. Most other cutting tools don't allow this feature.
Here's a picture the Tundra Boy took of him drilling the blade holes in his template before cutting it out.
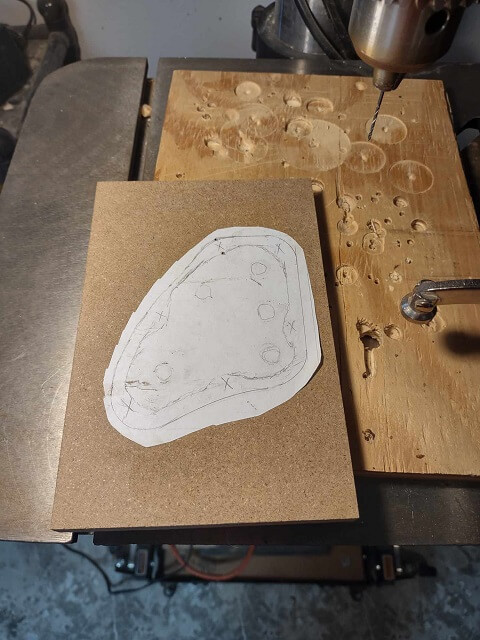
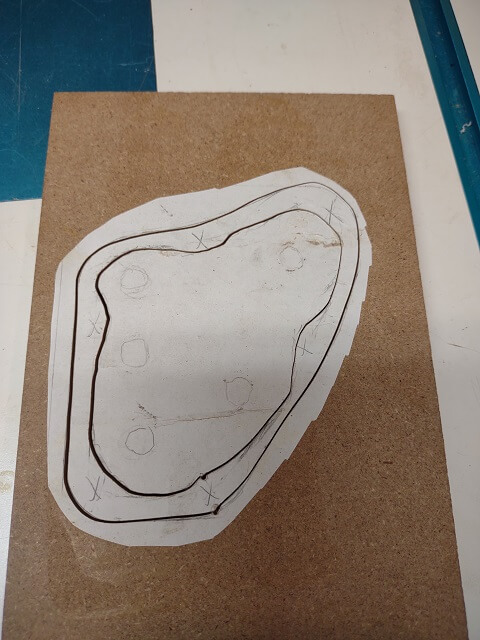
I've figured out that it works well to make the control cavity template in three pieces. The first layer has the outline of the outer cavity shape, has surface area to allow the template to be taped to the guitar, and has adequate space to support the router.
The second layer is to define the shape of the inner portion of the control cavity. The center layer of the template is mostly just a byproduct of creating the second layer, but will be used when creating the control cavity cover.
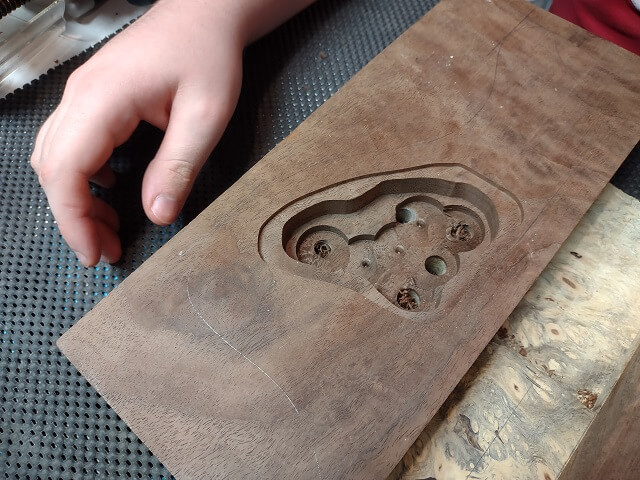
To reduce the wear on the router bits, and the associated mess of wood chips being flung throughout the shop, a large portion of the wood in the control cavity was removed via the drill press with a forstner bit. The Tundra Boy taped the first and second layers of the routing template to the guitar, then used that as a visual guide on where to drill out the wood.

The drill bit wasn't set to go to full depth, as a forstner bit has a little guide spike in the middle of the bit to keep it aligned. This spike cuts a small hole deeper than the rest of the bit. While this doesn't usually cause a problem, it doesn't look as clean. So the Tundra Boy opted to not go as deep with the forstner bits and take the cavity to full depth with the router.
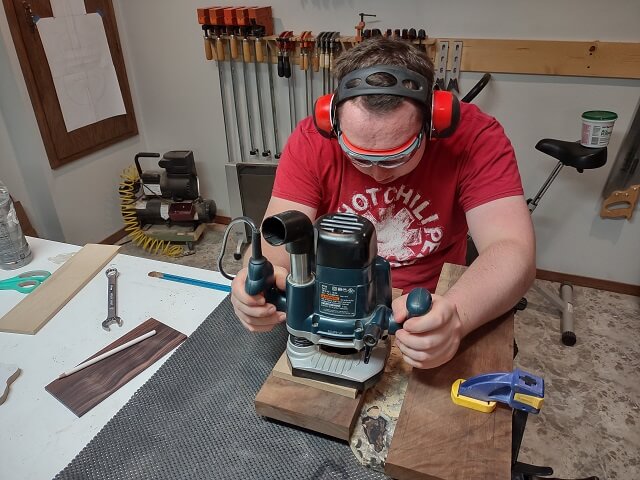
Then the Tundra Boy started routing. Rather than hogging out huge amounts of wood in one pass, he made several passes taking about 1/4" of wood out at a time.
Once the router bit had cut to maximum depth, he then removed the middle layer of the routing template, and routed the 1/8" deep recess to hold the control cavity cover. Doing this now saves the hassle of trying to re-fasten the routing template. With that route done, the template was removed.
Then, with the router bearing running on the inside wall of the control cavity, the Tundra Boy continued routing down to final depth. The last few passes were done at a depth of about .06", using a copper penny as a spacer to set the depth gauge. It was a little tedious, but I insisted we sneak up on the perfect depth in several small passes to make sure we got it perfect. Later on we wouldn't regret the extra few minutes spent, whereas if we routed too deep and wrecked the guitar the regret would be enormous.
Now attention was changed to the control cavity cover. Several wood options were considered, and the Tundra Boy finally settled on using some of the buckeye burl. The piece used was originally going to be used on the back of the headstock, before he opted to not use it. It had already been thinned to 1/8", so it was pretty much ready to go. The template just barely fit on the piece of wood.
A pattern cutting bit was used on the router table to trim the buckeye to the exact shape of the template. One of the push blocks from the jointer was used to guide the workpiece and keep fingers away from the spinning bit.

Pattern routing small pieces like this can be tricky. Routers tend to grab the wood and yank the workpiece. Often times on end grain the router bit will cause significant tear-out. Buckeye burl is so soft, however, that it shapes very easily. No major issues happened while routing the cavity cover to size.
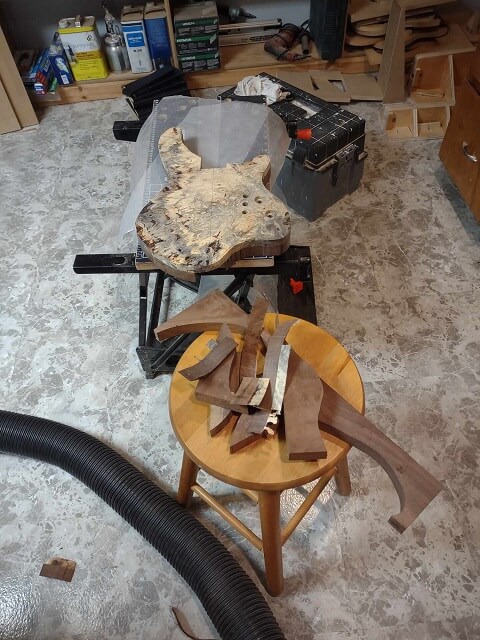
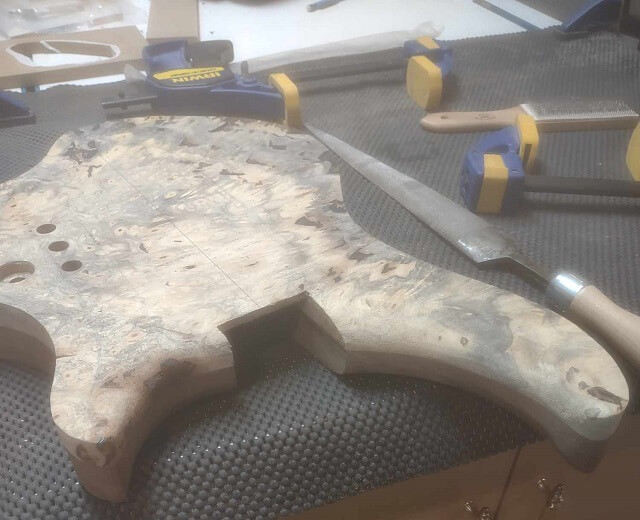
Now the excess claro walnut could be removed from the edges of the body. The Tundra Boy did this at the band saw. I wasn't in the shop while he was doing the next few steps, so he took some of the following pictures.
Here's the body cut to rough shape, with all the scrap pieces sitting in a heap.
To remove the blade marks left by the band saw, and to bring the body to its final shape, the Tundra Boy used the oscillating spindle sander. This keeps the walnut and the buckeye perfectly flush with each other, and allows him to sneak up on the shape delimited by the pencil line traced from the template..
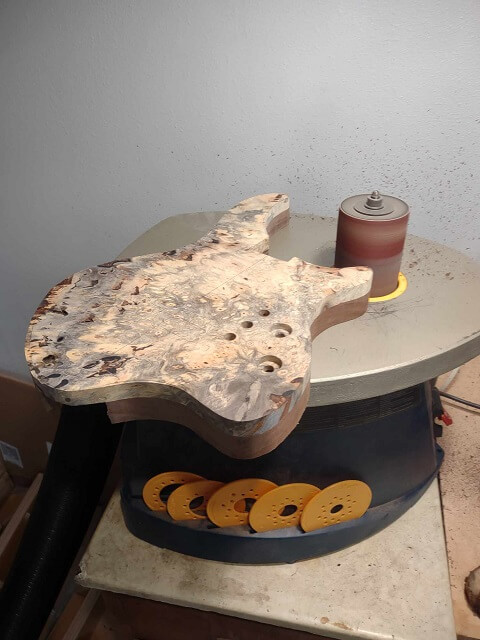
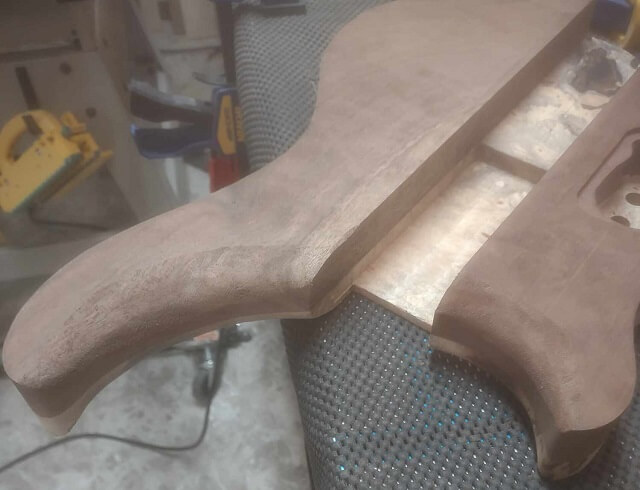
As mentioned previously, the top on this guitar will be heavily carved. Most of the carving will have to wait until after the pickup and tremolo routing is done, but the Tundra Boy decided to go ahead and carve the inner area of the horns. Once glued to the neck, this area would be tough to shape as the rasp would keep hitting the neck. Rough carving this section would be easier to do now.
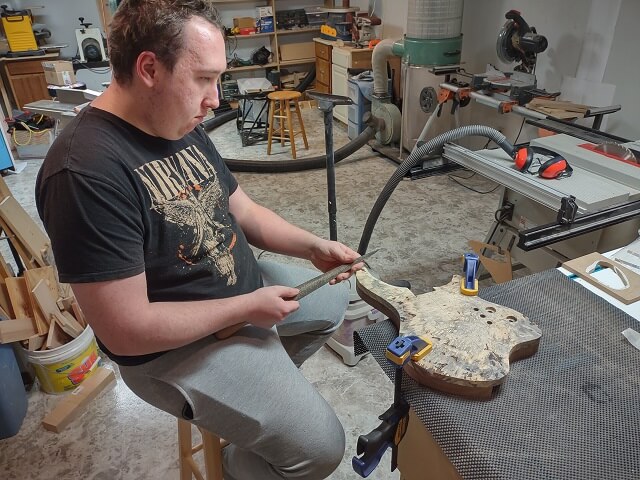
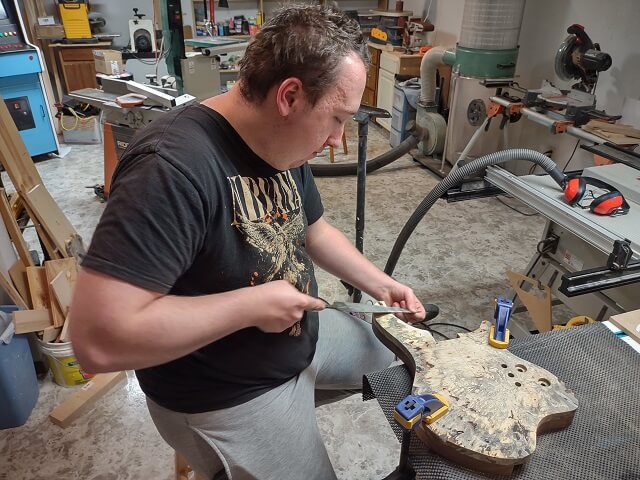
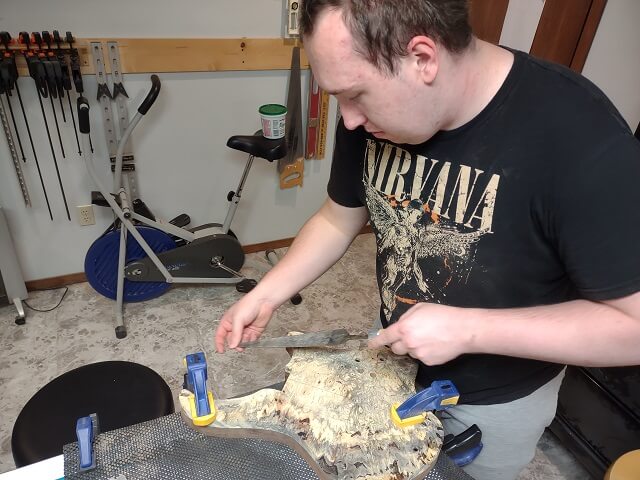
I came home from work to find the Tundra Boy in the shop, with the body shape finalized and carving away using my dragon rasp. So I snapped a couple of photos.
I had a church meeting, so I couldn't stick around. A few minutes later right before I left the house, I was grabbing something from our storage/utility room and decided to check on his progress. The main door to the shop opens to a hallway, and the "back door" opens to a storage/utility room. I entered the shop from the back door, and due to the direction the Tundra boy was facing he didn't see me come in. He apparently was "in the zone" and didn't hear me either.
I looked over his shoulder watching him carve for a moment, when suddenly he saw me out of the corner of his eye, shrieked, and hit the ground. Me being the caring, loving father that I am, completely doubled over in laughter.
However, the next night the Tundra Boy got his revenge. When I got home from work, I walked in the house and removed my bicycle shoes. As I opened the closet door to put them away, the Tundra Boy suddenly jumped out at me. He had been laying in wait. It gave me quite a start, but once the initial wave of adrenaline passed, I had to give him kudos for the joke.
Back in the shop, the Tundra Boy finished up the carving of both the front and back of the upper horn areas. There will probably be a bit of tweaking to do later, but the majority of it is done. He snapped some photos. I'm not sure why they came out so hazy.
The body had some about as far as possible without being attached to the neck. It is now time to start the assembly process.
Return To The Main Music Gallery
This page last updated on 04/02/2024