


The first step in a contest such as this is to pick the right project. I can imagine that this is at least half of what goes into winning, with the other half being the execution of the project. The trick is to pick a project that will require you to squeeze as much out of the stock as possible, but still be feasible. In addition, you want something that captures the eye and has an element of style. I could have made a square bookshelf that used 100% of the lumber, but there's little style in doing that. By the same token, I could have made an intricate piece of intarsia with lots of style, but that would have left most of the board unused, so there's little challenge in stock utilization.
I had mulled over several options, and finally settled on a variation of a tilt-top table I saw in an issue of Woodsmith. Obviously, I would have to change some dimensions and alter the plans to fit the limited amount of material with which I had to work. I knew I was on the right track when I explained the contest to a co-worker and showed him a picture from Woodsmith. When he said, "you're going to make that out of a 2x6?" I knew I was on the right track.
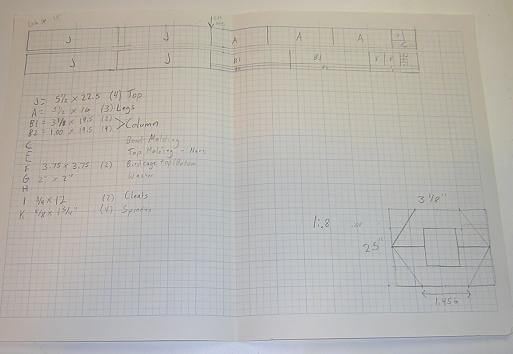
Of course, pulling it off would take careful planning. In an unusual move for me, I drew up a cutting diagram and made some notes on the dimensions.
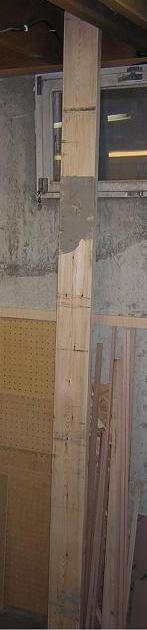
Next, I had to select a victim. My son and I went to Menards and found their 8 foot 2x6s. It was a sad stack. They only had about 15 of them left in the pile, and it looks like everything that was straight, knot free and mostly undamaged had already been purchased. They had another pallet of 2x6s sitting up on top of a stack of lumber, but nobody seemed too interested in pulling it down for a guy who only wanted one. Looking through what was left, I did manage to find one that was straight, mostly check free and didn't have monsterous knot problems.
Unfortunately, it was in nasty condition. It looked like somebody had purchased it, used it as a concrete form, then returned it. It was dirty and had something that looked like concrete stuck to the side. Nevertheless, it looked like it had promise under the gunk, so it came home with me.
So obviously, the first thing I did was sand the snot out of it to get rid of the gunk. I'd hate to run that crud through the blades of my good tools.
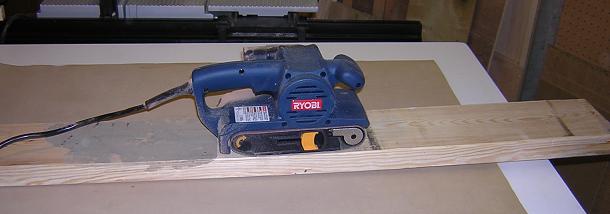
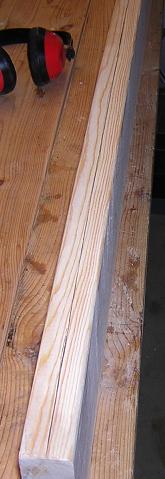
Once it was sanded, it actually started to look like a decent piece of wood!
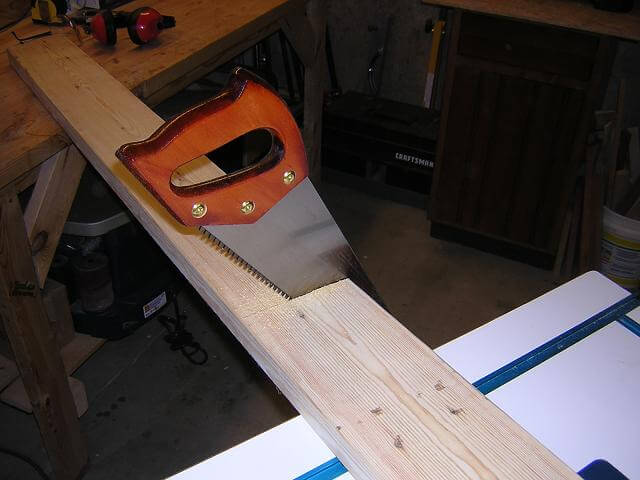
My plan was to use roughly half of it for the top, and the other half for the rest. Rather than wrestling around an 8 foot section, I cut off the piece I would use for the top. Power tool enthusiasts may stand aghast, but for rough cutting long stock like this, I often just grab a hand saw. I can cut it by hand faster than I can get my miter saw ready to go in my small shop.
In order to get enough usable pieces from the stock, I was going to have to resaw the stock into two thinner boards. Once planed, I would have 16 feet of 5/8" stock to work with. A little thinner than 4/4 stock, but for what I'm trying to accomplish it will work. To begin the resawing, I marked the boards with a guide line down the edge.
The boards were still a little long to manage without some assistance, so I set up my roller table to help with infeed support. Once they started coming out of the backside of the saw, I moved the stand. Resawing was uneventful, just saw the boards down the middle.
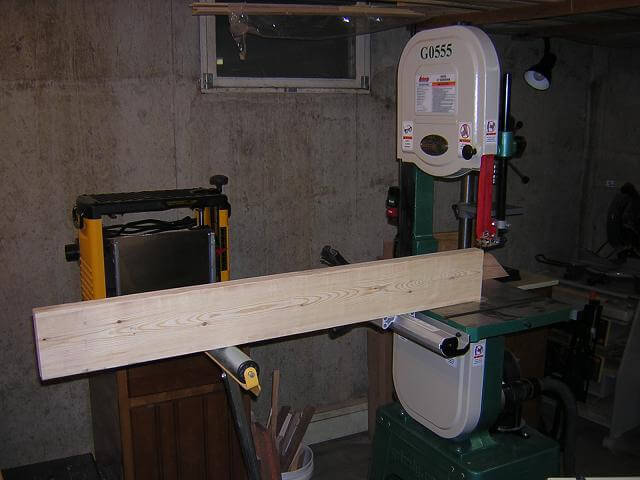
After resawing, I made sure to keep the boards marked so I could do somewhat of a bookmatching on the top.

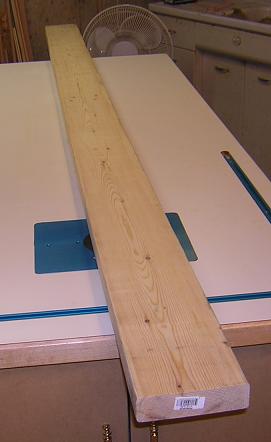
Once the boards were split, then I just planed them down to 5/8" thickness to give me smooth faces and remove the bandsaw scratches. Just for good measure, I did one light pass on the factory side as well.

The stock is ready to go. Let's build the feet.
Or you can return to the main page.
Return To The Main Wood Gallery
This page last updated on 06/28/2018