


With the jigs built, I could now start the fun(ner) part of the project: building the drum shell. The first thing I had to do was find some lumber. The Tundra Boy wanted a drum made from birdseye maple with African blackwood inlays. I compromised with him (well, "compromise" is a strong word; I told him what I was willing to do.) I agreed that I would build the drum from birdseye maple, but I didn't want to do any inlays.
My reasoning for no inlays is as follows: The topmost reason is that this being my first drum, the chances of messing up are high. I didn't want to spend 40 hours doing an intricate inlay only to make a fatal mistake and turn the whole thing into really fancy firewood. The second reason is inlaying into maple is hard. Really hard. With dark woods if the recess for the inlay isn't perfect, a little glue and sawdust will make minor imperfections disappear. That doesn't work with a light wood like maple. Minor imperfections are painfully obvious. And frankly, I'm not good enough at inlay work to not make minor imperfections.
So no inlays for this drum. But I did find a nice piece of birdseye maple online. I ordered it. Then a few days later I got an email from the guy selling it apologizing for a delay in shipping. He said he had a setback in his chemotherapy and would be in the hospital probably until the following weekend. He promised he'd ship the board as soon as he was released. "Uhhh.. yeah. No problem! I think fighting cancer is a bit more important than shipping me a piece of lumber."
The board arrived, and then I let it acclimate in my shop for a couple weeks before I started to use it. One minor oversight was that I slightly miscalculated how much wood I needed, and the board I purchased was about an inch too short. Ugh. So I searched through my stack of lumber and found another piece of maple that looked like a good match color-wise that I can use to make up the difference. That piece was slightly less fancy, but in the end I'll probably be the only one who noticed.
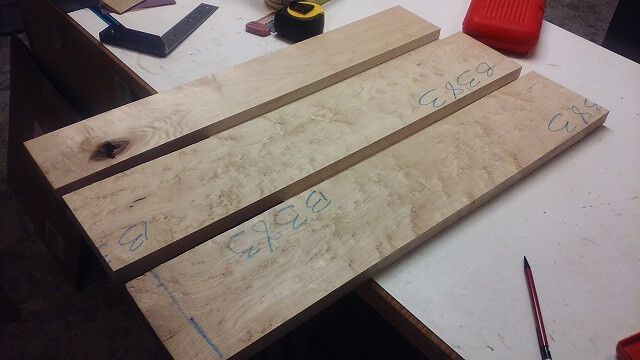
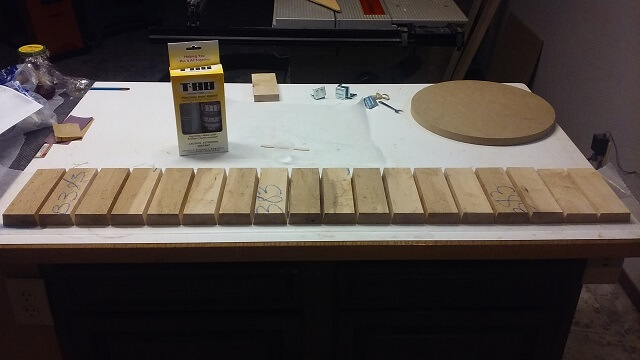
I jointed one side of the boards completely straight so I would have a good reference point, then proceeded to cut the boards into the lengths I needed. This drum was going to be 6.5" deep, so I cut a bunch of pieces exactly 6.5" long.
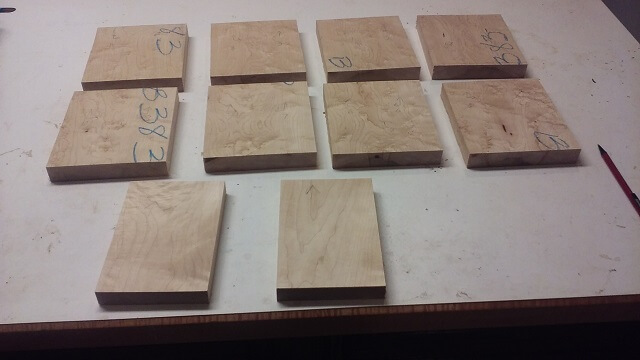
For this drum I'm going with 18 stave sections. I arrived at this decision by playing with different values in the stave calculator. Eighteen sections meant each section needed to be 2.41" wide which worked well for the width of my wood. Eight of my pieces were wide enough that I could cut them into two. That combined with the two pieces I cut from the mistmatched board gave me the eighteen stave pieces I would need.
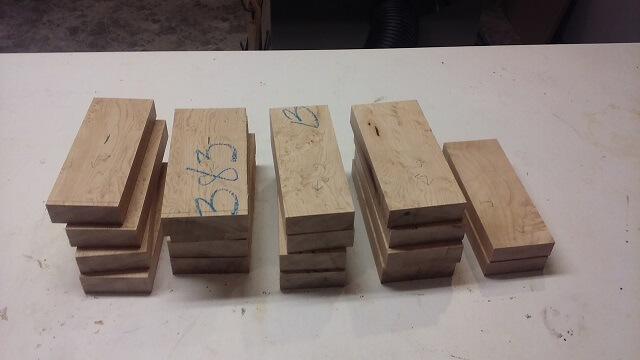
With the pieces cut to rough width, now it was time to miter them to final width. Having 18 pieces meant that each joint needed to be 20 degrees. Each joint was made up of two mitered pieces, which meant that each miter needed to be 10 degrees. I set my saw blade to exactly 10 degrees, then did some test cuts on scrap wood moving my fence until it was producing pieces as close to 2.41" as I could get, measured with my dial calipers. Then I ran each piece through the saw to miter both sides.
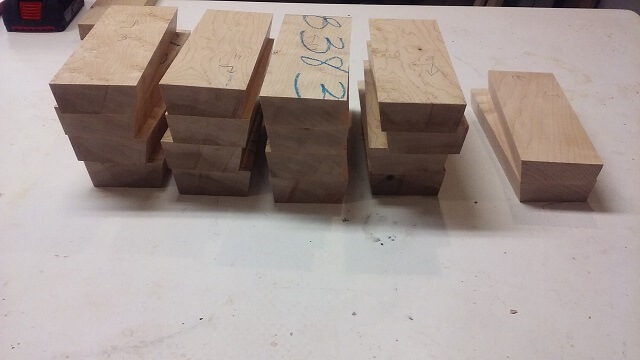
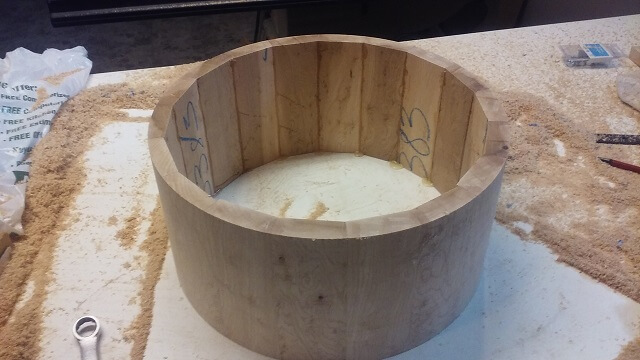
With all of the miters cut, I spent some time arranging the pieces so that they looked best to my eye. This was kind of a stab in the dark as I would be routing away quite a bit of the wood which meant the grain I see now would change. But I did the best I could.
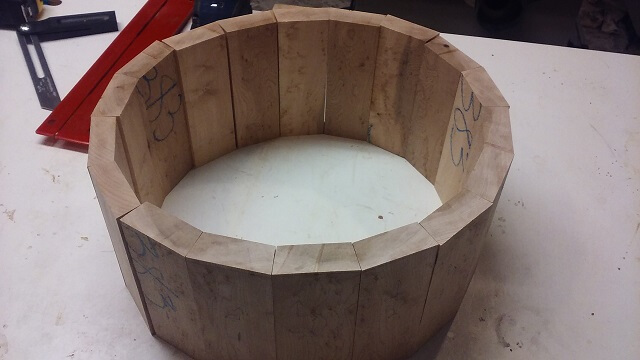
Before slopping glue on everything I put a band clamp on the pieces and practiced the clamping. The band clamp did a pretty good job of keeping everything round. The joints looked tight. A couple of them had minor gaps in the last 1/16" or so of the outside, but that didn't bother me as once it was glued together that portion of the joint would get turned into sawdust anyway. I was more concerned with the middle 3rd of each joint looking tight.
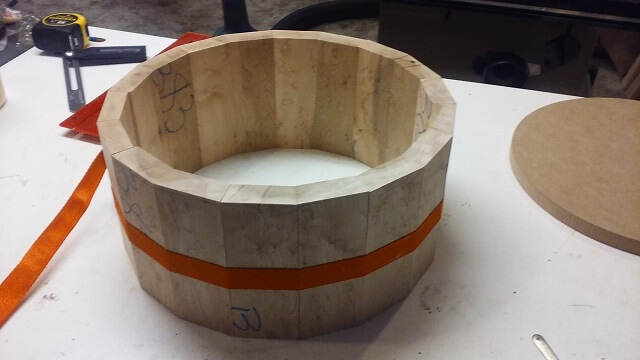
Once I was satisifed that the stave pieces were fitting together the way I wanted, it was time to glue them together. Rather than just pulling everything apart and slopping glue on everything, before I undid the clamp I ran a couple pieces of tape around the perimeter of the drum. Then when I removed the clamp I the tape kept the pieces stuck together in a long strip which made it easy to apply glue to each joint and then roll it back up.
I was probably a bit more liberal with the epoxy than I needed to be. But being my first drum I decided that too much glue would be better than not enough. It would be easy enough to remove the excess squeeze-out afterwards than to try and stick glue into a joint that was starved after the fact. I added a second band clamp for the actual glue-up, and I also put a layer of waxed paper between the staves and my clamps in order to keep from getting the band clamps all messy with dried glue. Or even worse, permenantly attaching the band clamp to the drum shell. The waxed paper also allowed me to align everything without getting glue on my hands and subsequently smearing glue on everything else I would touch.
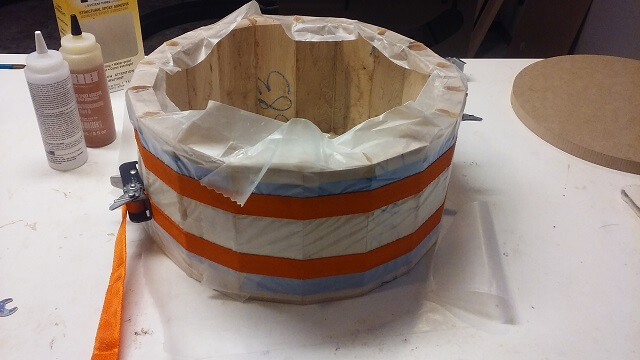
I used slow-set epoxy which cures in 24 hours. I waited about 48 hours, both to ensure the epoxy was dry and because I had other stuff going on and just didn't get back into the shop for a couple days. I peeled off the wax paper, but didn't bother trying to remove the blue tape. The tape was glued to the wood and wasn't going to come off clean, plus router would easily remove the tape.
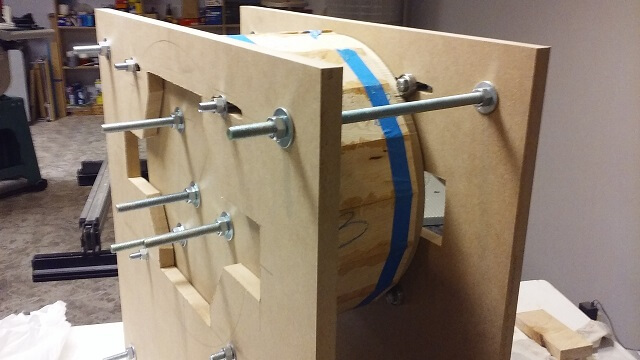
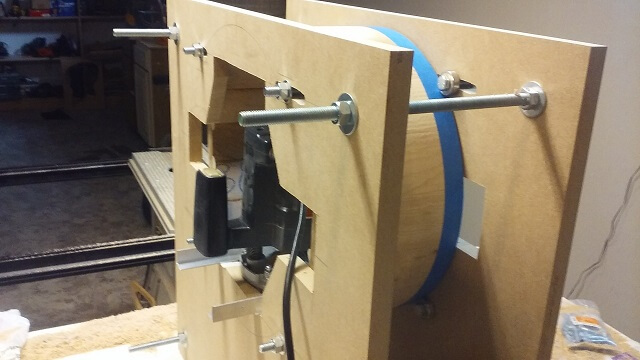
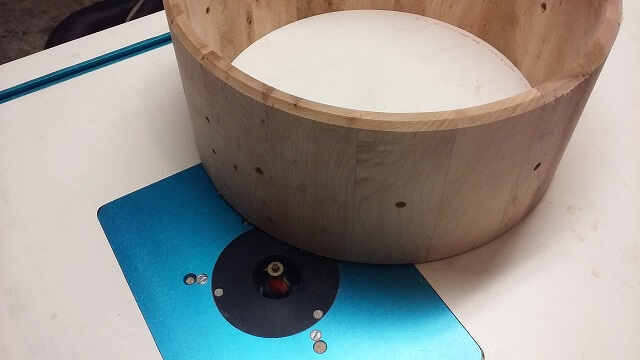
I now had an eighteen sided polygon, which for my fellow nerds is called an octadecagon. But it wasn't round. Drums are round. So I needed to turn this weird shape into a round drum shell. I would start by rounding the outside. This is where the jig I built comes into use. To round the outside of the shell, I clamped the two round pieces I created to the outside of my shell. The round pieces were the exact size of the final drum shell. So once clamped between them all I had to do was remove any of the wood sticking out from the sides.

I then placed this clamped up assembly into the outer sections of the jig. The round MDF templates would ride on the bearings and allow the drum shell to rotate.
My router was then placed on aluminum rails on the top of the jig. With the router running I could shave off any of the wood sticking out from the MDF templates by rotating the assembly on the bearings.
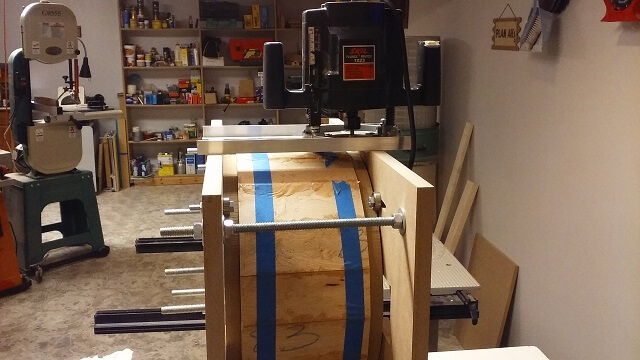
Rather than hogging all of the extra wood off at once, I went very slow only taking about 1/16 of an inch of depth at a time. I would rotate the assembly a full turn, then move the router in slightly and make another full turn. Once I made it across the entire width of the drum I would lower the bit another 1/16" and repeat the process. The amount of wood I removed with each rotation was exceedingly small, but it was necessary to keep the bit from wanting to grab the wood and wreck everything. At first the bit was only taking a little bit off each of the points of the staves. As I progressed I was cutting away more and more wood until eventually the bit was making contact around the entire perimeter of the drum shell.
This took a lot longer than I thought it would. In my mind I figured maybe it would take 15 minutes. In reality it was at least an hour and a half if not longer. I found it was way too easy to get aggressive and have the router jump, creating a gouge. Gouges weren't a problem early in the process when I still had lots more wood to remove, but would be fatal if I allowed them to happen once I was getting close to final depth.
I also didn't anticipate the amount of sawdust this would create. I mean, I expected the process to be messy, but I didn't expect to have a full six inches of wood shavings sitting at my feet. That, plus a couple of inches more that somehow made its way inside my shirt.
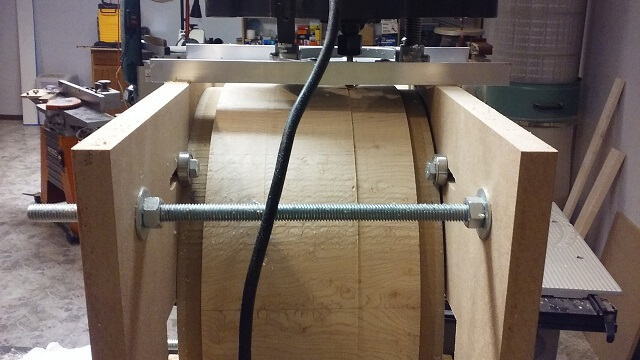
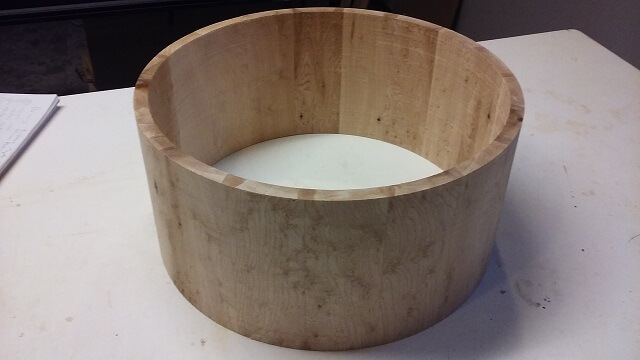
In any event, I eventually had the outside of the drum completely rounted off. It was pretty rough from the router bit, but I expected that. This part of the process was just to hog off the majority of the wood. I would make it smooth and pretty later.
I removed the drum shell from the jig and admired my work. I now had a shell that was round on the outside but still an octadecagon in the middle. I also noticed that the routing had revealed a few defects hiding in the wood that weren't originally visible from either side of the original stock. One of the defects (not visible in this picture) was particularly bad. I was a bit disappointed that this happened until the Tundra Boy saw what I considered was the defective area and said, "That part is the coolest part of the drum. Make sure that part is visible when it's finished." So I didn't feel so bad after that.
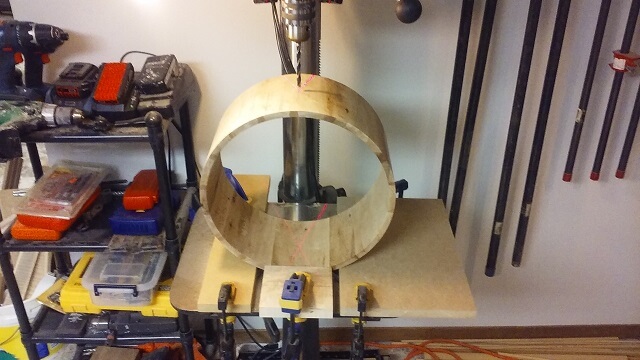
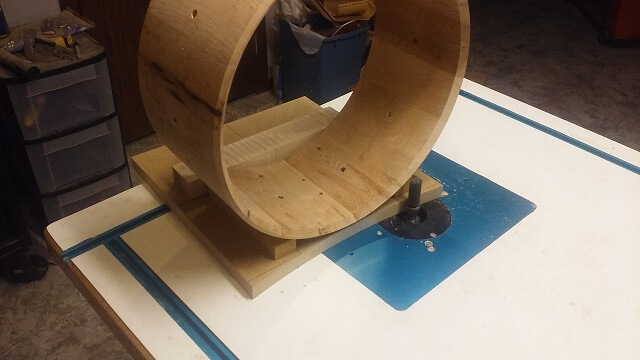
Now it was time to make the inside of the drum round. I used a similar process as before, with a couple minor changes. First, I no longer needed the round MDF templates; the round outside of the drum shell could now ride directly on the bearings (I put a couple layers of tape just to prevent any bearing marks I would later have to sand out.) Second, I moved the router to the inside of the jig. This is why the I cut the big hole in the sides of the jig.
For as long as it took to round the outside of the drum shell, the inside took even longer. The reason for this was because it was a lot more awkward to spin the drum shell by hand without the pieces of rod sticking out for grip. The visibility into the jig was quite obstructed as well, making it difficult to see what I was doing. So it took about three hours to carve the inside of the shell round. I did it in two sessions as my hands and arms got really tired spinning the shell in the jig.
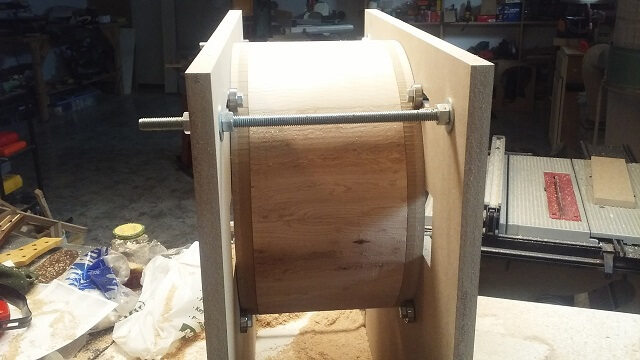
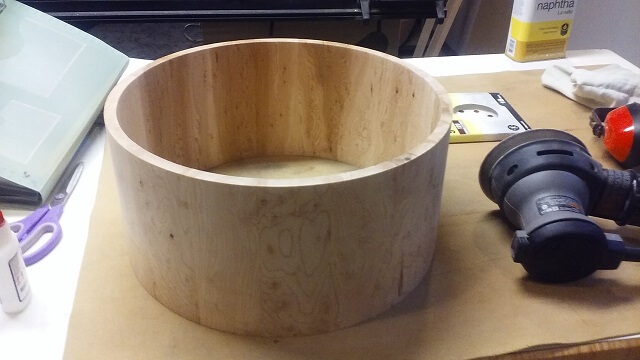
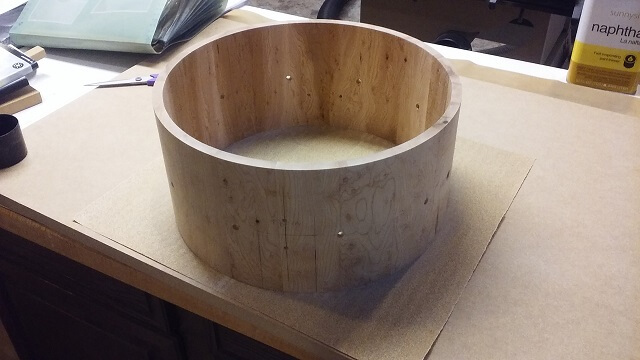
I routed the inside until I had a shell thickness of about 1 cm. Then I removed the drum from the jig. A down side to building drums is figuring out where to store the jigs. They're as big as the drums themselves.
The shell was round, but rough. I proceeded to rectify this problem with my sander. This too took a lot longer than I anticipated as the point of contact is very small when sanding round things versus a large flat area. But after a few hours I had a nice smooth drum shell.
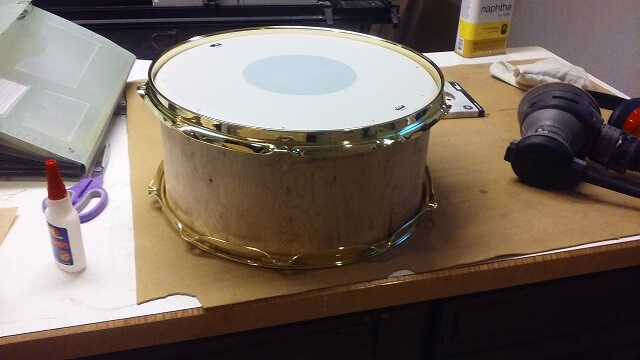
The hardware I ordered had arrived, so I did some test fitting to make sure everything looked like I was on the right track. I also used the hoops to mark the where the lug and throw off screw holes should be mounted.
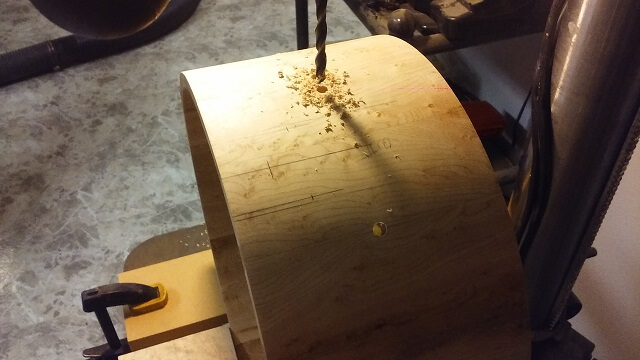
The next challenge was to figure out how to drill a perfectly perpendicular hole in a round drum shell. I could have just eyeballed it but that just seemed too risky. So I'll try to explain how I did it. First, I set the drum shell on its edge and placed a piece of scrap wood on either side so the shell was sitting on the bench and the scrapwood pieces were touching the shell on both sides. Then I removed the shell and measured the distance between the scrapwood pieces. I then clamped those two scrapwood pieces to my drill press table the same distance apart so that the drill bit was perfectly centered between them. At that point I could set the drum shell down on table. The scrap wood would keep the shell from trying to roll away, and the drill bit would be perfectly perpendicular to the shell face.
All of the holes were drilled for the lugs, the throw-off, butt plate and the vent. Different items needed different hole sizes so I had to change bits a few times.
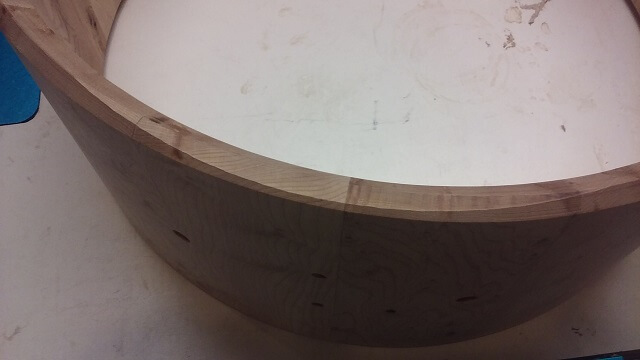
Next up was working on the bearing edges. To make a good sounding drum the skin should make contact all the way around the shell. To ensure this contact, the face of each side of the shell must be true. I took care when gluing up the staves so that all of the pieces were flush, so my faces weren't too bad. But just to be sure I wanted to flatten the faces. Lots of drum builders attach sandpaper to a large piece of glass or a granite surface, but I didn't have either available to me. What I did have was a reasonably flat work bench top to which I clamped a piece of MDF. Probably not microscopically flat, but I figured it was close enough. I glued sandpaper to the MDF. Then I made pencil marks all the way around each side of the bearing edges and rubbed the shell on the sandpaper until the pencil marks disappeared. Probably not perfect, but as my father used to say, "Close enough for government work."
Now it was time to cut the bearing edge profile. There are many different kinds of profiles out there and I'm not going to go into each and every type. I did a lot of research trying to decided and then the Tundra Boy eventually just told me which one he wanted, which is an offset 45 degree profile. More or less a 45 degree edge on each side of the shell, with the point being located closer to the outside than the inside. I started by routing the 45 degree chamfer on the outside of both faces. To avoid chip-out which would be devastating at this point, I slowly raised the router bit and just took off a whisper with each pass. It took about five passes to route the outside profile which is only about 3/16" deep.
Then I pretty much did the same thing again, only on the inside edge of the drum. Because the inside chamfer was deeper, I took about 10 passes this time until I had the edge formed.

Almost done! Or so I thought. I was doing some research and making sure all my bases were covered when I came across something called a "snare bed." Basically, this is a recessed area on the two sides of the bottom bearing edge of the drum where the snare wires pass through. This allows the snare wires to sit tight up against the bottom skin of the drum.
This recessed area isn't deep, usually around 3/16" or 1/8" maximum. However, it's also has to follow a gentle curve from the edges down to the deepest point of the snare bed so that the bottom skin of the drum doesn't get wrinkled as it is tightened. I used a calculator and determined that a 1/8" deep curve that extends out about 3" in each direction works out to roughly a three foot radius. I considered trying to just grab a file and trying to carve that snare bed by hand, but that urge quickly passed.
Instead, I built a jig which I covered on the previous page. This jig has a three foot radus curve on the front that the bearing of a flush cut bit can follow. The jig has blocks attached that help hold the drum shell in the proper place. Then it was a simple matter to run a router bit along the jig edge and carve that gentle curve into the drum bearing. I made sure to center the shell so the deepest part of the cut was in the center of where the snare wires would pass through. Of course, I had to spin the shell around and make a mirror cut on the opposite side for the other end of the snare wires.
The jig worked great. Now I had recessed areas for the snare bed. Unfortunately that also removed parts of my carefully routed bearing edge. So I had to re-form these by hand with a file. I drew some pencil lines as a rough guide and slowly re-shaped the bearing edges through the snare bed.
The construction of the drum shell is complete! Now it is time to apply a finish.
Return To The Main Music Gallery
This page last updated on 07/18/2018