


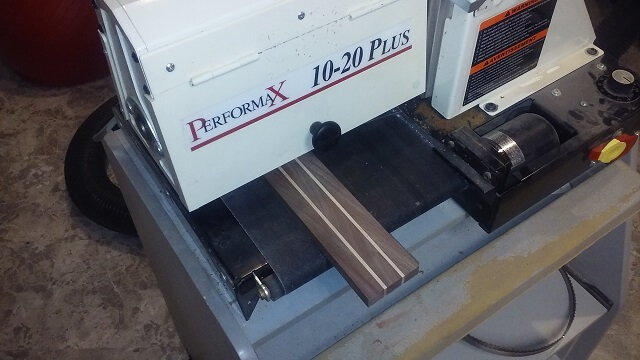
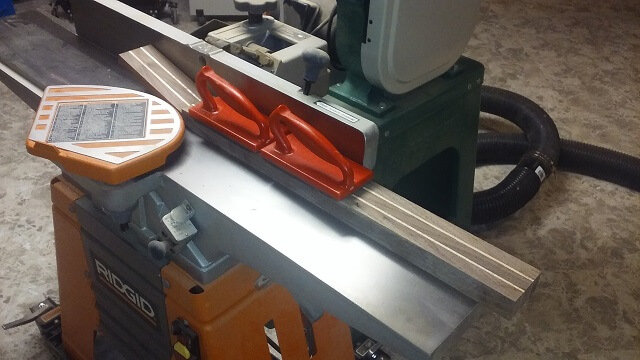
The piece that would become the neck was cut and prepared at the same time I was milling the pieces of the body wood. So this page starts with the approximately 30" long piece of wood that I had surfaced 3 sides (S3S). My plan was to do my typical laminated neck (versus a neck made from a single piece of wood) as I feel that it makes for a stronger and more stable neck. So rather than just forming the neck out of this single piece, I cut it into 3 pieces and turned them on their edge. Once glued back together they should be stronger than the original flat-sawn piece.
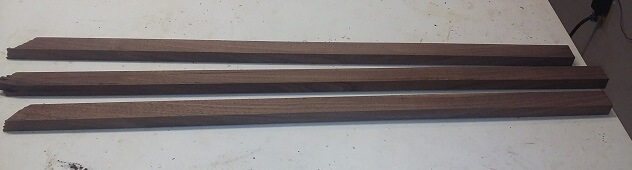
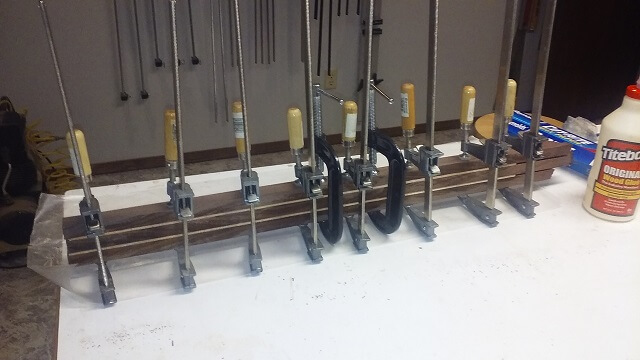
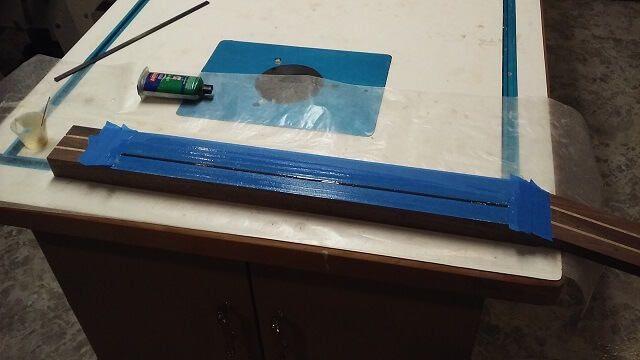
The original piece of wood was .75" thick. The three of them blued together would be 2.25" wide, which is also the exact size of the neck heel I will be using for this instrument. This left no margin for error. I decided to add a couple of strips of 1/8" wide maple to the neck laminations. In addition to giving me an extra 1/4" of width, it also added a nice decorative element and should hypothetically make the neck even stronger.
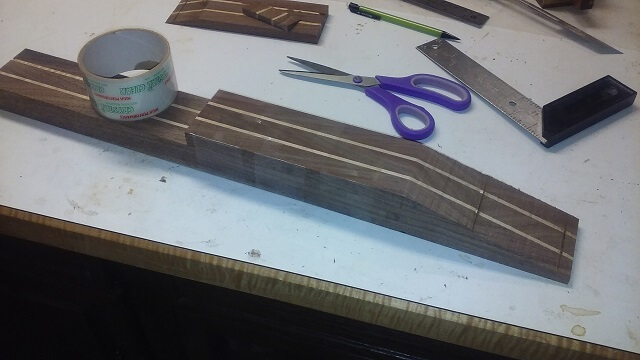
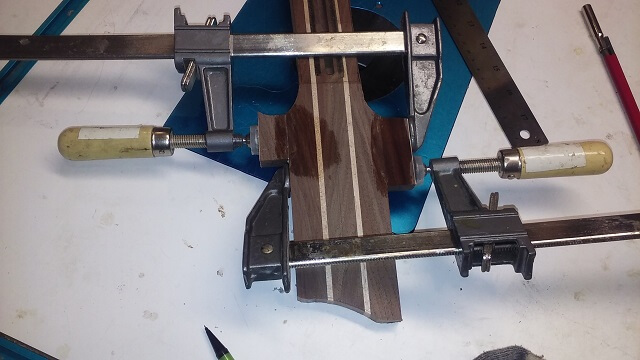
I clamped the five layers of wood together with a liberal layer of glue between each. I wiped off as much excess glue as I could to avoid having to sand it off later when dry. You'll also notice that my strips of maple weren't as long as the pieces of walnut. The wood on those ends of the walnut was a little "iffy" so I had accounted for throwing those pieces away when measuring for the length of the neck blank. I'll cut them off after the glue dries.
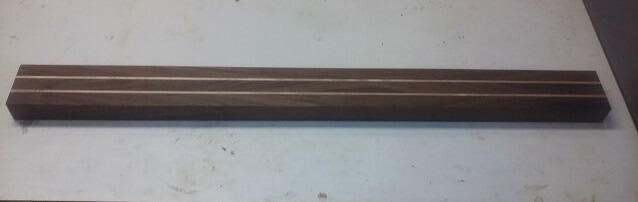
After the glue had dried and I removed the clamps, I ran what will become the fretboard side of the neck blank through the thickness sander. I wasn't yet trying to make the neck face perfectly straight, just attempting to smooth the slight uneven spots where the different layers of laminate didn't line up perfectly.
This instrument will utilize an angled headstock, where the top of the neck tilts back 12 degrees from the face. This will allow for the proper downward string angle over the nut to keep the strings from buzzing. There are a few different methods which are used to provide this string angle. Gibson uses an angled headstock cut out of large single piece of wood. This method produces more waste and is notorious for causing a weak area if the instrument should accidentally fall over (google "Gibson headstock disease"). Fender utilizes a flat recessed headstock cut out of a single piece of wood. This produces less waste than Gibson's method and produces a much stronger neck in the case of accident. However, while I've built instruments with this style headstock, it does have a different look that doesn't always suit a particular guitar.
In this case, I'm using an angled headstock with a scarf joint. Basically, one end of the neck will be cut off at a 12 degree angle. This cut off piece will become the headstock. The cut off piece will then be rotated and glued back onto the neck, creating the tilted headstock. Because the neck blank doesn't have to be extremely thick to account for the entire depth of the neck, this method uses less wood. And because the grain of the headstock is perfectly straight across the nut area it also makes the guitar less likely to become headless should it fall off a stand.
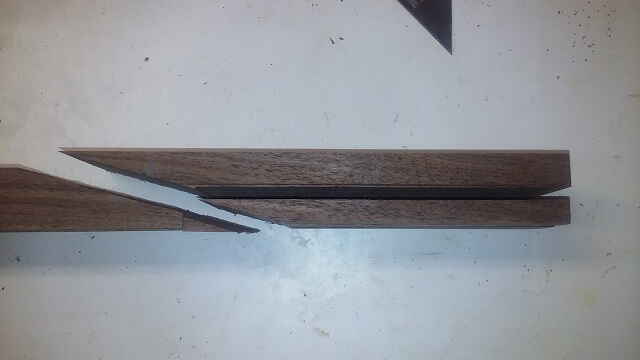
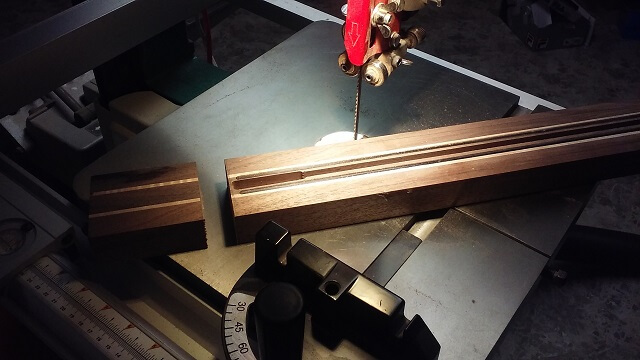
So, I began the scarf joint process by making the cuts. First the end of the neck was cut off at an angle. Then, I trimmed the cut-off piece to give me a 5/8" thick portion that will become the headstock. Here are the pieces sitting next to each other after the cuts. The piece on the lower right will be discarded.
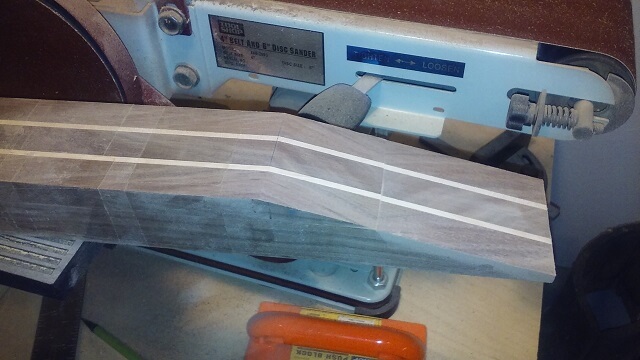
The band saw blade left what will become the face of the headstock rather rough. It was easier to smooth it out now rather than after it got glued to the neck, so I ran it through my belt sander to remove the blade marks.
Here's the trick to a successful scarf joint: the two pieces glued together need to be the exact same angle and perfectly smooth. The band saw blade doesn't leave the surface perfectly smooth, and because I cut the angle by eye there is some variance. So to correct these issues I tape the two pieces together so that the angled areas line up as close as possible. I can then smooth the two pieces at the same time ensuring the angle is perfect.
There are many different ways to smooth the scarf joint pieces. I've found the simplest way is to use my belt sander. I just hold the piece at the correct angle until they become perfectly smooth. I stop on occasion to check my progress, and to run a square across the end to make sure I'm applying even pressure. If the square shows a variance, I can easily sand a bit more and adjust the pressure to get it perfect. The smoothing process takes less than five minutes which is much faster than the other methods with which I've experimented.
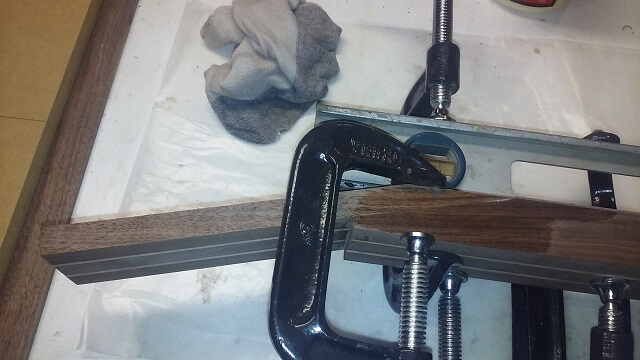
With the two pieces smooth and at the same angle, I could now glue them together to form the angled headstock. Because of the angle this can be a tricky joint to clamp. Some guitars fight me more than others. This one went very smooth, which was nice.
To assist with clamping my scarf joints I use an old aluminum level that once belonged to my wife's grandfather. The float-portion of the level itself isn't real accurate, but the edge of the level is straight and strong so I keep the old tool around specifically for gluing scarf joints. Plus it reminds me of Dempsey (my wife's grandfather) every time I use it.
The aluminum level gets clamped to the face of the neck. I can then apply glue to the joint and press the headstock into place. The level keeps the headstock from sliding too far down towards the heel end of the neck. I place the neck sideways on my flat workbench to make sure the headstock piece is on the same plane as the side of the neck. I then wait just a couple of minutes for the glue to start to tack up, which helps keep the two pieces from wanting to slide around while I'm applying the remaining clamps. Then I just wipe off the excess glue with a wet rag and let it all dry.
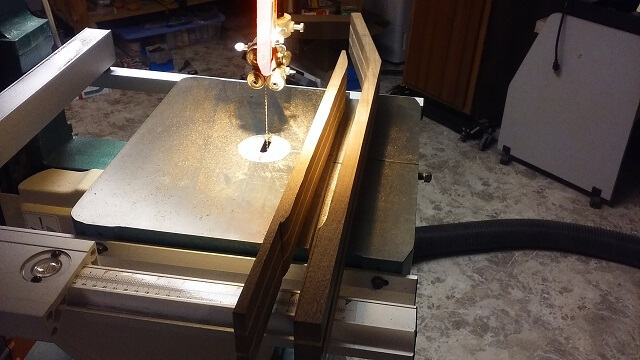
After the scarf joint glue has dried, I remove the clamps. At this point we can joint the face of the neck perfectly straight. I like to do this after I glue the scarf joint in place so that any slight irregularities from the gluing process will be smoothed out. Also, I've learned the hard way that I need to joint from the headstock end towards the heel. Going the other direction can cause a big chunk of wood to get ripped out when the blades hit the glue joint. Kind of like if you pet a porcupine in one direction you're fine, but if you go against the quills you're going to have a bad day.
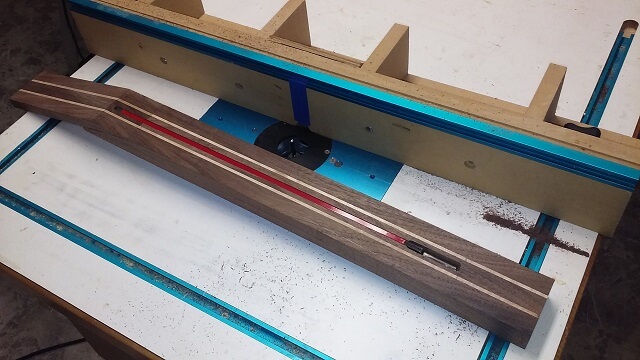
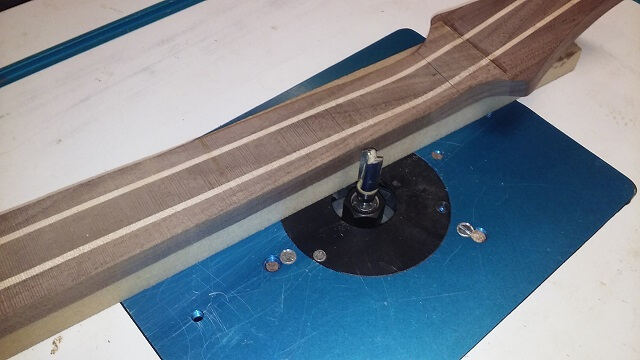
Next I decided to route the channel for the truss rod. This step is a lot easier to do while the sides of the neck are still straight. I took some time making sure the fence was in the exact right place to cut the channel in the center of the blank. Truth be told, if it was off by a couple millimeters it probably wouldn't be the end of the world as it's going to get covered by the fretboard and would still function just fine. But I sleep better at night knowing that underneath it's perfect.
Also, due to a couple of mishaps I've had in the past where my router collet slipped and the bit blew through the back and ruined some necks, I took a couple extra precautions. First, I tightened the snot out of the collet. I've had it slip on multiple routers, so maybe it's the bit? It was a spendy Bosch bit so I hate to just throw it away. Making sure the collet is extra tight seems to help. Second, I routed the channel in multiple passes slowly increasing the depth by maybe a millimeter at a time. It's slower, but the router seems to be happier versus trying to cut at full depth in one pass.
This particular truss rod I'm using is a two-way adjustable that needs a larger route on the adjustment end. After I cut the main part of the channel I went back and widened this area enough so that the rod would slip into place. Because of the larger area needed for the adjusment side, this style rod works better with a heel oriented adjustment where there's more wood surrounding the larger routed area. Doing a headstock oriented adjustment would have weakened the neck/headstock area and undid some of the efforts I did with the scarf joint attempting to prevent the Gibson Headstock Disease.
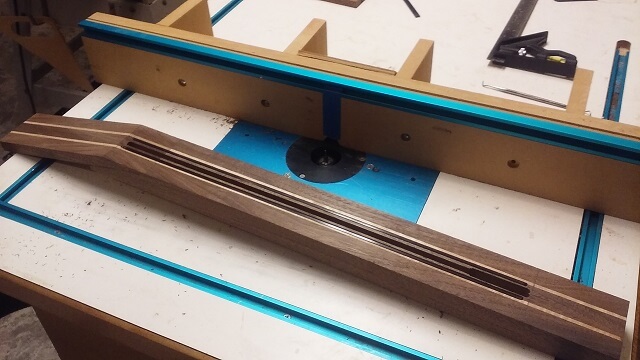
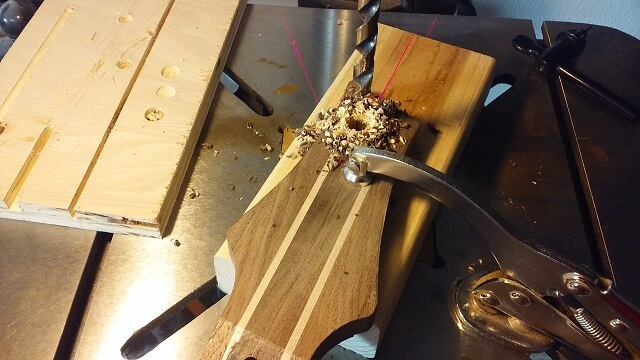
With the truss rod channel routed, I needed to route two more channels in the face of the neck for the carbon fiber reinforcement rods. Ounce per ounce, carbon fiber is about 10 times stronger than steel, and is especially rigid . Starting back with my 6th instrument, I have embedded carbon fiber rods in every neck I make. I figure it is cheap insurance to help keep the neck straight. There's also evidence that carbon fiber rods help eliminate "dead spots" in necks, although this may or may not be true. It certainly doesn't hurt to add them though. Plus it's one of those custom touches my instruments feature that you can't get from the big manufacturers.
The carbon fiber strips I'm using are 1/8" thick by 3/8" tall, and will be embedded edge-wise to take advantage of the greater rigidity of the strips in that direction. So the channels I routed needed to be a hair bigger than that size to allow the rods to slide into them without unnecessary force. A 1/8" router bit is pretty small and not very strong, so I made a whole bunch of passes, only removing about 1/32" of wood each time. It was kind of slow taking that little bit of wood off each time. In the past I've routed the channels using only 2 or 3 passes, but you could hear the bit howling and I even broke one once. After trying to take that much wood out at once the bit was black from being overheated. So I've found the slow and steady approach worked better. The Tundra Boy was practicing his drums in the next room, so it gave me something to listen to while I was slowly removing little bits of wood.
Placing the channels is a bit of a trick. I want them as close to the center of the neck as possible so that they're in the thickest part of the neck and I don't risk exposing the bottoms of the channel when I'm carving the neck. At the same time, I don't want them too close to the center so that the channels meet the channel for the truss rod, especially at the wider adjustment part of the truss rod route. In the end I got the channels about 1/16" from the widest part of the center route.
I cut some carbon fiber strips just a breath short of 18" long to fit inside the 18" long channels I'd routed. Test fitment showed one of the channels just a touch narrow, and the other just a touch shallow. I still had the bit chucked in the router and the fence in place, so I was able to make some small adjustments and make the channels respectively larger for a perfect fit.
Gluing the strips in place can turn into a mess in a hurry. The glue squeezes out and starts to go everywhere you don't want it to. Pretty soon you have glue that's dripped into the truss rod channel, glue all over the perfectly jointed face of the neck, glue on your gloves that is now smearing on everything you touch and frustration in yourself for not being more careful. How do I know all of this? I'll let you guess.
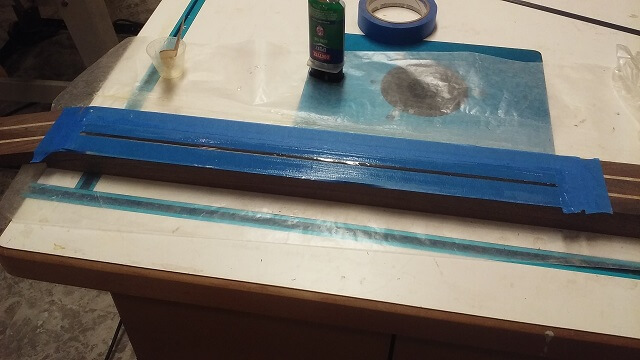
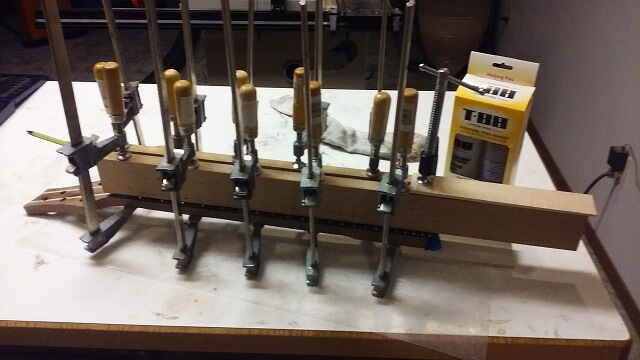
So as much as I'd like to glue both rods in place at the same time and be done with it, I've found once again that the slow and steady approach works better. I taped off the entire face of the neck except for one of the channels. I then mixed up some epoxy (not the cheap 5 minute stuff) and poured it into the channel. I took the tongue depresser I'd used to stir the epoxy and smeared the glue all throughout the channel until I was satisfied that it was covering every surface. Then I pressed the rod down in place making sure it was sitting flat across the whole length.
This caused a lot of the glue to squeeze out, but that was OK because it was only getting on the masking tape. I spent some time with the tongue depresser removing excess glue and smoothing the epoxy out over the top of the carbon fiber rod. Once it was all smooth, I then removed the tape before the epoxy started to set up. When it cures I'll have just a little bit of hardened epoxy (the height of the masking tape) sitting proud of the neck face. This will be very easy to remove with a scraper. And the rest of the neck won't have a bit of dried epoxy on it that I have to deal with. Now I just had to keep the cat out of the shop until the epoxy cures.
The next evening I repeated the process for the other rod.
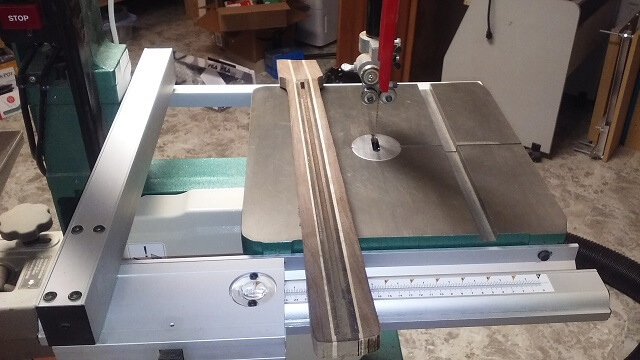
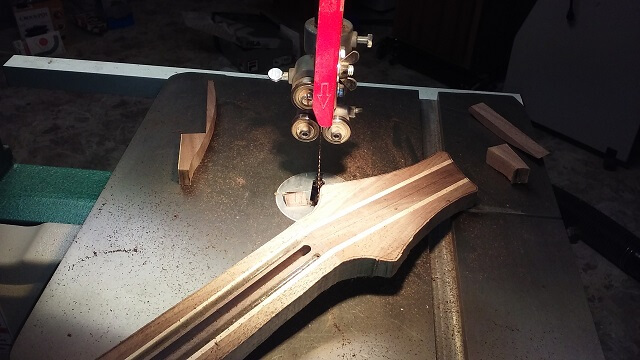
After the epoxy had cured for 24 hours I was able to resume work. Now it was time to get the neck close to its final shape. Most of that work will be finished with a router and templates. However, I don't like to use a router to trim off any more than about 1/16" of material. It's hard on the bit and just too great of a chance for tear out. Tear out can ruin a lot of work in the blink of an eye, not to mention if the bit grabs the wood hard enough it could also ruin your hand. So I start my neck shaping at the band saw, where I cut 1/16" or less from my marked lines. Great care is taken not to cut into the line, though, as it's a lot easier to remove wood than put it back.
I started by trimming the end of the neck to length. I never know what to do with the chunks of laminated neck I always have left over after this step. It seems too nice just to throw in the scrap bucket, but not really big enough to be useful.
I then turned the neck on its side and trimmed the back to thickness.
Next, I tapered both sides of the neck. I also rounded out the neck heel a bit just to get those corners as close to the line as I could. Those corners of the neck are spots where the router bit loves to grab the wood and ruin your day.
My headstock shape is about 1/2" wider than the base of the neck. When I make a neck blank I need to add some width to the "ears" of the headstock. I could have just made a wider neck blank but that seems like an awful lot of wood to be scrapped for the little bit of width needed in this one area. I cut off the scrap end of the headstock, then used those pieces to glue the ears on in the correct spot. As a bonus, by using the scrap end of the headstock the pieces are already the exact thickness I needed.
After the glue had dried I removed the clamps from the headstock and drew the outline of the headstock shape using my headstock template as a guide. Then I went over to the band saw and cut out the shape. As I do much of the time when cutting at the band saw, I wasn't looking to get it exact. I tried to get close to my line but not right on it. At this point I'm just looking to rough out the shape, not get it perfect.
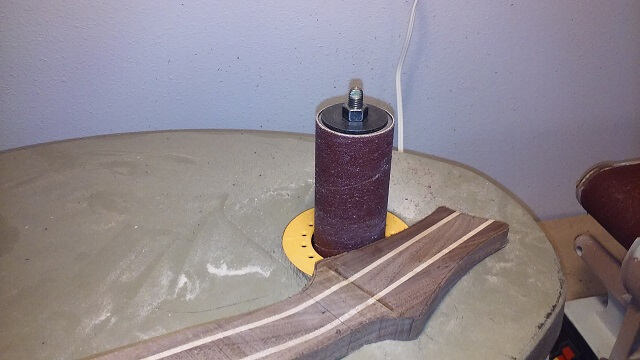
With the bulk of the wood removed at the band saw, now is the time to get it perfect. One common method (and one that I used to use) is to tape the headstock template to the headstock and then use a flush trim bit on the router to copy the template shape exactly. I found that using this method the router bit really likes to tear out chunks of the headstock wood, especially around the top. I've messed up enough necks that I've given up on this method.
Instead, I use my oscillating spindle sander (OSS) to sand the headstock shape up to the line. This method leaves a nice smooth surface and has no risk of tear out. Now that I've done it a few times my skill has increased so that the final shape nearly dead-on with the template, the difference not discernable by eye and only noticeable by calipers. As a bonus, I've found that it doesn't take any more time than the router once you calculate all the prep time of attaching the template and getting the bit chucked up in the router. My OSS is sitting there ready to go so there's hardly any set-up time required.
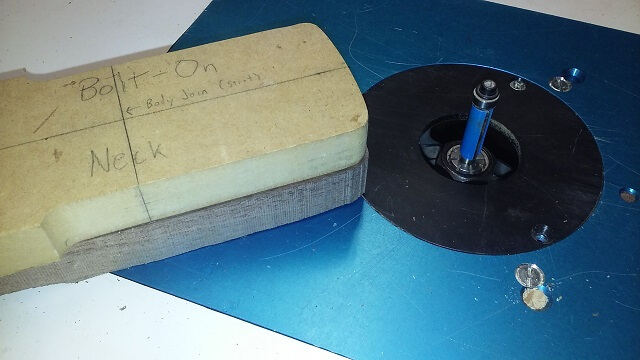
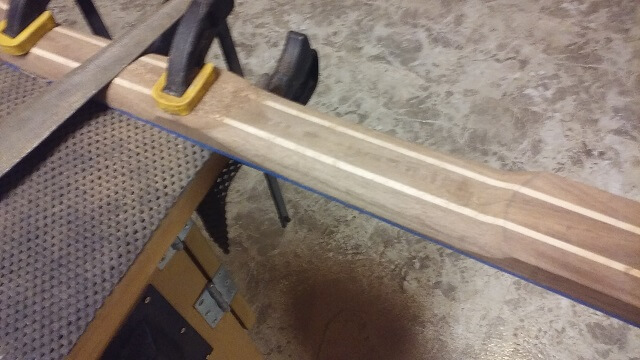
This isn't to say I've abandoned the router completely for flush trimming. The next two steps would be very difficult to do without a router. The first is forming the neck heel. I want the bottom of the neck to be the exact size of the neck template, as this template fits perfectly into the matching template for the pocket that will get routed on the body. So, my neck heel template and a flush trim bit are used to duplicate the shape. I just had to shave a little bit of wood off with each pass until the piece was finally flush. Trying to take the whole amount of wood at once is a recipe for disaster, especially around the corners of the heel. How do I know this? More than once I've searched the floor of the shop for the chunk of wood the router grabbed and flung across the room, hoping that once I it's found there's enough left that I can glue it back in place and hide my mistake. Thankfully, that didn't happen this time.
Another spot where flush trim bits work well are with long, straight sections like the sides of a neck. Trying to sand them perfectly straight would be almost impossible. It's pretty easy to sand a curved section, but a huge challenge to sand a perfectly straight area. I hear the same thing from people who do bodywork on cars: curved areas are easy, straight areas are hair-pulling.
In this case, I want the sides of the neck from the nut down to the heel to be arrow straight. So I taped a piece of MDF that had one edge jointed perfectly straight to my neck, and then ran that side of the neck along the flush trim router bit. Then I popped the template off, and taped it back on to do the reverse side. Because were not dealing with end grain, tear-out was less of a risk. However, I still took my time and inched up on the final cut. I figure it's cheap insurance. When the instrument is done and doesn't have a repaired section on the side of the neck (or worse yet, a ruined neck in the trash can) I won't remember that it took me 5 minutes longer to make multiple passes.
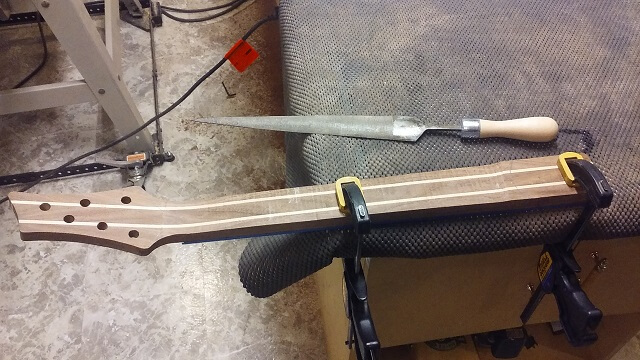
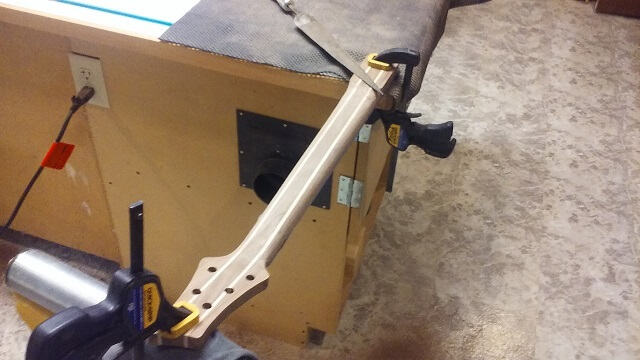
Next I drilled the holes for the tuning keys. I used a piece of scrap wood as a backing block to prevent the back side of the headstock from chipping out as the drill bit exited the wood. In addition, this backing block had to be rather thick to accommodate the angled headstock, otherwise the back of the neck would hit the edge of the drill press table and not allow the headstock to sit flat and cause the tuning hole to be drilled at an angle.
Now it was time to join two sub-assemblies and glue the fretboard to the neck. The construction of the fretboard is covered in detail over on the dedicated page for that piece.
I began by preparing the neck. I put a few small squeezes of silicone caulk in the truss rod channel at the top, bottom and middle just to keep the rod from rattling if it doesn't have any tension on it. Then I pressed the rod into place.
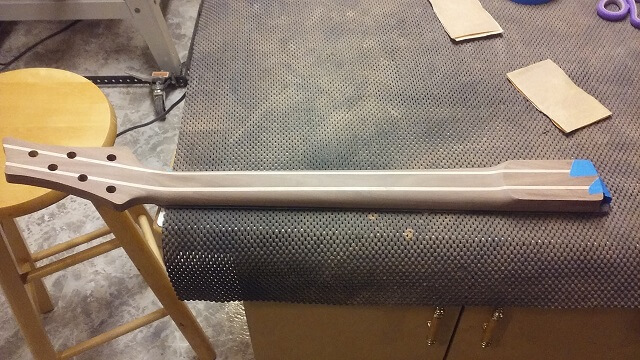
Because the fretboard has been finish sanded, I didn't want any glue squeeze-out to spoil my work. So I carefully ran some blue painter's tape around the edge of the fretboard. Then I did the same around the neck. The idea was that once the fretboard was clamped in place and the glue squeezed out of the joint, I could scrape the majority of the glue off using a popsicle stick, then peel the tape off to get rid of most of the rest of the excess. This should save quite a bit of sanding later.
I didn't want to squeeze clamps down directly on my sanded fingerboard, so I used a couple of cauls. These cauls had one side jointed completely straight, so that will aid in keeping the neck straight as the glue set. As I've mentioned in other build threads, I use epoxy to glue fretboards to the neck. I've found the moisture in wood glue induces a back-bow to the neck whereas epoxy isn't water based so it doesn't cause this issue.
Then it was time to apply the glue and clamp everything up. I'm glad I used slow set epoxy which gave me plenty of open time before the glue started to set, as this was a tricky glue-up. The epoxy made the fretboard want to slide around quite a bit as the clamps were applied, so I had to go slow and keep moving the fretboard into correct position as I gradually increased pressure on the clamps. After a few minutes I had everything in the right place and I was able to crank all of the clamps as tight as my hands could get them.
As expected, the excess glue came oozing out of the joint. This isn't a bad thing as if you get a solid line of squeeze-out all along the join it means that the glue was spread evenly and there aren't any glue-starved areas that would weaken the neck. I used my popsicle stick that I initially used to stir my two-part epoxy to scrape off most of the dripping glue. Then I carefully peeled the tape off of the neck. There were a couple spots where I accidentally clamped the tape to the neck so in those areas I had to rip the tape around the clamps, but that shouldn't cause any problems.
The next evening after I got home from work I removed the clamps and inspected everything. It looked good and the epoxy was curing properly. This was a bit of a worry. I've had issues in the past with epoxy not wanting to cure properly. Sometimes it would get stiff, but still be noticeably soft and still feel a bit tacky to the touch.
Two part epoxy seems to be sensitive to two things: mix ratios and temperature. Most brands of epoxy adjust their product to need a 50/50 ratio of resin to hardener. Some will give you more wiggle room so it's not the end of the world if you're off a little bit, but other brands are quite sensitive. If the mix ratio is off it's better to use too little hardener than too much. Counter-intuitively, too much hardener will make the epoxy soft.
Temperature is also a factor in how well an epoxy cures. Epoxy cures in heat. Once mixed, you can tell when epoxy starts to set because it will get hot very quickly (they call this point at which the epoxy heats up "kicking".) Hot enough that it caused me to drop the cup I was using to mix it. However, a cold environment will lower the temp that the epoxy reaches and will slow or even stop the cure process. Some brands are more sensitive to the cold than others. My shop usually stays about 65 degrees year round, which is just on the bottom edge of what most manufacturers recommend. 73 degrees is ideal.
As I mentioned over on the fretboard page, none of the hardware stores where I purchased epoxy in the past carry the slow set kind any longer, just the "5 minute" versions. Five minute epoxy isn't as strong as the slow set glue. So I had to order some online. To make it worth the cost of shipping I ordered a pint of System 3 T-88, which should last me a long, long time. The only thing I wasn't sure about was how well this brand worked. The reviews I read were positive, but until you get some experience with a product it's hard to know for sure. Just to be sure, I carefully measured my mix ratios to get a 50/50 blend by volume.
Gluing the fingerboard to the neck was the second time I used this epoxy (the first time was when I glued the inlays into the fretboard.) I was pleased to discover that both times the epoxy set up nice and hard within the advertised 24 hour window. Whew! Looks like the reviews on the new stuff were accurate and not written by some Russian bot trying to get me to buy the product.
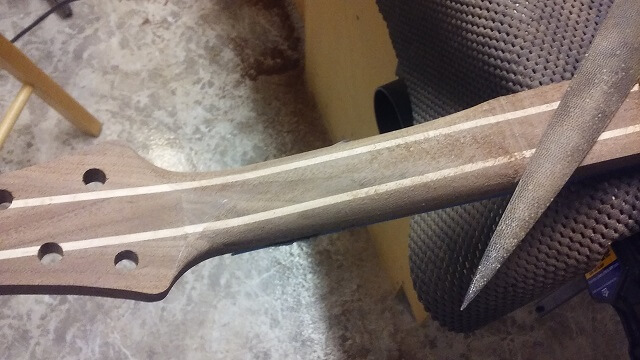
Even though the epoxy was hard enough, I had other things on my plate that evening so after I put all the clamps away I didn't do anything further with the neck the rest of the night. I returned the following night to continue with the project. The next step was to carve the back of the neck. To begin, I put some blue painters tape over the sanded fretboard to protect it. Then I clamped one end to my workbench and got out my Dragon rasp.
My process is to start on one end of the neck (usually the nut end simply out of habit). I roughed out the carve in that area, along with the transition from the curved neck to the flat headstock.
Then I flipped the neck around in the clamps and repeated the process for the heel end.
With both ends rough carved, it was time to finish carving out the middle, and then work to make the carve even across the entire back of the neck. I clamped the heel of the neck to the workbench, and the headstock to a roller stand. This was a little wobbly (which is why I didn't clamp the piece this way from the get-go) but I solved that by putting one foot on the roller stand to reduce its tendency to wander.
After about an hour of carving I had the neck profile looking pretty good. The Dragon rasp leaves the surface pretty rough, although not as rough as the Surform tool I used to carve necks! The Surform was like using a cheese grater on wood. In any event, the rasp is just used to form the shape. Now I had to smooth everything out with sandpaper. So another hour and some sore arms later I had the back of the neck looking pretty darn good.
So the actual construction of the neck is now finished. Now it was time to start final sanding everything smooth and begin the finishing process.
Return To The Main Music Gallery
This page last updated on 06/28/2018