


With the construction of the various parts of the guitar complete, now comes the less exciting portion of building guitars: applying the finish. Finishing a guitar takes just as much time as (if not more than) the construction, but encompasses just a fraction of the fun. It's dull. It's tedious. It often seems like it will never end. However if you persevere it will be what makes the guitar stand out from all the rest.
Everyone's seen the guitar made in his basement by "that guy". It looks like a guitar made in his basement. I would propose that the difference between "that guy's" guitars and the professionals are mostly due to the finish. Cutting corners on the finishing process will make the guitar look like "that guy" made it. Conversely, taking the time to do it right can make an instrument look so good that nobody will believe you built it in the basement.
Doug liked the idea of a mirror shine gloss on the body of the guitar, so I was going to use nitrocellulose lacquer to accomplish that. However, he liked the idea of a satin finish on the neck. This isn't an unusual combination. Most Fender guitars have a gloss body with a satin neck. While I like the look of a gloss neck, the satin finish does feel a bit better when playing the guitar. So in order to accomplish the satin finish on the neck I'm going to use my own custom blend of satin wiping polyurethane.
But before any finish can be applied, the piece has to be sanded. Then checked for any imperfections and sanded again. Then after no more imperfections are found I sand it yet again because they're always lurking even when you don't see them. Then after I apply the finish and assemble the guitar I usually find one or two more that I still managed to miss. Arrrgh!
This guitar is made from maple, walnut and ebony. Maple is considered a "closed grain" wood, which means it has very small pores, to the point where they're so small you really can't see them. Walnut is an "open grained" wood. Because of this, in order to get a glass smooth finish the pores of the walnut need to be filled with something. By the way, ebony is also an open grained wood, but because it's on the fretboard it won't need any finish applied so I don't have to worry about dealing with the pores.
Within the tedious finishing process, pore filling ranks highest (or would it be lowest?) on the tedious scale. It is not much fun. I've ranted about my various unsatisfactory experiments with different pore filling methods on my other guitar pages, so I'll save you the re-run. However I will reiterate one of my favorite quotes from Bob Taylor: "We should find the guy who decided that guitars should have their grain filled, dig him up and shoot him again."
So why do I grain fill? Because when done properly it looks soooo good. "That guy" above probably didn't grain fill his guitar, so it looks like he bought the wood at Menards. There's nothing wrong with buying wood at Menards, you just don't want the guitar to look like you did. Grain filling goes a long way towards that endeavor.
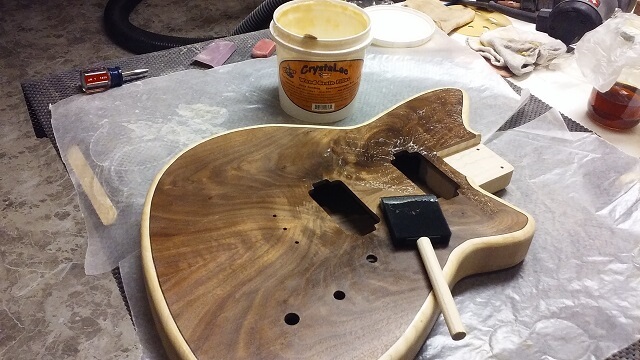
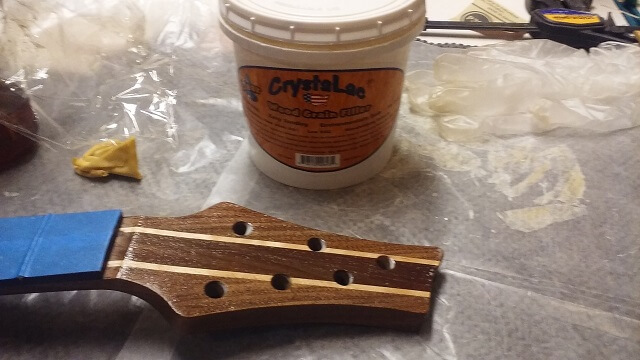
For this guitar, I'm going to go back to my tub of Crystalac I bought years ago. As mentioned, I've yet to find a grain filling method I'm 100% satisfied with. The Crystalac works. My main complaints I have is that it takes multiple applications until the grain is filled, it gums up sandpaper and when I've used it in the past it took some of the color out of the wood (which was my main complaint.)
Well, in my experimentations I think I have solved the color issue. Previously I would apply the Crystalac over bare wood. One of the selling points promoted by the Crystalac product is that it dries crystal clear. Unfortunately, crystal clear isn't always what we want when we finish wood. To my eye, wood looks better when a finish imparts an amber hue to the wood, which brings out warmth and character. When I'd used Crystalac in the past over bare wood it provided a clear layer over the top of the wood. This layer then prevented the top layers of finish from soaking into the wood fibers and bringing out the rich color.
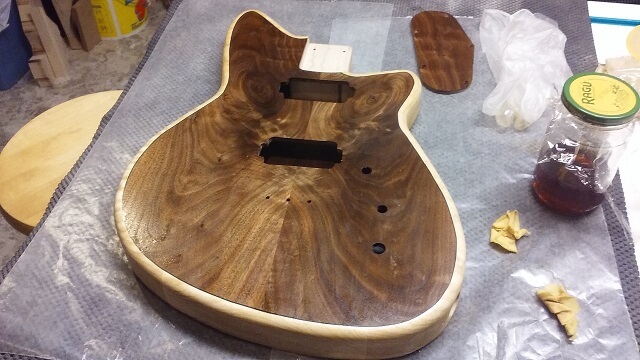
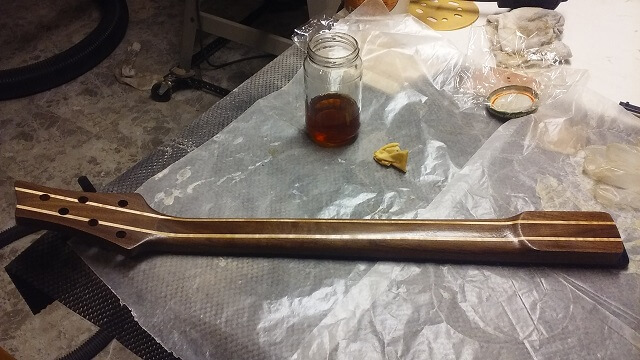
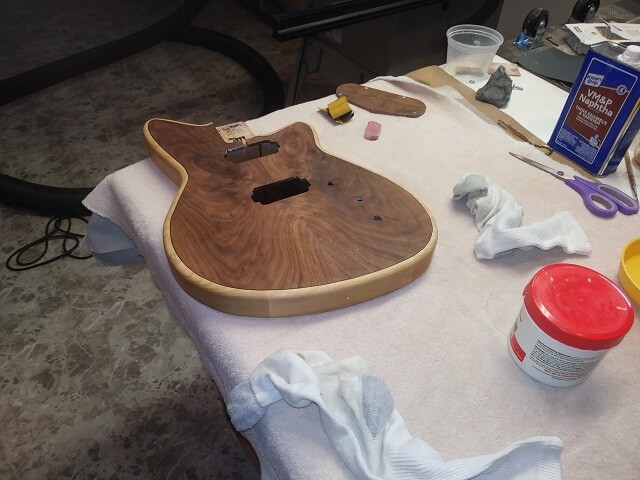
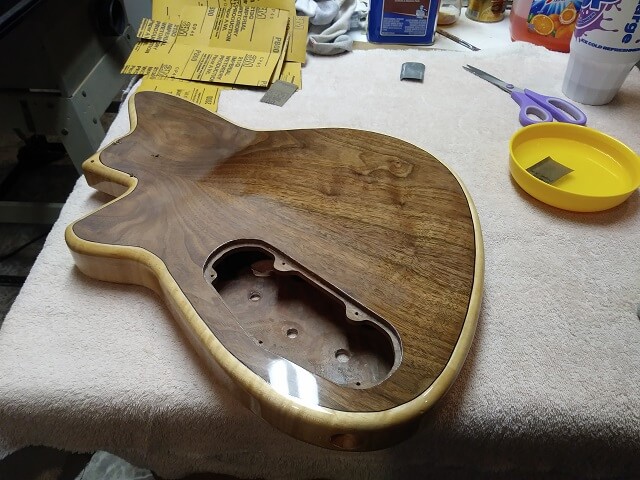
So to solve this, I first started with a layer of shellac as my base layer before the Crystalac. I applied three coats using a rag. This layer of shellac soaked into the wood and brought out the color I was looking for. Then when the clear grain filler gets worked into the pores of the walnut, this shellac will be underneath to provide the color.
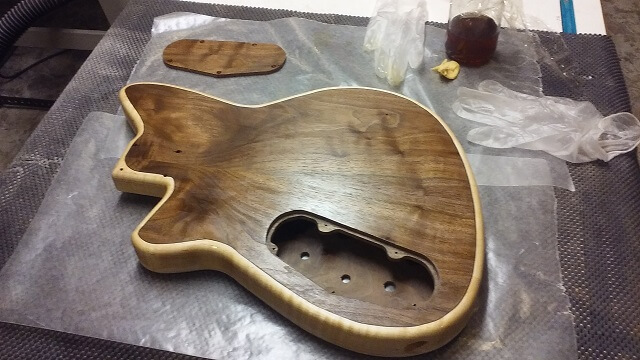
I applied shellac to both sides of the body.
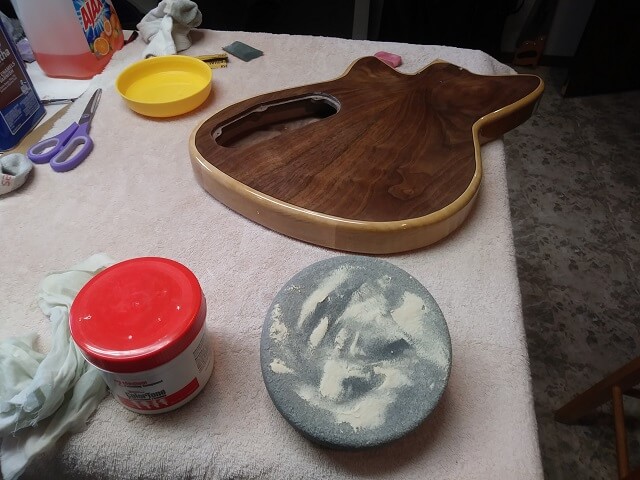
Now it was time to use the Crystalac. The process itself is pretty simple: spread the grain filler onto the wood. Work it into the pores. Remove the excess from the surface leaving the filler only in the pores. After dry, sand the surface smooth. Well, that's what the instructions on the plastic tub say, anyway.
In actuality it's a bit more difficult than that. Removing the excess filler from the surface without pulling it out of the pores is tricky. Leaving excess filler on the surface will have you sanding the dried filler off the top of the body for hours. So it turns into a bit of an art to leave enough filler on the body to stay in the pores, but not so much that sanding is more of a chore than it already is going to be.
My experience is that it usually takes about three cycles of applying grain filler and sanding smooth until all of the pores are filled. Most pores will be filled after the second cycle, but there are enough little ones left here and there that a third will be necessary. Sometimes even a fourth.
After application, the grain filler takes about a day to dry hard enough to sand. So it's time consuming. Add to that fact that it's hard to fill two sides of a body at the same time, so I generally only work on the front or back until that side is done, then flip the instrument over and start filling the opposite side.
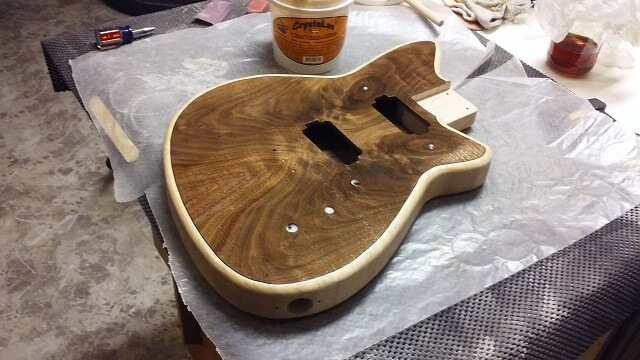
Once the grain on the body was filled I spent more time sanding with 320 grit. There were some spots where I had a little filler dribble down over the radiused edge of the guitar, so that had to be sanded off.
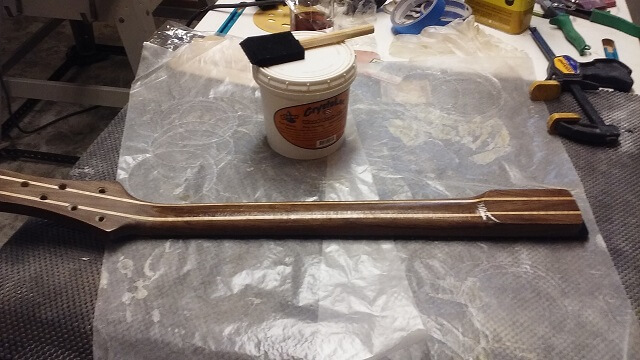
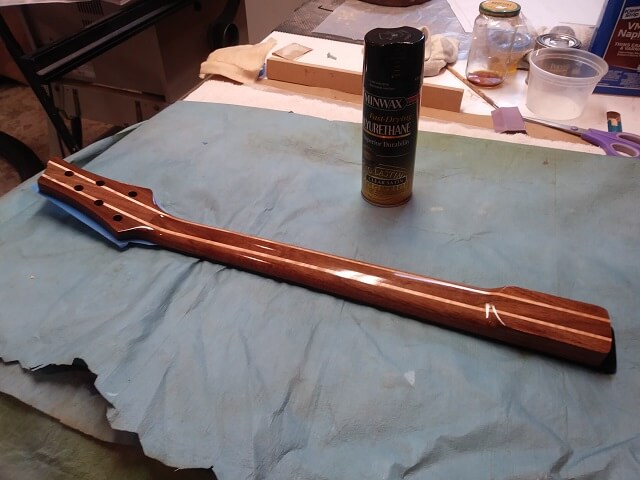
After the body was done, I started working on the neck. It began again with lots of prep sanding to make sure everything was perfect, then the application of the shellac base.
Then back to applying the Crystalac and sanding it off over and over until the pores were filled.
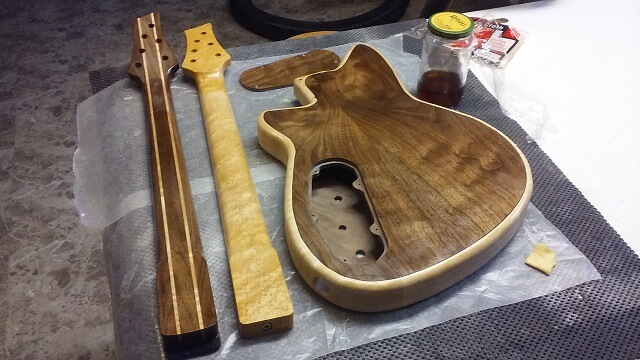
Once I had all of the grain filled on both the body and neck, I gave everything another good coat of shellac as a sealer before the finish coats of lacquer. Ignore the telecaster neck sitting there in the picture: it also needed a coat of shellac and as long as I was applying shellac to the other pieces I tackled it at the same time.
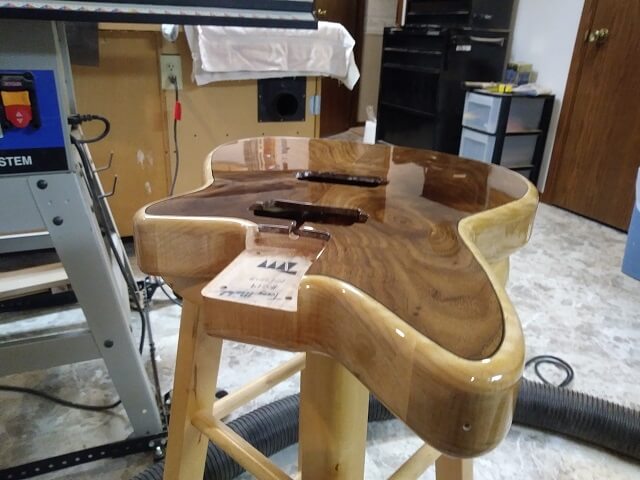
For the neck, Doug wanted a smooth satin finish. I really like the feel of satin poly on necks, so that was the route for which I opted. Usually I use my custom mix of wiping poly, but this time around I decided to try spraying. I found that the poly came out of the can rather fast, so the best results came when I sprayed a super quick pass which left a light coat. I'd let that coat dry for a while (like overnight) and scuff sand it to knock down the rough spots and then repeat.
It took quite a few coats, and because I was waiting until the next day between coats, subsequently took quite a few days. The good news is I was able to spray indoors so I wasn't subject to the whims of the weather. Eventually I reached a point where I was quite happy with the finish.
By the way, in the picture below I had just sprayed the poly so it was still wet. Once dry it was noticeably less shiny.
The body was going to get clear gloss nitrocellulose lacquer. You definitely don't want to spray that indoors. I don't even like spraying it in my garage. It is extremely toxic stuff, so I make sure to wear a respirator. I don't have that many brain cells to begin with, so I need to preserve all that I can.
Because I was spraying outside, I had to wait for the right weather. Obviously rain was a deal breaker. So was extreme wind. And humidity. Up to this point I had always tried to wait for days in the 70-80 degree range. Unfortunately that leaves me an extremely small window. I had the body ready for finish in August, but the temps and weather didn't get agreeable until mid September. Finally a day came when both the weather and my schedule aligned and I was ready to spray.
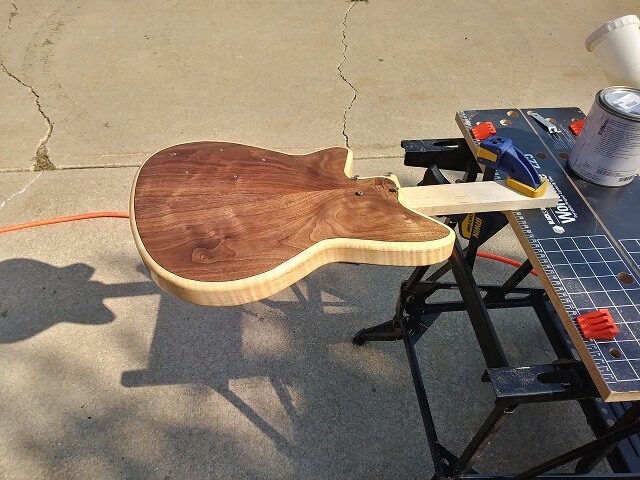
To support the body while I was spraying I screwed a piece of scrap wood into the neck holes. This allowed me to clamp the body horizontally, which aided in reducing runs if I were to get a little heavy handed with the coats. I clamped that scrap wood to my WorkMate and placed it out in the garage. I mixed up my lacquer and got everything ready. Here we go!
And then it came to an abrupt halt. It was at this time my spray gun decided it was done being a spray gun, and instead poured a huge pool of finish on the guitar which unevenly ran across the top and down the sides. Ugh! This set me back in two ways. First, I had to repair/replace my spray gun. Second, I had to wait for this mess to dry and then try and delicately sand off the runs without sanding through the shellac/pore filler that was on the parts that didn't have blobs of nitro.
The spray gun was the easy part. I spent a little time trying to fix it, but among other things the plastic cup had warped and the lid would no longer screw on. This was a cheap $30 Harbor Freight spray gun that I'd had for about seven years. I decided it had served its purpose, so I discarded it and went to Harbor Freight and spend $30 to buy another one. $30 every seven years isn't so bad.
The other part was a lot more tedious. After the finish dried I sanded off the blobs and runs. I didn't worry about getting all of the nitro off the body, I just tried to get it smooth and level. Any nitro that remained would burn in with the subsequent coats. Still, I spent several hours fixing the mess that the spray gun had left.
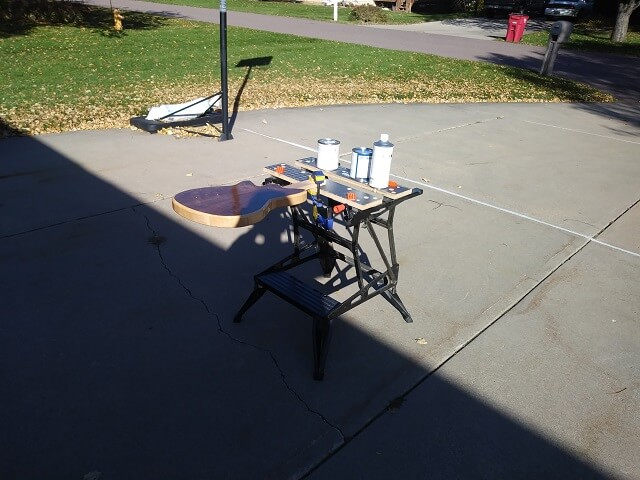
By this point it was early October. My weather window was really getting tentative. I was starting to worry that I wouldn't get the body sprayed before winter and that it would be next summer before I finished the guitar. After doing some research, I heard about the 50/50 rule for spraying nitro: that you can spray nitro as long as the temp is above 50 and the humidity is below 50%. Some people said they've successfully sprayed nitro in below freezing weather, but that didn't seem like a good idea to me. But I was willing to gamble and try the 50/50 rule.
We got a few days of nice weather where the daytime temps were in the 50s, so I jumped on it. Over the course of a week I laid down eight coats of nitro on the body. The days were getting shorter so a few nights I was out in the driveway with a flashlight to put the coats on. But I finally got it done.
After letting the finish hang in my closet for about three weeks to allow the nitro to cure, I pulled it out and started the level sanding process. I started with 800 grit and proceeded up through 1500 grit. This always takes hours and is mind-numbingly dull, but is a crucial step in making the guitar not look like something you built in the basement.
After I sanded the whole body, I then buffed it with my foam buffing pads using medium compound, then fine, then finishing up with swirl remover. The results were... not so good. From 5 feet back the body looked great. It was mirror shiny. But when I held it up to the light at the right angle I could see tons of scratches. For a few minutes I thought it might be "good enough", but I deep down I knew that it would always bother me. The final confirmation was when my wife saw the scratches in the light and said, "yeah, those look pretty bad."
I was a little heartbroken. I'm not sure what happened. In fact, I've never had this happen before. I hung the guitar back up in the closet and spent a few days moping. I was really worried that I was going to have to sand the nitro off again and re-spray. To make matters worse, it was now late November and the temps had dropped to single-digits and lower, so more spraying wasn't going to happen for about five months.
After stewing about it for a few days, I decided to attempt to salvage the existing finish. I thought maybe if I start over at the level sanding step that I could sand out the scratches. Part of me worried that the scratches existed below the finish and no amount of level sanding was going to make them better. There was no way to know for sure but to try.
This was going to be tricky. I didn't know if I had sprayed enough finish on the instrument to allow me to level sand a second time. If I burned through the finish I was probably going to have to respray. But I decided the risk of having to respray was better than the certainty of having to respray so I rolled up my sleeves and got to work.
Last time I started at 800 grit. I didn't know how deep the scratches were. They looked pretty deep, but that may have been amplified by the shiny finish. I decided this time I would start at 600 grit. I took my time and made sure to rinse my sandpaper often in my water/soap mixture to reduce the chance that the paper would clog up (which is a sure way to get scratches.) I also changed my sandpaper more often.
I spent at least another 8 hours re-sanding the whole body. After 600 grit I went to 800, 1000, 1500 and rather than stopping there I went to 2000. I did sand through one small spot on the back of the heel, but I was able to patch it by brushing on some more lacquer in the bare spot. I wouldn't want to brush an entire guitar, but it works for some spot touch-up.
Guitar manufacturers often tout their thin finishes which they claim improves the sound of the guitar. Personally, I think that's mostly a bunch of hooey for electric instruments. However, in this case I can't imagine there's a guitar out there that has a thinner finish than this one. I really hoped that the scratches were gone because there's no way the guitar still had enough finish on it to survive a 3rd sanding.
Now was the moment of truth: buffing a 2nd time. I had to be really careful while buffing as it would be easy to burn through as thin as the finish was. I started with medium compound.
Buffing went well with medium. I didn't see any scratches yet, and I didn't burn through the finish. So far, so good.
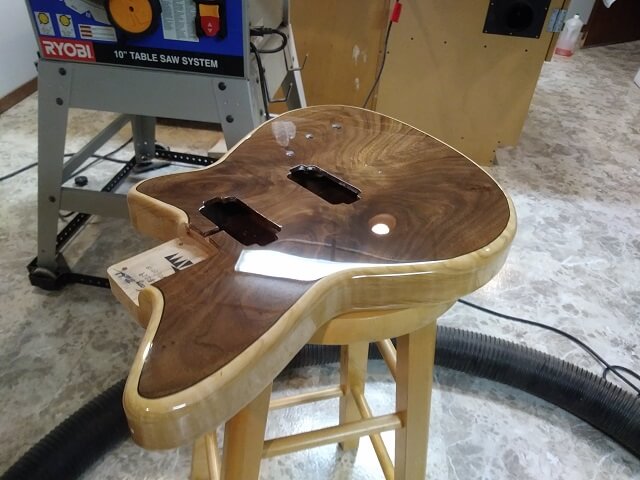
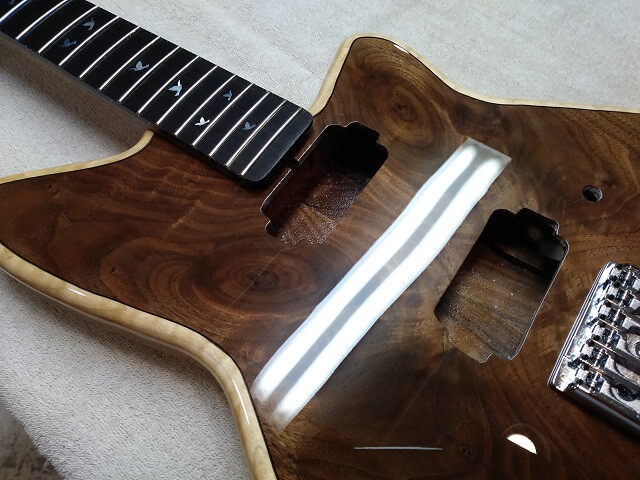
Next, I moved to fine compound. This went very well. Not only did the scratches not reappear, the finish looked phenomenal. In fact, it looked so good I decided to not even bother with the 3rd buffing stage using swirl remover. There was no swirl to remove. I decided that the additional buffing likely wouldn't make the guitar look better, but if I screwed up it could make it look worse. I decided to stop.
These pictures really don't do it justice. The finish looks deep. Which is weird, because this has to be the thinnest finish I've ever done.
Now with a finish applied to both the body and neck I could move on to assembly and set up. When I think about it, it's kind of weird that I'm not finished with a guitar after applying a "finish."
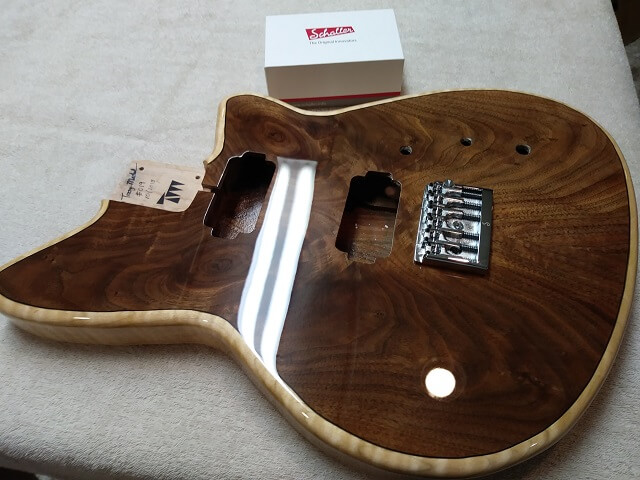
First thing I did was screw the bridge in place. I'm using a Schaller roller bridge. I splurged a little on the bridge versus just using a standard Strat-style hardtail bridge. I figured this was a special guitar, so I'm going to use a special bridge.
Next, I clamped the neck in place and drilled the holes for the screws. Then I screwed the neck on. One thing that I noticed was that the screws that came with the neck plate were unusually short. Normally bolt-on neck screws are 1.75" long. These were only 1.325" long which meant they only sunk into the neck heel about 3/8". That was concerning. I decided that it would be fine for the time being, but I went ahead and ordered some regular length neck screws that I would install before I turned the guitar over to Doug. It was worth the extra $5 to make me sleep better at night. I've never previously gotten a neck plate shipped with short screws before. That was weird.
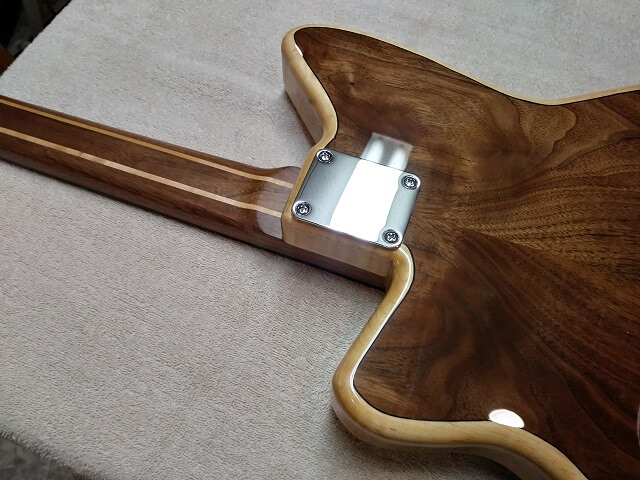
So the neck was attached. I flipped it over and inspected that everything still was tight and looked OK.
I've been using a fret leveling system called the "Technofret." Since I started using this method my fret leveling has been much more accurate. Basically the premise is that the guitar is strung to pitch, then the truss rod is adjusted as straight as possible. Once the fretboard is straight, the frets are leveled while the strings are still installed. After the frets are leveled, the truss rod can be loosened to add the proper relief to the neck.
The traditional method is to straighten the neck and level the frets without strings and then adjust the truss rod to provide proper relief after the strings are installed. The assumption with this method is that when strung up to tension the neck will assume an even curve down the length of the fretboard. In reality, this rarely happens. Usually under tension the neck will curve up until the point where it meets the body, which then levels off giving the neck a subtle "S" shape.
With the Technofret system the idea is that the neck will bend the way that particular chunk of wood wants to bend, and then the frets can be perfectly leveled to match the shape that neck wants to assume. I've heard some traditionalists decry this method. All I know is so far I've gotten better playing instruments when I've used the Technofret.
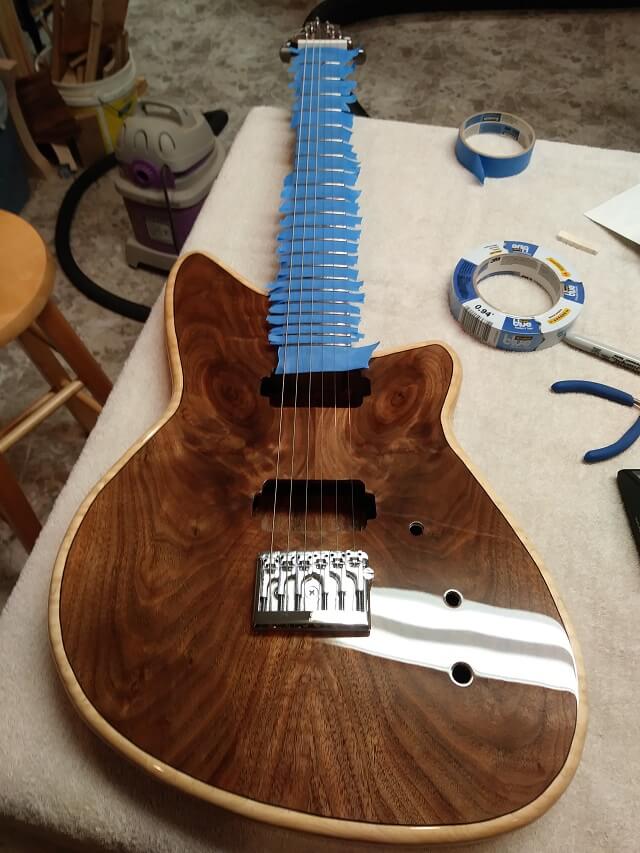
So I strung up the guitar and tuned it to pitch. I just used an uncut bone nut to hold the strings up over the neck. On the other end I raised the bridge up pretty high. This allowed plenty of room under the strings to level the frets. Later on I would shape a proper nut and bring the action down.
After tuning the strings to pitch, I wanted to give the neck a chance to "settle in". Coincidentally we were leaving town for a couple of weeks over Christmas. I just let the guitar sit with the neck under tension while we were gone. Two weeks should be plenty of time for the neck to bend the way it wants to bend with strings on it.
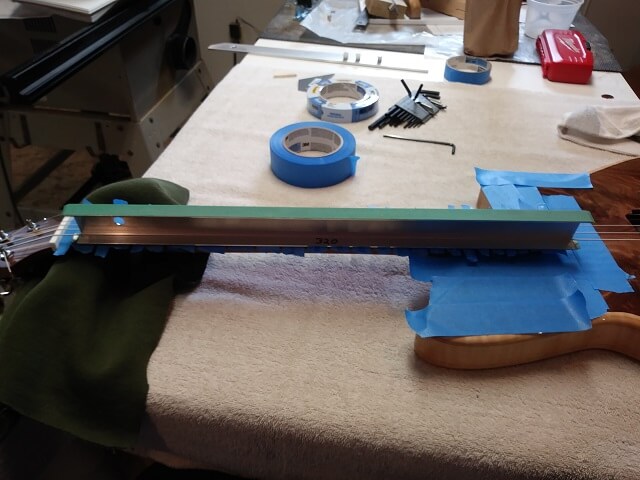
Back from Christmas break the neck had moved a little. All of strings had gone about a 1/4 step flat. I tuned it back up and then adjusted the neck as straight as possible using the truss rod. The Technofret system comes with a precision straightedge, and some precision shims for it to rest on to get it above the frets. I slowly tweaked the rod until the straightedge was touching all three points. I noticed that the carbon fiber rods were really doing their job, as it took a lot of pressure on the truss rod just to get the neck to move a little bit.
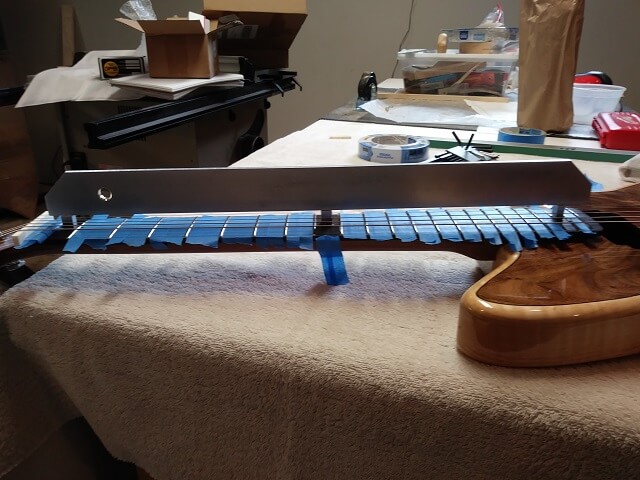
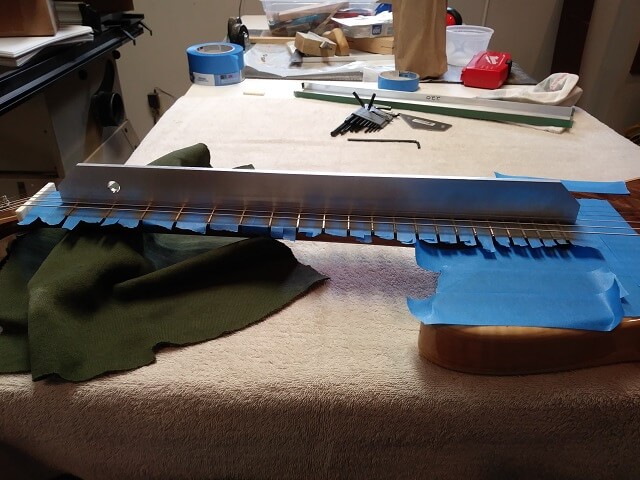
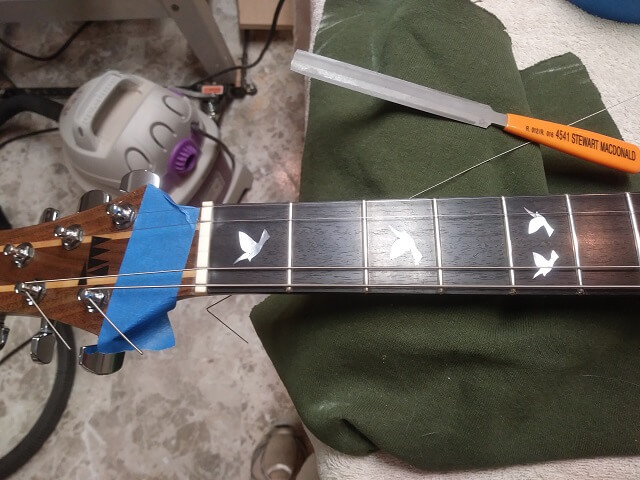
With the neck straight, I used the Technofret's leveling beam to sand the tops of the frets level to each other. The leveling beam has sandpaper on the edges, and is shaped so that it will fit underneath each string and level the frets perfectly for that string path. Before stringing up the guitar I colored the tops of the frets with black marker. Now I just sanded under each string until there was no black marker left on any of the frets. In theory, all of the frets should then be perfectly level.
After sanding, I made a final check with the straightedge that the fret tops were level. I couldn't see any specs of light under any of the frets, so leveling was complete.
Now comes another tedious part of building the guitar: recrowning and dressing the frets. I may dislike this step more than grain filling. Hard to say.
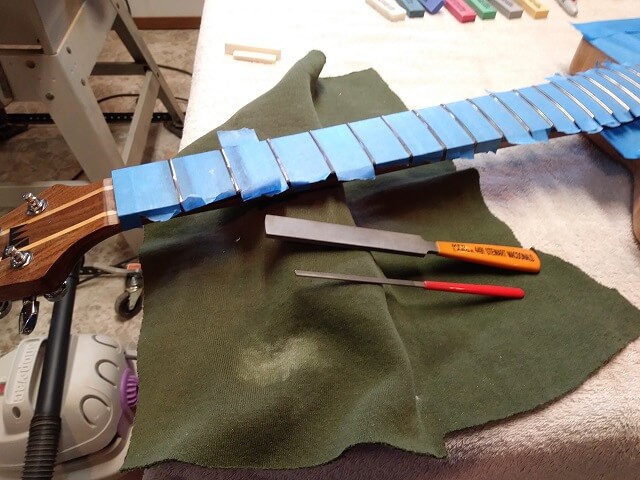
Level sanding caused each fret to have a flat spot across the top. So the first thing I did to each fret was to put the nice round crown back on the top. I ran my black marker down the flat spot of each fret. Then I used my crowning file to reshape the top of the frets until there was just a thin strip of marker left down the middle. This meant I once again had a rounded fret, but didn't change the height of the fret.
Next, I used a dressing file and curved over the fret ends so that they didn't have any sharp points that might snag a finger.
After that, I used my "fret erasures" to sand the frets and remove any scratches the crowing file might have left. This was the first time I used the fret erasures. Basically they look like square rubber pencil erasures that have grit in them. The package came with seven erasures from 200 grit to 8000 grit. I carefully rubbed the fret thoroughly with each erasure until they felt glass smooth.
My final step was to hit the fret with some Mother's chrome polish to make it nice and shiny.
I repeated these steps for each fret. The whole process took me about 20 minutes per fret, which was agonizingly slow. My hands would get tired after 7-8 frets so I broke it up across three days of work. All told, I spent over 7 hours crowning and dressing the frets. A "pro" could probably do it in about 3-4 hours. The good news is each fret looked amazing when I was done (if I do say so myself) so it was worth the time.
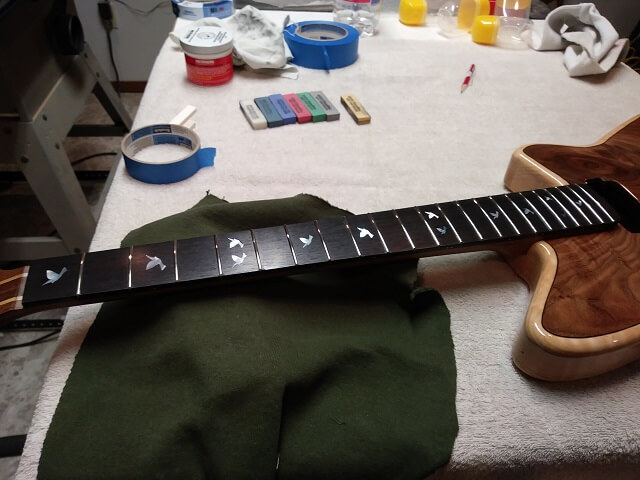
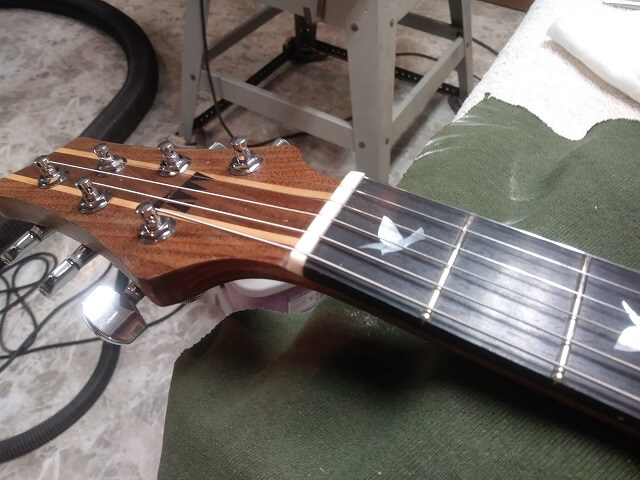
After what seemed an eternity, I finished the fretwork. I could then pull all the tape off and admire my handiwork.
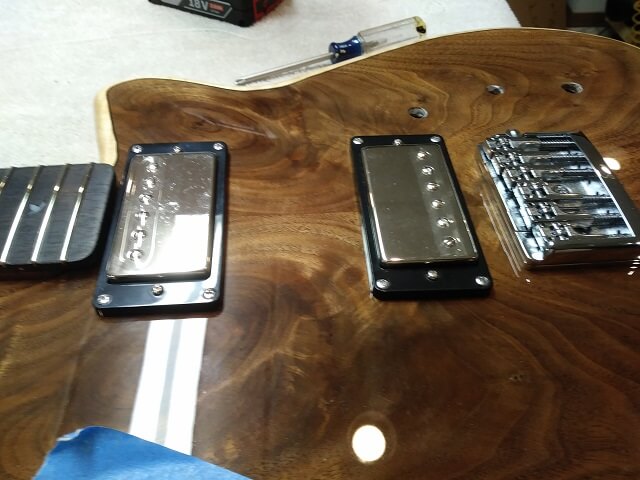
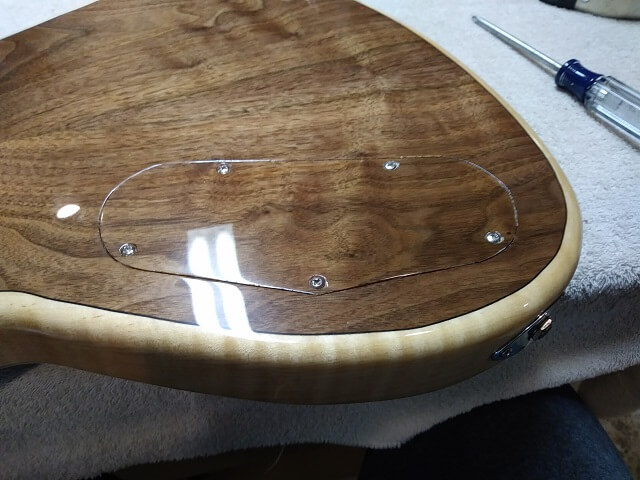
Before I strung it up to begin cutting and shaping a nut, I installed the pickups. Doing it now would save me the hassle of removing the strings later. I didn't wire them up yet, just screwed them in place.
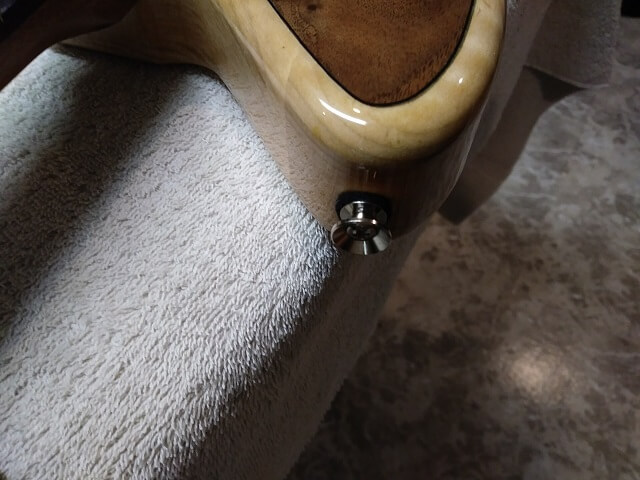
While I had my screwdriver out, I took a couple minutes to install the strap pegs. I noticed I'm getting low on felt washers. I can't remember from where I bought my supply last time I ordered, but I need to figure it out and order some more.
Now it was time for probably the 4th most tedious part of building a guitar: making the nut. Properly fitting/carving/slotting a nut, like other facets of building a guitar, is an art unto itself. It is really easy to mess it up. Because it is really easy to mess it up, it is also really easy to give up and say "good enough" when a nut isn't at an optimal level. BTW, If you walk into your local guitar superstore and pull an instrument off a wall, the nut will likely be "good enough." Really dialing in a nut takes quite a bit of time and manufacturers aren't going to spend that kind of time on each instrument when they're rolling off the assembly line.
I am certainly no nut expert, however, each one I do seems to get a little bit better. I make no claim to know every last bit about cutting a nut, so I'm not going to share every single detail of what I did. But I'll hit the highlights:
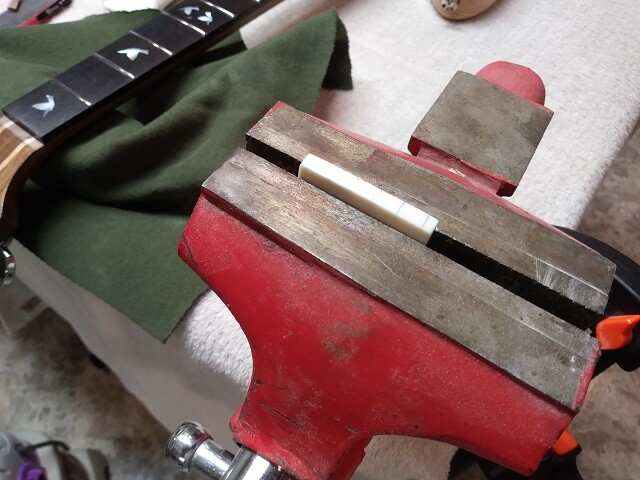
The first step began with me taking a square nut blank (I use cow bone) and cutting/sanding/filing to rough shape. I didn't worry about getting it exactly right at first, especially the height. I just removed about 30% of the original blank to give me a more workable starting point for slotting.
I put the rough blank in my vise and marked the string locations with a pencil. I marked the two outside slot locations, the marked the inside slot locations using my (new!) Stew Mac string spacing ruler. It's kind of an expensive tool, but I was given a gift certificate and it's one of those things that is useful enough that I finally decided to pick one up. Contrary to what your eyes might tell you, a properly slotted nut does not have the strings equidistant from each other. The low strings are a little farther apart, and the high strings are a little closer together.
With the marks made, I took my finest nut file and carefully cut a shallow notch directly on top of my pencil lines. This would serve as a starting location for each nut file. I then sat the nut in place on the neck and cut one string slot at a time. I would install the string, move it out of the way, then slowly file the slot for that string. I would deepen the slot a little bit, then slide the string into the slot and check the depth. I would slowly repeat this process until the slot was deep enough.
How would I know the slot is deep enough? I used a feeler gauge under the first fret. I wanted the string height over the low E string to be .020 above the first fret. Each subsequent string would be .002 closer to the first fret until the high E string had a clearance of .010. It's easy to remove more material but not so easy to put material back, so that's why I proceeded with a great deal of caution. This little amount of clearance doesn't give much room for error, but the reward is once the nut is cut this low it almost feels like chords fret themselves.
Once the slot for the low E string was filed to the proper depth, I then did the high E string. Then I went back and forth alternating high and low strings until all six were just right. I find the nut doesn't want to slide around as much while working on it if I alternate low and high strings, rather than just going right down the line.
Oh, and if all this wasn't enough, great care has to be taken to file the slots at an angle toward the tuning pegs. A nut with too little angle in the slots will tend to buzz as too much material is in contact with the strings. A nut with too much angle will make the front side of the slot brittle. And worst of all, if you manage to get a negative angle (i.e. the nut slot slopes toward the bridge end) the guitar will never intonate properly when chording. The string will be in tune unfretted and at the 12 fret, but the frets in-between will be slightly out. I've actually made this mistake in the past.
After the nut slots were filed, now it was time to pull the nut out of the guitar and shape the it to its final shape. The sides of the nut are filed so that they are the exact same width as the neck. The top of the nut is filed down so that each fret slot only has enough depth so that about 1/2 of the string is sticking above the top of the nut.
Finally, once the nut is shaped I sanded the nut using progressively finer sandpaper up to about 1000 grit, then finished by using polishing compound to make it shiny. Now it could be placed in the guitar permanently. Well, semi-permanently. I used just a little bit of wood glue so the nut will stay in place, but can be removed if maintenance is ever needed years down the road. All said and done, I probably had 4 hours of work into cutting this nut.
With the strings on, I spent about an hour doing the final setup. The truss rod was adjusted. Next, the string height was set. After that the intonation of each string was adjusted. Because the bridge I was using allows the string spacing to be configured, I used my Stew Mac string spacing ruler to set the proper spacing at the bridge as well. Finally, the pickup heights were adjusted. The guitar played like butter. But it wouldn't make any rock and roll noise, so installing electronics was the next step.
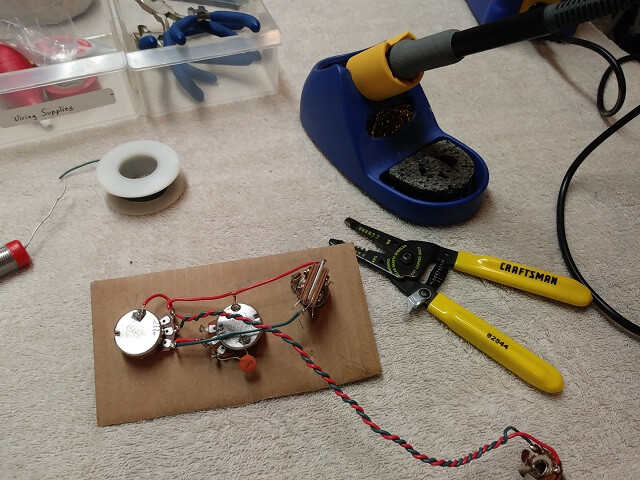
I've found that when wiring a guitar, the more wiring I can do outside of the instrument the easier it is. I drilled some holes on a piece of scrap cardboard that were in the same place as the holes in the front of the guitar. Then I soldered everything but the pickups and the bridge ground wire.
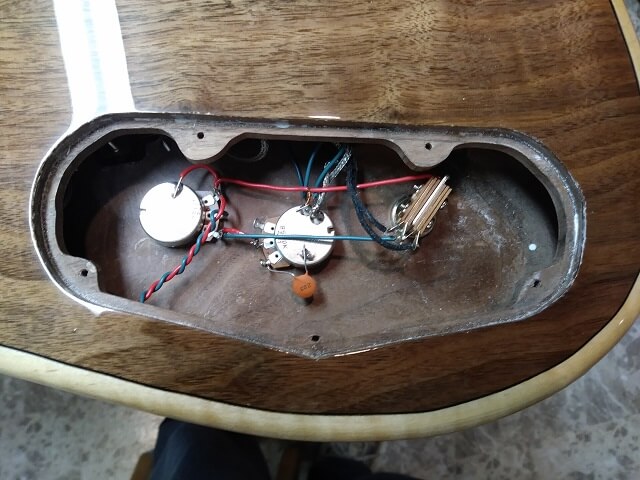
Next, I popped the components out of the cardboard and dropped them into the instrument. Now I just had a few wires left to solder and I was done.
After plugging the guitar into an amp and making sure the electronics were working properly, they weren't. Well, they were kind of working. The first thing I noticed was that as soon as I plugged the guitar into the amp, the amp started playing a radio station. Quite clearly, I might add. The radio stopped as I turned up the volume, but was replaced with a ton of humming, buzz and general cacophony. When I would play you could hear the guitar, and both pickups, the selector and volume and tone knobs worked. It was just really, really noisy.
Hmmmm... that was discouraging. Being a hollowbody guitar, sheilding is pretty much non-existent, so a little bit of noise wouldn't have surprised me. This was a lot more than a little bit of noise though. I really hoped I wasn't going to have to take drastic measures to fix this.
I broke out my multi-meter and started testing things. As the problem was noise, the first thing I checked was the grounds. Everything tested good. I continued the hunt for the noise beast. I plugged a cord into the jack, placed one probe of the tester on the tip of the cord and the other probe on the output of the volume pot and the meter read nothing. Hmmmm... that's not good. Then I moved the tester probe to the sleeve of the cord tip and my meter jumped. Ah ha!
When soldering things up I had a brain lapse and had reversed the wires on the output jack. Dumb, but at least it was an easy fix. I popped out the jack, re-soldered the wires in the correct spots and put the jack back in. Success! The guitar was now eerily quiet when plugged in and no radio stations were being broadcast through the amp.
At long last I could install the knobs and the control cavity cover. The instrument was finally done!
Return To The Main Music Gallery
This page last updated on 01/18/2019