


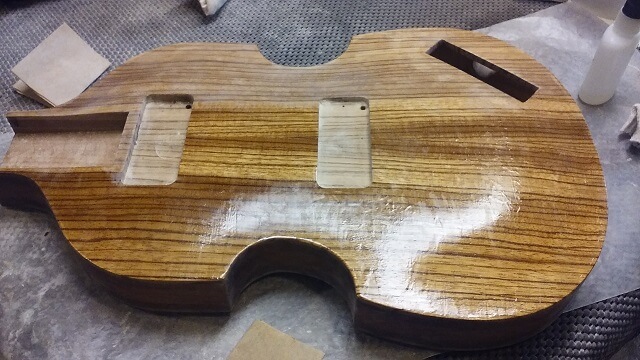
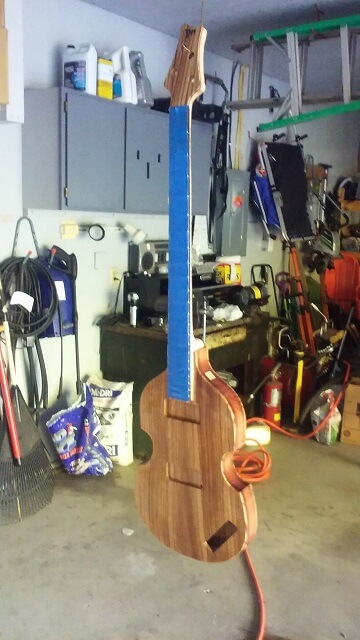
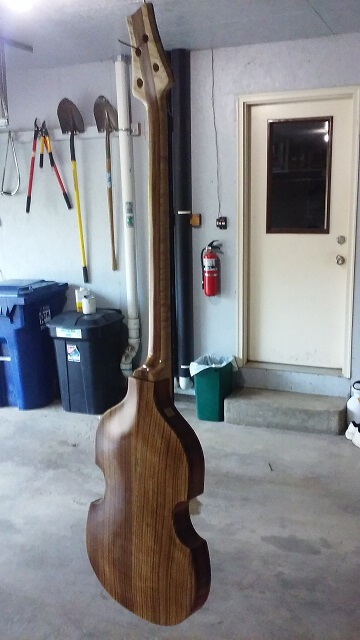
The neck was now finished. The body was also pretty much finished at this point, except for maybe a few holes that needed to be drilled (output jack, strap buttons, etc.) I was approaching the point in time where I would glue the neck onto the instrument. However, before I did that I decided to do all of the grain filling and as much final sanding as possible while the pieces were separate. It was easier to maneuver the smaller individual pieces than try to wrestle the whole instrument.
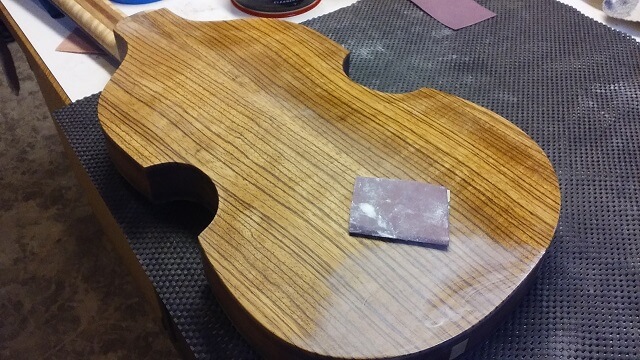
I started the grain filling process using a product specifically designed for filling grain called Wunderfil. This is a water based product. I've used it before with varying degrees of success. I found it difficult to apply using the instructions, as whenever I would wipe the excess filler off the surface it would also pull the filler out of the grain. The instructions had helpful tips like "remove the excess filler but be careful not to pull the filler out of the grain." Gee, thanks.
Once the Wunderfil product dried it was like sanding concrete, and would clog sandpaper in a heartbeat. The worst part, though, was how it made the wood look. The label touted it as drying crystal clear. Well, this is true, but this clearness prohibited any finish from bringing out the nice rich amber color that I love to coax from wood (I have this same complaint with water-based poly finishes.) Also, the sides were suffering from quite a few blotchy spots on the end grain portions.
After using this product on about a quarter of the instrument I decided I wasn't happy with the results. I sanded all of the Wunderfil off the bass and started the grain filling process over. This time I used medium-viscosity super glue (CA). The super glue required quite a few coats (five or six) and the fumes were terrible, but in the end it sanded much better and didn't mess with the finish color. In fact, I think it enhanced the finish color a bit.
The grain filling process was still slow and painful, but at least now the color issues were solved. I spent several weeks applying a coat of super glue to a side, retreating to another room while the fumes dissipated, letting it dry for a day and then sanding that side of the guitar flat. I would then repeat that process until the pores were finally filled. Ugh. But when I finally finish I'll look back and be glad I spent the time now. The more time you spend prepping the body for a finish, the better the end results will look.
We're in the home stretch now. With all the grain filled on the body and neck, the next thing to accomplish is to join the two pieces together.
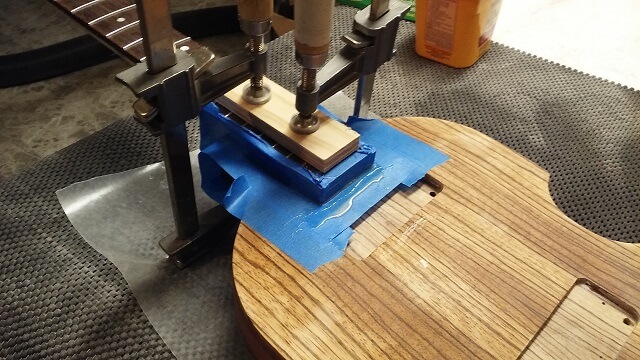
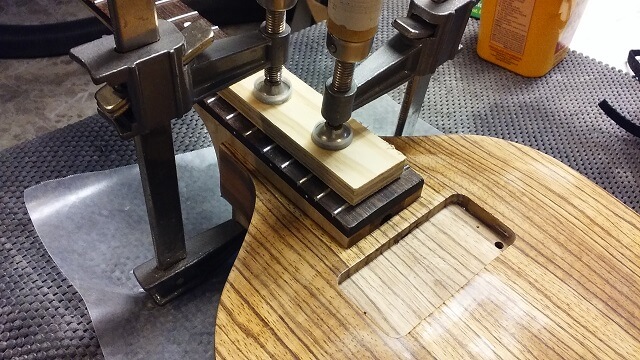
This being a "set neck" instrument (that is, the neck and body are two separate assemblies joined by glue) I needed to select an adhesive for the bond. I typically have always used slow-set epoxy for this. I think I started doing this with my first guitar where the neck pocket was a little "iffy" and I wanted to utilize the gap filling properties that epoxy provides.
However, this neck joint was pretty tight. In fact, it took a little bit of force to press the two pieces together. So regular PVA (wood glue) would probably work fine. Despite this I'm sometimes a bit of a slave to routine and I went ahead and used the epoxy like I normally do.
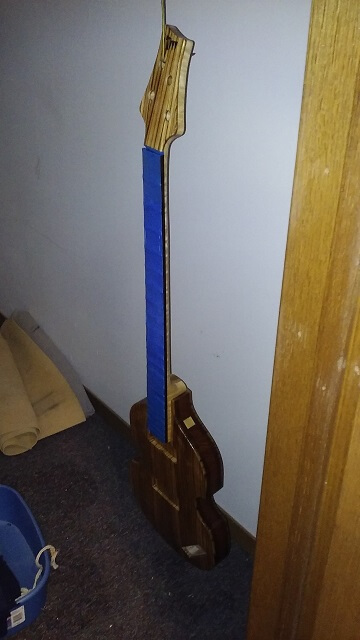
Knowing that this neck joint was pretty tight, I expected there to be a fair amount of glue squeeze-out when I pressed the neck into place. I didn't want to spend gobs of time cleaning up dried glue afterwards, so I spent a few minutes applying painters tape around the joint so that any glue forced from the join would wind up harmlessly on the tape rather than stuck to the wood where it would have to be sanded off later.
I mixed up the epoxy, applied it to the neck pocket and heel, then pressed the neck into place. I put a couple chunks of scrap wood on the front and back to spread the clamping force out a bit and then clamped the join in place. Sure enough, lots of epoxy squirted out. In fact, I was surprised with how much came out because I didn't think I'd mixed that much. Oh well, I'd rather have too much glue than not enough.
I took a popsicle stick and scraped off the excess epoxy where it oozed from the joints. Most of it came out immediately, but for about 10-15 minutes more I would occasionally remove more as it continued to squeeze out.
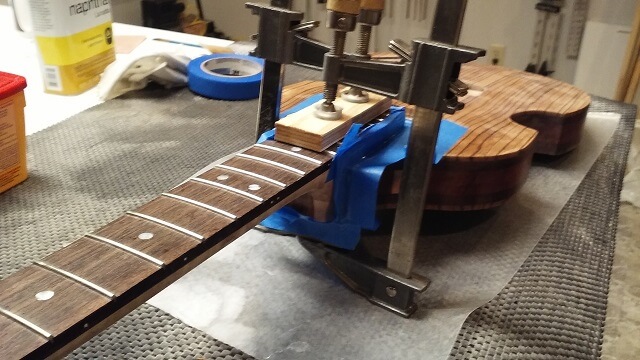
Once it looked like all of the extra glue was done seeping from the joint, I removed the painters tape. I didn't want to wait for the glue to completely set up and glue the tape to the bass. I also took extra care when removing the tape because it had wet glue on it, and I didn't want to accidently smear the glue across a sanded part of the instrument and force me to sand it again.
I let the bass sit in the clamps for about a week. Not because it took that long for the glue to set, but mainly because I just didn't get back to working on the instrument. I did a final once-over and made sure everything was "up to snuff" as far as sanding, then wiped the instrument down with a tack cloth and naptha.
Now I could start spraying a finish. While not as tedious as grain filling, I find spraying a finish to also be rather time consuming and dull. There's a lot of repetition involved.
For the amateur laquer-sprayer like me, spraying takes the right combination of weather and spare time. Because I spray outside of the house, the weather needs to be condusive. Ideally, the temp will be somewhere between the 65 and 85 degree range, and the humidity as low as possible.
The temp is less of an issue as the humidity. Lacquer can be sprayed outside of the "ideal" temp range with adjustments in the thinning ratio. However, because I'm not an expert (and I prefer working in comfort) I generally try and stay within this temperature range.
The bigger issue is humidity. Above 65% relative humidity and you run the risk of having the lacquer "blush." Blushing occurs when water vapor is trapped under a coat of dry laquer and results in a milky/hazy look to the finish. There are retarding chemicals you can use in your finishing mix to lessen the chances of blush, but again because I'm no expert I just prefer to spray on days with low humidity.
As I mentioned, the other factor outside of weather is time. Having more projects on my to-do list than available time is a pretty common occurance for me. The good news is I'm rarely ever bored. In any event, I needed to find the time to spray this finish which was proving to be a challenge as here it was already into July and the summer was slipping away. I had promised to have this bass finished by the time Tundra Boy's jazz band starts in September, so I needed to get going ASAP.
I found myself on July 10th with a Sunday afternoon open. Tundra Boy is a very avid golfer and usually wants me to take him to the golf course to play a round on weekend afternoons. I stink at golf, but I like spending time with him so I generally agree. However, on this particular afternoon he was laid up on the couch with a pinched nerve in his neck. So golf was out. In a convenient coincidence, the weather that day was about 80 degrees and the humidity was only about 50%. A perfect day for spraying. So I jumped at the opportunity and got my tail in gear.
I started by setting up an area in my garage. Lacquer fumes are toxic, so I didn't want to attempt to spray the bass in my shop (although it would be much more convenient if I could figure out a way to do that without killing all occupants of the house.) I pulled out the cars from one of the stalls and covered my motorcycle with a cloth. I brought out the supplies I would need and fired up my air compressor.
To begin, I sprayed three coats of vinyl sealer. I waited an hour between coats. Honestly three coats probably was a little overkill. I've done a single coat before without issue. Two coats probably would have been plenty. However I was having trouble getting my spray gun dialed in and I wasn't getting as smooth a coverage as I had hoped. I decided to lay on three good coats which would give me plenty of thickness to level sand before I moved on to spraying the lacquer. I don't spray finishes often enough to become super-familiar with my spray gun settings. In fact, I always seem to forget how everything works between instruments (maybe I've inhaled too many lacquer fumes?) So my spray gun and technique tend to get more dialed-in with each additional coat I apply, then by the time I get around to my next instrument I've forgotten a lot of it.
The garage gets pretty nasty smelling while I spray. I made sure to wear a respirator. Never spray lacquer without one! In this picture, note the big piece of cardboard sitting in the background. This was an old box I was using to adjust my spray gun. I could play with all the gun settings and adjust the spray pattern on the cardboard, then once I had it spraying the way I wanted I could move to the instrument. I would test my gun on the cardboard before every coat just to make sure I was still satisfied with the way it was performing.
After my three coats were applied and the instrument had dried for about half an hour more, I called it a "night" and moved the bass back down to my basement shop. Then I was able to move the cars back inside.
The bass sat overnight and through the next day while I was at work. When I got home I spent a couple hours level sanding the vinyl sealer. I wanted to get a nice smooth surface on which I could apply the lacquer. On the same token, I didn't want to sand through the sealer coat into bare wood and have to go back and repeat the sealing process. So I proceeded with care using 320 grit paper.
With the sealer coat leveled and smooth, I could now spray the nitrocellulose laquer. Generally I'll spray between 8 and 12 coats, waiting about an hour between them and doing no more than 3 coats per day. Expert sprayers can probably get by with fewer coats, but I like to have plenty of depth to the finish for when I level sand later on before buffing. Like I mentioned above, it's rather disappointing when you sand through the finish into bare wood and have to go back and spray some more. And yes, I've done it a few times.
The evening was a bit warm at around 85 degrees. However the humidity was hovering in the low 60s so I went ahead and started spraying. There's not much to the pictures. While I'm actually applying the finish I'm too engrossed to try and snap a picture at the same time. And when I'm done with a coat, you really can't tell much of a difference that a single coat makes.
I sprayed three coats that Monday evening. Because I'd spent a couple hours sanding before I started spraying, I was starting to run short on time. So I shortened the wait time between coats to about 45 minutes. I've gone as little as 30 minutes between coats in the past without issue, so I wasn't too worried that the shorter intervals would cause me any headache.
Tundra Boy's neck was starting to feel a little better so between coats I shot some hoops with him in the driveway. About an hour after I sprayed the last coat for that day I moved the instrument back down to my shop, mainly just to get it out of the way so I could move the cars back into the garage.
The next night (Tuesday) I repeated the process, except I didn't bother level sanding the finish. Each coat of lacquer "melts" into the previous coat, so unless there's an obvious blemish like a run or a horsefly stuck in the finish, I skip sanding between coats of nitro. So throughout this evening I applied three more coats.
Unfortunately, a warm front was moving in. The temp when I started was 87 degrees, which is a little above my normal threshold. However I wanted to get the finish sprayed so I let those extra couple of degrees slide. The bigger issue was the humidity. When I started that evening it was in the low 60% range. By the time I finished, I'm not sure what the humdity was at but it was noticably higher. I'm pretty certain it was above 65%. As a result, I got just a little touch of blush with my last coat of that evening. Bummer.
Thankfully it seemed to be restricted to just one section of one side of the body. If the blush isn't too bad sometimes just letting the finish cure a bit will take care of it. I was hoping I would get lucky, otherwise you often end up having to sand out the blush or try and do a spray coat of a extremly solvent-heavy mix of finish to try and let the water vapor release.
In my mind I had hoped I could get all the coats of finish sprayed this week. Unfortunately, by Wednesday the temp had risen into the upper 90s and even worse, the humidity was also up there in the 90% range as well. Not ideal for spraying, especially when I was already dealing with a blushing issue.
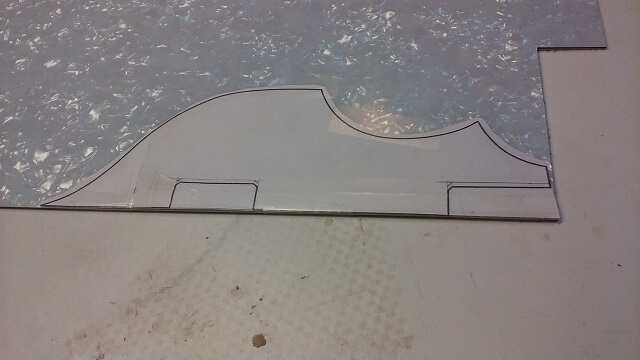
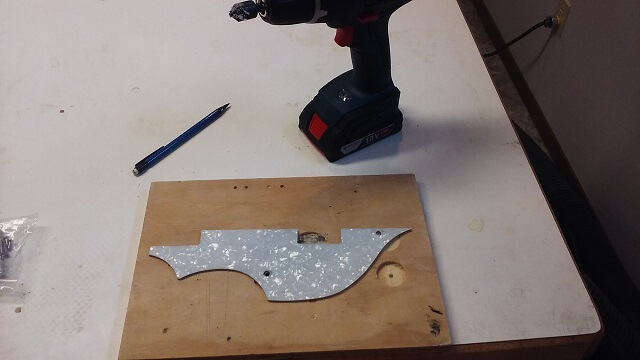
Instead, I turned my attention to building a pick guard. I'm not sure if we're going to put a pick guard on this instrument or not. Tundra Boy hasn't yet decided. So I figured I'd build one just in case. If one is built he could always take it on and off as his tastes dictate. I began by taping the pickguard pattern from the plans to a piece of mother-of-toilet-seat material. I did some measureing of the instrument and adjusted the pickup cutouts slightly to match the particular pickups I'm using for this instrument.
I cut out the pickguard shape on my scroll saw. It seems like I'm always using the scroll saw for handy things like this. I know very few luthiers use a scroll saw but for me I find it invaluable.
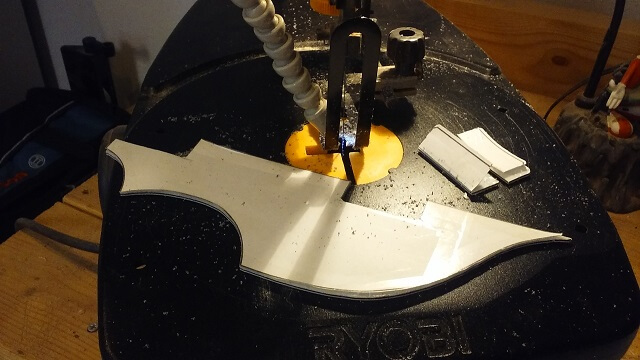
Once the shape was cut out I drilled some holes for the screws, and then countersunk them to make it look nice. With a bit of edge filing/shaping the pickguard should be ready to go.
Thursday and Friday nights of that week were booked with other activities, which is just as well as the temperature and humidity were still inhospitable to spraying laqcuer. On Saturday we spent the day at my cousin's lake cabin, leaving early that morning and coming home late that night so no work would get done that day either.
On Sunday, my son awoke to discover he'd re-aggravated his pinched nerve in his neck, probably from being bounced around on an inner-tube pulled by a boat that previous day at the lake. As a result, no Sunday afternoon golf was going to happen. While I didn't like to see him in pain, this freed up my schedule to be able to spray three more coats of finish on the guitar. As an interesting side note, there was an air show going on that day so between spraying coats I was watching the Blue Angels perform in the skies overhead.
Before I started spraying that day, I checked out the guitar and was relieved to discover that the previous four days of curing had pretty much eliminated the blushing issue. There was still just a hair visible on one small little area on the side. To be honest, it was so faint probably nobody but me would have noticed. I took a piece of 600 grit sandpaper and removed just enough of the finish to take care of the blush. Crisis averted.
The following Tuesday we were scheduled to leave on a family vacation for a week. After that was my annual motorcycle trip. Because laquer needs to sit and cure for a few weeks before the level sanding process is started, this would be the perfect opportunity to wrap up the finish application. I really wanted to finish spraying before we left. I was now at 9 coats, and my goal was 12.
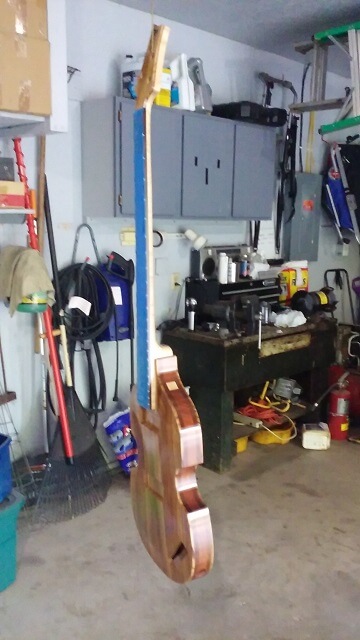
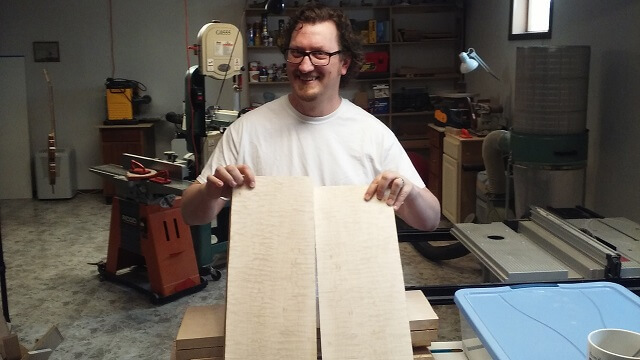
On Monday July 25th my friend Mike Dresch, owner of Cathouse Studios and also a fellow guitar builder came over to visit the shop. He doesn't have a bandsaw suitable for resawing, so he brought a few boards over for me to do it. I also occasionally help him out by slotting his fingerboards. In turn, a few years ago he gave me our dining room set, so I still owe him from that. Because I don't get too many visitors to my shop, I snapped a photo with one of the pieces of curly maple lumber I just bookmatched for him. To keep things on topic, you can see the bass hanging in the background.
After Mike left, I sprayed my 10th coat of finish. While it was drying I mowed the lawn. Usually that's Tundra Boy's job, but at the moment he was at the doctor for his neck so I decided to be a nice guy and do it for him.
It took about and hour to mow and weed-whack. When I was done I sprayed the 11th coat. While spraying this coat I noticed some areas were getting pretty thick with finish and almost looking like they were about to sag. A sag is where so much finish gets applied to an area that when another coat is applied the solvent loosens the previously applied finish and the whole section starts to drip off the surface. Definitely not something you want to have happen.
Because of this, I decided that 11 coats would be sufficient. As I already mentioned, 8-12 coats is my norm so I was in the acceptable range. As you can see in the picture below, the final coat had left an "orange peel" finish. It wasn't as smooth as I had hoped, but this would get rectified in the level sanding process after the lacquer had cured.
My timing worked out well. I had finished spraying the lacquer before we left on our family vacation. We were gone for six days, then I was back to work for five days. After that I left for another six days on my motorcycle trip. During this time I was either gone or busy, which gave the instrument a good stretch of time to just sit there and let the finish harden up. That wait is always a difficult one when building an instrument, so it was good to have things to do to keep me from messing with the bass too soon.
After it had sat for about 18 days untouched, I began level sanding. This is tedious, but it's what separates an amateur finish job from a professional looking finish. Too many people spray a finish on something (not just guitars) and then call it good. When they do that it's easy to look at the finished product and tell that it's been attacked by a rattle-can. Taking the next step is time consuming, but in the end is what turns the instrument into a mirror.
I usually level sand either with 600 or 800 grit paper depending on how smooth the final coat of finish turns out. In this case, after this bass had sat for a couple weeks much of the orange peel had leveled itself out (lacquer shrinks as it cures.) Because of this, I skipped the 600 grit sanding and went right to 800 grit.
When finish sanding, I'll have a bowl of water with just a drop of dish soap in it. I soak my sandpaper it the water, which acts as a lubricant as I sand. I know sanding lubrication almost sounds like an oxymoron, but without the water my sandpaper will clog up very quickly. By using the water I can level sand an entire instrument using a single sheet of 8 1/2" by 11" sandpaper.
If you're trying to emulate me, be carefull not to get the instrument too wet with water. You just need a few drops for lubrication. If any water gets into an area without finish the wood can swell, which will then crack the lacquer. This is a certain recipe for a bad day.
As I level sand, I'll work in small sections and re-dip my paper in the water frequently to clean it and re-lubricate. Then I'll shake the paper a bit to get rid of excess water. I have a rag to wipe down the area I've just sanded. What I want is a nice, even milky haze to the finish. If I see little shiny dots in the finish, I know I need to keep sanding because those are low spots. They may look like pinholes now, but they'll turn into craters once you buff.
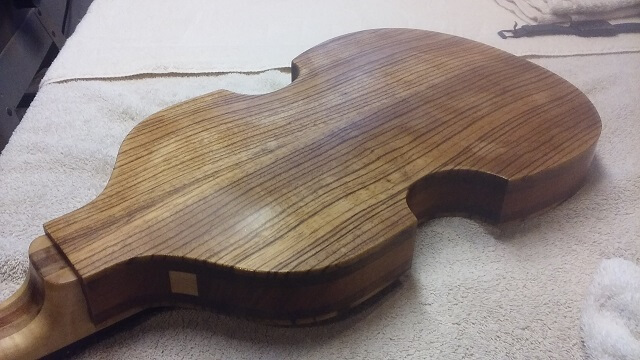
This process is slow and not much fun. It took me about four hours to completely level sand the instrument. To make matters worse, until you're experienced in the process it looks like you've just destroyed all your hard work. Before I started I had a bass that was quite shiny, albeit a bit rough to the touch. Once the level sanding was done I had a bass that was silky smooth to the touch, but looked terrible with no shine whatsoever.
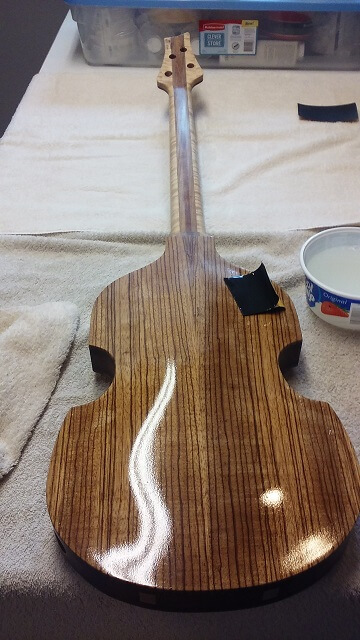
I continued the process, repeating it with each successive grit of paper:1000, 1500 and 2000. The entrie sanding of the instrument took about 9 hours of dull labor that feels pretty pointless when you're in the middle of doing it. The entire finishing process for that matter, from prep work, to grain filling, to sealing, to spraying and final sanding isn't much fun. That is, until the buffing process begins and the beautiful shine reveals the point behind all that hard work. I'm almost there...
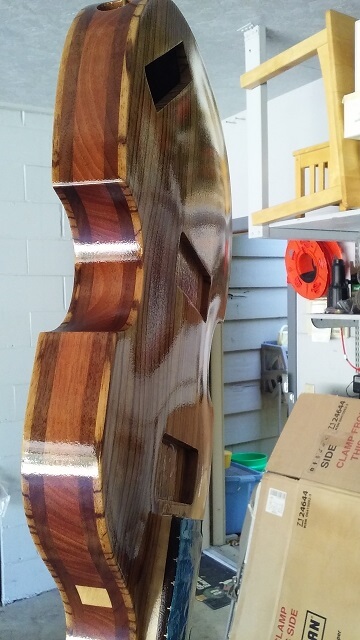
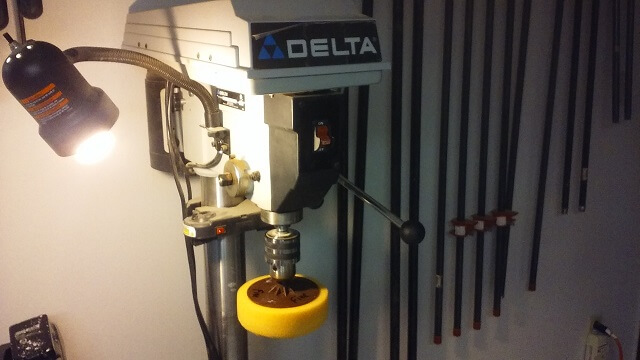
Now I began the buffing. This is a lot more fun, as the fruit of all the finishg labor starts to reveal itself. Some of the tight spots I did by hand, but the majority of the instrument I used a foam pad in my drill press. I set the drill press speed to it's lowest setting (about 240 rpm), and held onto the instrument securely with both hands. If you're not careful it's pretty easy to let the pad grab the instrument out of your hands and have it crash into the wall or the floor.
First I started with a medium compound. The medium brings out a good portion of the shine.
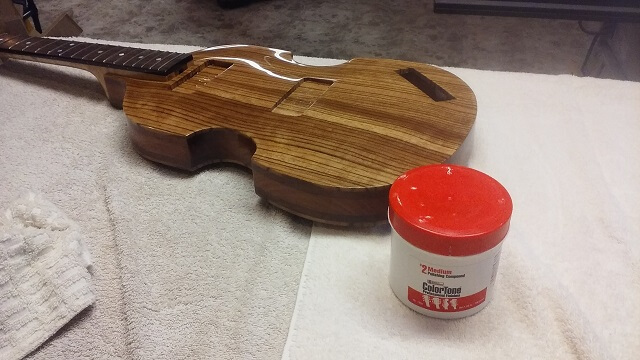
Next, I moved on to the fine compound. I use a separate pad dedicated to each grit of compound. More of the shine can be seen.
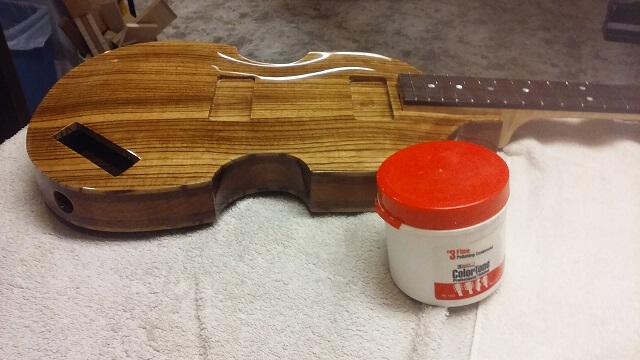
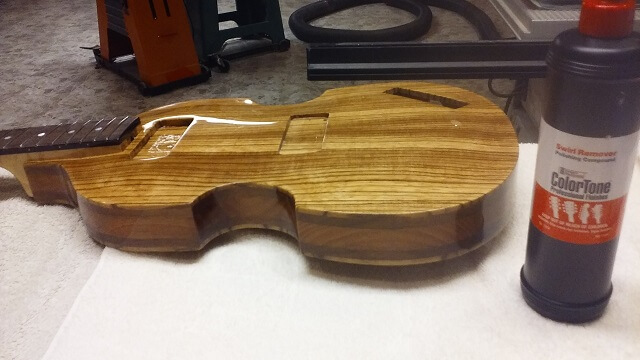
Finally, I finished up the buffing with swirl remover. This created an incredible amount of shine. I showed it to the Tundra Boy and he thought it was pretty cool that he could use it as a mirror to comb his hair. The pictures I took don't do justice as to how crazy shiny this bass turned out.
With the buffing done I gave it a good coat of paste wax. I used pure carnuba wax with no silicone additive. As I've mentioned, having silicone molecules contaminating your shop can wreak havoc with getting a good finish on future projects, so I avoid it altogether.
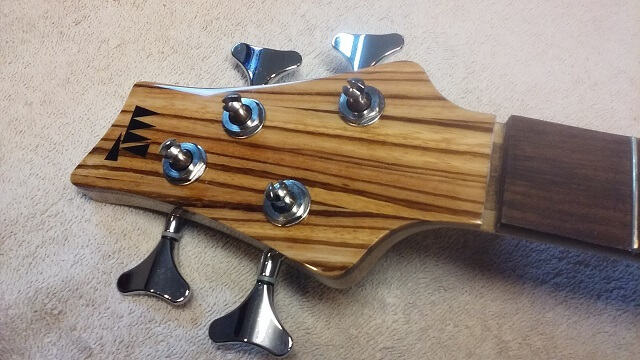
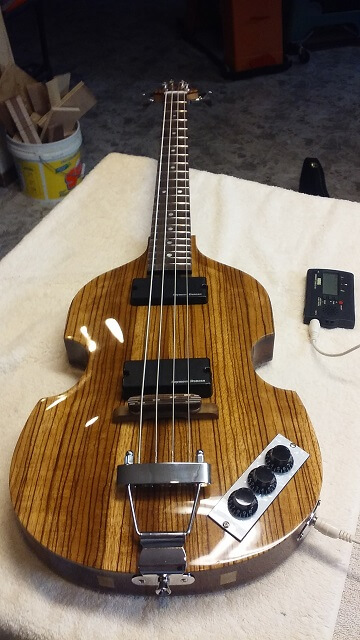
With the finishing done, I was on the home stretch. I could now install hardware and set up the instrument. This was much more fun than finishing, but also more nerve wracking because this is the point at which you sometimes discover that a critical error was made early in the process. I always breathe a big sigh of relief when I get done with an instrument and know for sure that there were no major mistakes. I started with the hardware by installing the tuning keys.
Next I wanted to install the trapeze tailpiece. I could have just measured to the center of the instrument and drill the holes, but the more I've worked with wood the more I've learned that I get better results whenever I can figure things out without measuring. In this case to properly position the bridge I ran some string through the slots where the two outside strings will run. I could then move the tailpiece around until the strings are evenly spaced down the neck. From there I could mark where the holes should be drilled. You'll notice a lot of masking tape on the body in the following pictures. I put the tape in place to protect the finish from getting scratched and scuffed as I was installing the hardware.
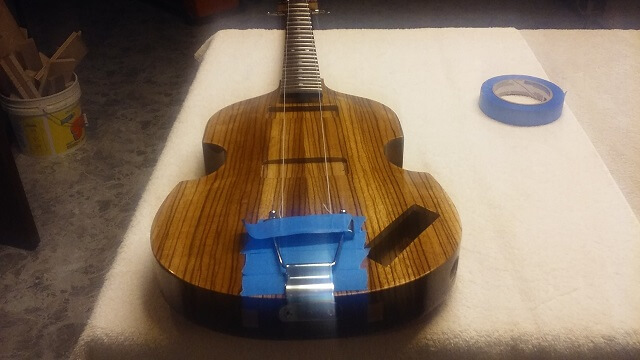
With the positions marked I drilled the holes and installed the tailpiece.
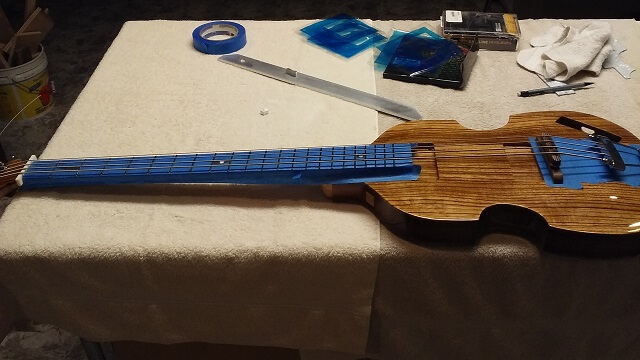
Now it was time to finish the fretwork. I did the basic installation when I built the neck. I still had to level the frets, re-crown them and then polish. To start, I covered the fretboard with tape to protect it. You'll see why I left those three spots unmasked in just a moment...
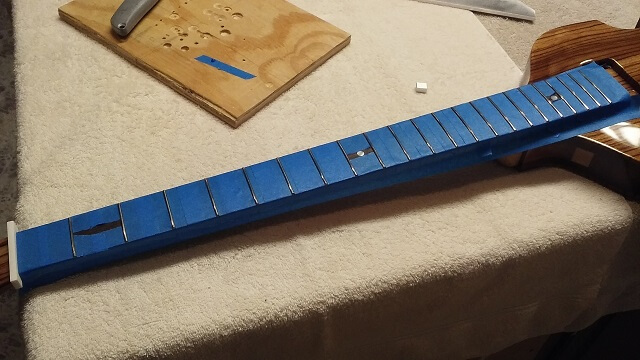
With this instrument I was trying out a new fret leveling system called the "Technofret." The idea is that it allows the frets to be leveled while the neck is under regular string tension. I started by temporarily installing the strings onto the instrument and tuning to pitch.
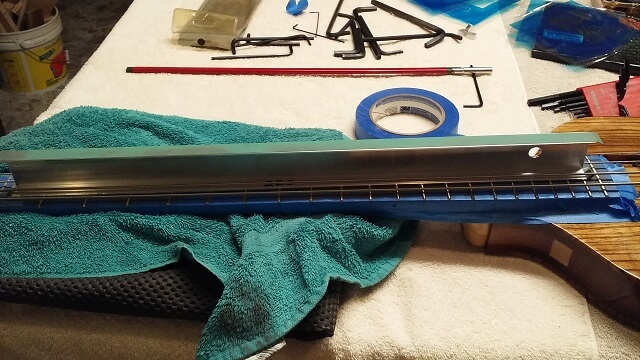
Next, the system comes with a precision straightedge and spacers. The spacers are set on the bare wood which allows the straightedge to rest above the frets. The truss rod is then adjusted so that the straightedge is touching all three spacers. This means that the neck was perfectly straight while the strings were tuned to pitch.
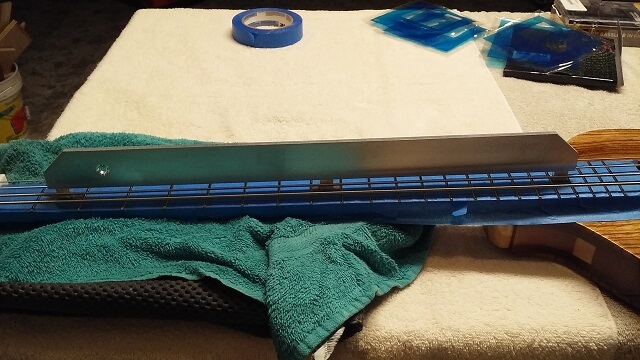
Now the neck was perfectly straight, but the frets probably aren't level. The next step is to use the "L" shaped sanding beam under each string to level the frets perfectly straight. The typical method is to straighten the neck and level the frets without the strings, then hope that the neck bends in an equal manor once the strings are installed. The idea behind this system is that by leveling while the neck is under tension that in the end the frets will be much more level.
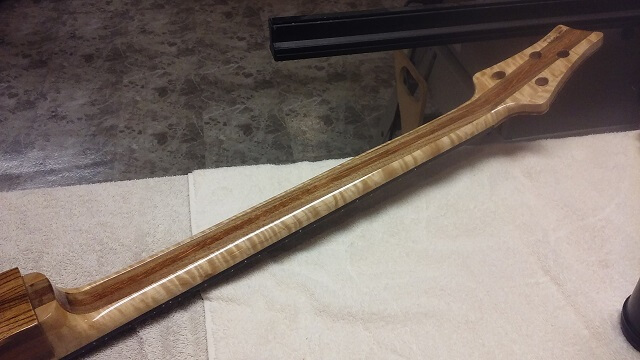
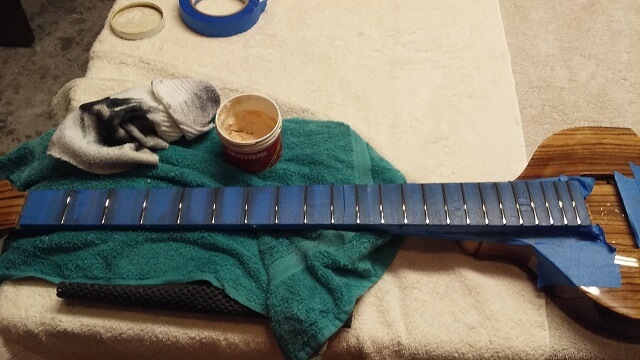
After the frets were leveled, I then removed the strings and re-crowned the frets. This meant I rounded off the tops of the frets that had been flattened out during the leveling process. Then I sanded out any remaining scratches and finished off with some metal polish to give the frets a beautiful shine.
When it was all said and done, this probably turned out to be the best fret job I've ever done. Later on when I was doing the final setup I set the action as low as I could without buzzing. It was pretty darn low for a bass. In fact, Tundra Boy asked that I raise it up because it was lower than he cared for.
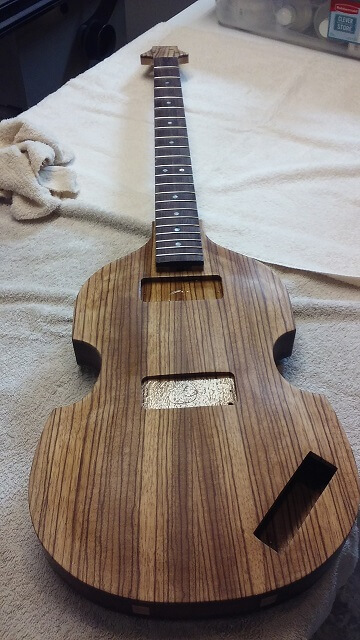
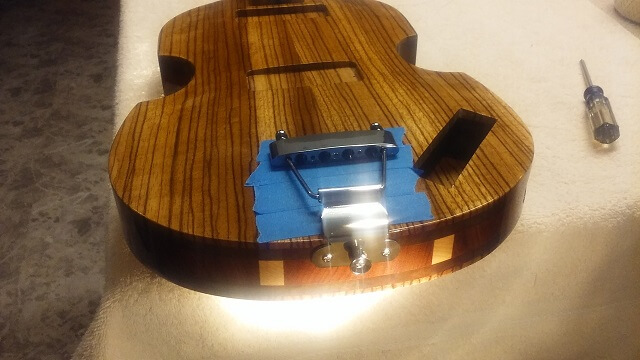
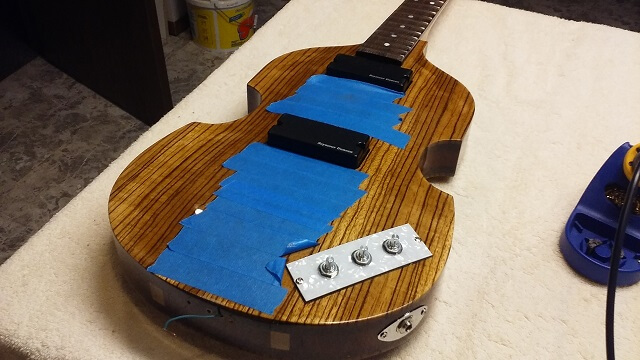
Next, I installed the pickups, the output jack and the electronics.
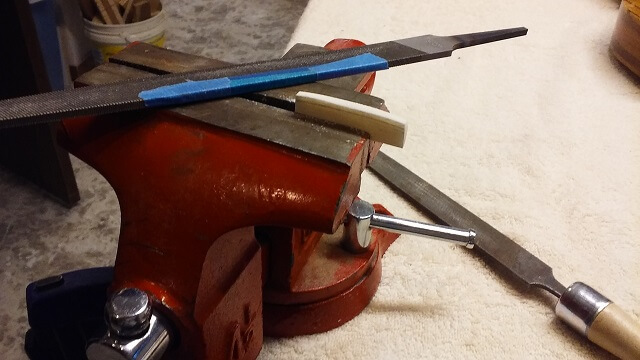
Now it was time to cut a nut. I used a piece of bone which I filed to shape, and cut the notches for the strings. Making a nut seems to be as much technique as it is an art. I'm getting better at it the more I do, but it still takes me a couple of hours to make one.
Finally, the strings were installed and all the little final setup details were completed. The instrument was finally done. This guitar was much more labor intensive than some of the others I've built, but in the end I think it turned out pretty good. Tundra Boy loves it, and really that's all that matters.
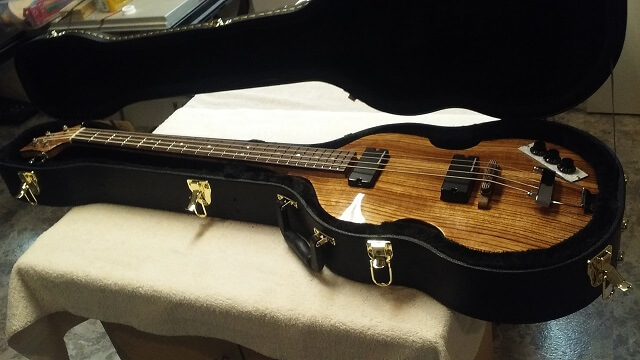
The last thing I did was place it in a case I purchased specifically for this instrument. After all this hard work I certainly didn't want it to get damaged!
Click here to return to the main page for this instrument.
Return To The Main Music Gallery
This page last updated on 06/28/2018