


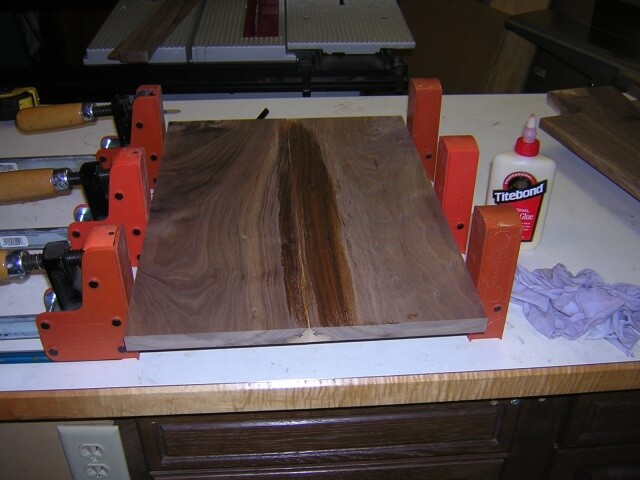
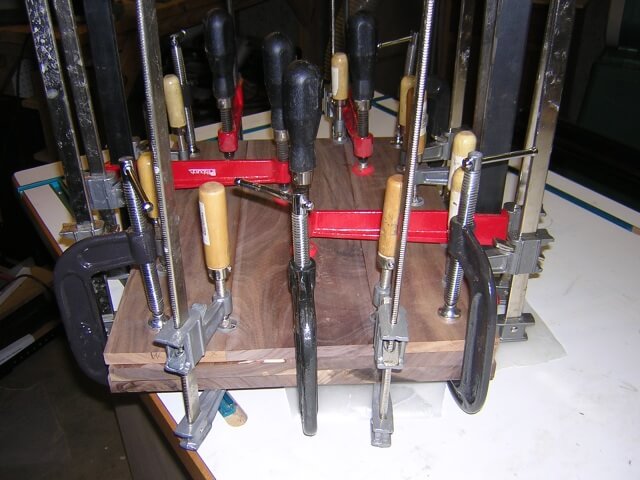
Because this guitar was made of the scrap pieces left over from my father's cremation urn the beginning of the construction process was a little different than other guitars. I didn't have wood scraps large enough or thick enough to make a typical one or two piece body blank. Instead, (like I did with the neck blank,) I created the body blank by gluing together a bunch of scrap pieces. I started by picking out two best looking pieces of scrap that to make up the top. After trimming and jointing them, I glued them together. The dark streak in the picture is where I used a wet rag to remove some glue that squeezed out from the joint. It's a lot easier to remove the glue when it's wet than to try and scrape or sand it off after it hardens.
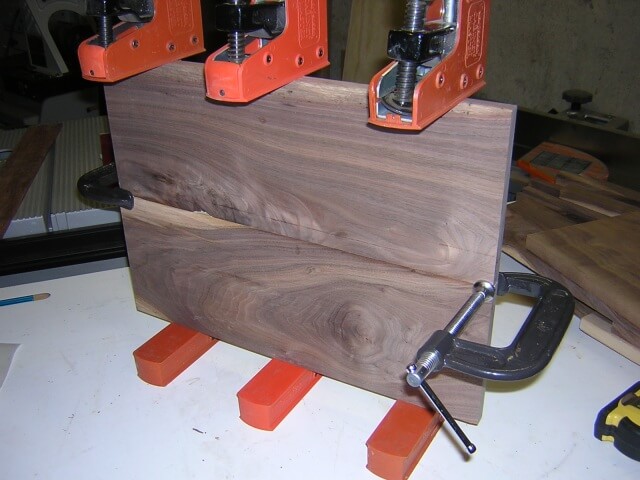
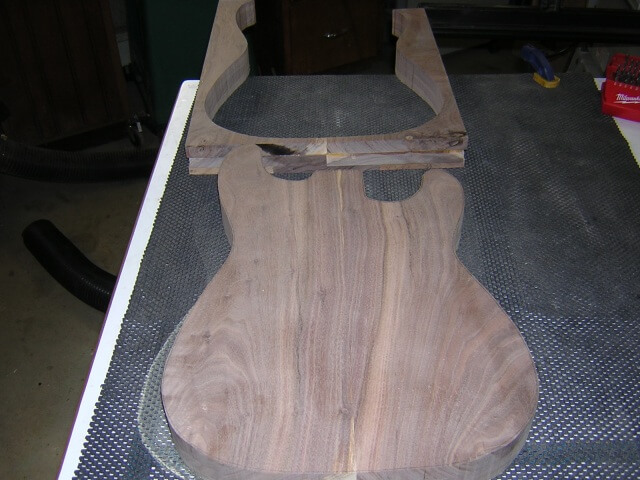
Next I trimmed, jointed and glued the two pieces that will become the center layer of the body. You can see in this photo that there was some knots on these pieces. I oriented them so that they will be hidden inside the body out of sight
These two layers were sanded flat then glued together.
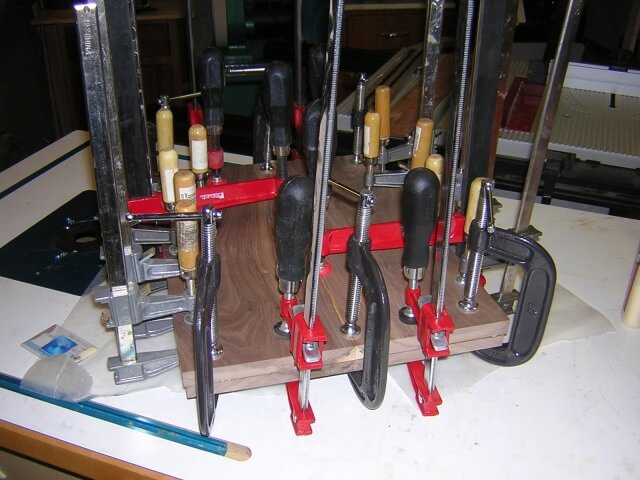
My body blank was now roughly 1.25" thick, which was a half inch thinner than the 1.75" I wanted. I would have to glue together a third layer. At this point I was running out of scraps, so the bottom layer was made up of three pieces glued together.
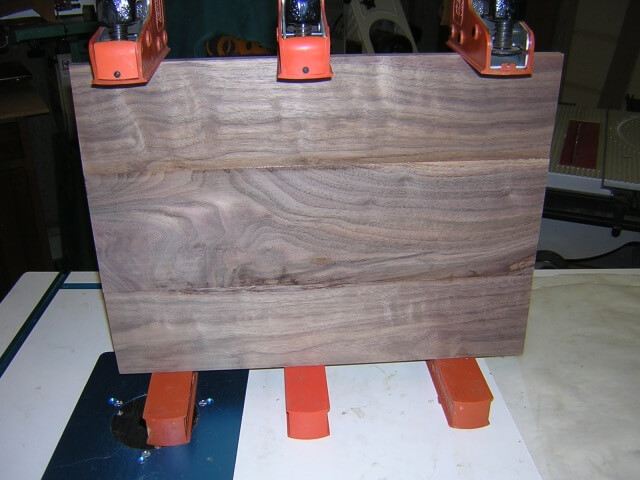
After the glue dried I sanded the bottom layer flat and glued it to the other two layers. So the body blank was made up of seven different pieces of wood.
At this point in time, allow me to address my feelings on electric guitar bodies made using this method. Some people may look down upon a multiple piece body claiming that using so much glue "robs tone." My opinion is that this is a pile of hooey. As long as the pieces are properly jointed, the amount of actual glue remaining between the pieces of wood is so small that it's difficult to measure. I dare anyone to listen to guitar recordings and then accurately tell me how many pieces of wood made up that instrument. A bad sounding instrument is a bad sounding instrument, and I feel the actual number of wood pieces has very little to do with whether a guitar sounds good or not. I've seen high-dollar Gibson Les Pauls that have a body made from five pieces of wood. You're not going to convince me that having two more pieces in a body makes any sort of noticable difference. If reducing wood glue was the key to good tone, then we would see a lot more guitars (body and neck) carved out of a single huge block of wood utilizing no glue whatsoever (and when was the last time you saw one of those?)
Assuming proper construction, the only difference between using a single piece of wood for an electric body and multiple pieces is aesthetic. Multiple piece bodys generally don't look as nice as bodies made out of one or two pieces. In the case of this guitar, I was using this wood because it had a sentimental meaning for me. The aesthetics are second in consideration.
"You are surrounded. Back away from the soapbox..."
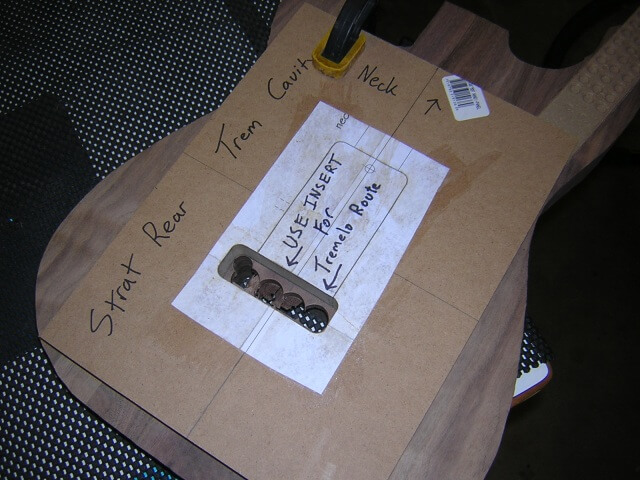
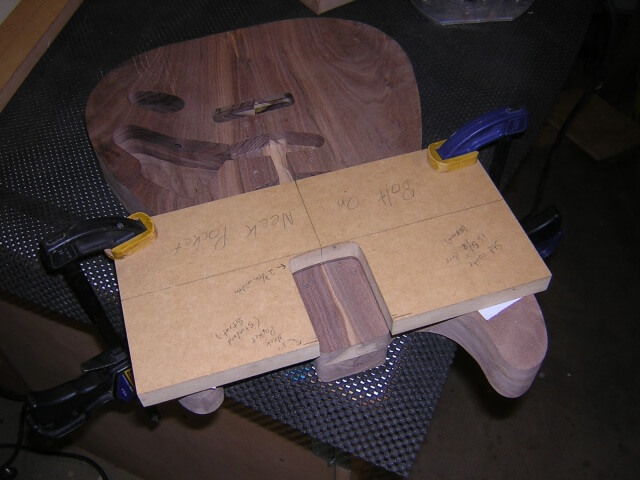
Building an accurate Strat replica is a lot easier through the use of templates. I spent some time creating a few templates using a blueprint I downloaded off the internet. Here's the template for the rear tremolo cavity. The templates I made for this guitar utilized inserts which assisted with the routing of patterns with differing depths. Please ignore the fact that I misspelled "tremolo" on the template insert.

The body template was made from 3/4" MDF. I printed out the blueprint and glued it to the wood, then cut out the pattern on my scroll saw.
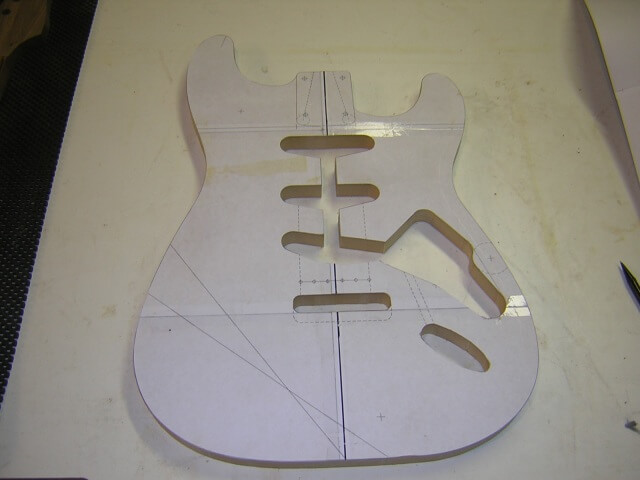
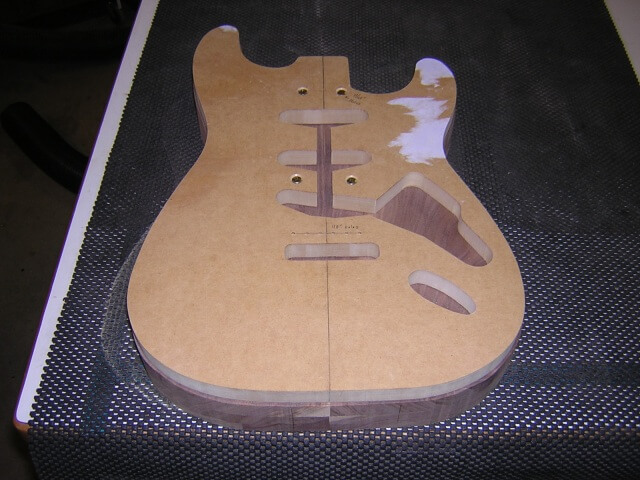
Using a pencil I traced the template onto the body blank. I then rough-cut the body shape at the band saw, taking care to stay about 1/16th to 1/8th outside of the line.
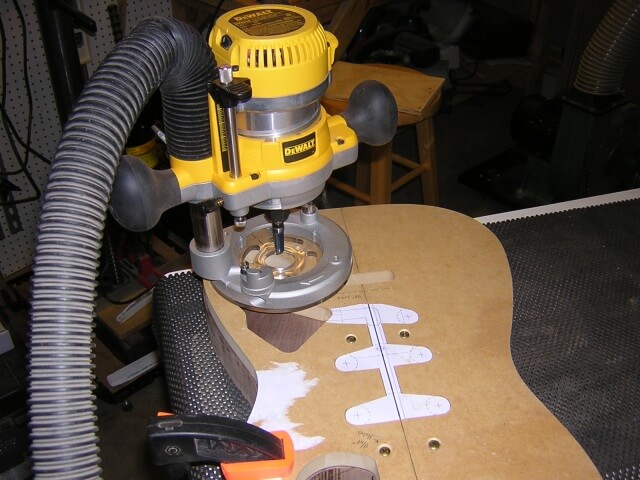
I then attached the template to the body with screws. Two screws were placed where the neck bolt holes would be located, and two more screws were placed where the pickguard would cover the holes. I used screws instead of double-sided tape because I wanted to be able to remove and replace the template several times and get it in the exact same location each time.
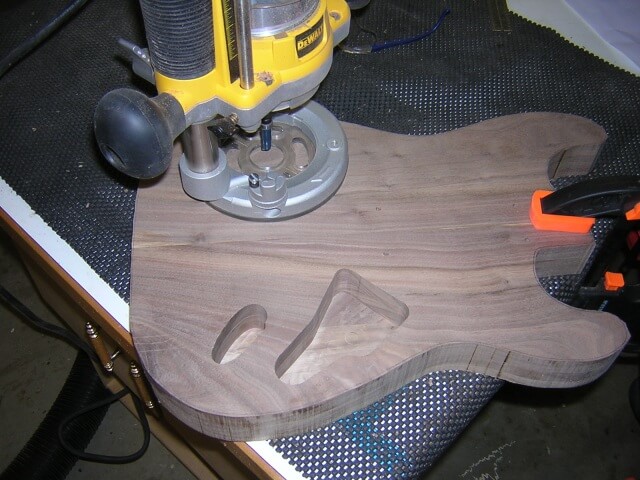
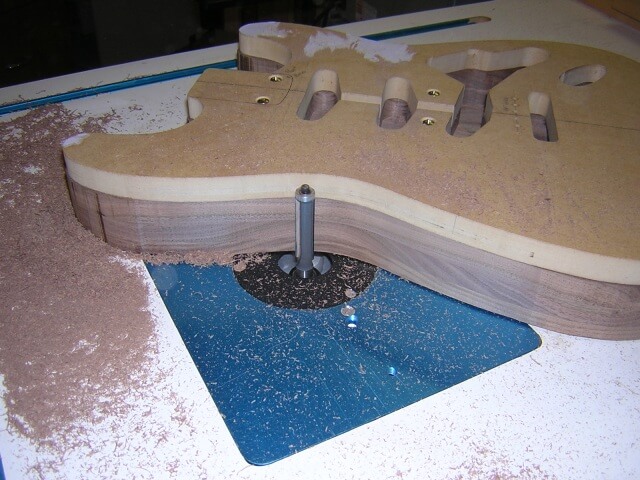
I began routing the body cavities with the output jack. Using a 1/2 flush trim bit, I ran the router around the hole in the template.
My router bit wasn't long enough to cut the full cavity depth with the template attached, so I removed the template and used the upper walls of the cavity as a guide to route to the final depth. In this picture you can see a spot on the cavity wall where my router bit slipped. Thankfully this mistake will be covered by the lip of the jack plate, so nobody but you and I will ever know.
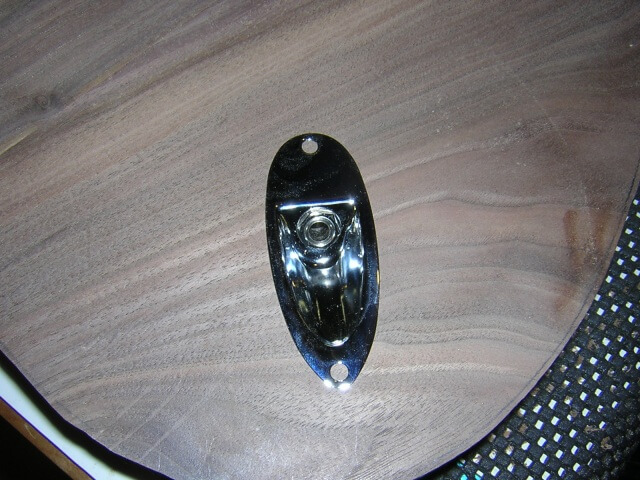
Here I'm test fitting my output jack in the cavity. You can see the flub is completely covered.
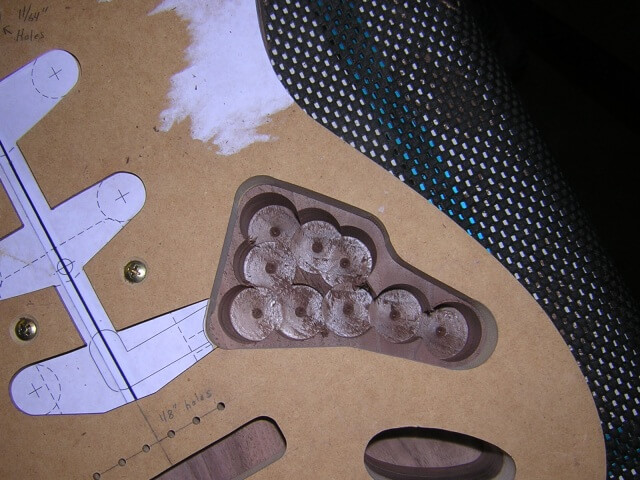
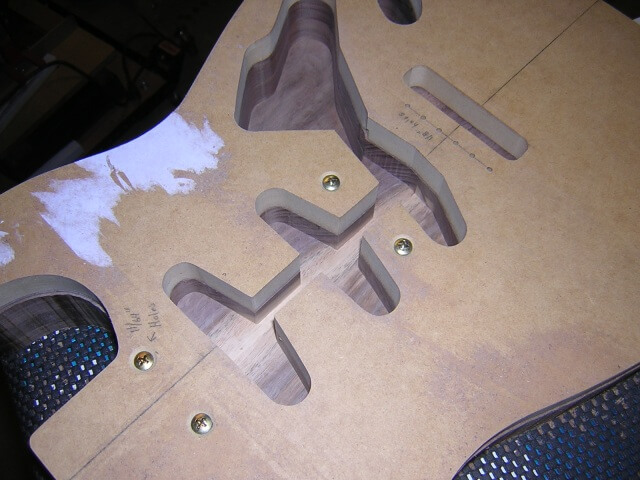
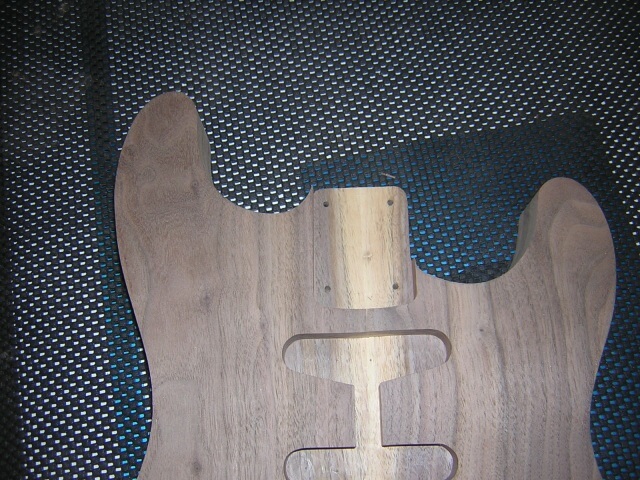
I then re-attached the template and proceeded to work on the control cavity. Because there would be a lot of wood being removed, I hogged a lot of it out with the drill press before routing. This would make routing go a lot easier, and add quite a bit of life to my router and bits. Also note that I have placed the pickup cavity insert into the template to route this cavity.
Like I did with the output jack cavity, I routed the control cavity as far as I could reach with the template in place. Then I removed the template and routed the cavity to final depth.
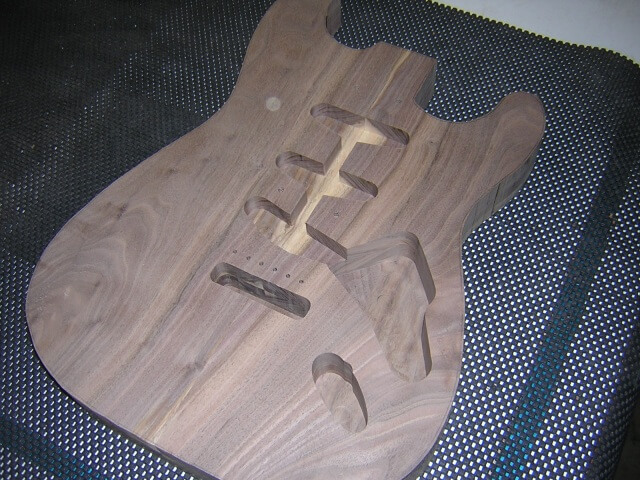
The template was screwed back in place and the insert was removed. I now routed the pickup cavity to a depth of 3/4", which was approximately half of the depth of the control cavity.
Next, I routed the hole for the tremolo. This was taken as deep as I could go. It will match up with the cavity on the back side of the body.
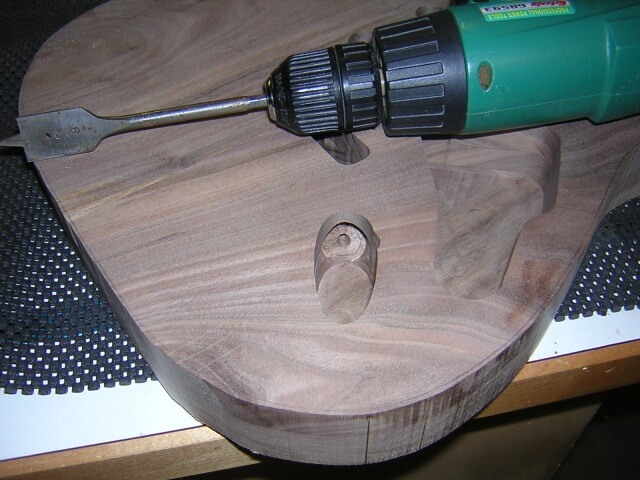
With Strat-style output jack plates, the side of the cavity will sometimes interfere with tip of the guitar cable completely inserting.
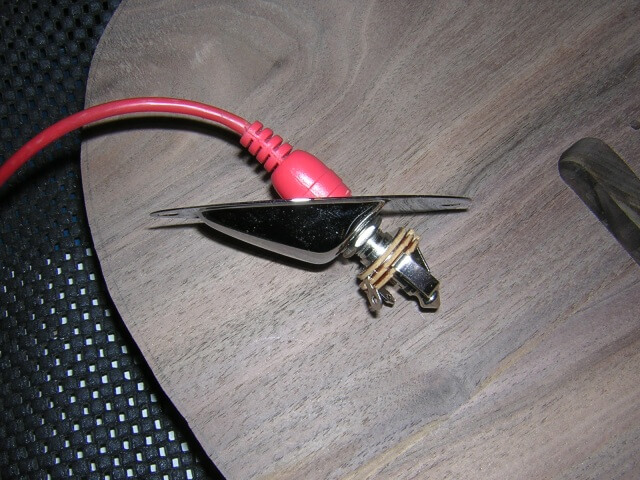
The solution is to take a spade bit on the drill and hog out a little space for the jack.
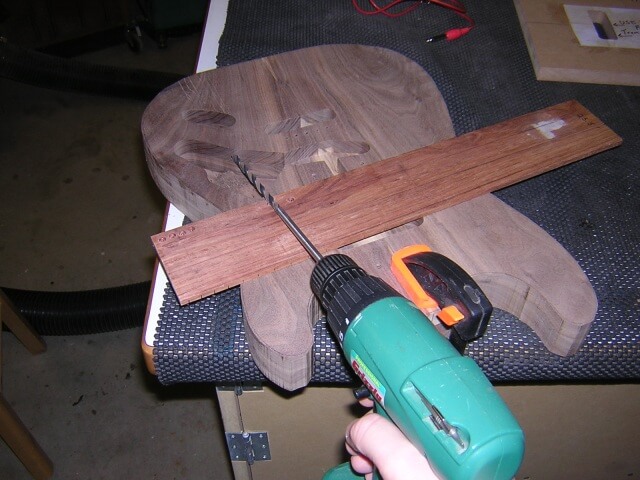
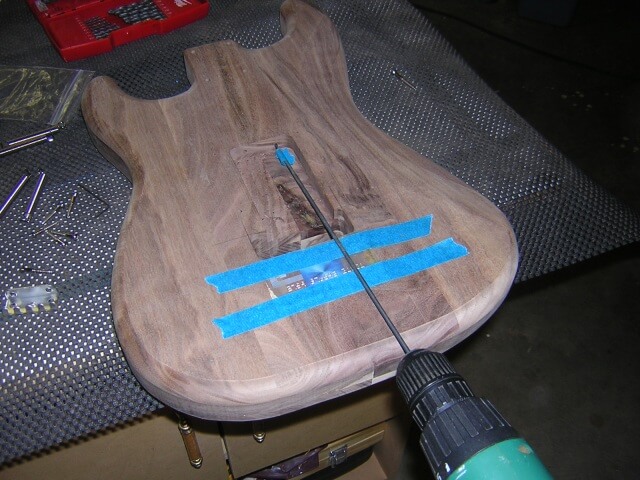
There needs to be a hole drilled from the control cavity to the output jack cavity for the wires. I drilled this hole using an aircraft bit at an extremely low angle. A piece of scrap wood was placed to protect the guitar top from the spinning bit.
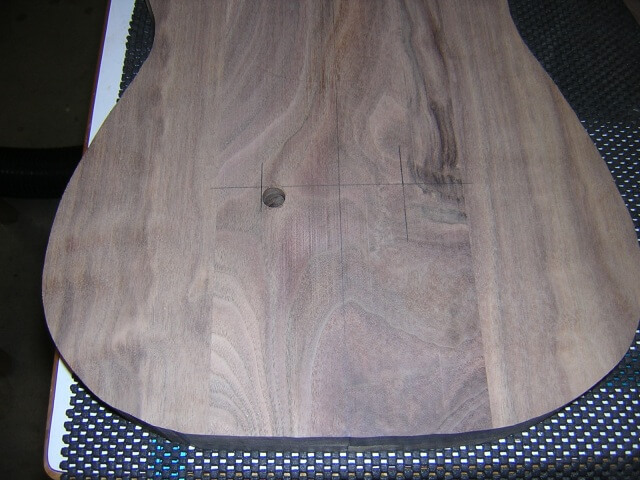
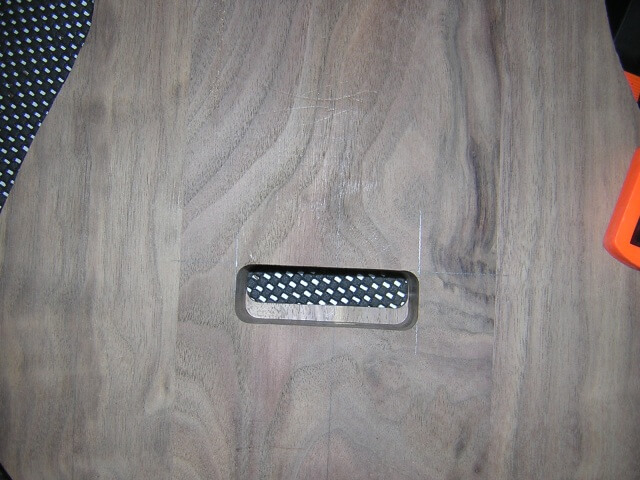
With the cavities routed on the front side, my attention turned to the rear tremolo cavity. This needed to align precisely with the cavity on the front side. To assist with this, I started by drilling a hole through the front of the body in the corner of the trem cavity. I could then use this hole as a reference point for aligning my rear template. The lines I drew were where I calculated the template should be located prior to drilling the hole. The only reason I did this was out of curiosity to see how close I would have been using this method versus the reference hole. As it turned out, I would have been about 1/32" off. Not terrible, but not perfect either.
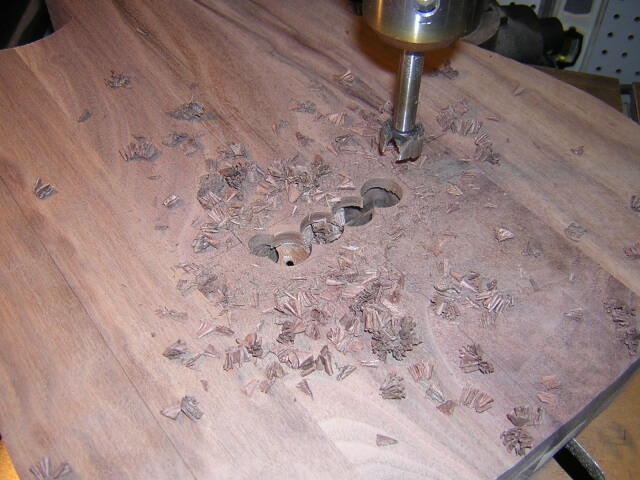
As I often do to make routing easier, I drilled holes on the drill press to remove much of the waste. You can see where the drill bit cut through to the tremolo cavity on the front of the guitar.
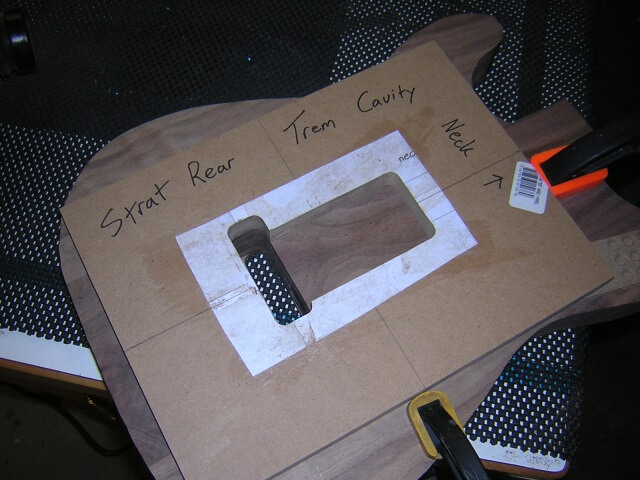
I then attached the template to the body using the reference hole for alignment. The insert was set in place so I could rout the deeper portion of the trem cavity first. I used double-stick tape to hold the template in place. The clamp is just keeping the whole body from sliding around on the work bench while I routed. The tape was plenty strong enough by itself. In fact, I had a difficult time separating the template from the body once I was finished!
Similar to the front cavities, my router bit wasn't deep enough to cut to full depth with the template in place. I pried the template off and then finished the rout using the walls of the cavity as a guide.
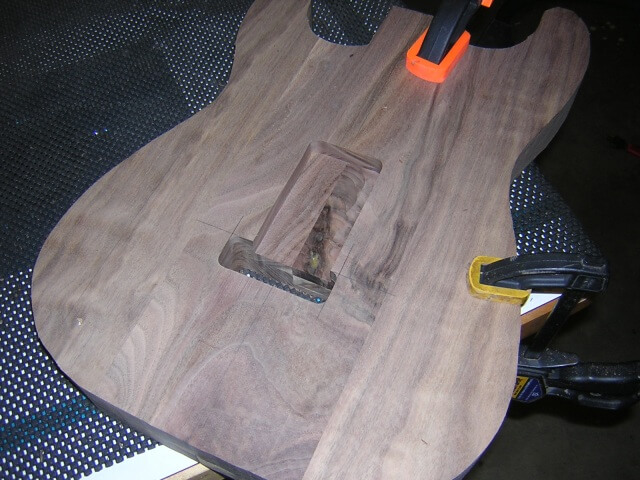
I carefully aligned the template and put it back on the guitar. Removing the insert allowed me to rout the cavity for the tremolo springs.
The spring cavity was routed to a depth of 5/8". You can see the router exposed one of the knotty areas on the middle layer of the body wood. This is no big deal as it doesn't affect the guitar's structural integrity and it will be covered up by the rear plate, so it won't be visible.
Now it was time to re-attach the body template and cut the body to final size. I began the process using a flush trim bit at the router table. This was a brand new bit I had just purchased and to be honest, I wasn't happy with how it was cutting. It seemed to have excess vibration and actually scared me a little as it was running. I cut about a third of the body using this bit before I chickened out.
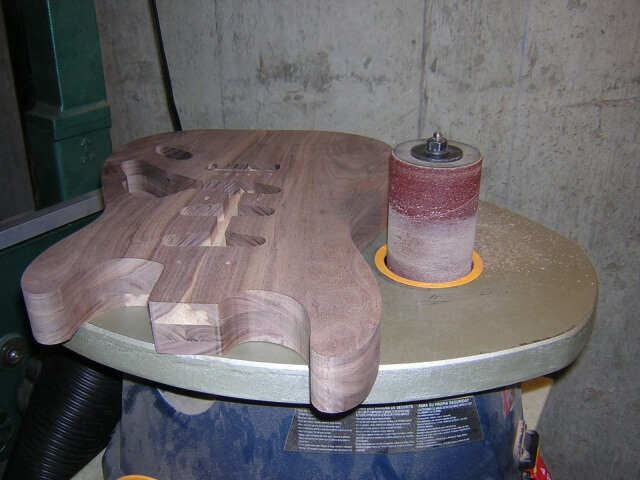
I decided to give up on routing the body flush, and switched over to the drum sander. I removed the template and then just sanded the body by eye to the line I had traced on the wood. This took a little longer than routing, but the results were just as good and I didn't feel like I was in danger of losing an appendage.
It was now time to mark and drill the holes for the neck bolts. I did this before I routed the neck pocket so that I didn't have to be concerned with any tear-out as the drill bits emerged from the front of the guitar.
I flipped the guitar over and attached my neck pocket template. Once again double-sided tape was used to hold the template in place and the clamps are just to keep the guitar from sliding around.
With the neck pocket routed you can see the screw holes have been exposed. The pocket was routed to a standard depth of 5/8" inch.
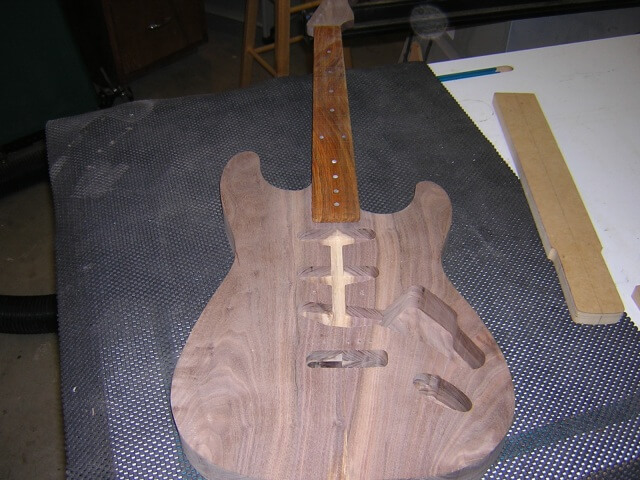
Now I could test-fit the neck. It's starting to look like a guitar at this point.
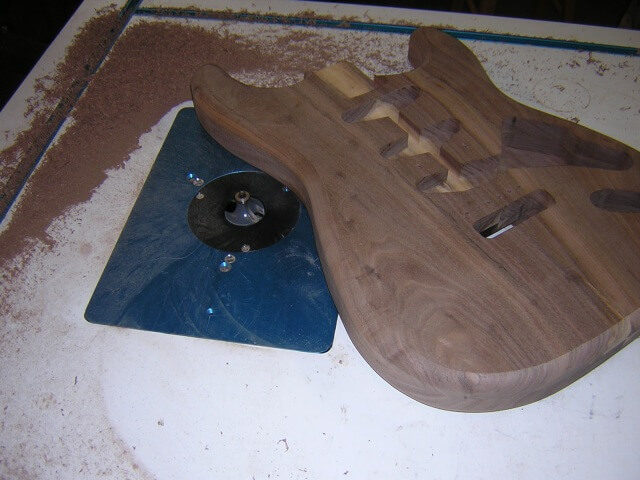
Time to deal with the square edges. I chucked-up a 1/2" roundover bit in the router table and ran both sides of the body around it.
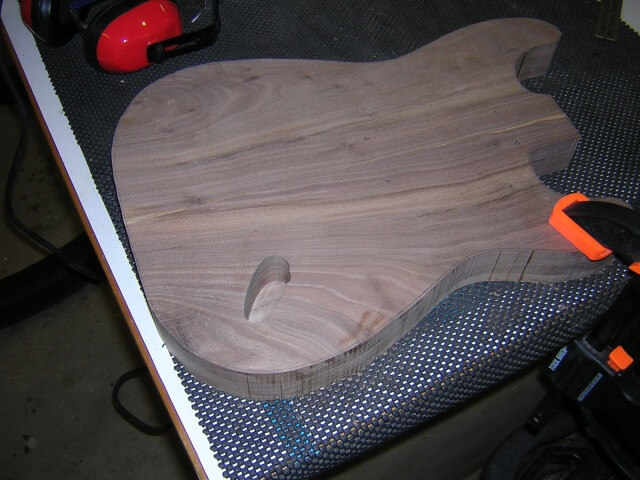
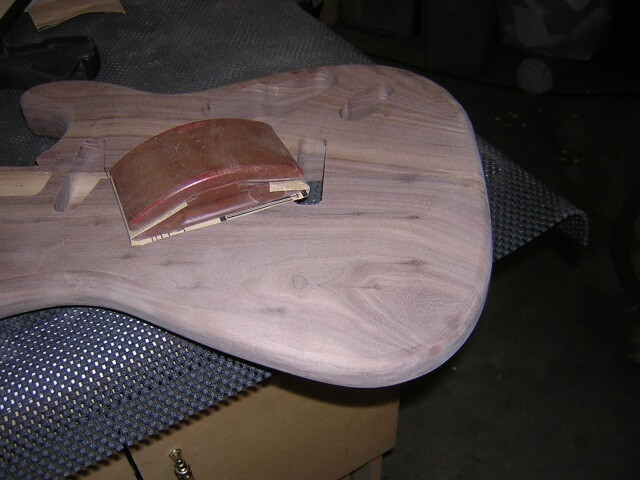
Flipping the guitar over, I prepared to carve the "comfort contour." This is also known as a "beer-belly cutout" or in my case, a cheese belly. There aren't any real rules or jigs for carving this area. I just roughed out the carve area with a pencil until it looked right.
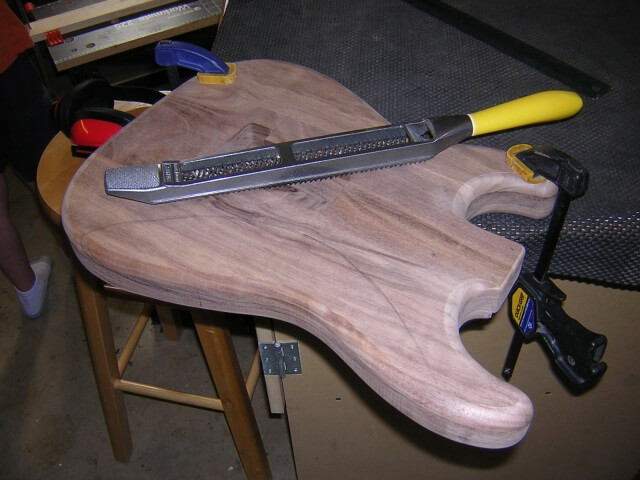
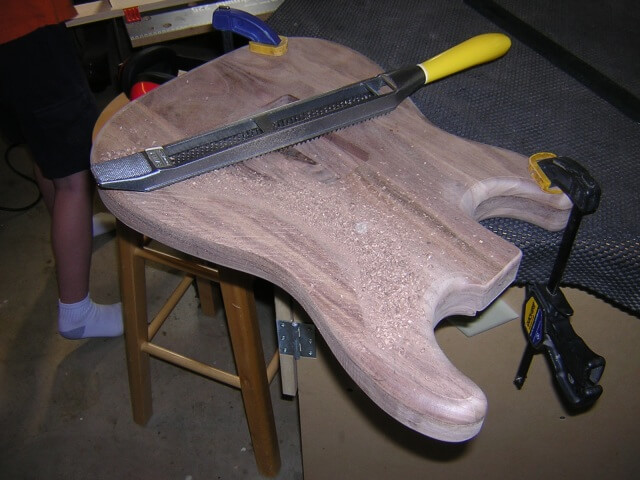
I used my Surform tool (which is like a cheese grater with a handle) to rough out the carve. The Surform is not a precision instrument by any means. It leaves a rough surface and a mess of wood shavings. It also leave me sweating. However carving with a Surform is probably my favorite part of guitar building. In the background you can see the legs of the Tundra Boy. He was in the shop at the same time building a rubber band gun.
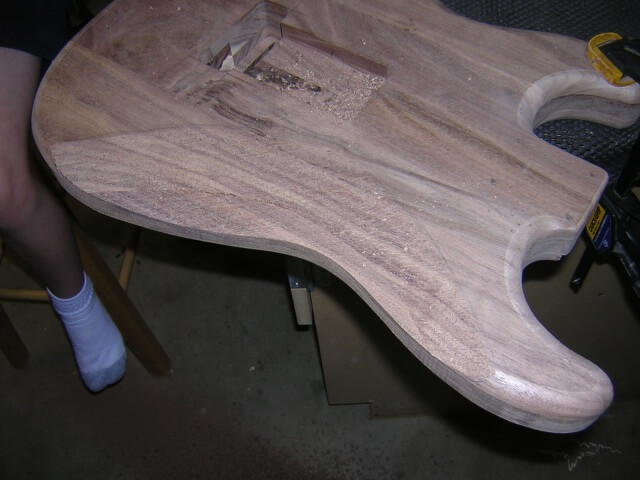
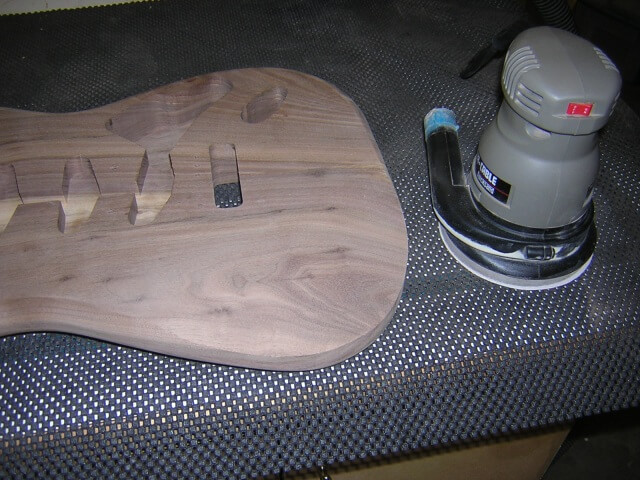
After about ten minutes, the carve was satisfactory. Next was sanding to smooth out the gouges left by the Surform. Thankfully a random orbital sander makes quick work of the rough surface.
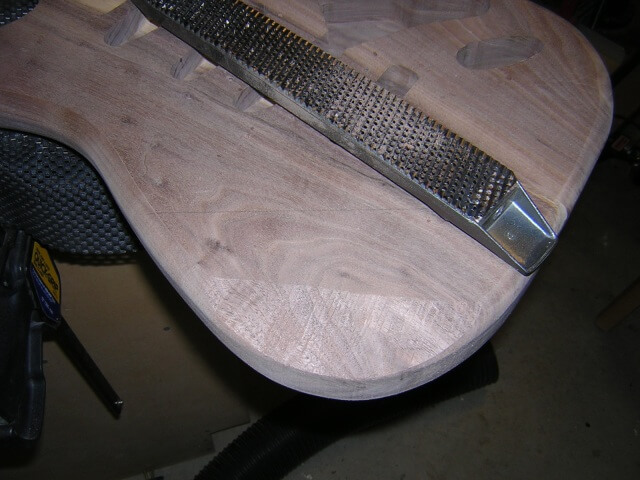
The forearm contour on the front was done in the same fashion. A couple lines were drawn for reference, then I went to town with the Surform. This carve was a little simpler as it didn't involve any curved lines.
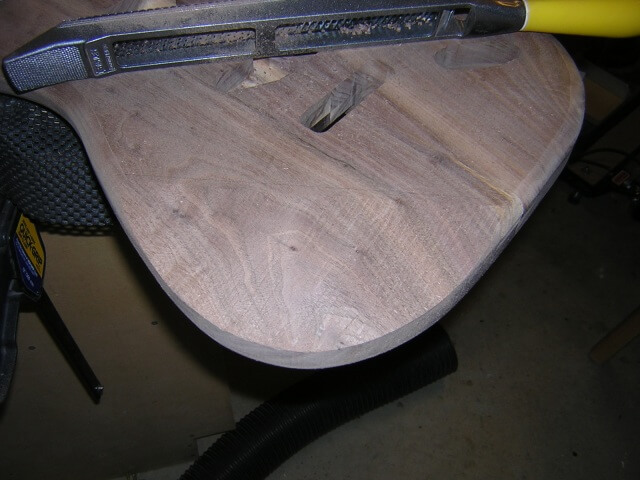
Again, after about 10 minutes and a bit of sweating, the front contour was ready for sanding.
The ROS (random orbital sander) may be the most used tool in my shop. It can make a multitude of sins disappear. I've abused this particular sander for nearly 10 years with no maintenance and it's still going strong. If it died I'd buy another one in a heartbeat. In less than two minutes I had my forarm contour silky smooth.
One of the side effects of carving the front and read contours was that I removed the 1/2" round-over that the remainder of the body sports. To make the contoured areas match I needed to form a new round-over in these areas. Because of the curves, I was unable to do this with a router. The only way I know of is to round over the edges by hand, using a sanding block.
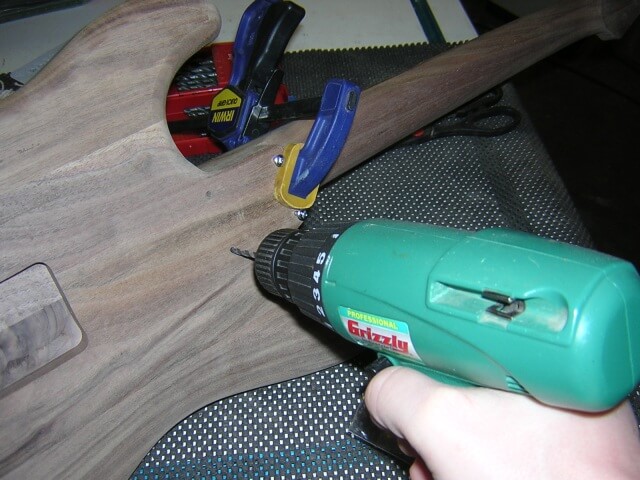
Using a clamp to hold the neck in the correct position, I drilled the holes for the neck screws. The holes in the body were already there. What I was drilling at this point in time were the holes in the back of the neck heel.
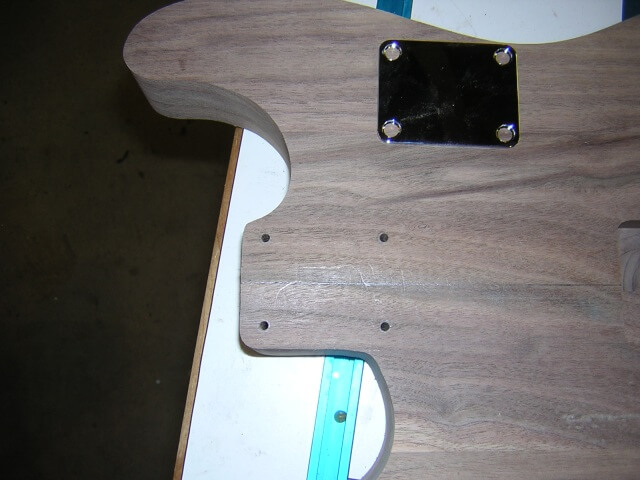
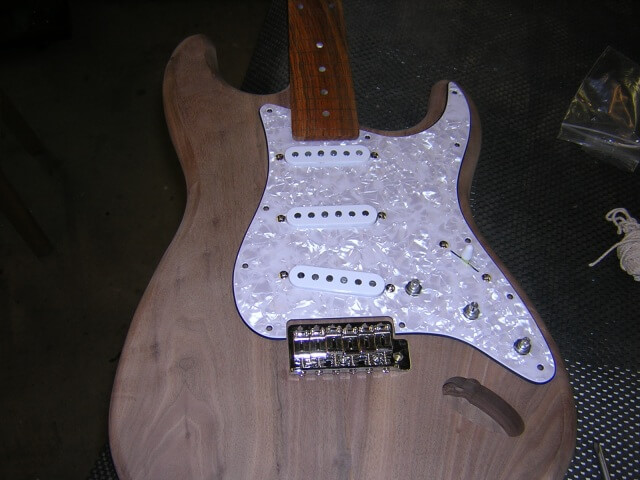
With the neck bolted in place, I set the pickguard and bridge in place so I could mark the holes for the screws to hold these pieces to the guitar. In this photo it's starting to look closer to something that will actually make music.
In the rear spring cavity, I drilled a couple holes for the screws that will hold the claw spring in place. Because of the low angle of the holes, I used an aircraft bit.
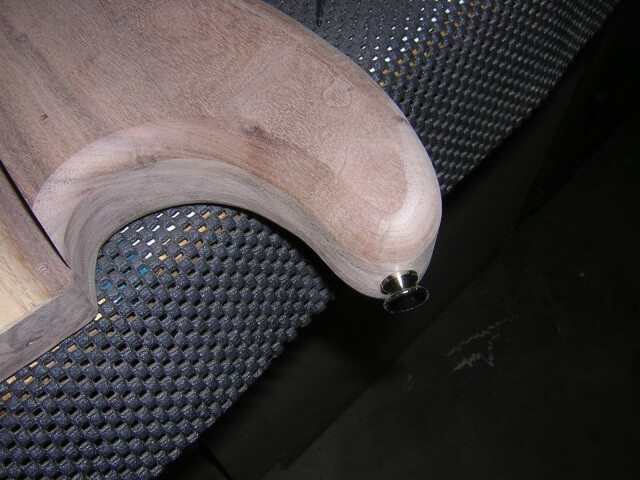
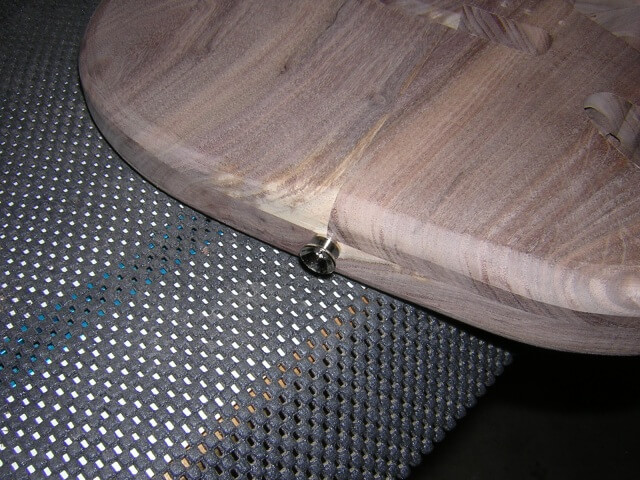
The last thing the body needs before starting the finishing process was a couple of holes to hold the strap buttons.
With the neck and body finished, it's time to put all the pieces together.
Return To The Main Music Gallery
This page last updated on 06/28/2018