


The body and neck/fretboard were done. Now comes all the fiddly little bits to stick them together and make a completed guitar.
The next step for this guitar was applying a finish. I generally don't take many pictures during this process as there's not much to look at. I mean, do you really want to see a picture of me sanding? I didn't think so...
But sanding was step one in the finishing process. Went over the whole guitar starting with 100 grit and worked my way up to 220 grit, removing all the scratches and slight imperfections that happen when building an instrument.
After sanding came grain filling, which is a fancy name for putting something inside all those little wood pores so that when the lacquer is sprayed onto the guitar it can be mirror smooth. Grain filling is my least favorite part of building a guitar, but it's part what separate a professional looking guitar from an obviously homemade instrument. Indeed grain filling is such a pain that Bob Taylor from Taylor Guitars has said, "We should find the guy that decided all guitars should have the grain filled, dig him up and shoot him again."
I'm still searching for a grain filling method that works well, doesn't require dozens of coats, doesn't mess up the color of the wood and won't make your arm fall off from sanding. I'm still searching.
Seeing as this guitar is all one color, I attempted to use a method of thinned wood putty which I worked into the grain using a plastic scraper. I hadn't tried this method yet. Here's what I found:
Q:Did it fill the grain?
A: For the most part, yes. I found a couple spots after the finish was sprayed where there were some unfilled pores. This probably would have been fixed with an additional coat.
Q:How many coats did it take.
A: In most spots I did two coats. There were a few places where I saw the need for a 3rd coat. As I mentioned above, there were also places where I didn't see the need for another coat but should have added one.
Q:Did it change the color of the finish?
A: This was probably the least satisfactory part of using the thinned wood putty. The putty itself didn't look bad in the grain. It also didn't create areas of blotchiness in the end grain like I've experienced with some other methods. The problem I had is there were spots where I didn't get all of the putty sanded off the surface. Unfortunately these spots weren't noticeable until after I sprayed the finish. They looked fine prior to spraying. So under the finish there are areas that look a bit browner and have less visible grain.
Q:Was it difficult to sand?
A: This was the best part of using thinned wood putty. Once dry it sanded pretty easy. Some other grain filling products I've tried are like sanding concrete.
Now that it's all said and done, I'm probably not going to use this method again in the future.
After the grain was filled, I sprayed about 12 coats of nitrocellulose lacquer. Once the lacquer is sprayed, you're supposed to let the instrument sit for at least 2 weeks to let the lacquer cure before level sanding/buffing. This is where life threw a wrench at me and the project went on hiatus.
The same week I sprayed the finish on this guitar, my mother passed away. As a result I spent the better portion of the next two years cleaning out my parent's house and settling their estate. Because we weren't busy enough, in the midst of this process my wife and I stumbled across our "dream" house and decided to move. Then our old house needed to be fixed up and sold. There were a handful of other things that happened to steal my focus away from this guitar and before I knew it four years had passed.
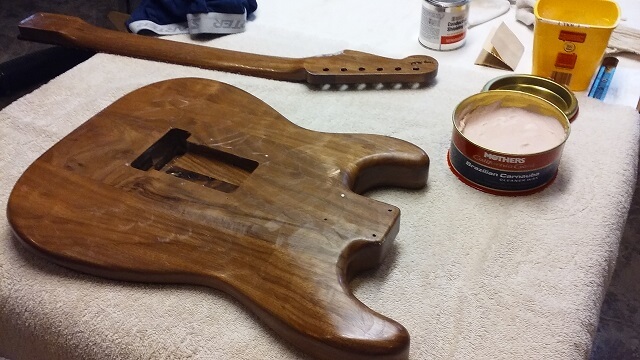
I finally decided it was time to return to this guitar and get it out of my shop closet. The good news is that the longer you let lacquer cure before you level sand and buff the better. Well, four years should make for an extremely cured finish. Once the finish was through the buffing process it was very, very shiny.
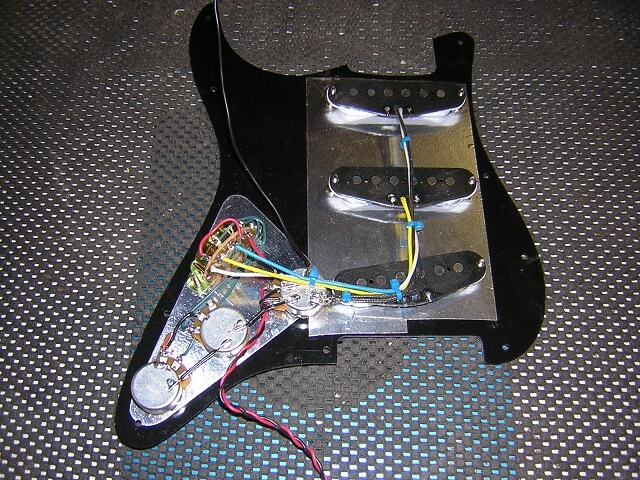
On a Stratocaster most of the electronics are mounted to a pick guard, which makes it a lot easier to wire than rear-routed guitars. I bought a pre-made pickguard, some pickups, pots and switches, then wired up the whole shebang. I tested everything on my bench to make sure it was working. The output jack wires and bridge ground wire can't be hooked up until it's installed in the guitar, but everything else was wired.
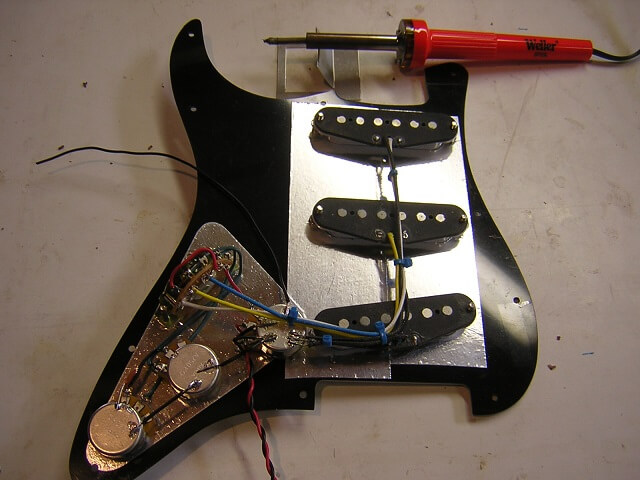
For some reason I took two pictures of the wiring. Either I was real proud of my wiring job (possible) or I forgot I already took a photo (more likely.) In any event, I went through the trouble of taking the picture so here it is.
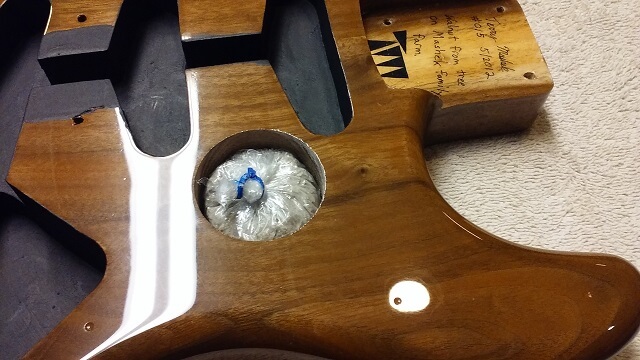
After I had level sanded the body, but before I buffed the lacquer I had an idea. I chucked up a 1 7/8" forstner bit in my drill press and plunged a hole in the guitar.
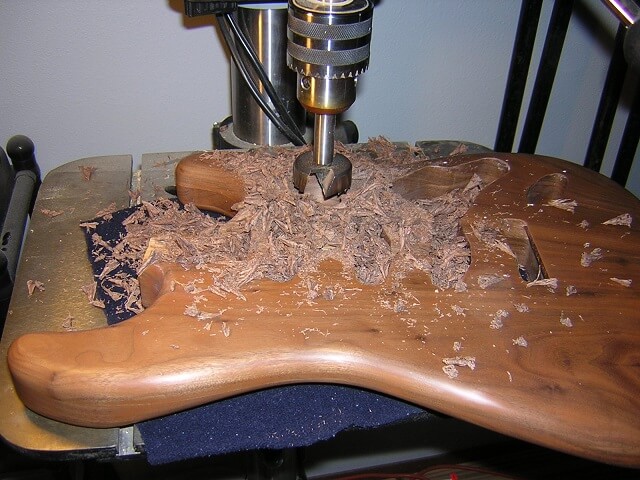
Given the nature of this instrument is intended to be a tribute to my father, I decided to take it a step further. This hole will hold a small portion of his ashes. It will be hidden under the pickguard so that I will probably be the only person who knows it's there. But it will be a way to keep a bit of my dad with me. You may find this touching or you may find this creepy. I haven't fully decided myself which it is. But it felt like something I needed to do, so it is what it is.
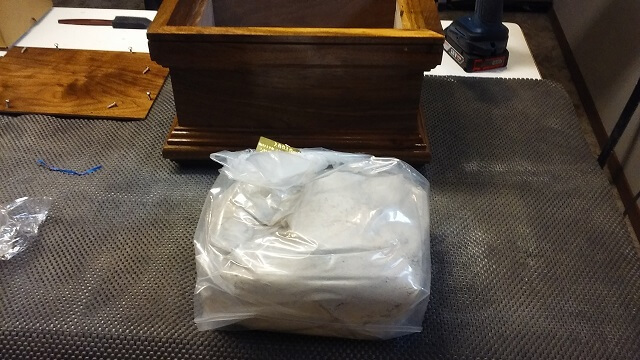
My father's cremation urn was still sitting on the mantle in my basement. He has a burial plot at a nearby cemetery, and eventually he and my mom's urns will be laid to rest there. My brother and I have been procrastinating for quite a while getting around to having it done. Seems like there's always something else going on that makes us forget about doing it. Every once in a while my wife will remind me that my parents are still in our basement. I think it makes her feel a little weird.
Anyway, my procrastination paid off in this case because I still had his ashes available to me (at least without using a backhoe and under the guise of darkness.) I opened up the urn and removed his ashes.
The next few minutes were very solumn. That's the best way I can describe it. I made sure I was alone because I wasn't sure if I was going to cry or not. A lot of memories came back and I didn't feel like being around anyone.
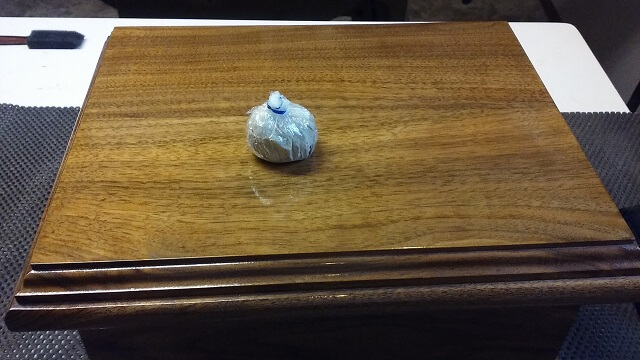
I was ultra-careful to not spill any ashes. I filled a double-layer of plastic with 2 oz of the ashes, then tied it shut. I used a plastic spoon, and when I was finished I packed the spoon into the urn so that any of the ash dust clinging to the spoon would remain. I just didn't feel right throwing the spoon in the trash. That's why I used a disposable spoon, because I also didn't want to just rinse off any of the dust down the sink drain. That, and I would probably always wonder at every subsequent meal if this was the spoon that scooped my dad.
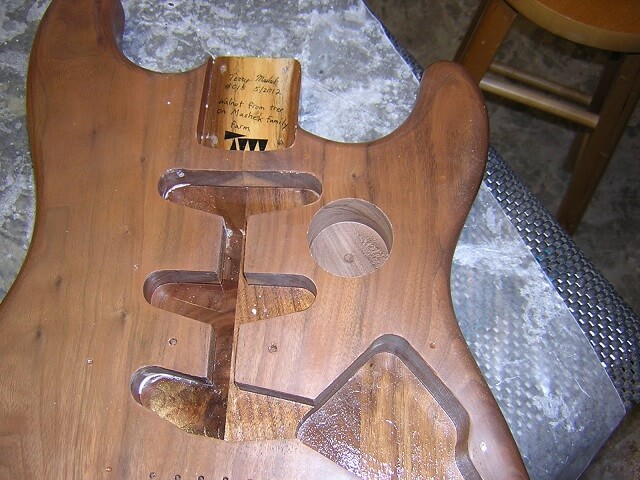
The 2 oz of ashes was about the right amount to fit in the cavity I drilled into the body. I placed the ashes in, and also typed up a short description of whose they were and the history of the tree, the urn and the guitar in case years later someone other than me opens the guitar up and wonders what this bag contains. Hopefully the note will prevent them from thinking they found a drug stash.
Before I went any further I applied a good coat of paste wax on the body and neck. This will help protect things while I finish the assembly. I make sure to use pure carnuba wax without silicone, as silicone that gets loose in a shop can wreak havoc on the finishes of future projects.
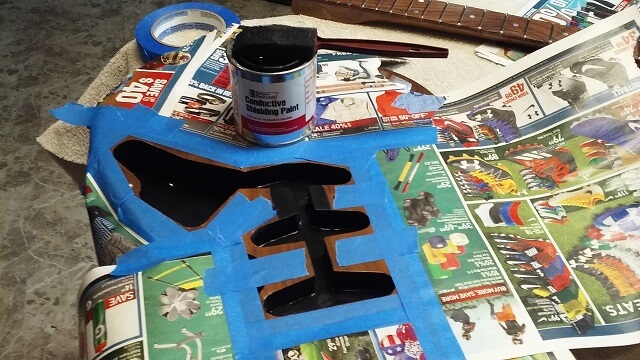
Now it was time to shield the control cavity from RF interference. I use sheilding paint. Metal foil also works (and maybe slightly better) but it's also a lot more difficult. I prefer painting on a few coats of the paint and calling it good.
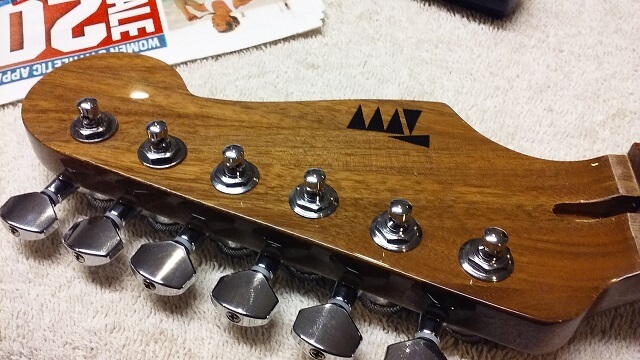
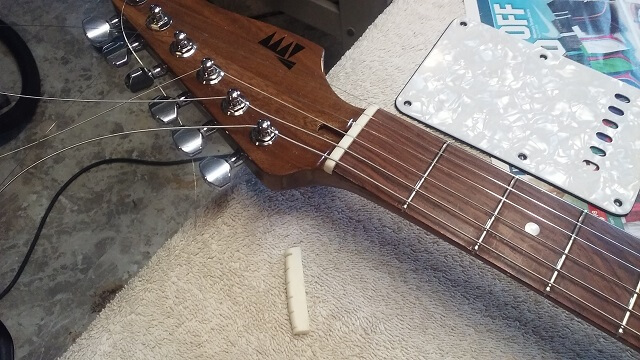
While the shielding paint was drying I installed the tuning machines on the headstock. I used locking tuners, which should help keep the instrument in tune well. It also makes changing strings way easier.
Next, I installed the pickguard, the output jack and the bridge. I had to do a little soldering of the three items. Most of the pickguard was wired, but the output jack wire had to be run though the pre-drilled channel and wired up. Also, the ground wire had to be run through a hole I drilled into the back cavity and soldered to the bridge claw.
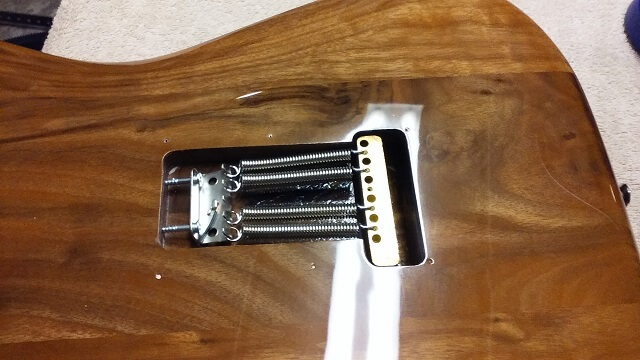
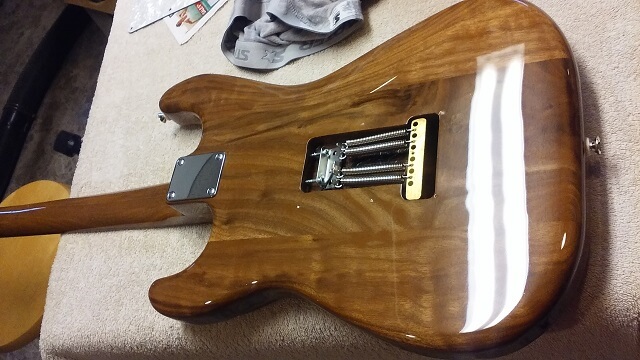
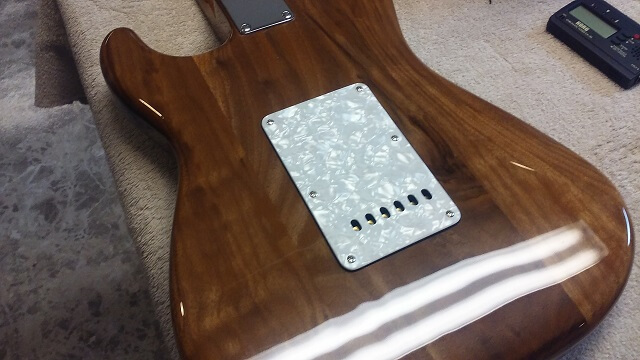
Here's what the back of the bridge looks like. This guitar has a tremolo system that will be set up to float. I initially installed four springs, but later on when I was setting up the bridge I removed one of them to get the bridge to float the way I wanted.
Now it was finally time to make the two pieces one. I screwed the neck into the body.
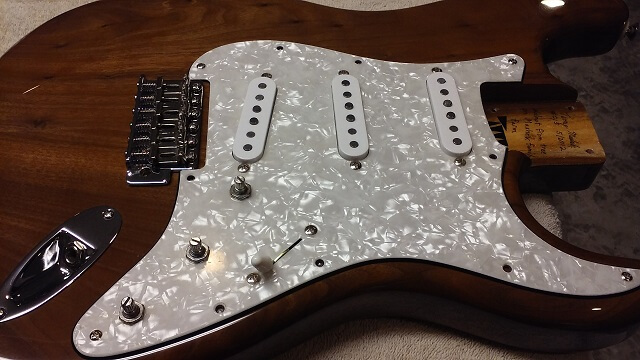
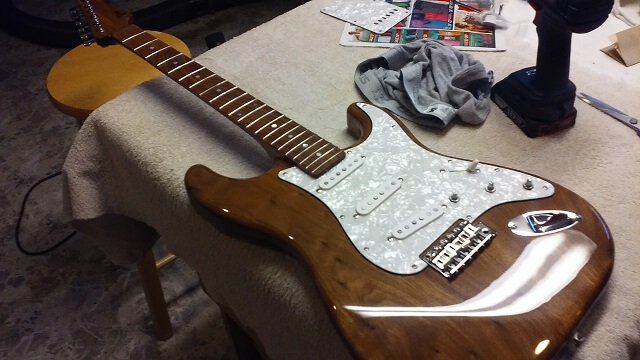
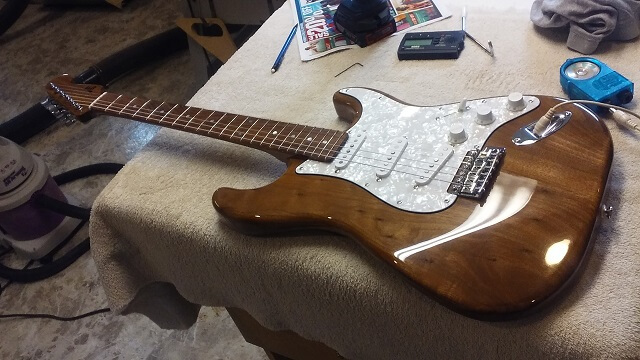
Here's the front of the guitar with the neck attached. We're getting really close now!
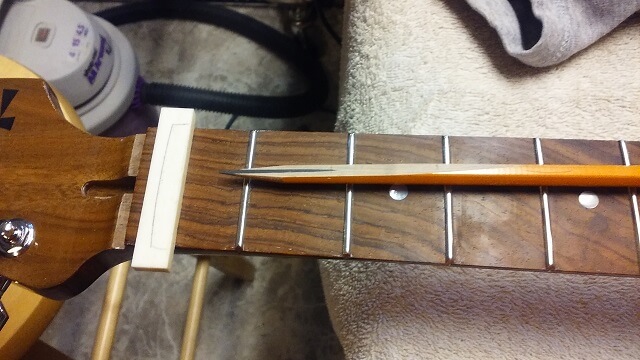
Now it was time to make a nut. I find making nuts rather tedious. They're easy to get wrong. I'm not going to explain every single step to make a nut here as it's really an art form and I'm not a self-proclaimed expert. You can watch the whole process on YouTube and get an idea of what all is involved. The very first step was to take a bone blank and mark the basic shape of the nut. Note the sanded pencil I use that allows me to mark the exact height of the frets on the nut blank. My slots I will file later should be just above that line.
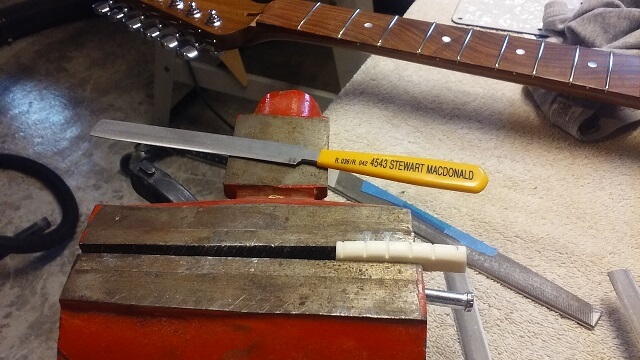
There's a lot of cutting and filing to shape the nut to the proper size, and to cut the slots to the proper depth. I had to buy a gauged set of nut files for the slots, and I use a regular bastard file to shape the outside. I clamp the blank in a vise when I'm shaping it, and put it on the guitar when I'm testing the fit. There's a lot of back and forth. Like I said, tedious.
At long last, the nut was finally done. I actually messed up the first nut I started to make when I got careless and started thinking about something else. Pretty soon I found I had cut a slot way, way too deep. Rather than trying to fix it I just started over with a new nut blank. In this picture you can see the original nut sitting on the workbench
With the nut finished and the strings on, it was now time to do the setup. I adjusted the truss rod, set the intonation, adjusted the action and dialed in the tremolo. Things will settle in over the next few weeks and I'll have to come back and do a few little tweaks to really make everything play nice. With everything adjusted I was able to "button up" the rear and add the cover.
So there we go. We're finally done. It "only" took a little over four years from start to finish. As my father liked to say, "What I lack in speed, I make up for in sloppiness."
Return to the main page for this guitar.
Return To The Main Music Gallery
This page last updated on 06/28/2018