


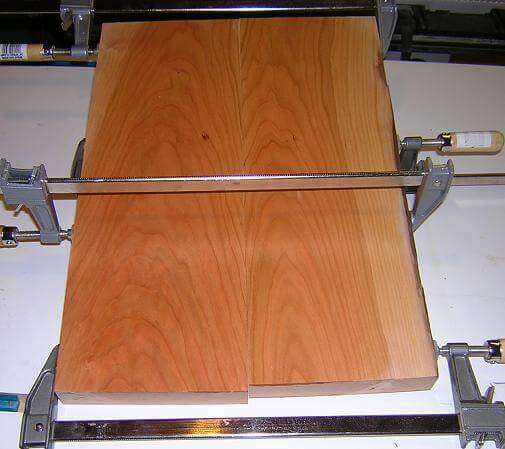
The body of this guitar is made out of 8/4 cherry. I planed the stock down to 1 3/8" thick, so that when the top is added the total thickness will be around 1 3/4". I glued two pieces of the cherry together in order to get a blank wide enough for the body.
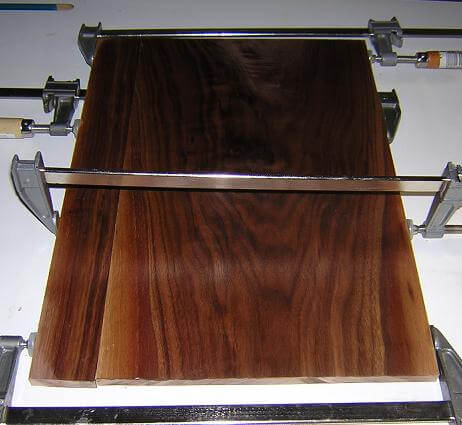
The top is going to be walnut, 1/2" thick in the middle carved down to 1/4" thick on the edges. I found a beautiful board at my hardwood supplier. I planed this board to 1/2" thick for the time being. At 12" wide, it was just a hair too narrow for me to use by itself, so I glued on a 2" strip to one side in order to give me the width I need.
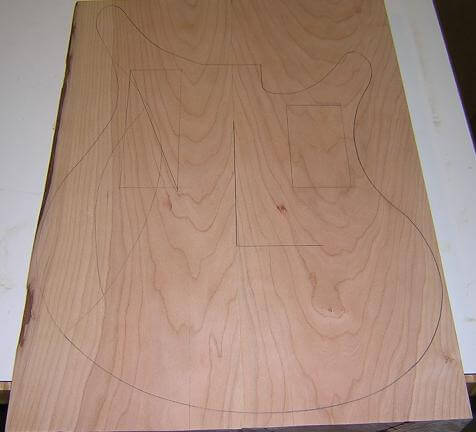
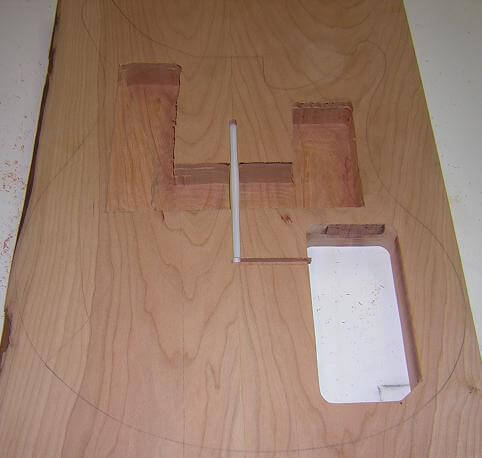
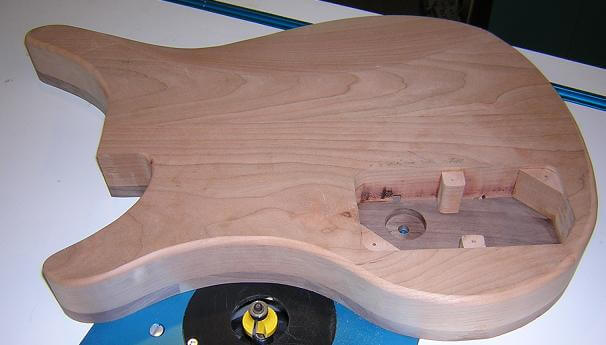
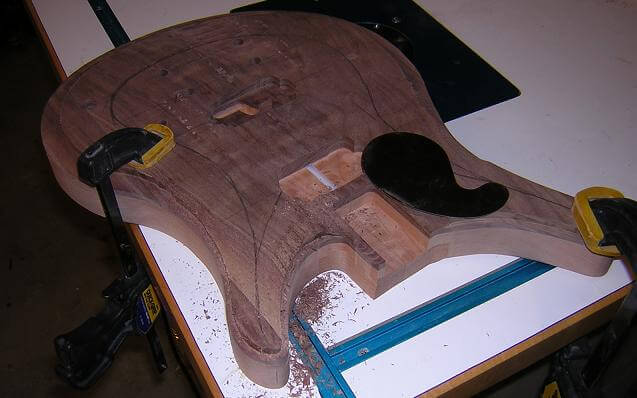
The piece of cherry I'm using is heavy. Like, disturbingly heavy. With the extra long neck a baritone has, I was estimating that the finished guitar would be in the 13 pound range, which would be extremely uncomfortable. To counteract this weight, I'm going to chamber the body to attempt to bring the weight down significantly. If I can get the total guitar weight under 10 pounds, I'll be happy. When marking for the chambers, you have to be very careful not to cut into areas that will be later carved away and possibly expose the chamber. I spent some time with a pencil figuring out where I should put the chambers. I also marked out the areas to be removed for the control cavity, and a channel for the wiring.
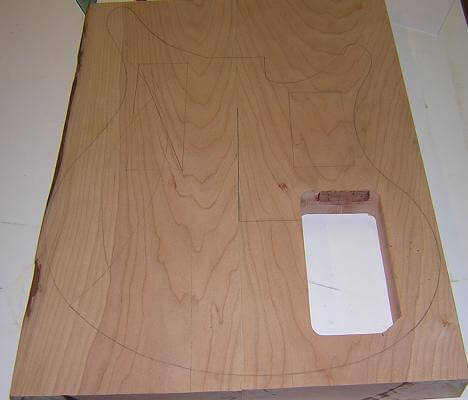
The chambers won't be cut all the way through the body, so I'll use a router. The control cavity, however, has to be open to the back of the guitar, so I could remove the material in the cavity with my scroll saw. I set the cut-out piece aside, as I will use that to make a control cavity cover later.
Next, I routed out the body chambers that, as mentioned above, should help lighten the body. Once the top is glued in place, these channels will never again see the light of day, so I routed them freehand and didn't worry too much if the edges looked a little rough. I also cut the wiring channels that will be used to pass the wires from the pickup cavities to the control cavity. Because I removed wood between where the two pickups will be mounted, running a wire between them would have proven to be tricky once the top was in place. To assist with this, on a recent trip to McDonalds I picked up an extra straw which I will glue into place across the chamber to form a sort of "conduit" in which to run the wire. I used a McDonalds straw because they have a larger diameter than those of other fast food restaraunts. Yes, I am a fast food authority and I know all the minor details such as straw girth.
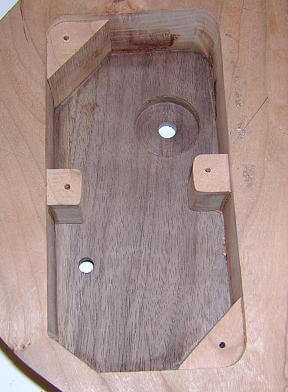
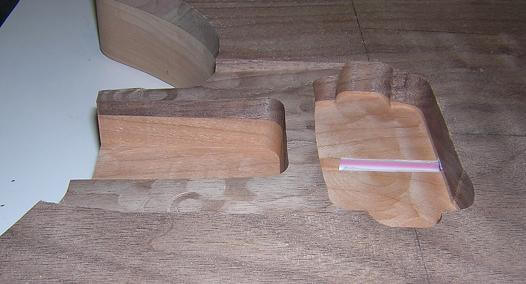
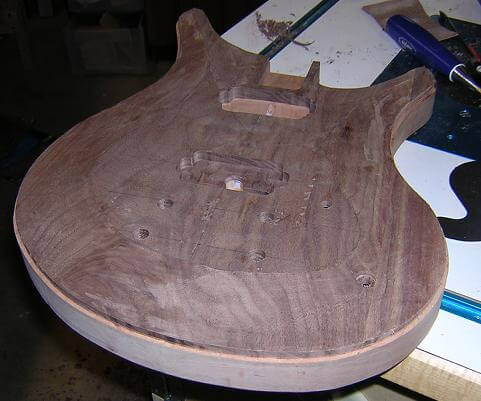
I cut the control cover from the cutout that was removed when cutting the control cavity. In order to fasten it in place, I then made some little blocks (also from the control cavity waste) and glued them in place, low enough so that when the cover is in position it is flush with the back of the guitar. Here's a picture of the control cavity cover and the blocks glued in place.
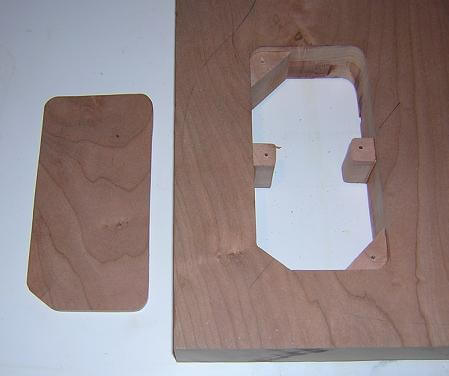
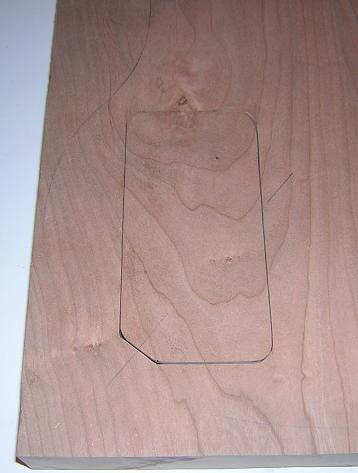
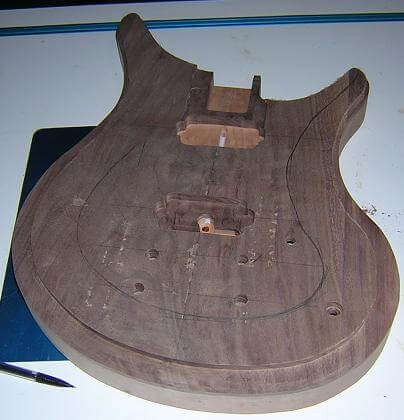
Here's how the control cavity will look when it is in place. Note that because it was formed from the same piece of wood, the grain matches perfectly.
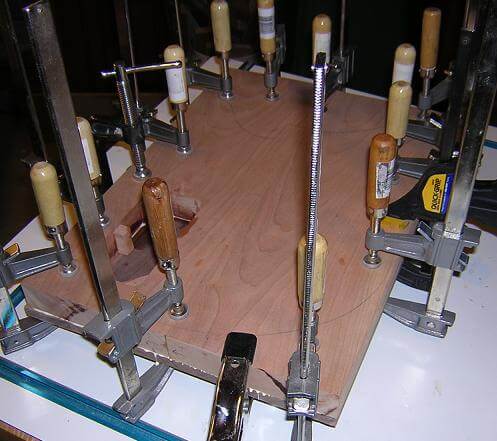
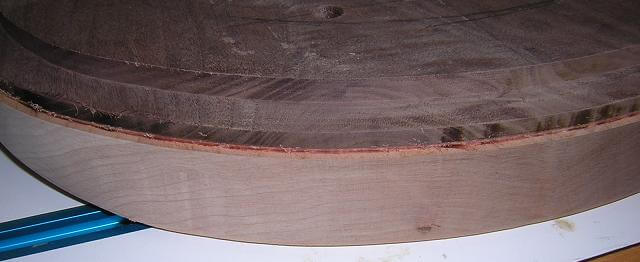
Now it was time to glue the walnut top to the cherry back. Lots of glue and clamps hold everything in place, and a wet rag is used to clean up the squeeze-out before it gets too out of hand. I did the glue-up with the back of the guitar facing upwards so I could make sure to clean any glue that seeped into the control cavity, just to ensure everything would look neat inside and out.
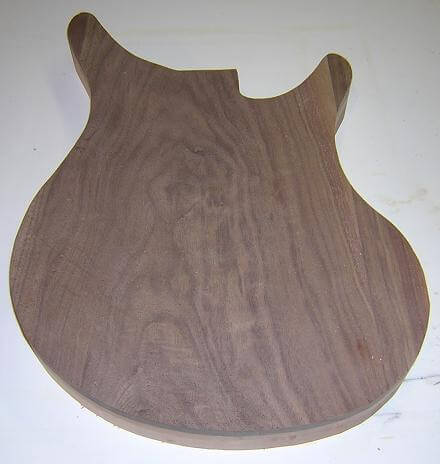
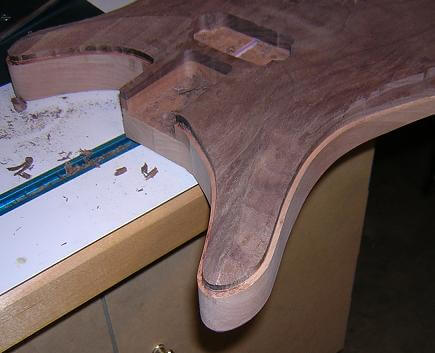
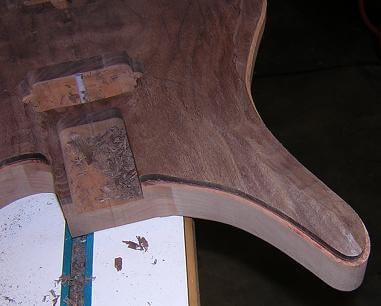
I traced the body shape onto the blank and cut it out on the band saw. I stayed outside of the line, approximately 1/8" or less.
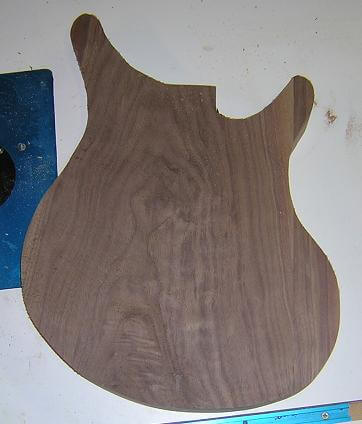
Then I attached my hardboard template I'd created to the rough-cut body blank, and used a flush-trim router bit to trim the body blank to the exact size of the template.
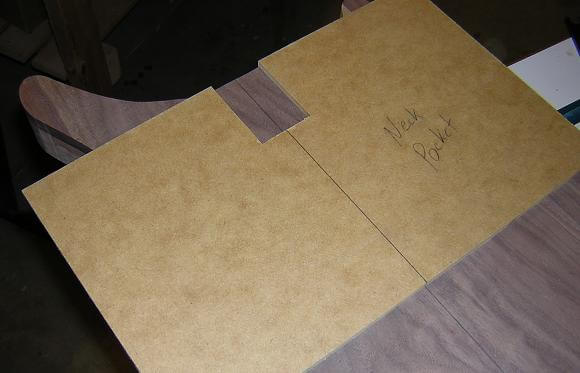
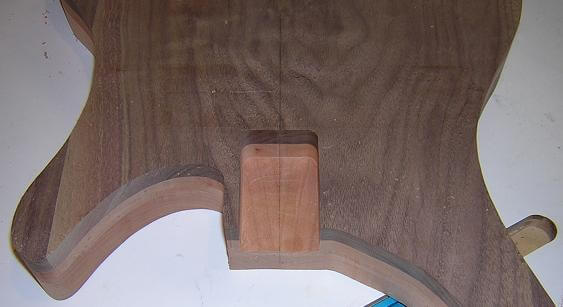
I had a neck pocket jig already built, but it was made from 3/4" material. Seeing as the neck pocket on this guitar had to be extra deep (to account for the carved top), my router bit wouldn't cut deep enough. So, I had to build a new jig out of 1/4" hard board. I attached it to the guitar using double-stick carpet tape.
When removing large areas of wood, I like to remove the bulk of it with the drill press and a large forstner bit. This puts much less strain on the router. Here's the neck pocket with a couple of waste-removing holes drilled.

Then, I used my router and trimmed the neck pocket to the exact size of the jig.
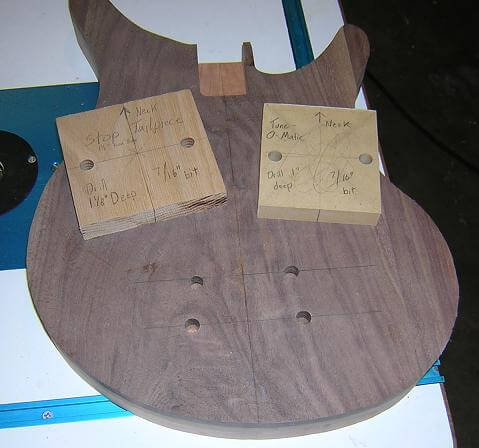
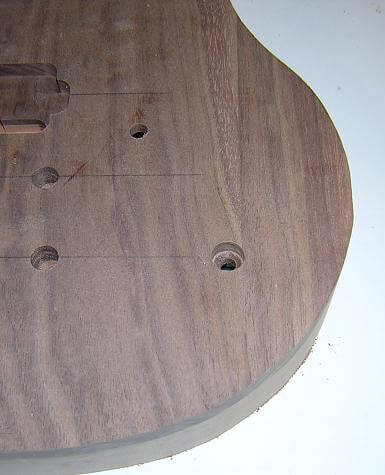
Next up, I wanted to drill the holes for the Tune-o-matic bridge and the stop tailpiece. These holes have to be drilled extremely accurately. Not only do they have to be located precisely from the end of the guitar, and centered exactly in the middle, but the holes also have to be spaced perfectly to ensure the posts in the hardware will properly line up with the bushings. If these holes are drilled incorrectly, they will make the guitar unplayable. So to assist me with getting the holes in the right spot, I created a couple of jigs to guide my drill. There are marks on the sides to assist with the front-to-back and left-to-right locating, the holes spaced properly, and the hole on the bass side of the bridge 1/8" farther from the neck (for string compensation purposes.) Since I built these jigs, it sure took the sweat factor out of drilling the holes in the right place! By the way, the scribbling on the jig at the right is Tundra Boy's handiwork.
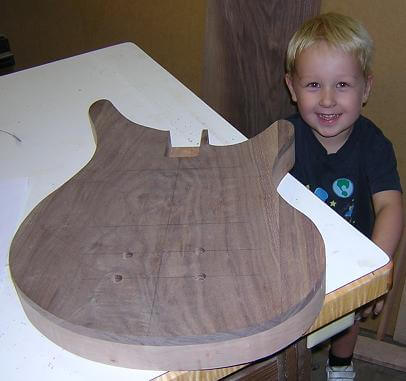
Of course, Tundra Boy is helping with the project. He's my QC inspector. He also scribbles on my plans if I'm not watching him close enough...
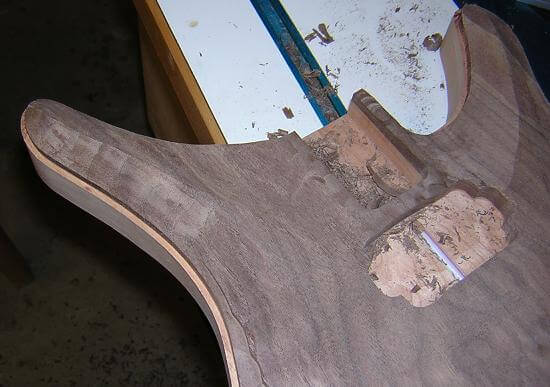
Now it's time to rout the pickup cavities. This is done with my MDF template and a pattern cutting bit in the router. A close eye will reveal where I made a dumb-out and ran the router bit into my template, destroying it. Thankfully the mis-rout in the neck pickup cavity will be hidden by the pickup cover. The mistake is seen easier in the pictures further down on the page. I'll have to build a new template for future guitars, as I ruined it beyond use. At least it happened on the 2nd cavity and not the 1st! You can also see where the McDonalds straw/wire channel has been exposed, just as planned. Once in a while things go as planned!
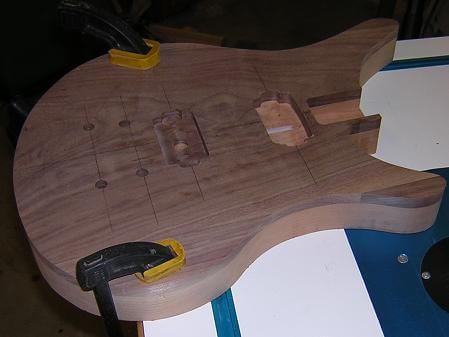
The controls on David's guitar are going to be very simple: a blend pot to pan between the pickups, and a WFO (on-off) switch in lieu of a volume knob. I marked the positions for the controls and drilled the appropriate holes. Because the top of the guitar is going to be carved and is currently 1/2" thick, I had to drill a recess for the switch.
On the back side of the hole for the blend pot, I had to recess an area to make sure the thickness of the walnut was no more than 1/4", which is the maximum thickness the shaft of the pot will allow.
Now to carve David's favorite part of a guitar (or so he tells me): the cheese-belly cutout. Most guitar makers call it a beer-belly cutout, but seeing as I like to build different guitars I decided to give a unique name to mine. My approach isn't very scientific. I start by scratching out a pencil outline of the cutout. After making a few tweaks with the erasure, I have an outline with which I'm satisfied.
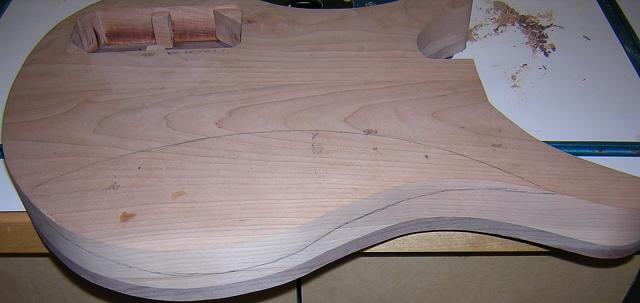
Next, I take a surform with a convex blade and go to town. It takes about fourty-five minutes and I'm dripping with sweat by the time I'm done, but I have the carve roughed out.
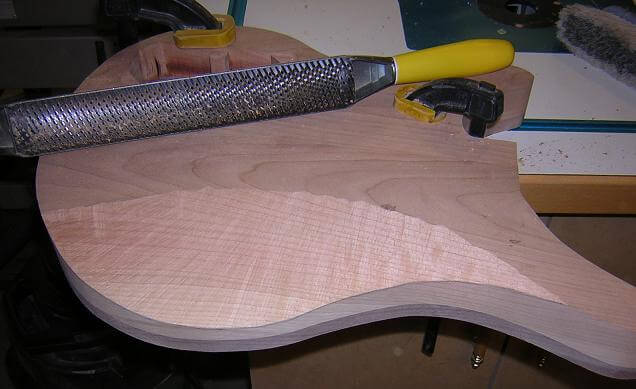
Finally, I finish up with (lots) of sanding to smooth out the curve and remove all of the gouges left by the surform. Here's the finished cutout.
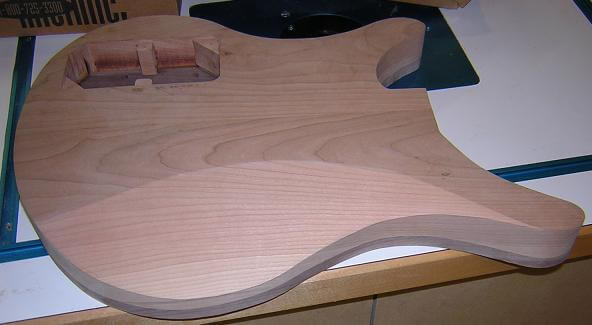
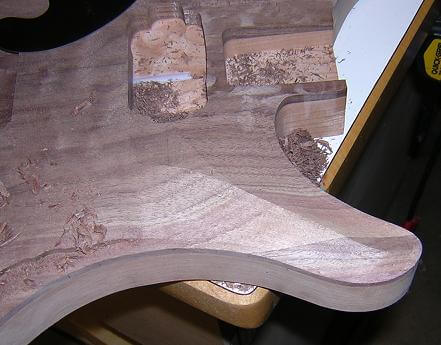
To soften the rear edge of the guitar, I went around it with a 1/4" roundover bit in the router table.
Now came the part of building David's guitar that had me the most concerned: carving the top. I have a few guitars under my belt, so I had previously faced most of the challenges I would encounter while making this guitar. A carved top, however, was a brand new challenge for me. The beautiful thing about wood is that it's pretty forgiving and even if you make a mistake there's usually a way to correct it, so rather than sweating and trembling at the thought of the process, I just jumped in with both feet. Then I decided I'd do a much better job if I used my hands instead...
Anyway, I calculated that on this guitar with the tune-o-matic bridge and the carved top, I was going to need a 3.75 degree neck angle. Rather than placing the bottom of the fingerboard flush with the top of the body at the point of the neck join, then making a wedge to suspend the end of the fingerboard above the guitar top (which is what I've done on all my previous guitars), I decided to try the Les Paul method of concealing the neck angle by cutting it directly into the carve of the top of the guitar.
I cut a wedge out of a piece of 2x6 with an angle of 3.75 degrees. I then used this as a guide to rout an angled portion into the top of the guitar where the bottom of the fingerboard will sit. I made it a little wider than the fingerboard to give me some "wiggle" room when carving the rest of the guitar top. From the picture, it looks like I really messed up the top of the guitar, but believe me there's a madness to my method.. er, well you know what I mean.
The thickness of the walnut top will be 1/2" in the middle, tapering down to 1/4" at the edge. Rather than trying to guess or eyeball this amount, I routed a ledge around the edge of the guitar at the proper depth. This way I can just carve down to this point from the middle, and the thickness of the guitar will be uniform around the edge. In the picture below, you can also see my pencil scratches that I used as a guide for carving the transition between the top of the guitar and the ledge.
This guitar is going to have binding around the edges. I decided to rout the channel for the binding now, while the top was still relatively flat.
Now came the hard work: actually carving the top. There are many tools people use to carve tops. The large manufacturers have CNC machines to do this job. Smaller, more experienced builders use power tools such as sanders and grinders to carve the top. Seeing as I had no idea what I was doing, I wanted something with a little more control. I was willing to sacrifice speed for accuracy. Apparently, I'd rather take 15 minutes to make a mistake rather than 15 seconds.
I thought the perfect tool for the job would be a curved spokeshave. I didn't own one, so I swung by my local woodworking store to see what they had available. They had a flat-blade spokeshave in stock, but would have to order a curved one and it would take about a week. I was already behind on this project (according to the timeline in my head) and am impatient to begin with, so I didn't want to wait for a spokeshave to arrive.
Instead, I found a curved card scraper. Card scrapers are basically flat pieces of metal of which an edge is sharpened onto one end. They are usually reserved for fine, finishing, touch-up type work. However, I discovered that if you are diligent, you can carve an entire top of a guitar with one; it just takes a long time. I began with the lower horn.
Slowly, I removed more and more of the wood until the horn was starting to look like what I had envisioned in my head. I used a small chisel to carve the very tip of the horn, as the scraper wasn't very accurate in that area.


After a couple of hours, I had the lower horn looking about right. Wow, this took a long time. My fingers were about to fall off, and I still had a majority of the rest of the guitar ahead of me! I can see why CNC machines have become popular. From this photo it can be seen how the neck angle has been blended into the carve of the top.
Then I moved on to the upper horn and followed the same process. My fingers were really aching at this point, and every once in a while I'd look down and see blood on the guitar. The edges of the scraper are sharp, and as you're working it's easy to run your fingers along the edge and lay them open. I can honestly say that blood, sweat and tears (well, not so many tears) went into this project. If I do another carved top guitar in the future I'm going to try a more agressive method.
Time ticked by and I kept carving. I had finished both horns, and now was removing material around the edge of the guitar. I could now see the end in sight!

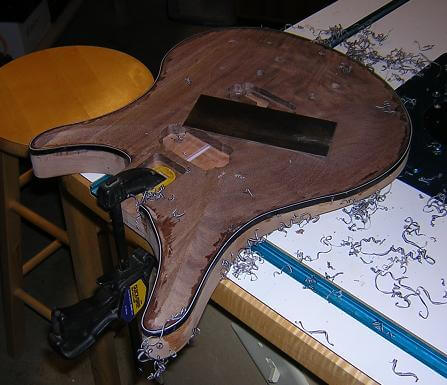
Finally, I had finished the rough-carving of the top. I didn't watch the clock closely (to keep me sane) but I would guess it took about 6 hours of labor intensive work. What else do I have to do in the middle of the night, right? It wasn't perfect yet, but it was close enough that I could tweak the rest with sandpaper.
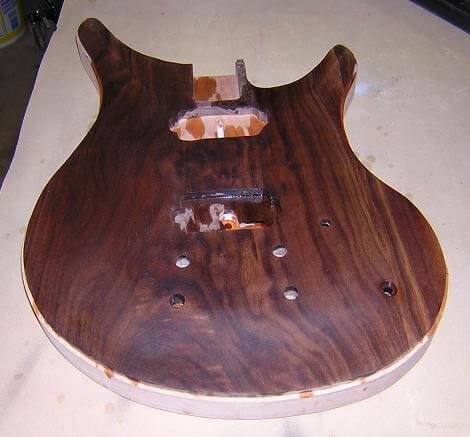
After a good sanding, I was quite satisfied with the way the carved top turned out. Especially, since I had never done anything like this previously. I wiped down the top with naphtha to highlight any areas that may need more sanding. The naptha really brought out the color of the walnut and gave me a good glimpse of what the finished guitar may look like, so I had to snap a picture:
With the carving complete, the next step was to install the binding. I had already routed the binding channel above, so that part of the job was already done. The binding I'm using on this guitar is three layers of plastic (black, white, black). To begin, I start laying the binding in the channel and tape it in place, making sure that it is seated down correctly.
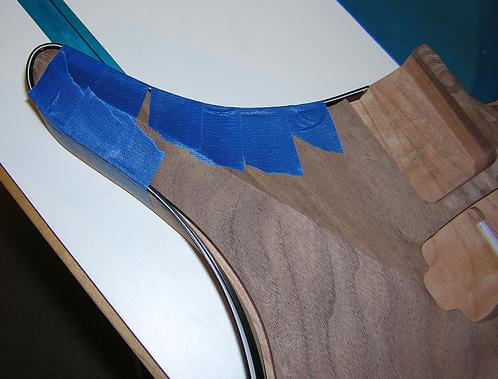
This process continues all the way around the guitar until it is in place. Right now there isn't any glue holding the binding to the guitar, just tape.
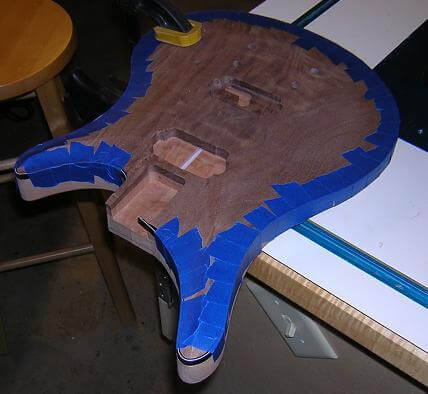
Resisting the urge to just spray clear finish over the blue tape, I began to glue the binding in place. I did this by removing a piece of tape at a time, and flooding the binding with water-thin CA (super glue). The CA wicks into the cracks between the binding layers, and the space between the wood and the inner-most layer of binding and glues them all together. It took about an hour and a half to work my way around the guitar and make sure the binding was glued in place, and by that time the CA fumes were really making my head spin! I think the next time I do binding I should probably take some breaks every so often and get some fresh air. In a few spots, I had to use clamps to hold the binding until the glue cured. Once I made it all around the guitar, the blue tape was gone but there were dark spots all around the edge of the guitar from the CA. This will be cleaned up in the next step.
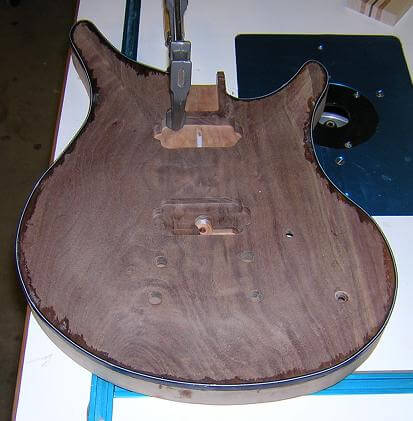
The binding channel was routed to make the binding sit ever so proud of the face of the guitar once it was glued into place. Now I took a card scraper and began to shave off strips of binding until it was level with the guitar.
Finally with a bit of sanding to do the final leveling and remove the excess CA glue, the binding is done.
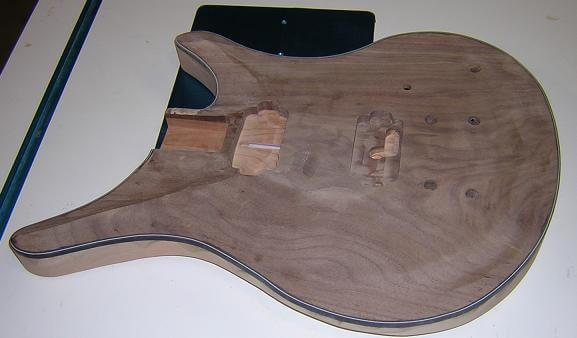
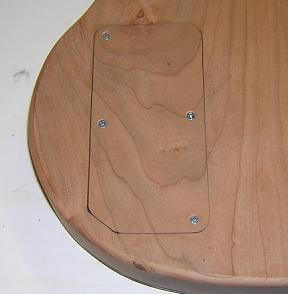
The only thing left on the body is to finish up the little details. I wanted all holes that were going to be drilled to be done prior to finishing. Things like strap lock holes and such. One of these things were the holes for the control cavity cover. I drilled and countersunk them in the cover, then test-fitted everything to make sure it fit correctly. After the guitar is finished I'll paint the screws black to match the rest of the hardware.
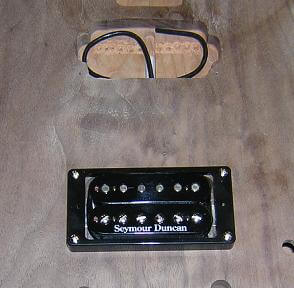
I wanted to drill the mounting holes for the pickups and pickup rings prior to finishing as well, so I did this at this time. Not overly difficult, you just have to be careful to get everything lined up right before marking and drilling the holes. Here's the neck pickup...
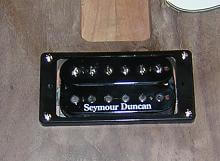
...and the bridge pickup.
Finally, the last thing to do on the body was to drill the hole for the output jack. The drill press is a perfect tool for this job, as you want the hole to be straight and accurate. Unfortunately, my drill press is just a benchtop model, and doesn't have the height capacity to drill output jacks into the bottom of a guitar body. On prior guitars I had spun the head of the drill off the bench and clamped things up to the side of the cabinet, but I was never satisfied with the results (or safety!) of this method.
For this guitar I decided I'd try something different. I took a piece of scrap and drilled a straight hole through it on the drill press. I then clamped this piece to the workbench, and clamped the guitar body in the correct position so that the point of the guitar where the output jack should be located would butt up against the scrap-wood jig. Then I took a hand drill and carefully drilled the output jack hole. This worked much better than my methods for the previous guitars.
Next up, we build the neck.
Or, you can go back to the day he received the guitar.
Return To The Main Music Gallery
This page last updated on 06/28/2018