


Now it's time to tackle what is probably the most tedious part of this whole project (except for possibly finishing, which is always tedious on every project!) Each of the squares formed in the side by the outer molding need to be trimmed with molding. Again, the original plans I loosely used as a reference dictated the use of pre-fab moldings from the home center. I kind of felt like this was "cheating", so instead I opted to build my own, using the same ogee profile I used on the skirting and crown.
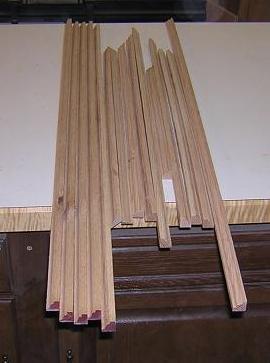
To begin, I selected a few pieces of 3/4" stock that were much wider than what I needed. I then passed these pieces of stock through the router on edge to cut the profile.
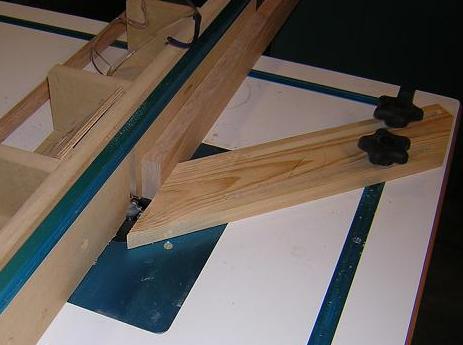
I routed several boards at once to reduce the number of times I had to do each step.
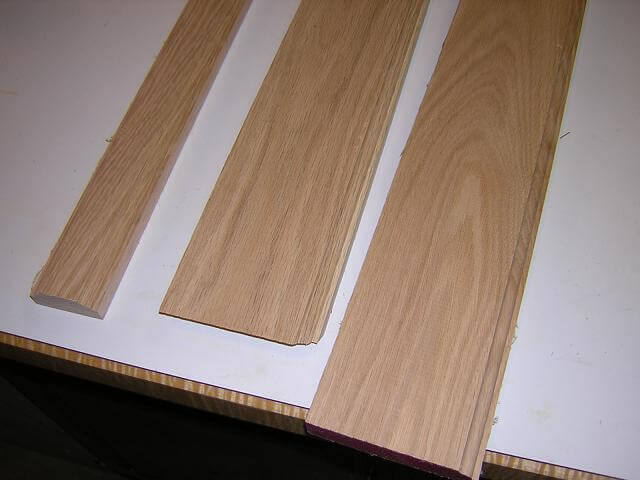
Once I had the profile routed, I set my rip fence for 5/8" of an inch and cut the profile free from the carrier strips.
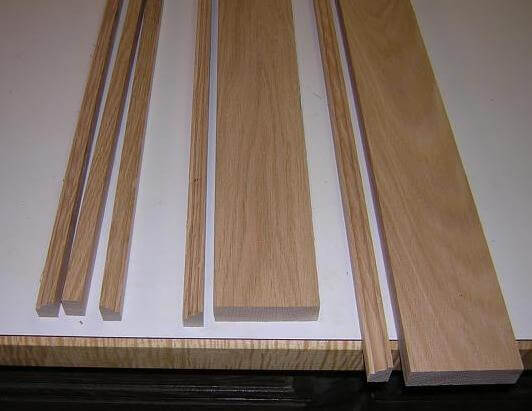
Now I had a piece of molding that was 5/8" by 3/4". I wanted the molding to be 5/8" square, so I rotated it 90 degrees and ran it back through the saw.
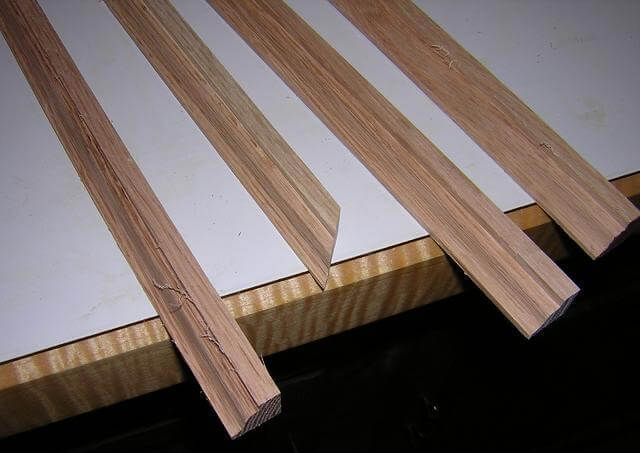
I continued the process until I had cut enough molding to do the whole project. I guesstimated that I needed about 32 linear feet, which in the end was about right. Once all the molding was cut, I spent lots of time sanding it all smooth. It was easier to do it now than after it was installed.
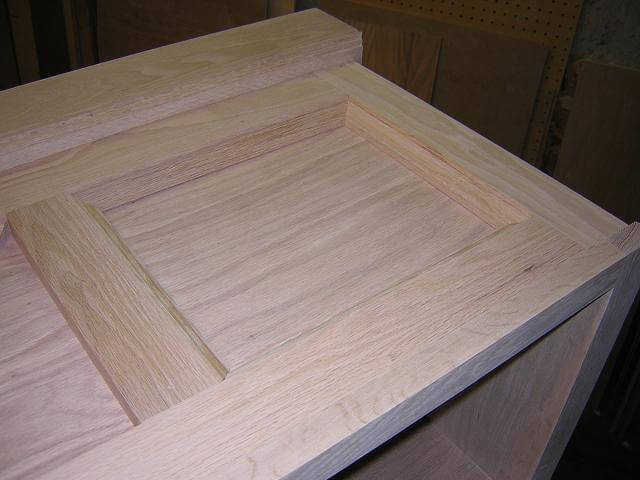
I then started cutting and mitering the molding to length one square at a time. It was important to take my time and sneak up on the cuts in order to get everything tight. It is also important to hide your tape measure when doing this type of work, as it's not accurate enough to get the joints tight. I would cut a piece too long, then slice off 1/64 at a time until it fit perfect.

Once I had four pieces of a square cut, I then glued them in place. I didn't bother with brads because the miters were cut tight enough that the pieces were tight when dry, so glue should be plenty to hold them in place. Also, minimizing squeeze out is pretty important at this step, as this will be the part of the project where your eye is drawn when you look at it.
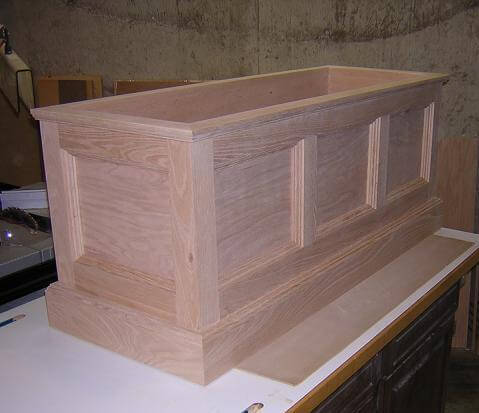
And I continued the process until all 8 squares in the box were trimmed. This step was tedious, but it made a startling difference in the look of the project, even in it's unfinished state.
Whew! Now we can have a little more fun and build the top.
Return to where we installed the skirting and crown.
Back to the toy box main page.
Return To The Main Wood Gallery
This page last updated on 06/28/2018