


As I mentioned on the last page, zebrawood isn't something you just run down to the hardware store and buy. I had to hunt down a piece that had the right combination of size, aesthetics and price. With wood, pick any two from this list of criteria and it's not too difficult. However if you want all three, it can take a while to find.
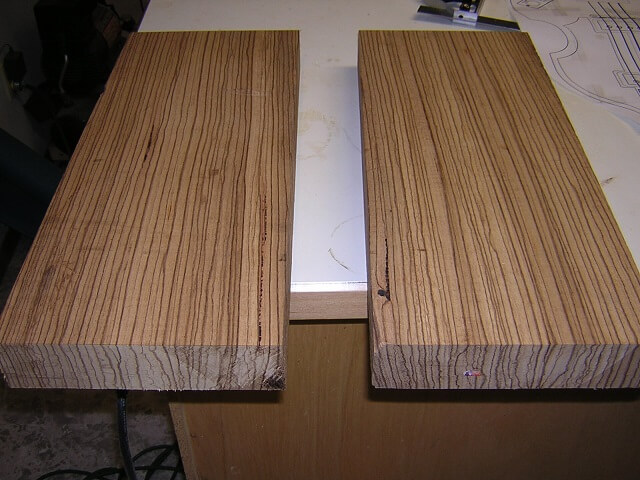
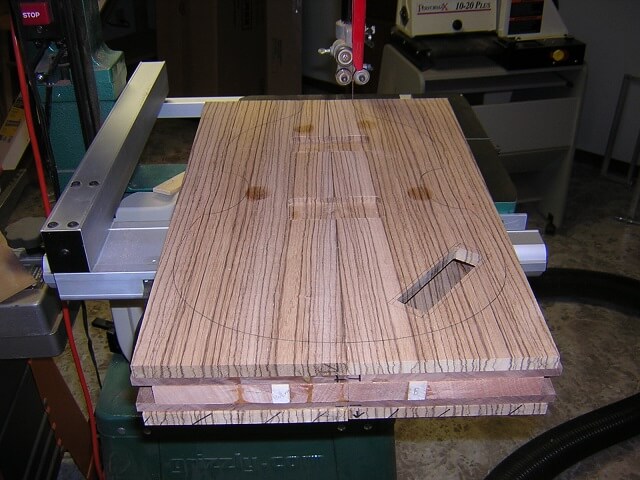
I finally located a satisfactory piece of lumber and had it shipped to me. As I try to do with most wood that I purchase, I let it sit in my shop for a few weeks before touching it just to let it acclimate. Here's the board after I cut it into the two pieces for our back and front.
You can see that the end grain on these pieces runs straight up and down. This is known as being "quartersawn." Our previous pieces that are now in the scrap bin had the grain running more horizontally (flat sawn.) With zebrawood, flat sawn wood has a little more character. However quartersawn wood is much more structurally stable and given the history on this project I figured the slightly subdued look would be worth the added strength.
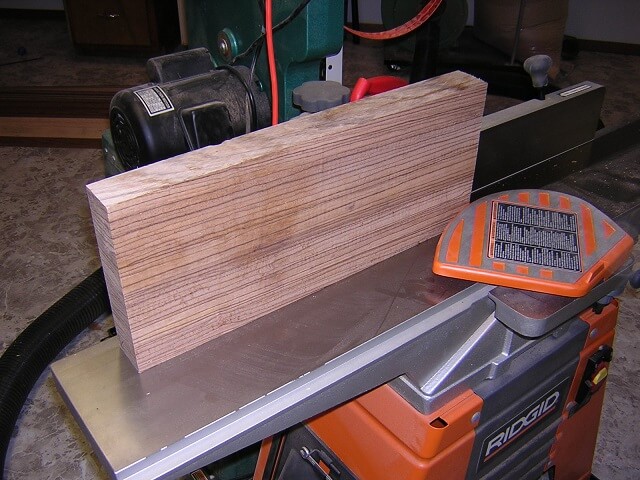
To begin the bookmatching process I ran one edge of each piece through the jointer. This will give me a perfectly flat edge to rest on the table of the band saw, and (more importantly) give me two perfect edges to glue together once the board is split.
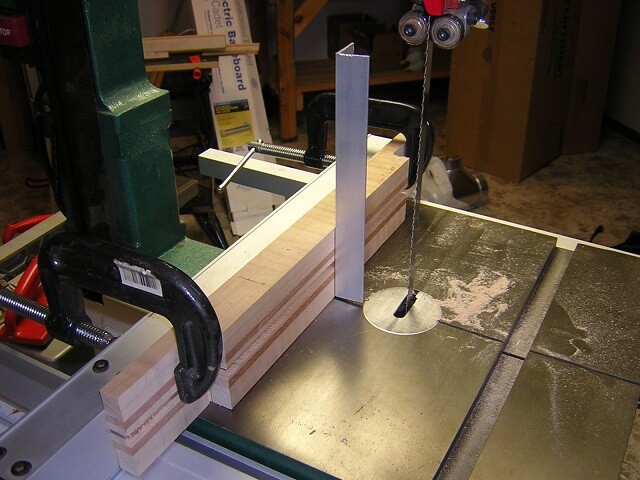
While I don't think it was the only cause of the resawing problems I had with the old board, I decided to make a new resaw jig out of an old failed neck I had sitting around and some scrap aluminum "L" stock. This fence will allow me to adjust for blade drift as I make a cut where my old resaw fence didn't allow for this.
By the way, something about this picture makes it look like the blade isn't parallel to the fence. I think it's an optical illusion caused by the background of the picture because in real life the fence is indeed the same distance from the blade at the top and the bottom.
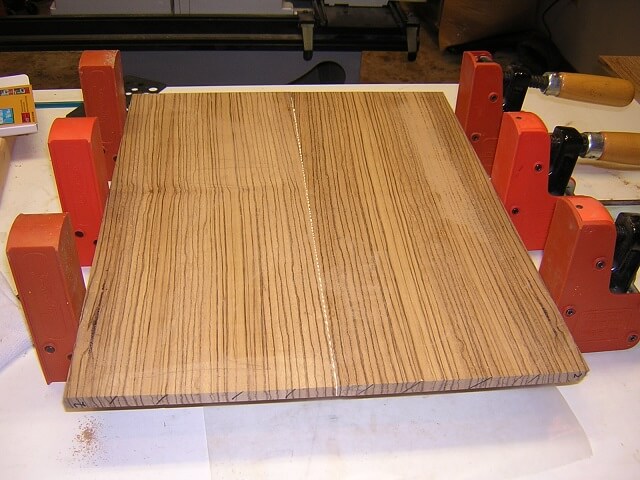
These pieces were much better behaved when I sliced them down the middle. I glued them together. You can see that our finished thickness is a uniform 1/2" as desired.
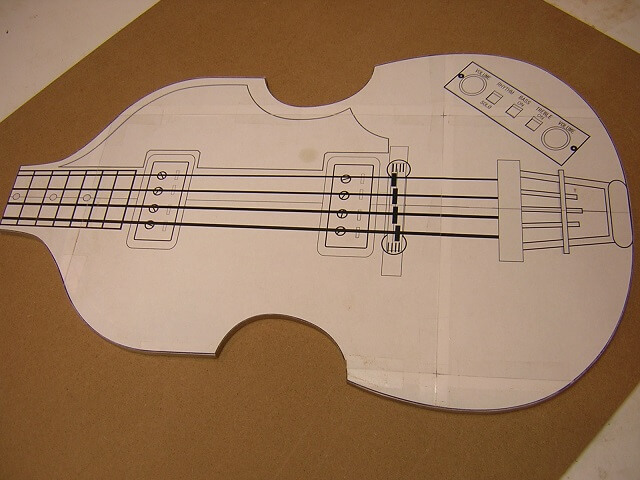
Templates are a very useful part of making guitars. I created one by printing out a copy of the plan, gluing it to a piece of hardboard and cutting it out. The nice thing is if you screw up a template you're not out a whole lot, whereas if you screw up a piece of exotic lumber it's a lot more painful.
So here's where I deviated fairly significantly from the way a Hofner is constructed. If you watched the link to the video on the main page for this instrument you will notice that the Hofner company constructs their instruments in much the same way a violin is made. The sides and tops are made up of many thin pieces of wood layered with glue and pressed into forms to produce the curves. This is pretty cool, but they have lots of specialized jigs created to provide this ability. I don't know if I will ever make another Hofner-style bass like this. Right now I have no plans to (but never say never, right?) If I'm only making one instrument, I highly doubt that it would have been worth it for me to make similar jigs for myself.
As I've already mentioned, I'm also not trying to make an exact duplicate instrument right down to every single detail. More or less this will be a bass that captures the spirit of the Hofner 500/1 bass but won't be considered a clone. So I decided to modify the construction process to make it easier for me to build.
I still intend this instrument to be hollow. However because I'm not bending wood I'm able to do more of a "hippie sandwich" with layers of decorative laminates. My plan was to have an inner layer of mahogany, sandwiched between layers of walnut, sandwiched between the zebrawood top and bottom.
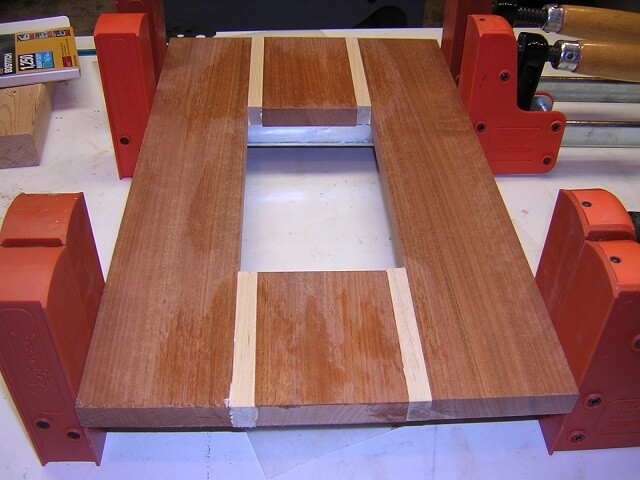
So I started by gluing up the mahogany that will make the center layer of the instrument. Because the center was going to be hollow, there wasn't any need to waste material in the middle that would just get discarded. I glued together this center layer with a hollow portion. Also my three strips of mahogany that I used weren't quite wide enough so I decided to add some extra decoration by adding strips of maple to separate them. In retrospect, this didn't give me the look I was really planning on and if I were to do it again I wouldn't have used the maple. But it is what it is.
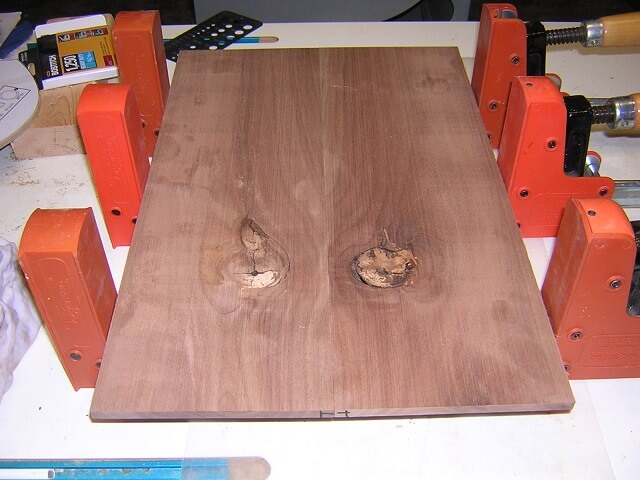
I then glued up two 3/8" thick pieces of walnut that will sandwich either side of the center layer. The walnut was already wide enough that two pieces were sufficient so I didn't get fancy and make the center area hollow. This particular piece had some nasty knots in it, so I positioned the knots so they would land in the area that will get cut out and discarded. The remainder of the walnut was perfectly fine so there was no issue using this piece that appears to be defective. In fact, this was a great way to salvage some walnut that otherwise would have been deemed useless and thrown in the burn bin.
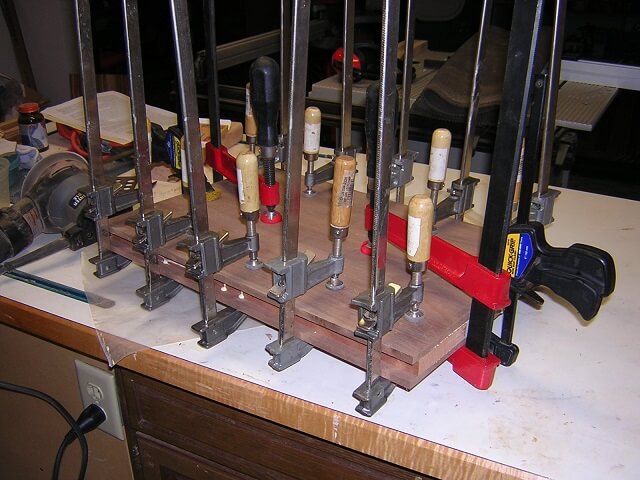
Now the walnut was glued to either side of the center layer.
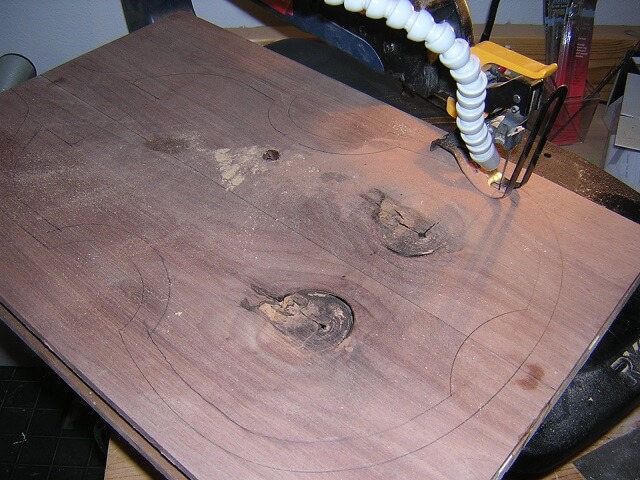
In order to create the hollow center section I traced my template outline on the piece. I then used a compass and some freehand to sketch a line about 1/2" inside the template line. I added some extra meat at the top for the neck pocket, and a little extra at the bottom for the strap button. I then drilled a start hole and proceeded to cut out the hollow area using my scroll saw. The scroll saw is a little slow, but it's invaluable for doing things like this.
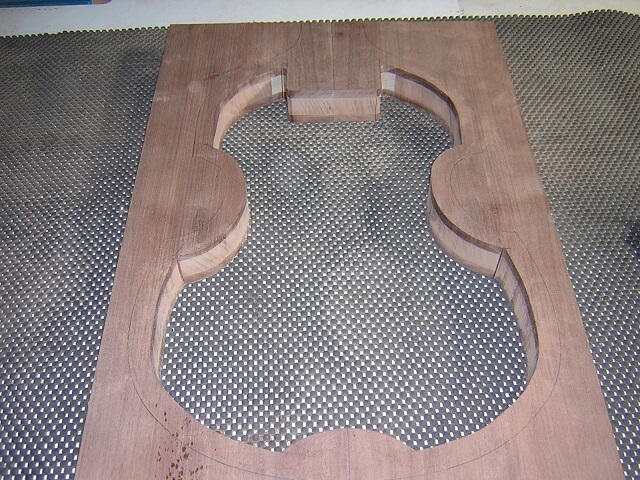
So here's the middle layer with the hollow portion completely cut out. You can see that the knots and defects have been completely removed. I won't cut out the outer portion until the top and back are glued in place.
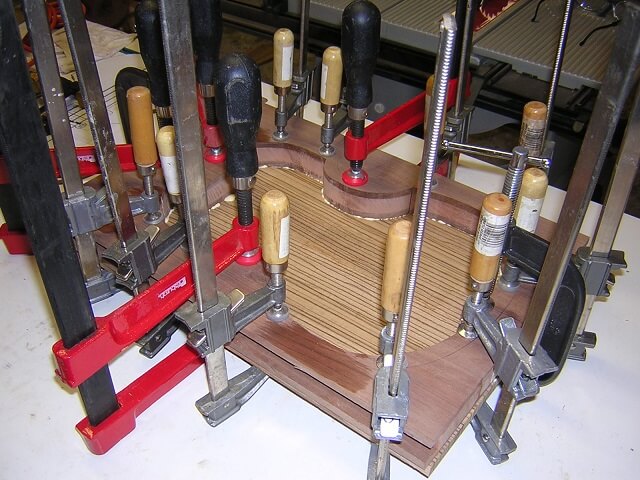
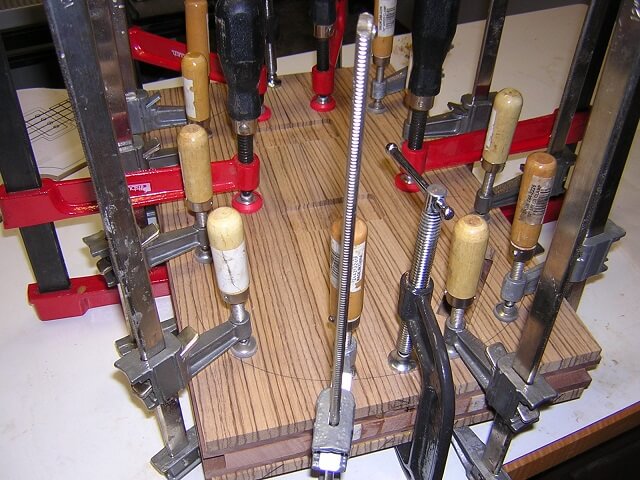
I now glued my hollowed out center section to the zebrawood back piece.
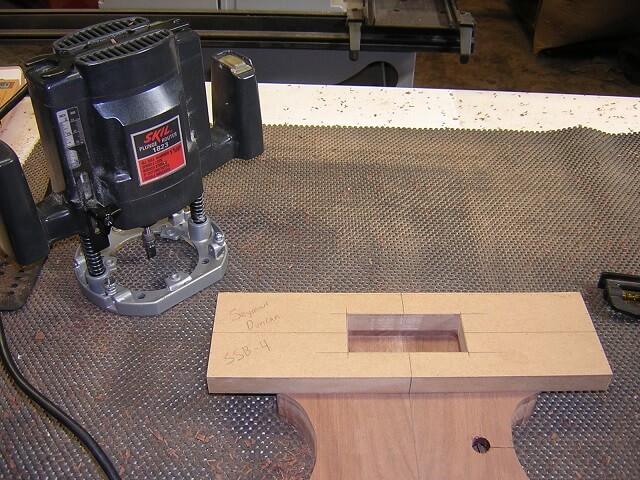
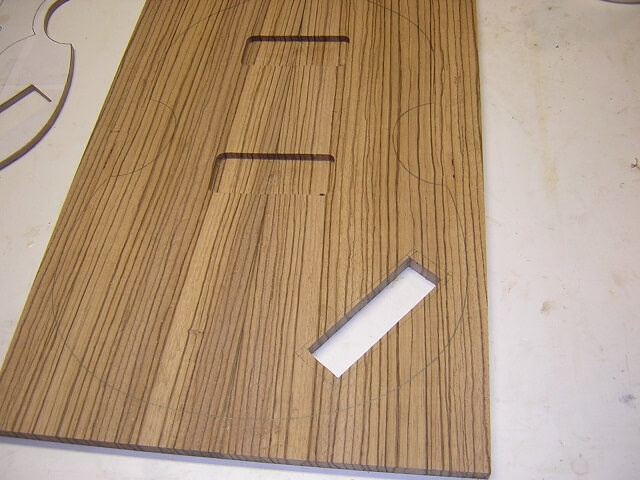
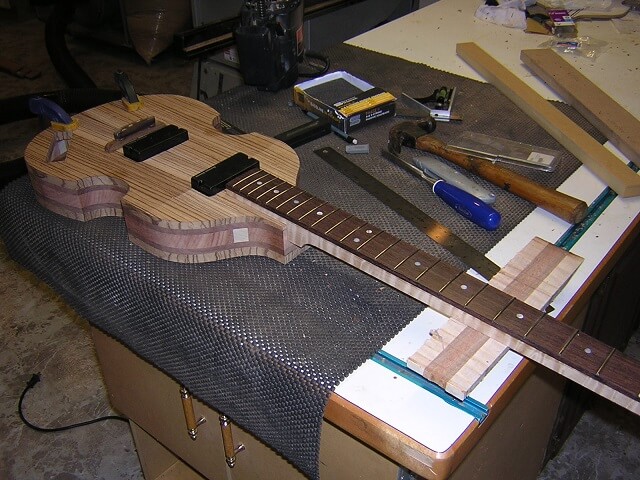
Before I get too far, I wanted to do a few things to the top. First, I needed some pickup cavities. I had already purchased the pickups that I planned to use, so I made a routing template out of MDF. Before I cut holes in the top of the guitar though, I went ahead and test routed a piece of scrap (the center section I had just removed) to make sure I was satisfied with how the pickup fit in the cut-out.
I only have pictures of the test route, but not of the actual routes being made in the zebrawood top. But you can see the completed pickup cavities in the forthcoming pictures.
I contemplated a few different ideas I had for how to mount the controls, but in the end I decided to make a cover out of plastic just like a Hofner does. I used some "mother of toilet seat" pickguard material and made one to match my template. I'm not going to do all the fancy switches, just three knobs: volume, volume, tone. So my control plate only has three holes.
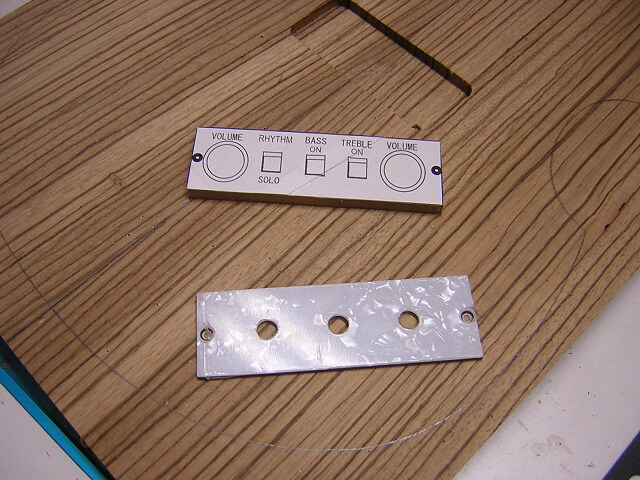
I also needed a corresponding hole in the top of the bass. It was easier to cut this now on the scroll saw before the top was glued in place. The hole size wasn't indicated on the template plans, so I just made it up. It had to be large enough to fit the controls, but small enough it could be hidden by the control plate I just made.
Now I was able to glue the top to the remainder of the body. I now had a body blank with a hollow center.
When the glue dried the shape of the bass could be cut out at the bandsaw. Per my usual method I stayed outside my line about 1/16". The bandsaw leaves a fairly rough surface so if I cut exactly on the line and then sanded off the scratches my body would be too small.
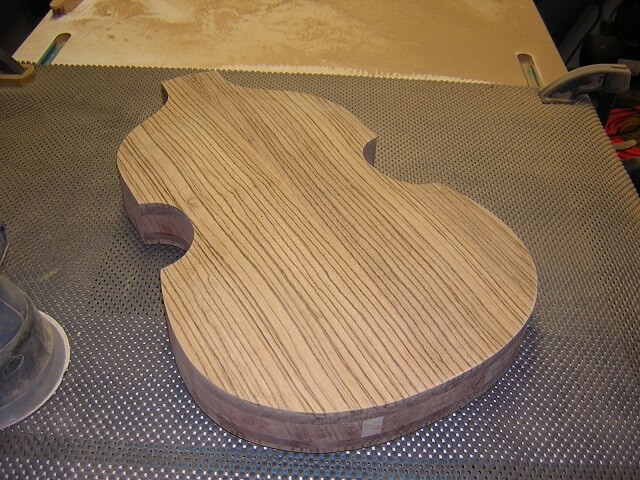
With the body rough cut to shape it's actually starting to look like a bass (or at least a violin) rather than just lumber. You can see from the control cavity hole that it's indeed hollow.
Over at the oscillating spindle sander I removed the band saw scratches and sanded the body all the way up to my template line. The body is looking pretty thick at this point as it's 2.5" from front to back. Once the top and back is carved, though, it will look much thinner.
From this angle you can see one of the maple laminations peeking through the side. It doesn't look as decorative as I had hoped it would have. To me it just looks like four random maple squares peeking through the body sides. That's one detail I wish I had omitted and just made it all mahogany. Well, there's no fixing it now so I guess we're going to have to live with it.
In order to properly maintain satisfactory string action and use the floating bridge for this instrument, the neck needs to be installed at an angle. I don't remember exactly what angle I calculated but it was somewhere between 3 and 4 degrees. On a carved top guitar this angle is easy to blend into the face of the guitar so it isn't immediately apparent to the observer's eye.
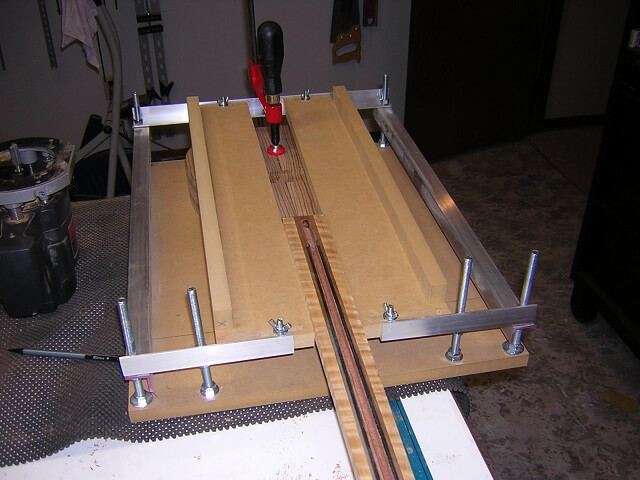
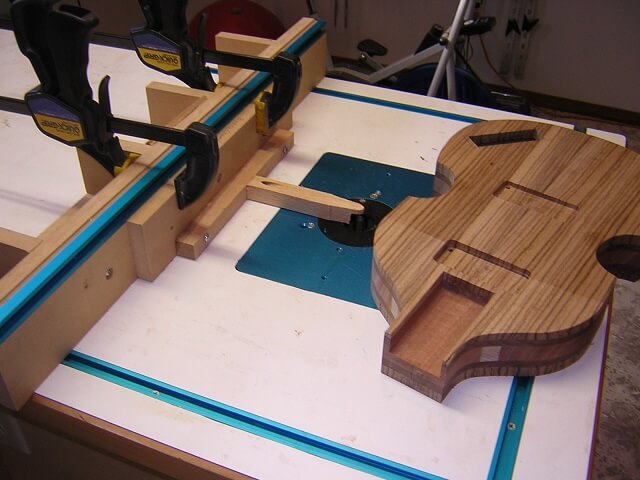
The actual creation of this angle, though, can be rather challenging. I had used a variety of methods of cutting this angle in the past, none of which I had been happy with how they worked. In order to "build a better mousetrap", a few years ago I had built a jig to assist with this type of operation. The jig had been built, but this was the first time I had a chance to use it. So you get to see the maiden voyage.
Basically the instrument body is taped to the bottom of the jig. The side rails that run the length of the instrument have nuts that allow the rail heights to be adjustable. I've calculated that every 6 1/3 difference in rotation between the front and back rail nuts equals 1 degree. Using a bit of math I can set the jig at extremely precise angles.
Then across these angled rails I have a "sled" that will slide back and forth and allow the router to make many passes across the face of the instrument to cut the angle. Here's a picture of the jig in use.
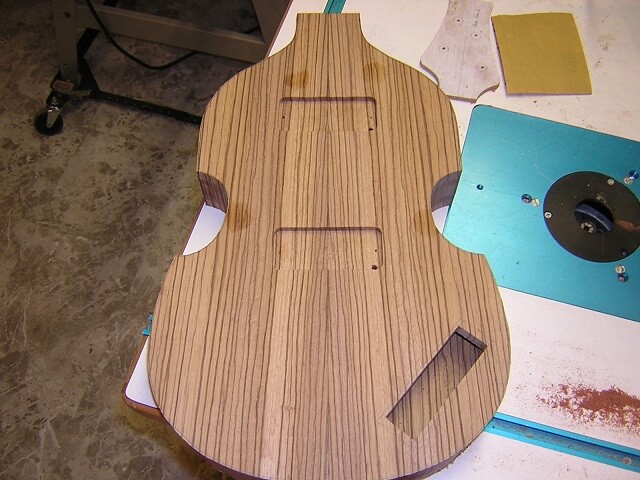
And here's the top after the appropriate angle has been cut.
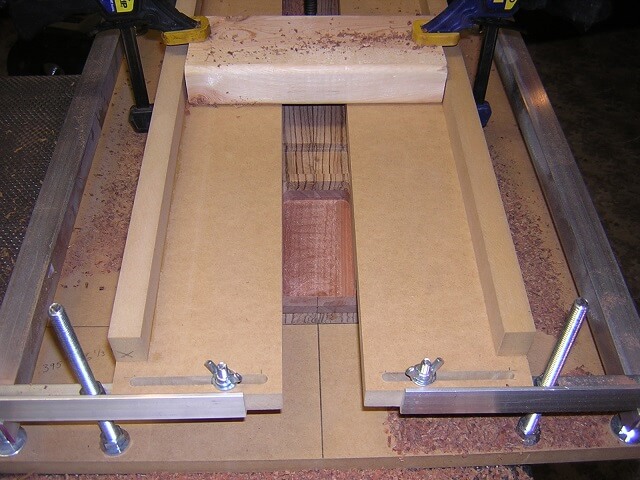
Now the neck pocket can be routed. By using the same jig with some additional pieces I designed for it I'm able to route the pocket at the exact size and at the matching angle. I started by setting my neck in place and adjusting the jig so the sides are tight against the neck. Then when the neck is removed I can use the sides of the jig to route the pocket to the exact size.
The depth of the neck pocket is set by clamping a piece of scrap wood in the proper spot to keep the router from traveling too deep.

I then used a flush trim router bit to cut the neck pocket.
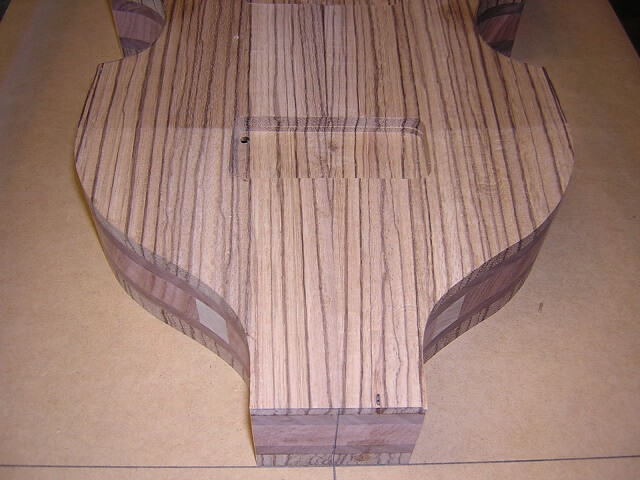
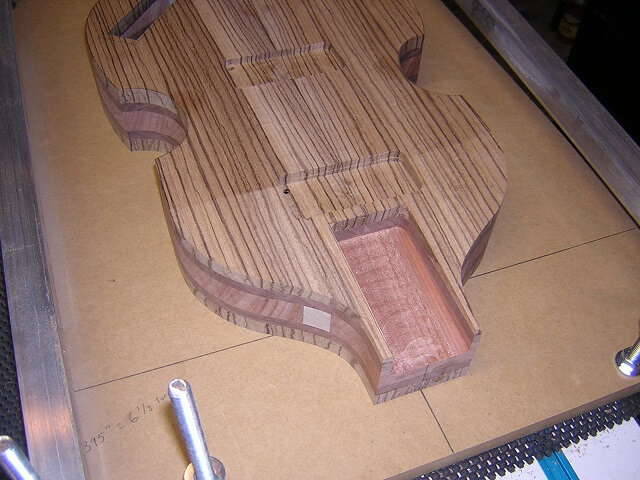
The result is a neck pocket that matches the angle of the top perfectly and is sized exactly to the end of the neck.
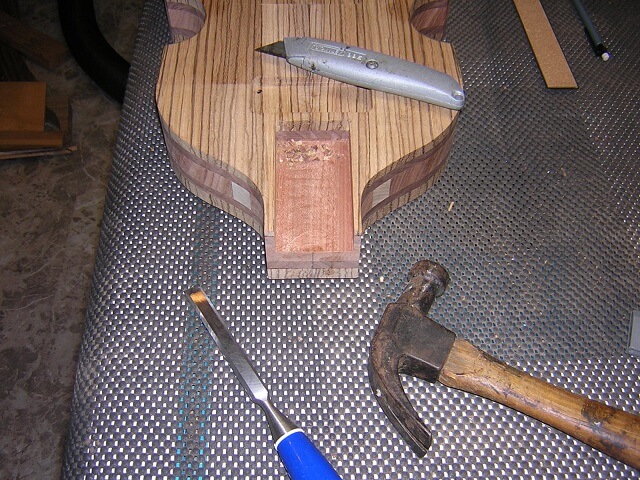
Router bits don't cut square corners well. The end of the neck pocket had rounded corners. The end of my neck was square. So I had to either square off the neck pocket or round the end of the neck. Hofner's have a square neck end so I went that route. I just did it by hand with some chisels and a utility knife to score lines.
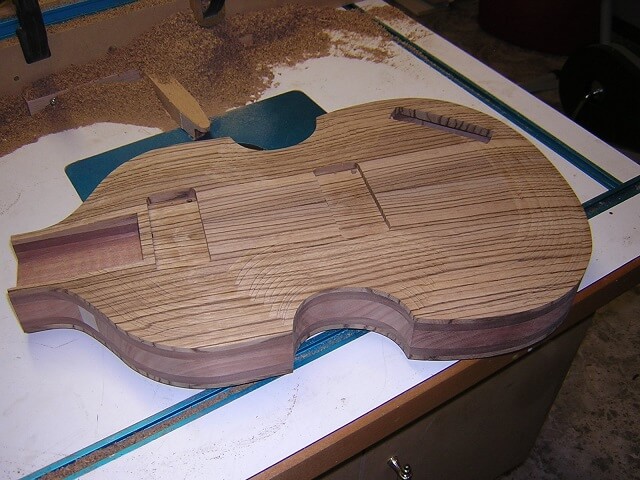
Once the pocket corners are square I could test the fit of the neck. I also set my pickups and bridge in place to make sure I had the correct angle. If it was off it's a lot easier to fix it now rather than after the neck is glued in place. Thankfully it was correct.
Now it was time to carve the front and back of the bass. Unfortunately this was probably the riskiest part of building the body and it was pretty much the last thing that I did so the risk of screwing it up was high. I had to be extra careful.
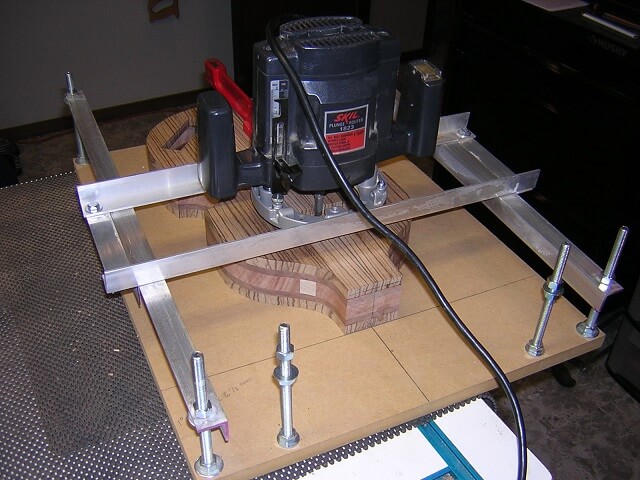
I have a jig I built for my router that allows me to do rough carves and remove a bulk of the wood with the router. There's a long rub arm that I clamp to my fence. This rub arm controls how deep across the face of the body the router bit will go. I'll set the bit to the maximium depth of my carve, make a pass, then lower the bit a hair and move the fence away from the bit a hair. I repeat this process until I have a fully step-carved top and bottom. It's crude but it works.
The top and back were initially 1/2" thick. The plan was to do a 1/4" deep carve, which means that the face of the instrument will remain at full thickness in the middle, but tapers to 1/4" (actually I went just a hair thinner) on the edges. Here you can see where I've started the process. I'm not moving the bit down by much each time, maybe three or four hundredths. Also I'm sliding the fence back about 1/8" to 3/16" after each pass. It's not a process that I've found requires a great deal of precision. I basically just eyeball it. Right now I'm just removing the bulk of the wood to speed up the final shaping process.

Because I'm doing both a carved front and back, I would change the router settings then route one side of the instrument, flip it over and route the other side. Then I would repeat. Doing both sides at once was faster than completely routing one side, then resetting the router and doing it all again on the other side. Here's the top once I finished all of the rough carve with the router.
And likewise, here's the back with the rough carve done.
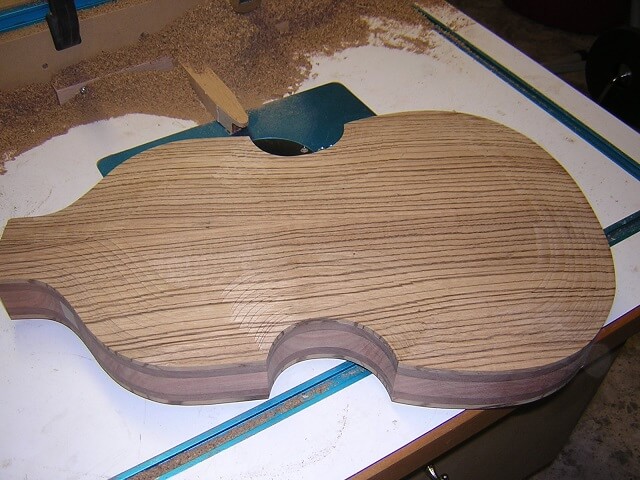
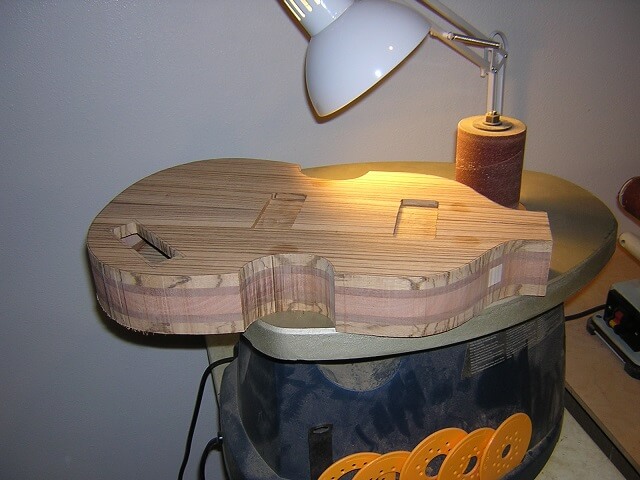
Then it was time to grab the sander and spend some quality time removing all the "steps" that remained from the router. This is where I did the final shaping, which is why I didn't have to be exact with the router. I did have to be careful while sanding because it was pretty easy to grind down the outer edges of the instrument faces to less than 1/4", which is what I didn't want to have happen. Here's the back of the instrument sanded smooth.
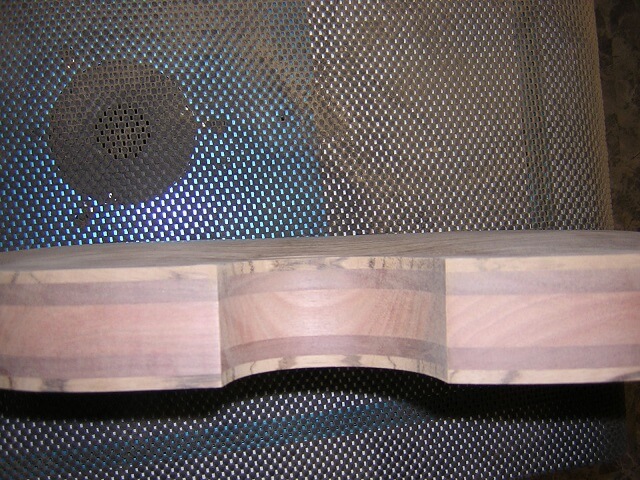
I tried to get a picture of the carve from the edge, so you can see how the center is raised up 1/4" higher than the sides.
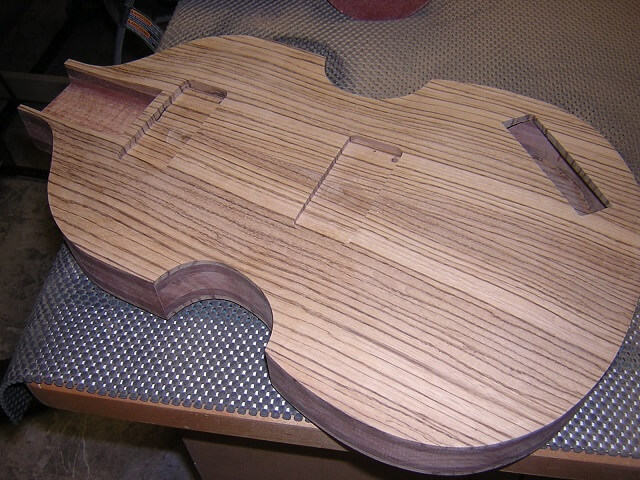
Then I flipped the bass over and repeated the sanding process with the front. It went a little faster because there wasn't quite as much surface area that needed to be sanded, as the neck pocket, pickup cavities and control cavity took up probably 20% of the instrument's front.
With the body pretty much done, I was now ready to wrap this instrument up.
Return To The Main Music Gallery
This page last updated on 06/28/2018