


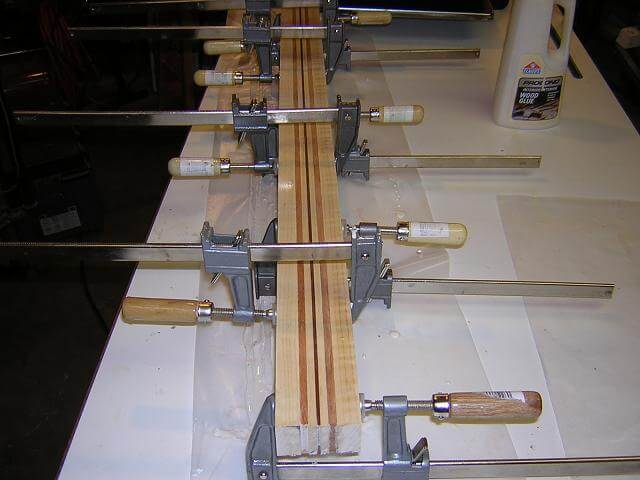
The neck I laminated previously for David wasn't long enough for the 28.5" scale length that this baritone would use, so I had to build another neck blank. That's OK; I'll use the old blank for another guitar some time. This neck used my normal maple/mahogany wood combinations, but to add some additional eye candy and match the walnut top, I added a strip of walnut to the mix as well.
Like my other guitars, the headstock on this one will be tilted back 12 degrees. Here's a picture of the scarf joint being glued together. Note that I have already trimmed the headstock to thickness to minimize the amount of cleanup I'll have to do later after the neck is being cut to size.
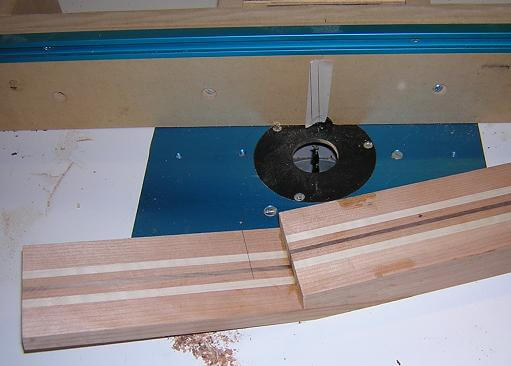
The next step was to rout the channel for the truss rod. Here's an example of how sometimes bad things can happen even if you're being careful. I have a cheaper router in my router table. Occasionally, the collet will loosen while under heavy use, which causes the bit to move (usually upward, for some reason.) While routing this truss-rod channel, the problem reared it's ugly head. It began announcing it's presence towards the end of the cut with an increase in bit chatter. By the time I reached the back of the headstock, I knew what had happened because the bit emerged straight out the back of the neck. The roughness of the cut is evidence that something wasn't right.
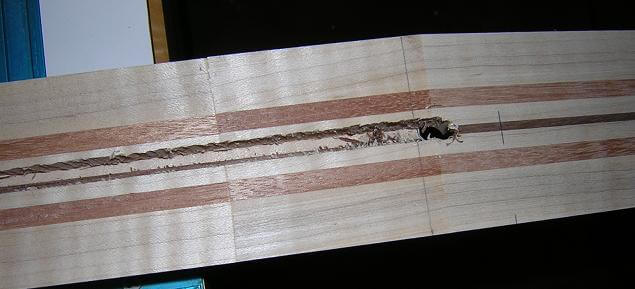
Bummer! Here's another picture from the back of the headstock, where you can clearly see that the bit went clean through. From the body end of the neck, the depth of the channel is correct. As you move upwards towards the headstock, the depth gets deeper and deeper until the catastrophe we can see here.
Could I fix this neck? Possibly. It would be feasible to rout a larger channel through the neck, then carefully glue in another piece of wood. If the neck were one solid color, this wouldn't be very noticable and would only be seen towards the headstock on the back. On this guitar, the neck was laminated with different types of wood, so the repair would be more visible. If this guitar was for myself, I would probably try and salvage it. However, because this guitar is for someone else, I can't accept a defect such as this. The only solution is to trash the neck and start over with a new blank.

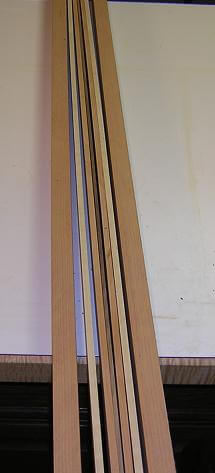
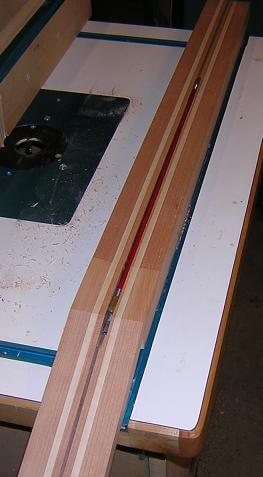
Seeing as I was starting over on the neck, and seeing as I'd had time to mull it over, I decided to make a change in the wood for the new neck. I thought it would match the body better if I used cherry as the main wood. I included some maple and walnut laminations as well, to give it my signature touch. Here's a picture of the neck layers after cutting and planing them to size.
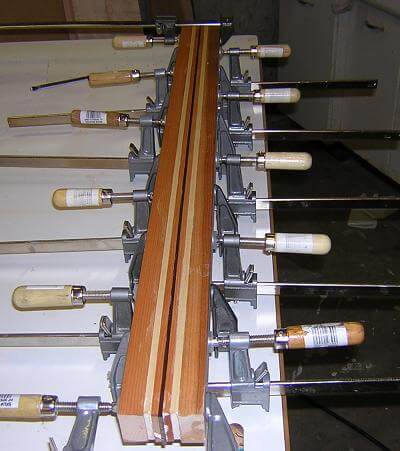
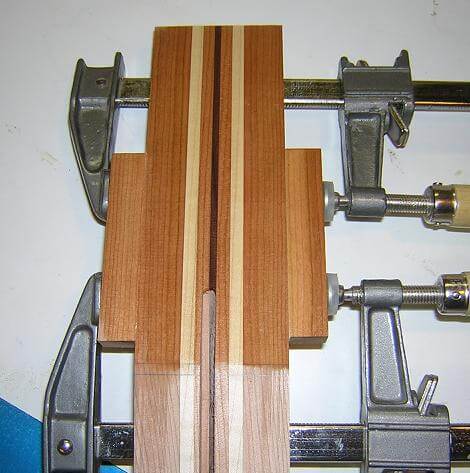
Gluing up this many layers at once can be a challenge if you're new to the endeavor. I've now had quite a bit of experience with the process, so anymore it's a pretty uneventful procedure for me. It always takes lots of clamps. The big thing I've learned is to use a wet rag and clean up the glue squeeze-out before it dries. Otherwise, it's a big pain trying to remove it later.
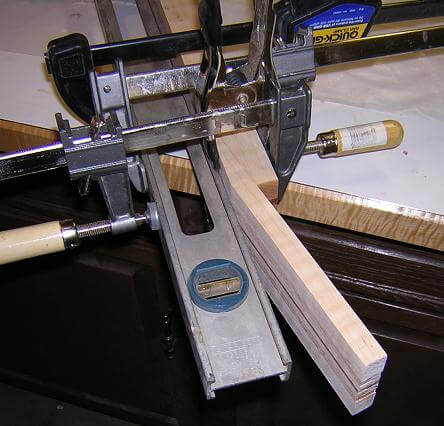
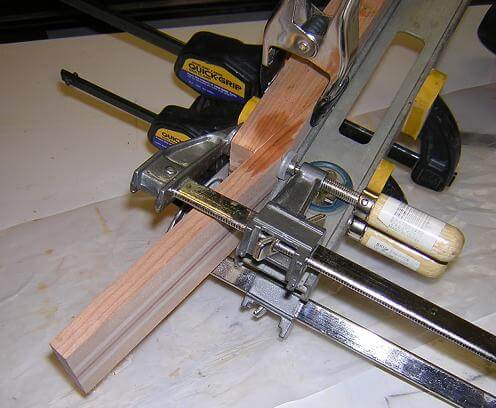
After the glue on the new neck blank had cured, once again I cut the scarf joint and glued it in place. My weird straightedge/clamp combination may not be pretty, but it works well for me.
After the scarf joint had cured, I removed the clamps and planed the top face of the neck flat.
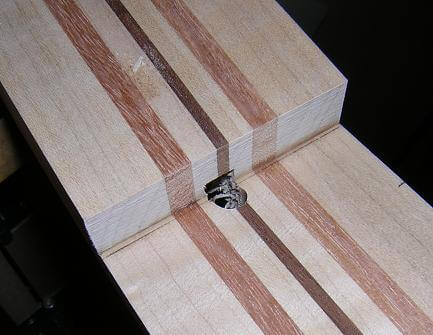
Here we go again: this is where things on the first neck went south. It's time to rout the truss-rod channel. I put the 1/4" spiral cutting bit back into the router table, and this time I made darn sure the depth adjustment knob was tightened down, and then tightened it some more. One of these days I need to invest in a decent router.
Success! The routing went without issue. Here's the truss rod being test fitted in the channel.
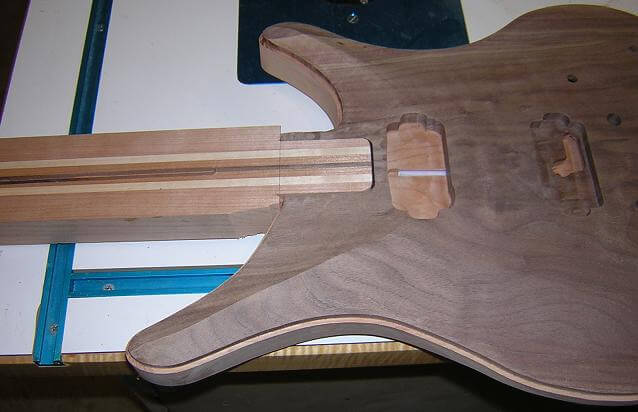
The next step was to cut the neck tenon. The trick is to make the tenon good and snug in the neck pocket, so that the vibrations will transfer well between the neck and body. Loose neck joints equate with dead sounding instruments, at least from my experience. To make sure the fit is snug, I slowly removed material and did test fits until it was perfect. My test for a proper neck tenon fit is to size the tenon so that it will press into the socket without tools, but still be snug enough to suspend the body via friction. Also note that the bottom of the tenon is cut with the 3.75 degree angle of the neck pocket.
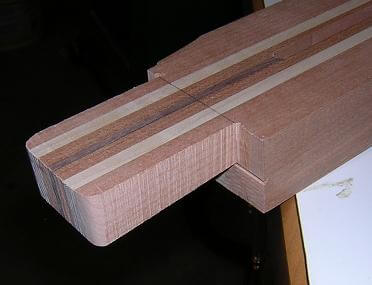
After the tenon was tweaked and I was satisfied with the fit, it was time to cut the rear profile of the neck. I used my standard neck width, which not counting the fingerboard is 5/8" at the nut tapered to 3/4" at the 12th fret. This cut was made at the band saw.

The neck blank isn't quite wide enough for the headstock, so we overcome this situation by gluing on a couple of "ears" onto each side of the headstock. After the glue has cured, the ears are sanded flush with the rest of the headstock.
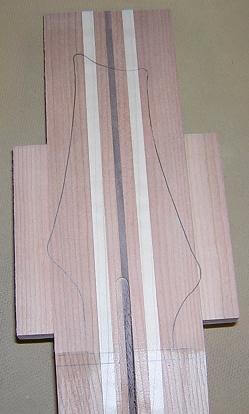
I took my hardboard headstock template and marked the outline of the headstock. I then used the bandsaw and cut out the headstock shape as close to the line as possible, without going into the line.
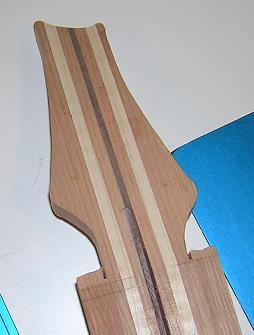
With the headstock at it's rough shape, I taped my hardboard template to the headstock and used a pattern-trimming bit on the router to bring the headstock to it's final shape.
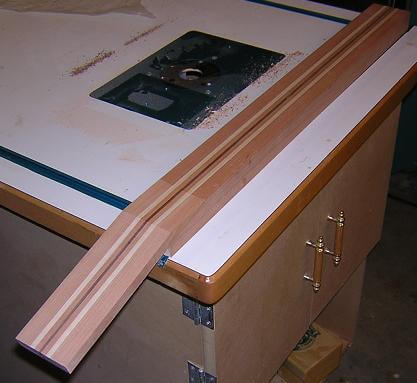
Now I marked the taper of the sides of the neck. I rough-cut this taper at the bandsaw. After the fretboard has been glued to the neck blank, I'll use a flush-trim bit to cut the neck flush with the fingerboard.

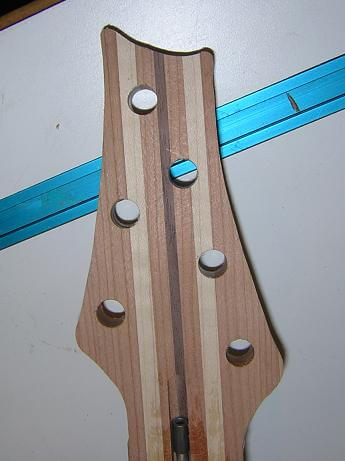
The last thing to do prior to attaching the fretboard is to drill the holes for the tuning machines. I had punched marks into the headstock when the template was attached to correctly position the holes. The drill press is used to make sure the holes are perpendicular, and the neck is carefully clamped in place to make sure the holes are accurate. A piece of scrap behind the headstock helps prevent the wood from tearing out on the back side when the drill bit protrudes through.
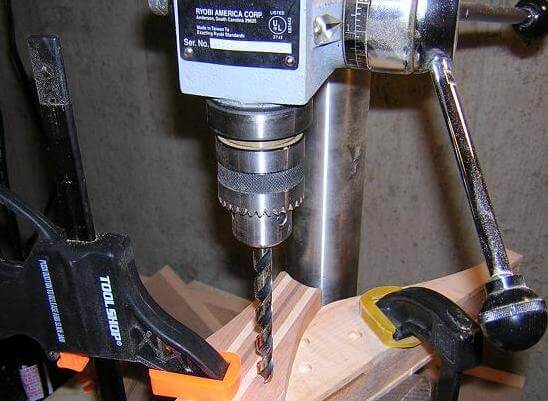
The process is repeated for all six tuner holes.
Well, the neck is officially done with everything that I do prior to attaching the fretboard. But first, we must build the fretboard.
Or, you can go back to the body building page.
Return To The Main Music Gallery
This page last updated on 06/28/2018