


After nearly six months of work, we're finally on the home stretch! The next step is to apply a finish. Unfortunately, the first part of the last step is the most tedious, boring part of building a guitar (or a bureau, for that matter): sanding. The entire guitar needs to be sanded and sanded to make sure that every bump, gouge or scratch is removed. This is boring and manually intensive work (power sanders don't work very well on all these curves) but it is also extremely important that it is done well, as every little imperfection will be highlighted once a glossy finish is put on the guitar.
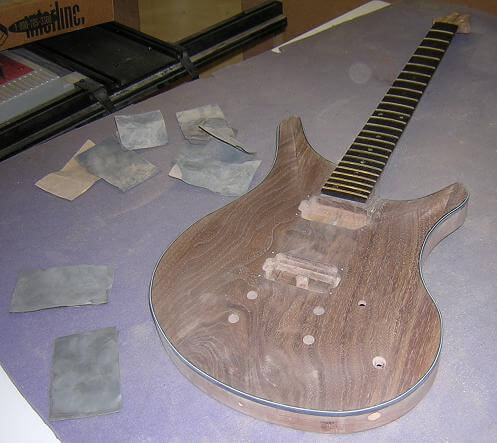
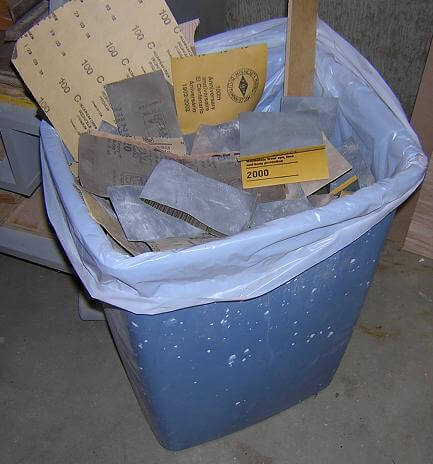
I started with 100 grit (actually 80 grit in a couple spots that were real bad) and slowly worked my way up to 150, 220, 320, 400, 600, 800, 1000, 1500 and finally 2000 grit. This guitar will have an oil finish, so I will sand to a much finer grit than I would if I were using say, lacquer or a poly finish, in which case stopping at 220 or 320 would suffice. Basically I wanted the surface of the wood nearly glossy even before I applied a finish. How much sanding did I do? I took a picture of the garbage can where I put my used pieces of sandpaper. Except for the thin piece of hardboard sticking out, the whole trash bag is full of sandpaper. It took me several days to sand this guitar completely, and boy did my hand remind me afterwards!
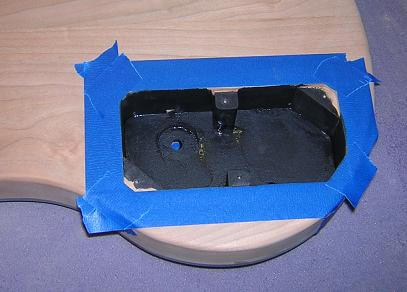
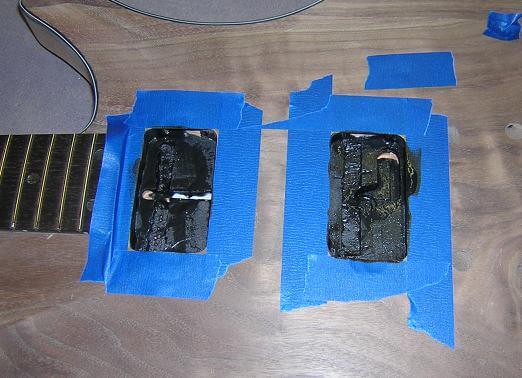
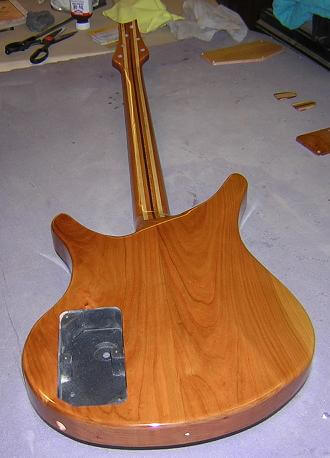
With the majority of the sanding done, I could shift my focus a little. Because an electic guitar is susceptible to electrical interference (fluorescent lights, computer monitors, bionic arms, etc.) I wanted to shield the electrical cavities to reduce this interference. I painted both the control cavity and both of the pickup cavities with two coats of shielding paint. This paint is pretty expensive ($25 for a half pint) but I'd rather do it now and have a quiet guitar than trying to figure out how to quiet it down after all the electronics are installed.
David wanted his guitar finished naturally, with no color added. Good choice considering the beautiful wood in this guitar. It is common that mass-produced guitars are finished using lacquer, and I have used lacquer in the past. The downside to lacquer, however, is that it requires moderate temperatures, low humidity and excellent ventilation. In South Dakota during the winter, the only one of those three you have a shot at getting is the low humidity. We were having a particularly nasty blizzard and cold snap at the time I was finishing this guitar with temperatures below zero (Fahrenheit - brrrrr...). So finishing outside wasn't an option. My garage isn't heated either. My shop shares it's space with our boiler, which is a big no-no with lacquer as well, and I'd hate for an explosion to ruin all this work I've put into a guitar, as well as level the entire block. Even opening the window (again, brrrrr...) wouldn't be adequate to deal with the toxicity and flammability of the lacquer fumes.
So, I decided that lacquer is out of the question. For my first guitar, I used a water-based brushing varnish (polyurathane). This didn't have the fumes or flammability issues of lacquer so it can be used inside, which is perfect for my situation. However, it was difficult to get coats applied evenly and I didn't care for how it made the wood look; there was no real "pop" to the grain where the character of the wood jumps out at you. The wood looked a little dull and lifeless. So, I didn't really want to go this route either.
Oil and wax is a fairly easy finish for those wanting a satin sheen, but I was looking for a glossy finish. Polyester is another option that is used, but the hazards, equipment and experience needed to use it make lacquer look like an easier option.
I had heard about a product called "Tru-Oil". It is an oil-based finish that is primarily marketed as a gun stock finish, but some custom instrument makers have been using it with good results. It is applied with a rag in very light coats (no spray equipment needed), it doesn't stink (yay!), doesn't have the flammibility of lacquer (again, yay!) and does a pretty good job of highlighting the grain (3rd time yay!) It is a very thin finish, so it leaves the guitar feeling very natural rather than the plastic feeling that some thicker finishes will leave. The down side is that it takes a great deal of care to apply it as a gloss finish. Many people decide to apply Tru-Oil as a satin finish just to make things easier. I made the decision to use Tru-Oil and apply it as a gloss.
The first step is to put on an initial coat of the Tru-Oil a little thicker than normal. It is left to sit for a minute or two and really soak into the wood. Once it looks like the wood has absorbed as much as it can, the excess oil is rubbed off with a rag and the guitar is left to dry for 24 hours. I could only work on one side of the guitar at a time, so I had to repeat the process again for the back side after the front side had dried.
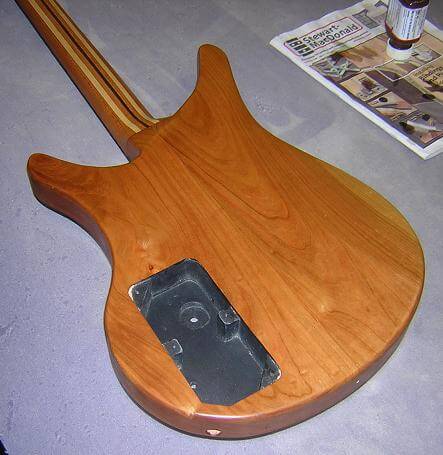
The remaining steps of the finishing process don't really lend themselves to pictures, so I'll just describe them. The top of the guitar is made of walnut, which is a fairly open-grained wood. To help smooth out the top, I filled the grain using a slurry of Tru-oil and sanding dust. Basically I worked in small sections, dripping oil on the area and sanding until the oil and sanding dust are worked into the pores of the wood. As the oil dries, I repeat the process and finally remove the excess with a rag by rubbing it across the grain. Then again, the guitar is left to sit for 24 hours. Then I start over and repeat the grain-fill process and wait another 24 hours. I probably could have done this grain-filling another time or two to completely smooth out the top, but I decided to leave just a little bit of the grain open to enhance the "woodiness" of the guitar top. The cherry back didn't require filling as cherry doesn't have the open pores that walnut does.
After the oil dried on the top, I then re-sanded the top (starting at 400 grit) all the way up to 2000 again to remove any lumps of oil that I had missed in the wipe-down process.
Now I could apply the finish coats of Tru-oil. As mentioned above, they are wiped on with a rag. With Tru-oil, in order to get a glossy finish the thinner the oil is applied the better. There definitely is an art to getting it applied evenly and glossy, without lots of marks caused by the rag passing over finish that is starting to dry. Tru-oil dries very quickly, so this can be a trick. After a coat has dried for a couple of hours, the area can be lightly roughed-up with 0000 steel wool and recoated. I repeated the process seven times, although I've heard of some people applying up to a dozen coats. I just applied coats until I stopped seeing improvement in how the guitar looked compared to the previous coat.
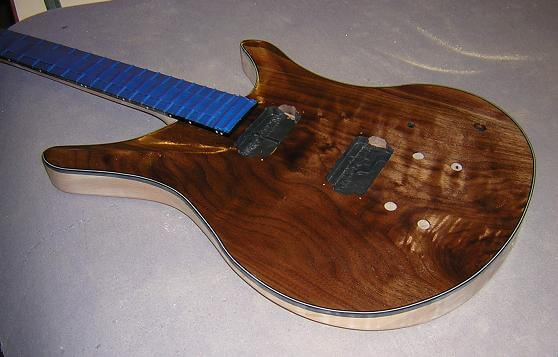
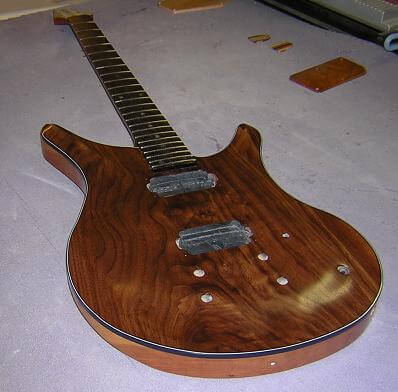
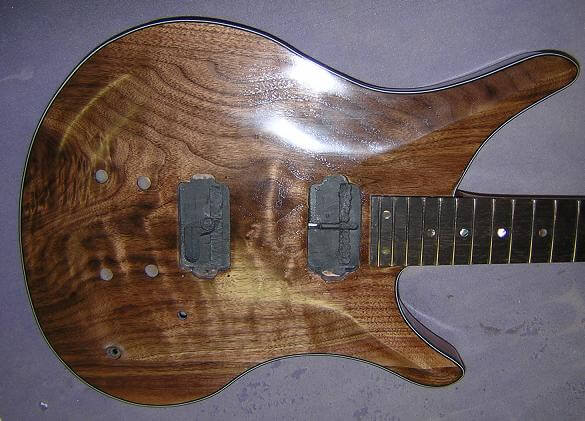
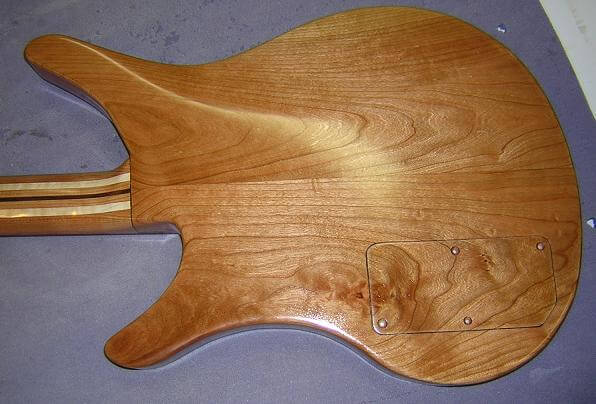
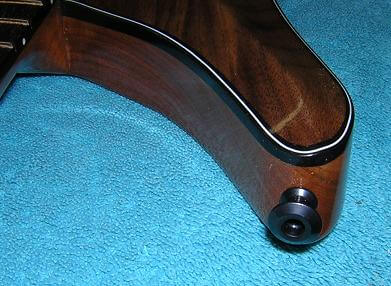
So here are the pictures I snapped after the final coats have been applied and dried. I'm pretty pleased with the finish; it's very natural looking and really brings out the grain and color of the wood.
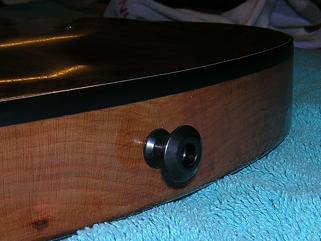
Now we can start installing some hardware, electronics and doing the final setup. I started with some easy things. David does a lot of jumping around on stage, and the last thing he wants (well, one of the last things he wants; I'm sure there's a bunch) is to have the guitar come loose off of its strap. So he had specified to have strap locks installed on his guitar. I already had the holes drilled, so I just had to screw them in place. The matching strap-side of the lock will be installed on his guitar strap.
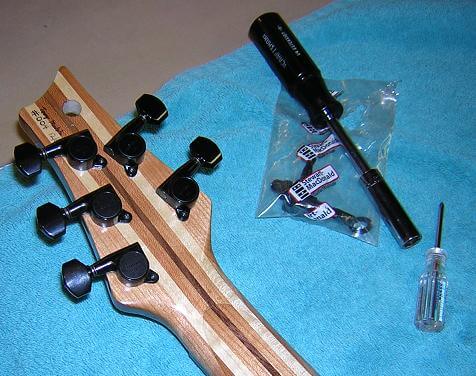
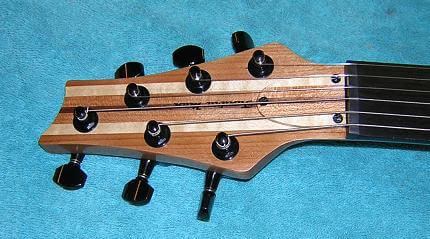
Next up, I installed the tuning machines.
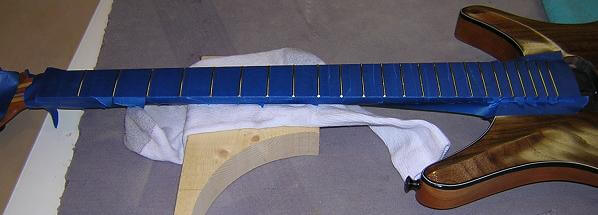
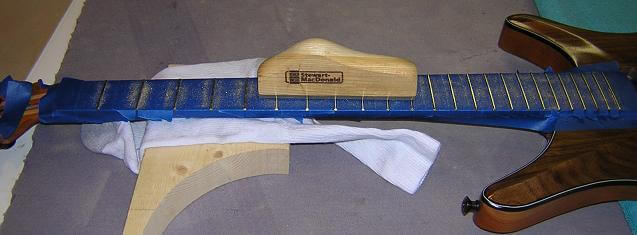
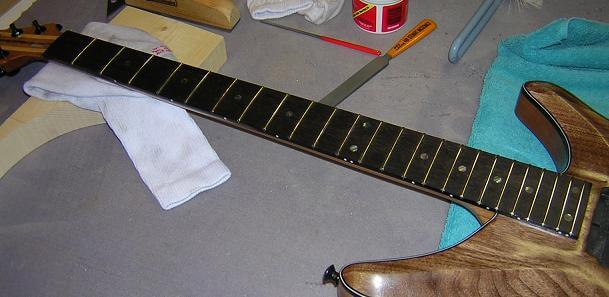
Now the fretwork has to be finished. This is messy work which creates a lot of metal shavings and black guck, so I like to tape off the fretboard and surrounding area on the guitar.
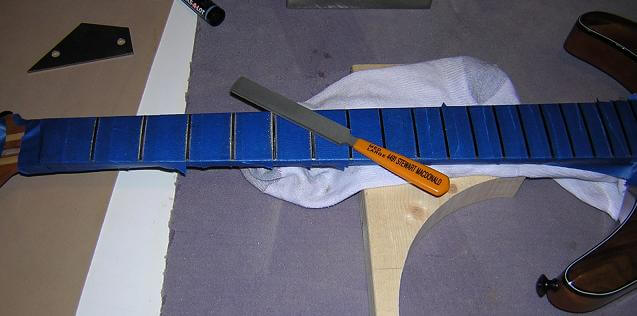
We begin by using a file to level the frets and make them all exactly the same height.
With the frets leveled, they now have flat tops. I use a fretfile to restore the crown on each of the frets.
Finally, after a good polish the fretwork is done.
Both of the pickups are installed. On this guitar, I screwed them directly into the body. The pickup rings are used only to tidy up the hole for the pickup.
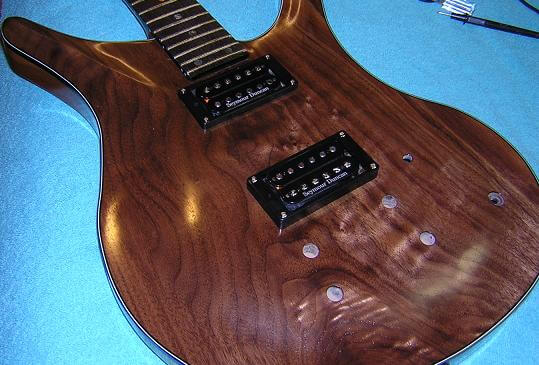
The inserts for the bridge and stop tailpieces are pressed into place, and the components are added.

The wiring on this guitar is real simple. A blend pot for switching pickups and an on/off switch. No volume or tone.
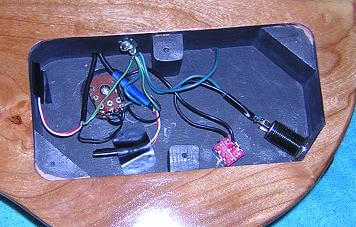
Here's a shot of the blend pot (with the knob installed) and the switch on the front of the guitar.
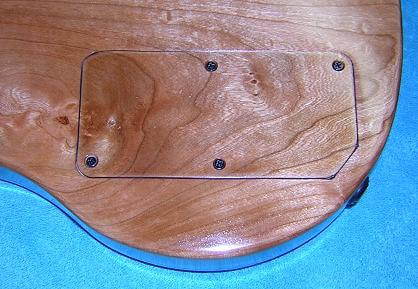
With the electronics completed, the control cavity cover is screwed in place.
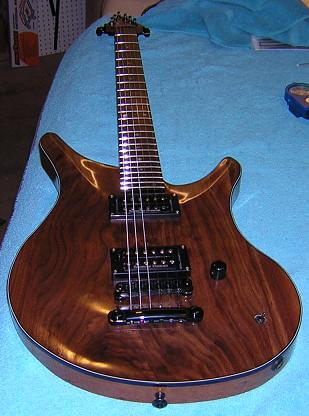
The last step is to install the nut and truss-rod cover. After a good set-up, the baritone is ready to rock!
We're done! You can return to the main page for David's guitar, or you can go back to the assembly page.
Return To The Main Music Gallery
This page last updated on 06/28/2018