


With the basic construction completed with the three major components of the guitar (body, neck and fretboard) it is now time to put them together to form the completed instrument.
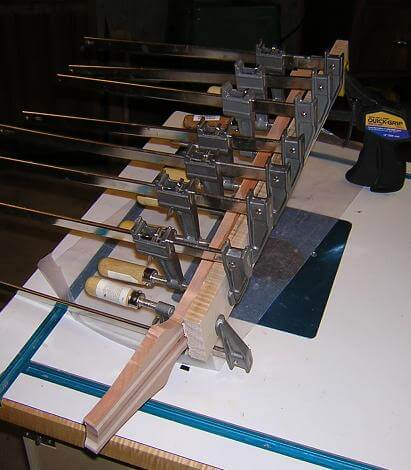
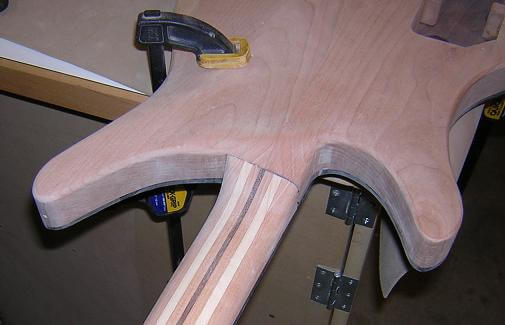
The first order of buisiness is to glue the fretboard to the neck. Once glue is smeared on the neck, it's easy for the fretboard to slip around when you're trying to clamp it up. To assist with this, I shot a few small staples into the face of the neck wood, leaving them slightly proud of the surface. Then I cut the top of the staples off which left several small "pins" sticking out of the neck. After carefully aligning the fretboard, I pressed it into place on top of these "pins", which would keep the fretboard from slipping around while trying to glue it in place.
The truss rod is laid in the channel (don't forget to do that!) along with a few drops of silicone caulk to prevent the rod from rattling. It is very important not to get any bit of silicone on the rest of the guitar, as it'll cause finishing nightmares down the road.
Before applying the glue, I laid a strip of masking tape over the truss rod channel. This will help prevent the channel from filling up with glue and causing problems that may prevent the truss rod from working properly. Glue is then smeared across the surface of the neck (watch your fingers on the staple cut-offs unless you like red glue!), and the tape is removed.
Now it's just a matter of placing the fretboard on the neck and clamping the whole assembly up. I used a scrap piece of wood on top of the fretboard to protect the freboard surface from being marred by the clamps. Once again I wish I had more clamps. After the clamps are in place, I wiped any glue squeeze-out from the sides of the fretboard with a wet rag, as it's a lot easier to remove it now.
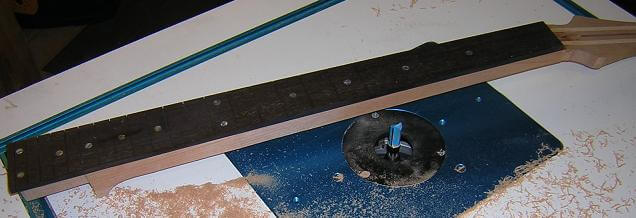
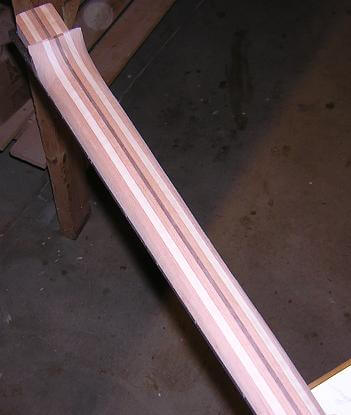
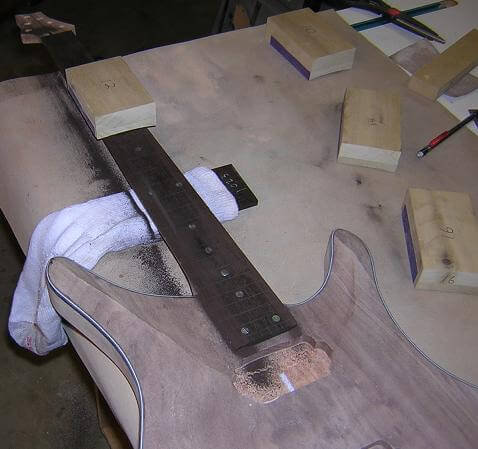
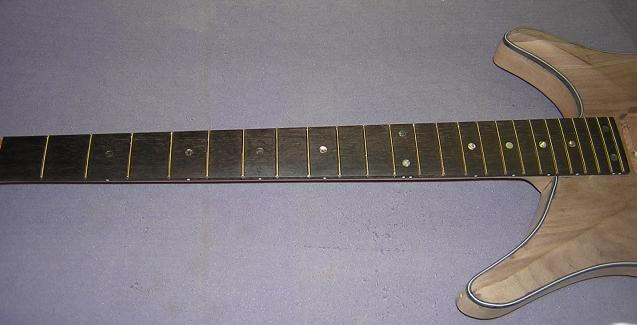
I let the assembly "cook" in the clamps overnight before removing them. When I constructed the neck, I had cut the taper slightly proud of the final fretboard size. This gave me a little "wiggle" room while clamping the fretboard to the neck blank, as trying to perfectly line up two pieces of wood cut to exact size would be near-impossible. The fretboard was already cut to final size, so I just used a flush-cut bit in the router table to trim the sides of the neck even with the fretboard. In this picture I had finished the cut and turned the neck over, fretboard side up. The flush trim was actually done with the fretboard facing down.
And now comes one of my favorite parts of building a guitar, and the part that scares the feint of heart: carving the neck.
By the way, for those of you who like to e-mail me about my spelling errors, that is the proper spelling of the word feint when used in this context. The homophone faint has the same pronunciation, but holds a different meaning. Check Webster if you don't believe me. Hey, at least I picked up one small tidbit of information during the semester I spent as an english major before switching over to a science degree! Well, that and I became a pretty good pool player. Now, back to our regularly scheduled guitar making...
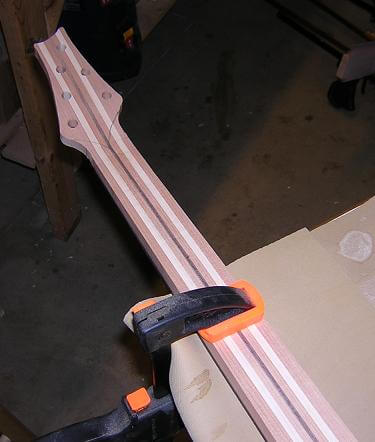
To begin, I mark a centerline down the middle of the back of the neck (this is hard to see in the walnut strip, but it's there!) The centerline is useful as both a visual reference to where the curve should start, and also as a depth control guide. As long as I don't carve away any wood where the center line is, I don't have to worry about carving too deep and exposing the truss rod (can you say "the destruction of another neck?" I knew you could!) I also mark lines that will guide the carving of the transition to the headstock and heel areas. Then I securely clamp the neck to my workbench and prepare to carve!
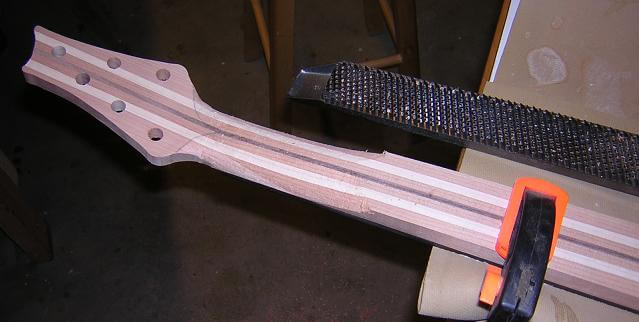
Using a surform (which is kind of a fancy rasp) I begin hogging away wood. The process is slow and labor intensive, but extremely satisfying. This is the part of the process that I feel really defines the personality of the instrument. A good feeling neck will keep a guitar in a player's hands even if there are other parts of the instrument that aren't quite perfect. Heck, I've got one guitar that I should probably sell as it sounds like foot odor smells, but the neck on it feels so awesome that I keep it around. Actually this is the guitar that I use as a reference when I carve necks.
I keep checking my progress with my hand until the neck begins to "feel" right. It helps to keep a finished guitar handy (like the my fungal friend described above) and compare the neck profiles frequently, as I've found my hand will develop a sort of memory. The carved neck will feel great until I play a finished guitar for a minute or two, then when I picked up the neck I'm carving I'll find areas I need to tweak. It's important to go slow, as it's pretty easy to remove more wood but pretty difficult to put any back on. I also find it amazing how your hand can feel minor variations in the contour of the neck that are impossible to see by eye. You can stare at the neck all day and it will look great, but when you pick it up you can feel little bumps and ridges that need to be addressed.
Here's the top half of the neck being carved. Once I get it feeling right, I'll flip it around in the clamps and carve the lower half. You can see the extremely rough surface that the surform leaves. After the rough carving is done, it takes quite a while with some sandpaper to smooth everything out.
Then, as mentioned, I flipped the neck around and carved the lower part of the neck.
After the rough carving was done, I spent a good chunk of time smoothing the neck out and doing a final honing with sandpaper. I used the OSS to smooth out the headstock and heel transitions. Finally, the neck carving was done.

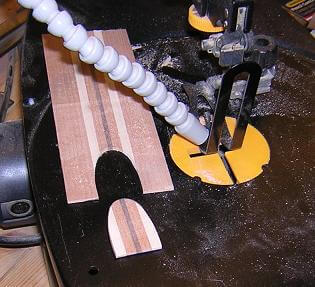
I needed to do something to cover up the ugly hole where the adjusting nut of the truss rod sat. I took a piece of scrap off of the neck blank and cut it to 1/16" thick. I coated the back of the piece with epoxy to give it strength, then cut out a cover plate on the scroll saw.
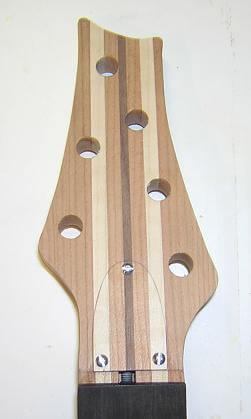
The holes in the headstock and cover plate were carefully drilled, then I test-fitted the cover. I'll paint the screws black once the guitar is finished so that they match the rest of the hardware.
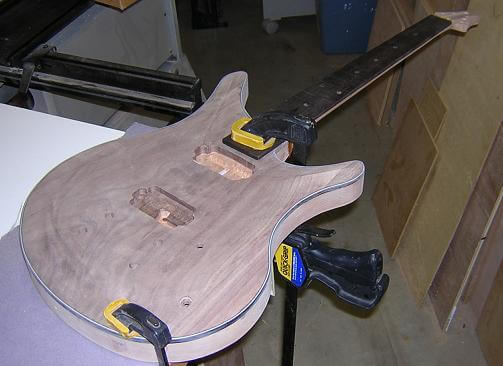
Finally I was at a pivotal moment: I glued the neck to the body. I always use slow-set epoxy for this join, as the strength is very critical and I don't want any chance of glue failure. I know that standard wood glue really should be strong enough for this join, but using epoxy lets me sleep better at night. The neck joint was good and tight (as it should be) so only one clamp was more than sufficient to hold the neck in place while the glue cured.
Once the epoxy had cured, I added one of my "signatures" to the guitar: the carved neck heel. I like to carve away the neck heel versus having a traditional heel, as it makes playing in the upper fret regions a lot easier. Again, I did the rough work with a surform and finished up with lots of sandpaper.
Now it was time to radius the fretboard. This guitar will have a compound radius starting at 10" at the nut, and progressing to 16" at the body end. I used my homemade radius sanding blocks to sand this profile into the face of the fingerboard. The ebony dust sure makes a mess!
The next step is to do the initial install of the frets. I like to hammer, trim and bevel the frets prior to finishing, then complete the fret level and dressing after the finish has been applied. I cut the frets a little bit wider than the neck, and hammer them in place with the plastic side of my fret hammer. I use the plastic side as the brass side really does a number on your fretboard (and finger) when you accidentally miss the fret. The plastic side does damage too (as I type this without use of my left index finger), but not near as much as the brass.
I have to admit, fretting is not my favorite part of building a guitar. Sometimes I need some supervision to keep me on track with my work. Tundra Boy is a heavy task driver...
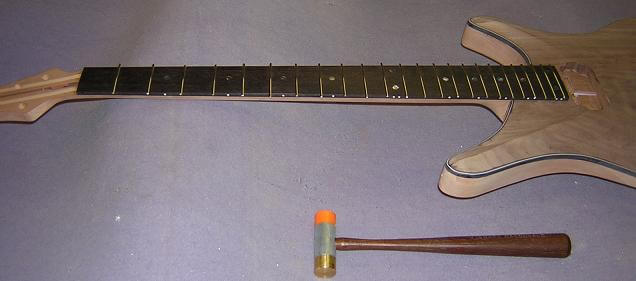
With all the frets in place, I trimmed them flush with the end of the fretboard, and beveled the edges. The frets are still pretty rough, but I'll take care of that after I apply the finish.
At last it's time to apply the finish and install the hardware.
You can always go back to the fretboard page.
Return To The Main Music Gallery
This page last updated on 06/28/2018