


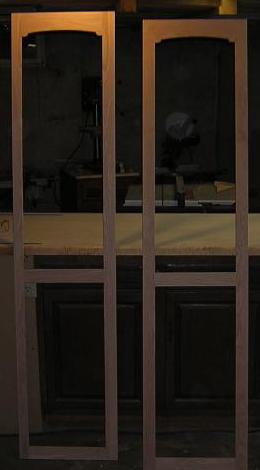
I began by working on the sides. I cut all of the pieces to length, then used a dado blade to cut a 1/4" groove on the inside faces to be used to hold the glass. The top stiles received a 1 1/4" deep groove, to allow the arch to be cut out of the inside edge. The ends of the stiles had tenons cut in them, sized to fit in the grooves. On the inside faces of the edge pieces, I drilled holes to hold the shelf pins where the glass shelves will reside. Then I glued up the two side assemblies and spent an extra few minutes making sure everything was square. Once the glue had dried, I cut a 1/2" rabbet in the inside back edge that will hold the plywood back. I also removed the inside edge of the glass channel with a router and a chisel to square up the corners. I didn't remove the edge in the top, arched stile. After much sanding, the sides were ready.
Speaking of the plywood back, I cut the back to size. Because my shop was small, I had to spill out into another (yet to be finished) section of our basement to assemble the carcass.

Next up, building the three shelves.
Back To The Curio Cabinet Main Page
Return To The Main Wood Gallery
This page last updated on 06/28/2018