


One big difference between this instrument and the last one that the Tundra Boy built, is that this time around he is financing the whole project himself whereas last time I paid for everything. About two months prior to starting the build, he went and got himself his first job. He's working at Menards, returning carts from the parking lot and helping customers load their purchases. It's very physical work, and he admits that he doesn't enjoy it very much. However, it is a paycheck and he does enjoy having a paycheck.
Things take a different perspective when you are spending your own money. What you originally desired often quickly changes when you see the price on said item. The Tundra Boy spent a lot of time carefully deciding what woods and hardware this bass should have, trying to find the best balance between what features he wanted and what price he was willing to pay.
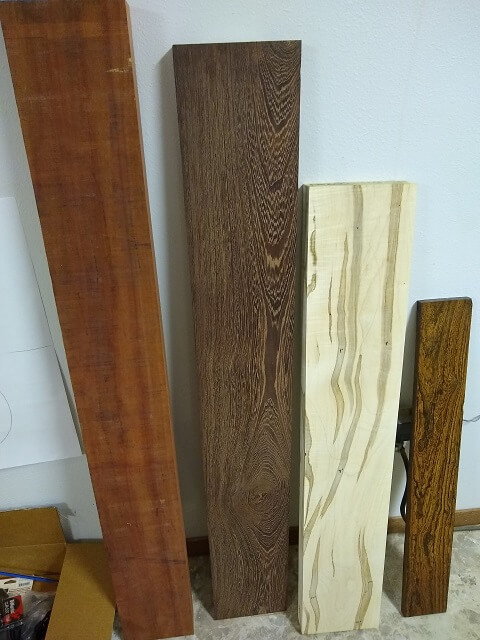
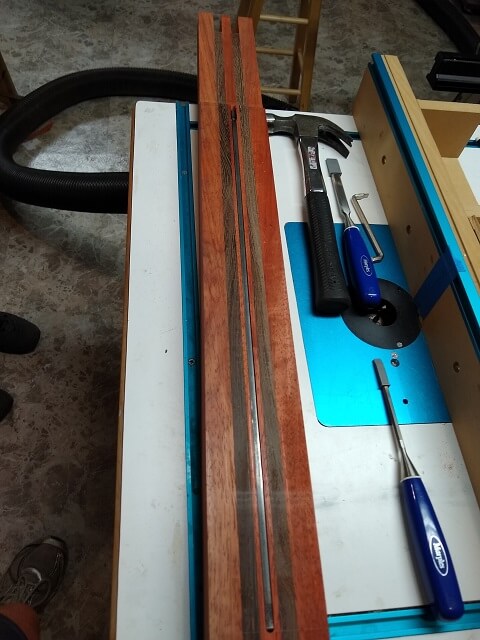
He ordered all the materials for this instrument before he started construction. Here is a picture of the wood he chose. The 8/4 Padauk board (on the left) will be used for most of the neck, and actually came out of my inventory but he agreed to pay me $40 for it. I might have given him a really good price. Next to that is a Wenge board that will be used for constrasting lamination strips in the neck. He should have enough left over to easily build another bass neck with the scrap. Moving right, he purchased a piece of Ambrosia Maple that will become the body wings. And finally on the right side is a beautiful piece of Bocote that will be used for the fretboard.
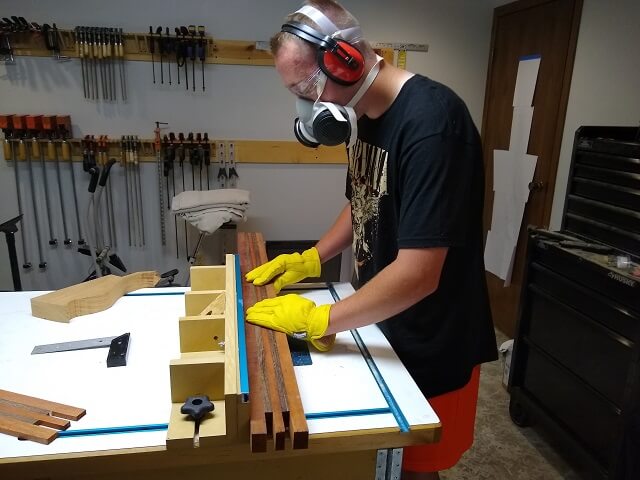
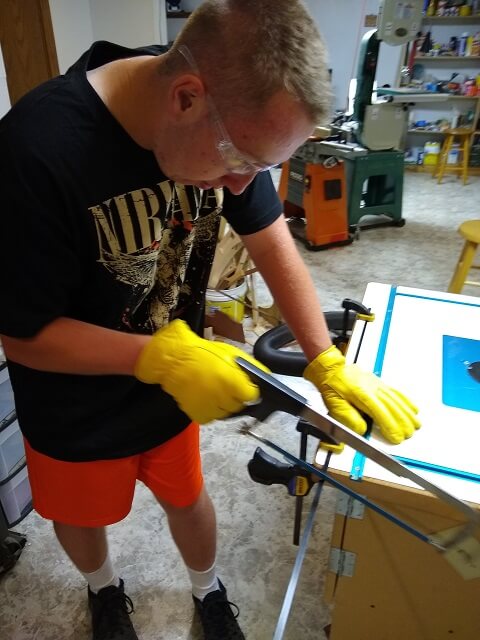
The Tundra Boy started by cutting the Wenge to be used for the contrasting lamination strips in the neck. Wenge is a very dense, but brittle wood. It has a reputation of splintering easily, and slivers of this wood in your skin can become septic very quickly. Also, the dust can be rather toxic to some people. To error on the safe side, he wore extra protective gear including a respirator and gloves.
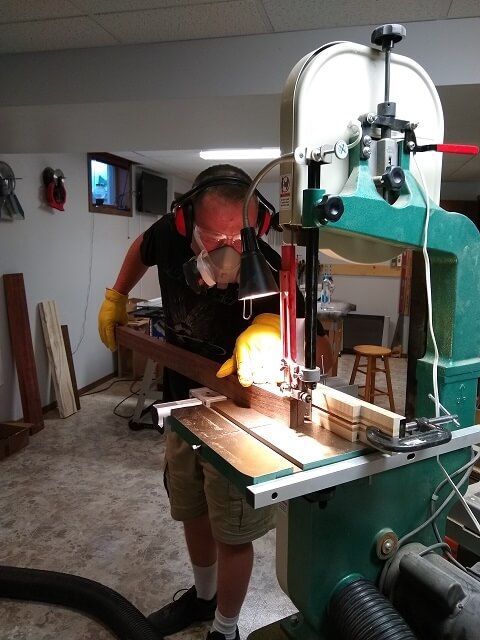
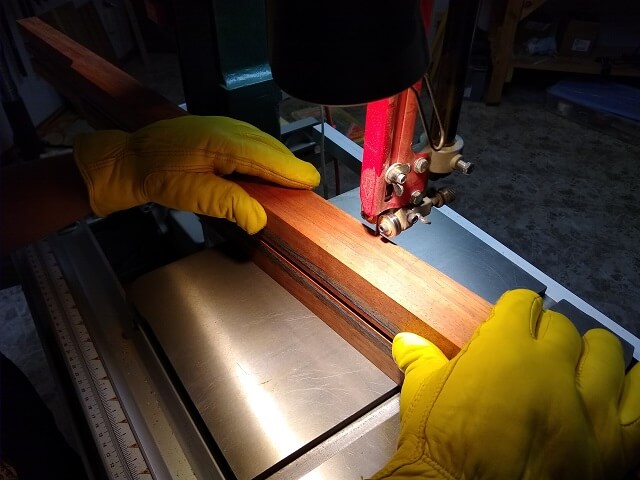
The Wenge board was more than 1.25" thick. He wanted the neck laminations to be closer to 1/2" thick, so it was simply a matter of resawing the Wenge down the middle to create two thinner pieces.
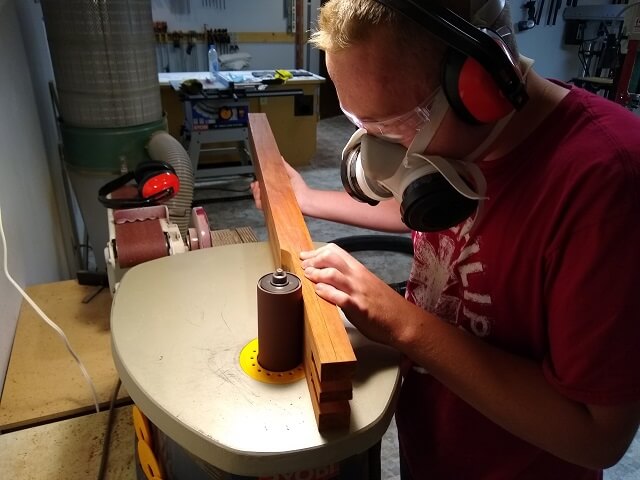
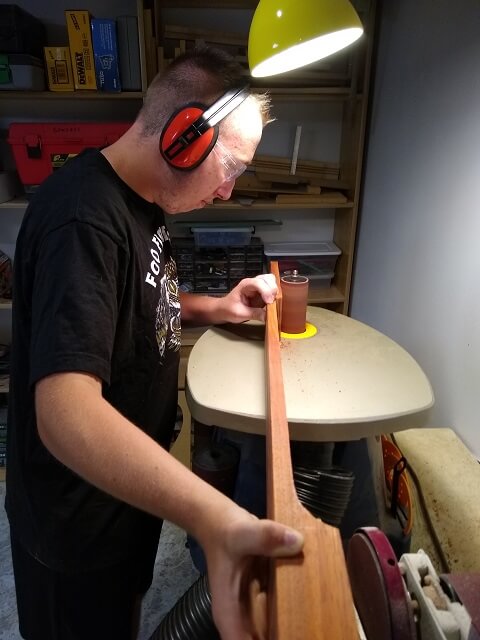
The Wenge strips were then run through the drum sander to remove the band saw scratches, and bring the strips to the final desired thickness.
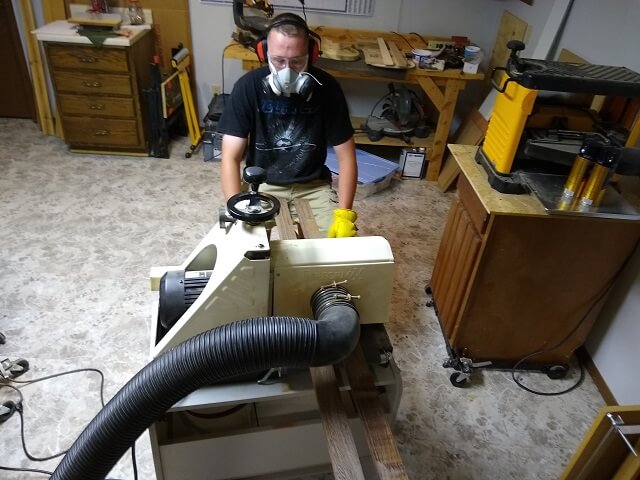
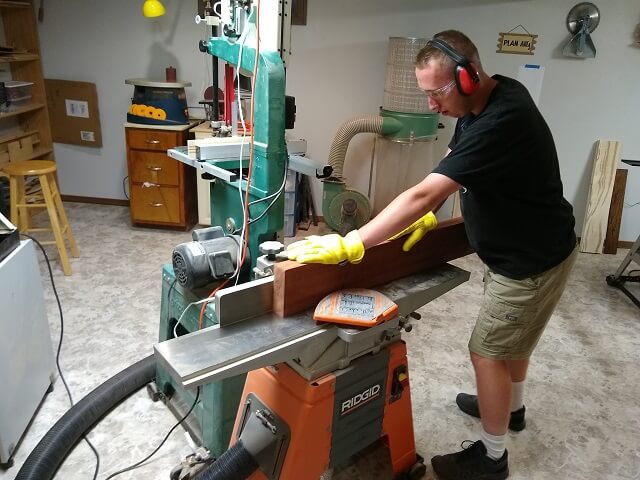
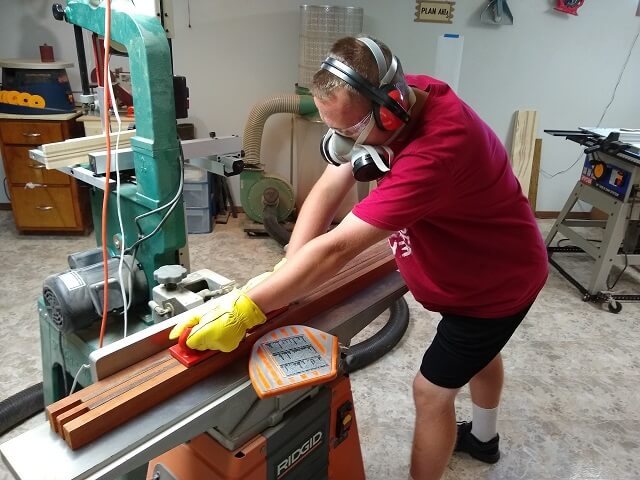
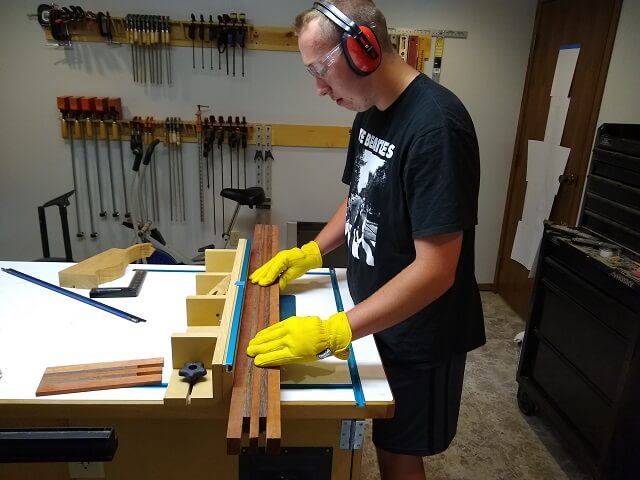
To begin working with the Padauk, one side of the board was jointed perfectly straight. Padauk doesn't have the reputation for slivers that Wenge does, but while handling the Padauk board earlier the Tundra Boy managed to get a nasty sliver that required some skin removal in order to extract it all. As a result, he chose to wear gloves while handling the rough Padauk as well.
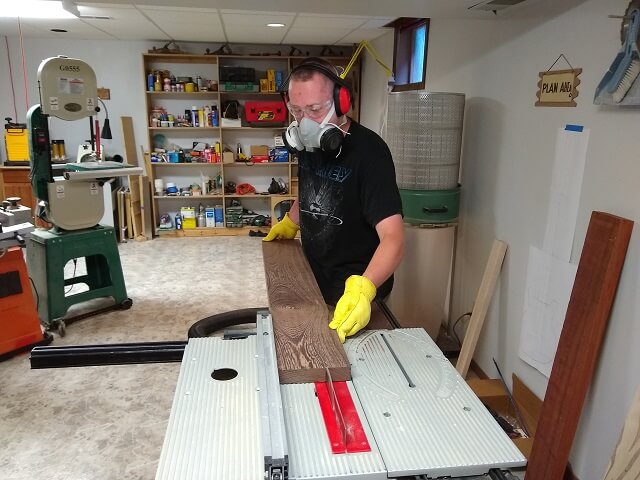
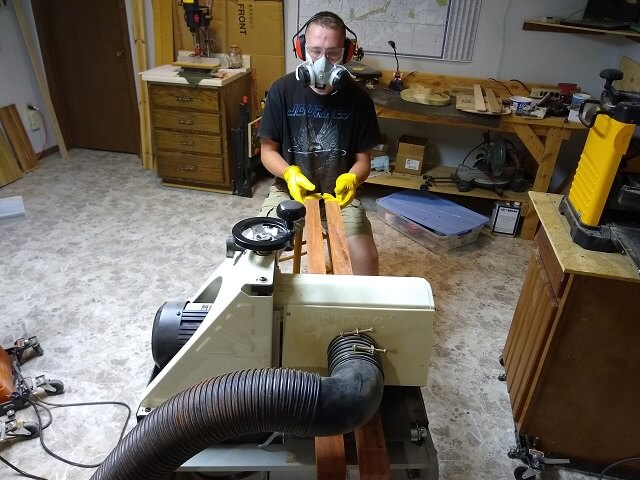
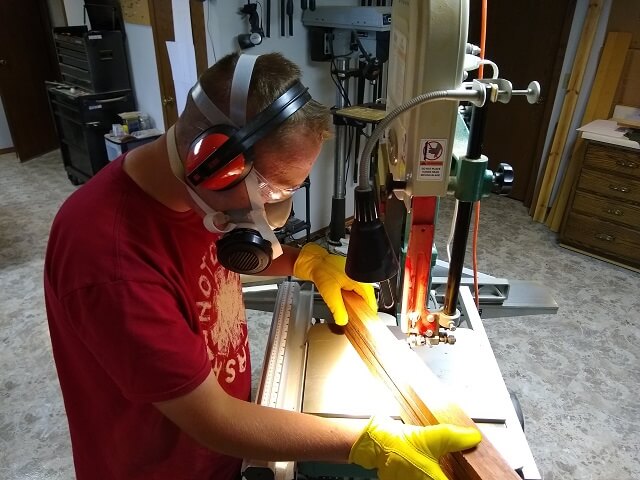
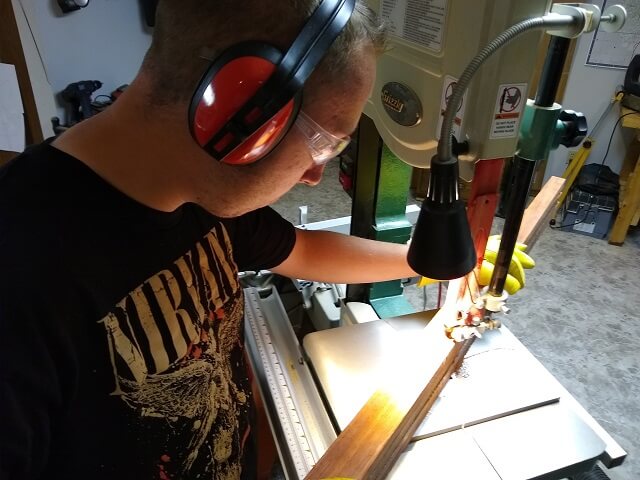
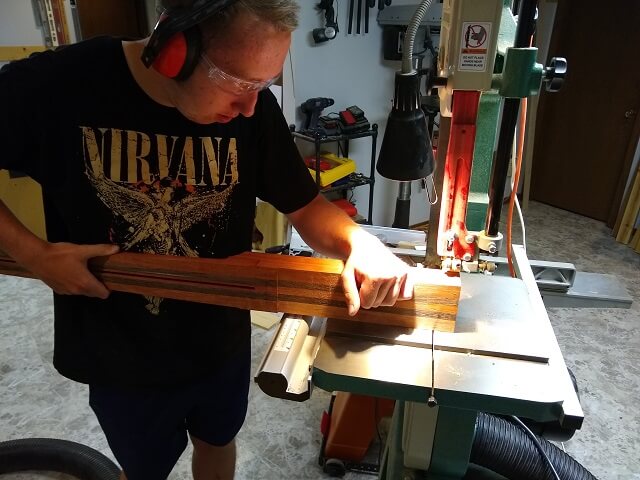
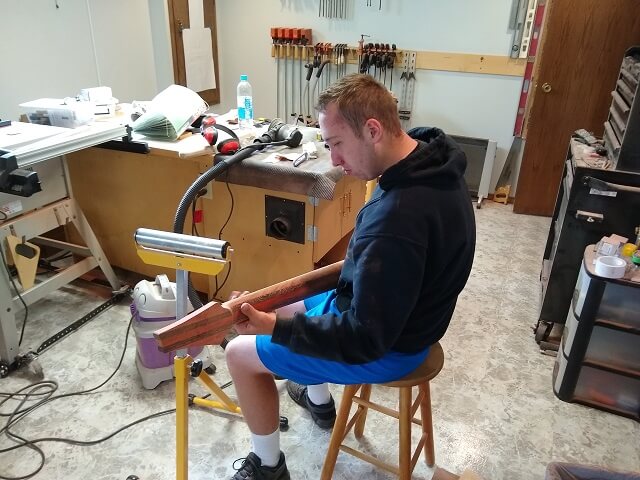
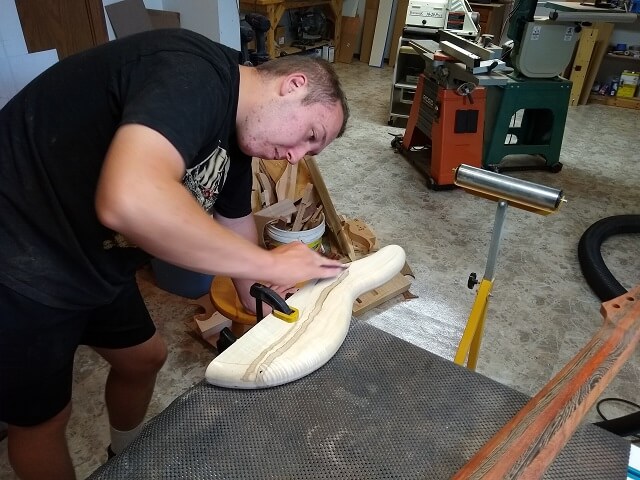
Three strips were eventually cut from the Padauk, and the drum sander was again employed to remove the saw scratches. In this photo the Tundra Boy is working on the two strips that will become the outside pieces of the neck.
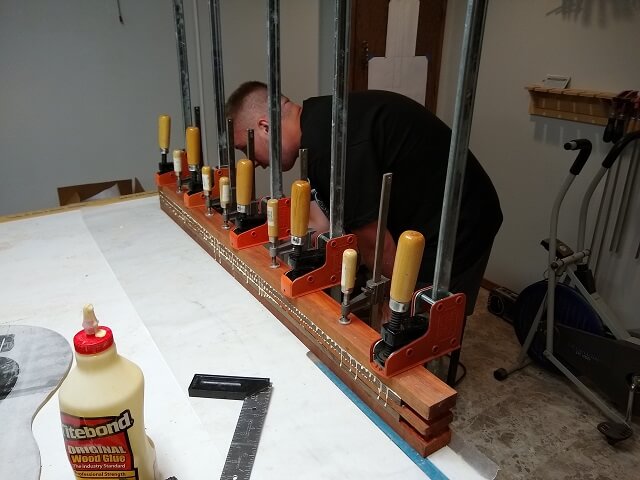
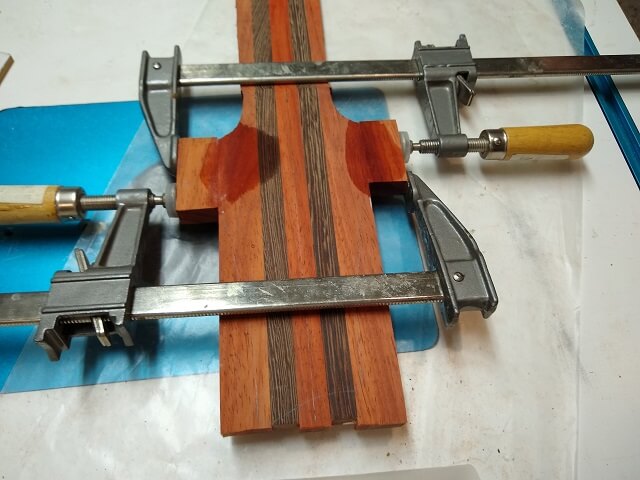
With the five pieces of wood cut, it was time to glue them together into one huge neck blank. The pieces were all fairly straight, but in order to help keep them that way the top of the workbench was used as a clamping surface. Regular PVA wood glue was used for this glue-up, which you can see seeping from the joints. In this photo the Tundra Boy was removing the excess drips of glue from the back side with a damp rag. After the back side was cleaned up, he removed the extra glue from the side you can see in this photo.
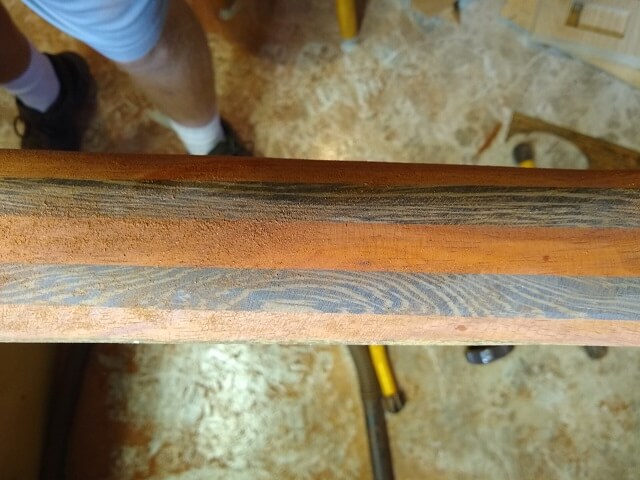
The neck sat in the clamps for almost 24 hours until the next evening. Tundra Boy removed and inspected it. The first thing that was obvious was it was fairly heavy. It's going to be a heavy instrument, no doubt about it. Also, you can see some color variation in the Padauk strips, even though they all were cut from the same board.

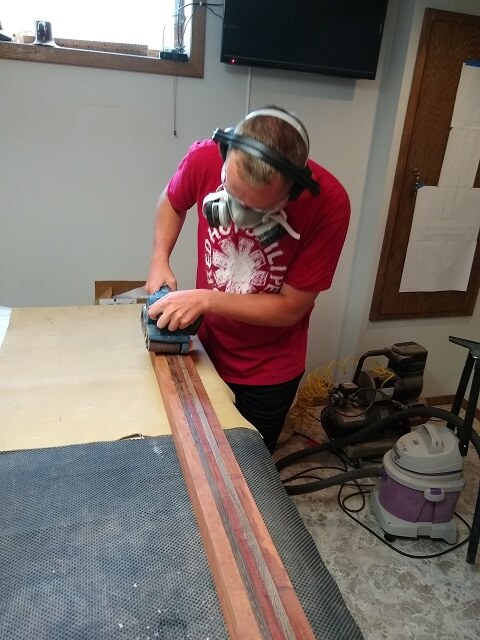
Before the neck blank could go any farther, Tundra Boy needed to get one side of the neck blank completely flat. The Wenge strips were slightly taller than the Padauk strips, so when they got glued together the Wenge was sitting a little proud on both sides. It was uneven enough that the blank wouldn't sit very flat on the jointer bed, so an intermediate step was needed. He used a handheld belt sander to bring the Wenge flush with the Padauk.
With everything flush, now the Tundra Boy could run the neck blank through the jointer to make the face perfectly straight.
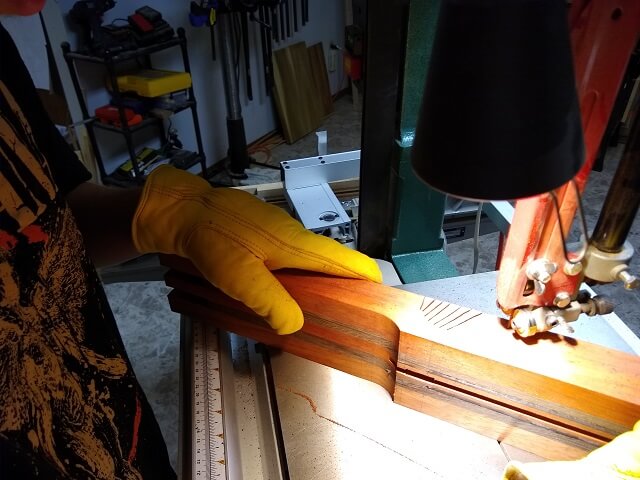
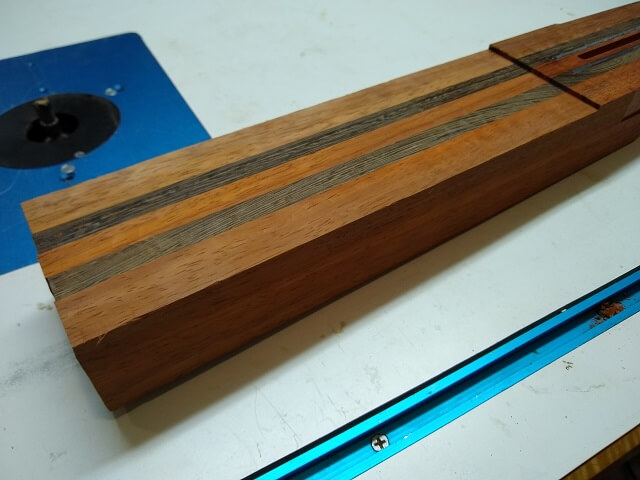
This bass is going to use a Fender style recessed (flat) headstock. Now was a good time to cut out the front side of this recess, which will define exactly where the nut will be located on the blank. Most of the rest of the instrument's measurements will be based on this nut location, so it's good to define it early in the process.
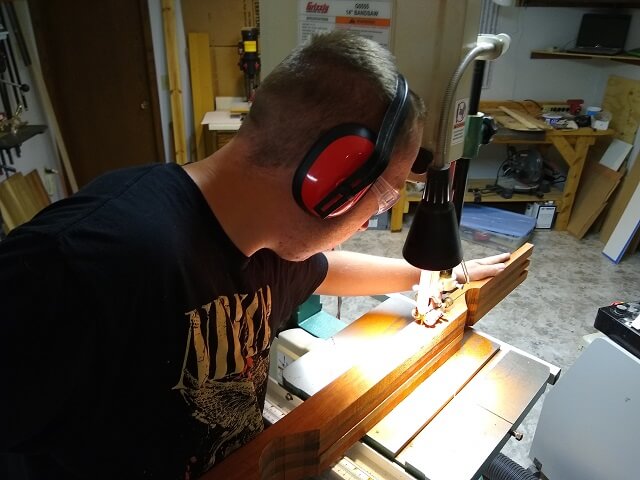
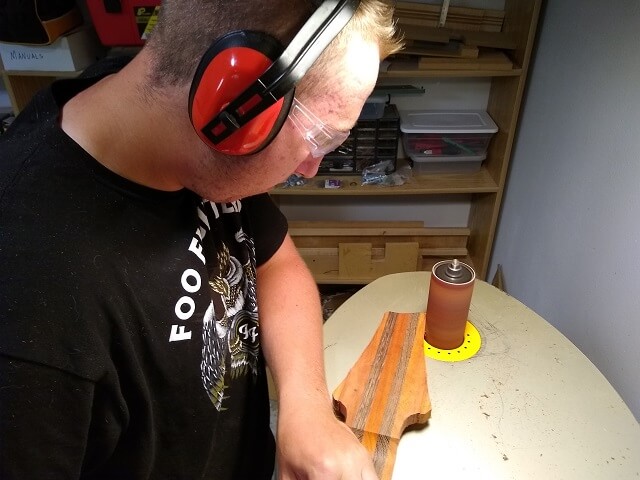
The bandsaw left a rough cut, especially on the curved portion.
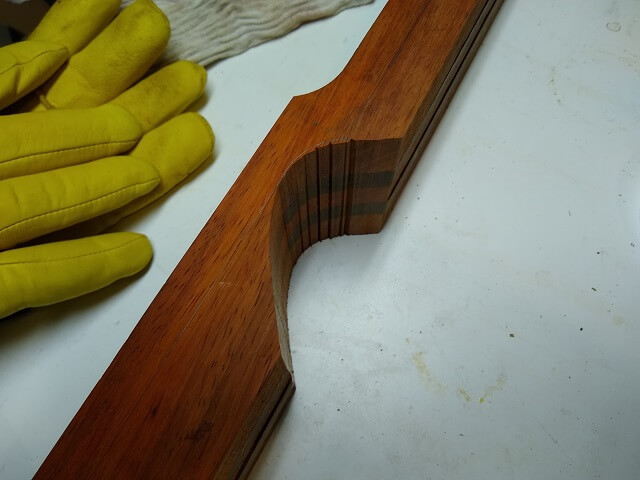
The bandsaw scratches were cleaned up on the oscillating spindle sander.
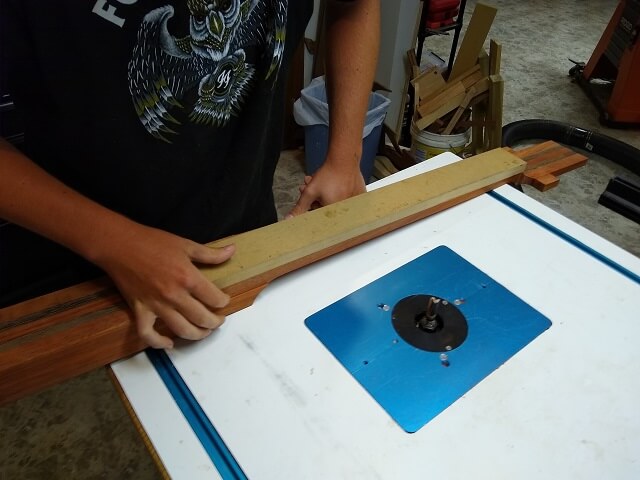
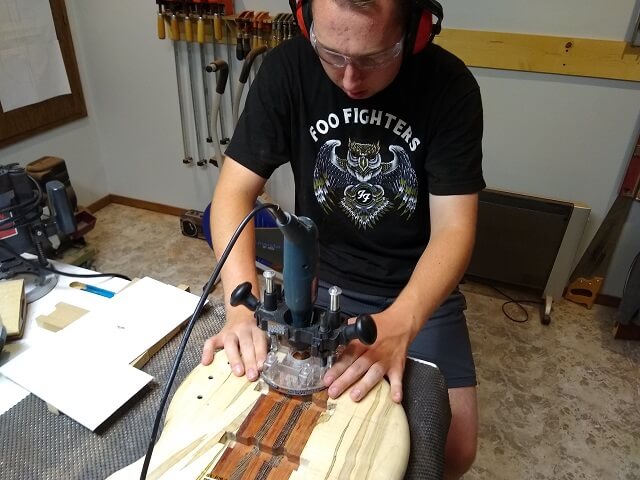
Now it was time to rout the channel for the truss rod. On his last guitar the Tundra Boy wasn't comfortable with doing a blind cut on the router table, so he used an edge guide and routed the channel from the top where he could see what was going on. By this point in time, however, his skills with the tools had improved enough that he was willing to give the router table method a shot. I think he quickly figured out why this was the method that I use. One of the benefits is that all the dust gets sucked down into the table by the dust collector, rather than shooting straight into your face. He wore the respirator for the first cut, but abandoned it on subsequent cuts as there wasn't any dust flying around.
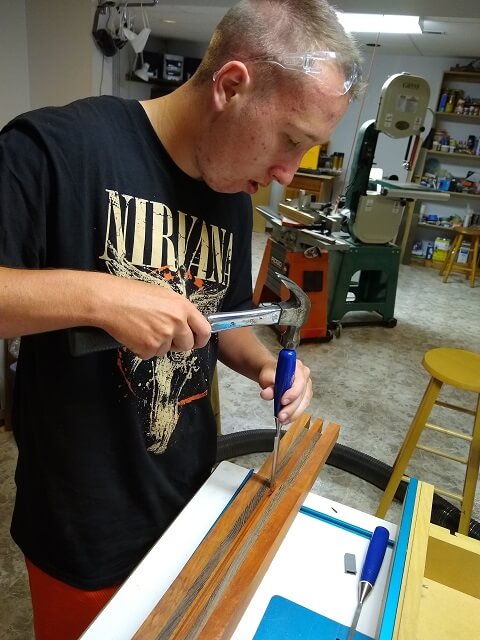
With the truss rod channel at the proper depth, the nut adjustment end had to be widened just slightly to allow the adjustment nut to slip down into the slot. He did this using some sharp chisels, and some light tapping with a hammer.
Here's the truss rod fitting perfectly in the slot.
Next up, it was time to install the carbon fiber strips into the neck. The rods come in 4' lengths, which worked out well as cutting one in half would yield two 24" strips, which were about the perfect size for his neck. He cut the rod in half using a hacksaw.
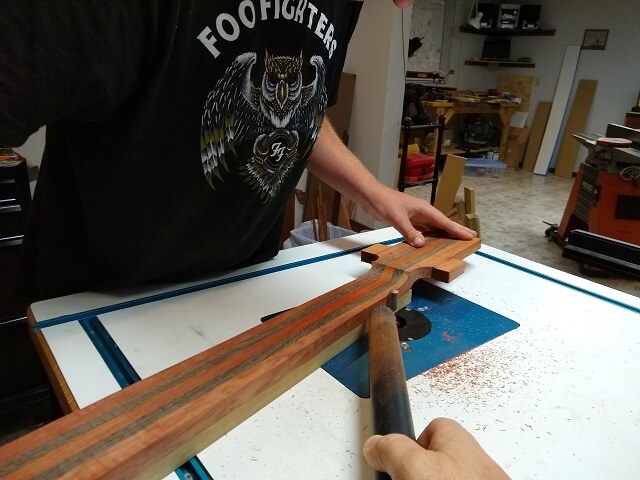
The channels for the carbon fiber strips were routed a similar way as the truss rod channel. The big difference was there were two of them, so after routing one side the Tundra Boy would flip the neck blank around and route the channel for the other side. The tiny 1/8" router bit really struggled cutting through the Padauk and Wenge, so he did it in five or six passes, raising the bit ever so slightly between each.
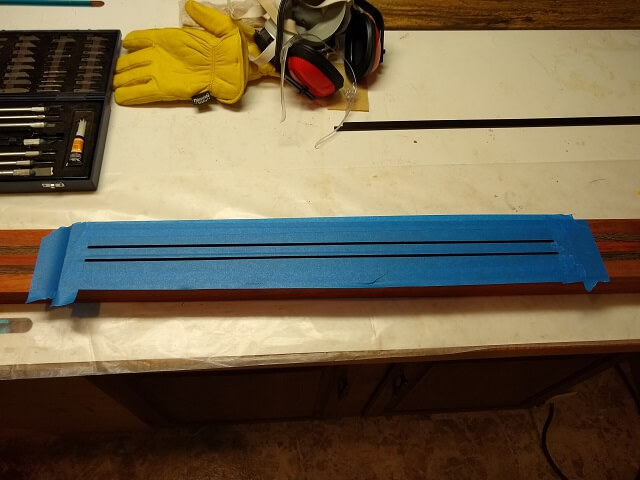
The carbon fiber strips are glued in using epoxy. Seeing as the face of the neck blank has been jointed straight, he didn't want epoxy to get smeared all over and undo this work. So some time was spent covering everything but the channels with tape. That way once the strips were in place he could level the epoxy and remove the tape.
The Tundra Boy mixed up a batch of epoxy. At first we thought he had mixed way too much, but as it turns out those channels held a lot of glue and he had mixed the right amount. He used the high-quality 24 hour set kind, not the 5 minute hardware store junk.
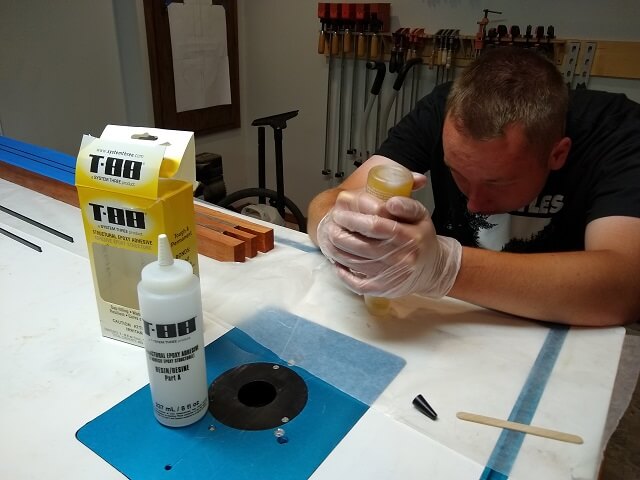
With glue poured into the channels, the carbon fiber strips were pressed into place. This caused a lot of the glue to squeeze out, which then could be scraped level with the flat side of a popsicle stick.

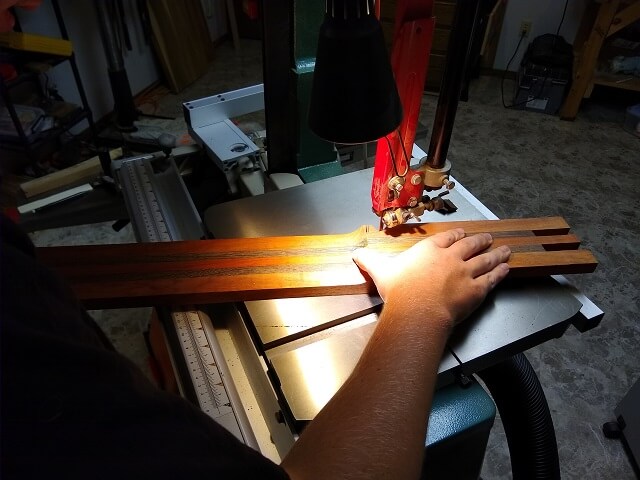
The next day the epoxy was dry so work could resume. Now it was time to cut the back of the neck to thickness. The curved areas behind the nut and the heel were the most difficult areas, so that's where the Tundra Boy started. To keep the blade from binding up on these tight curves, he started by making relief cuts from the edge of the neck blank in to almost the cut line. This way as he was cutting out the curve the relief cuts would allow little pieces to become free which give the blade more room to turn without binding up.
With five or six relief cuts in place, he cut out the heel part of the neck.
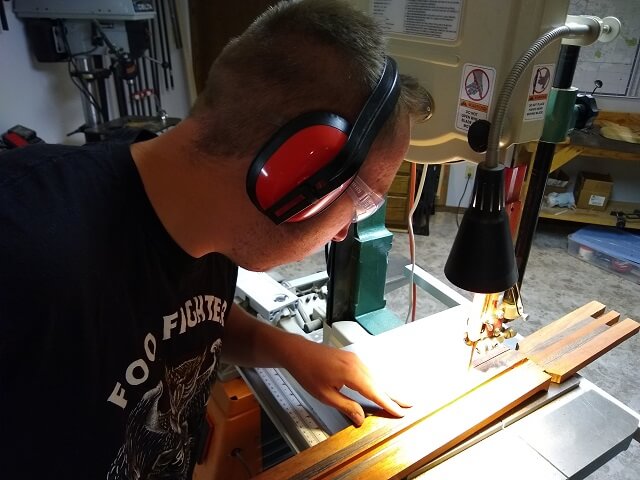
The the same process was followed for the curved area behind the neck, first making a series of relief cuts and then removing the wood.
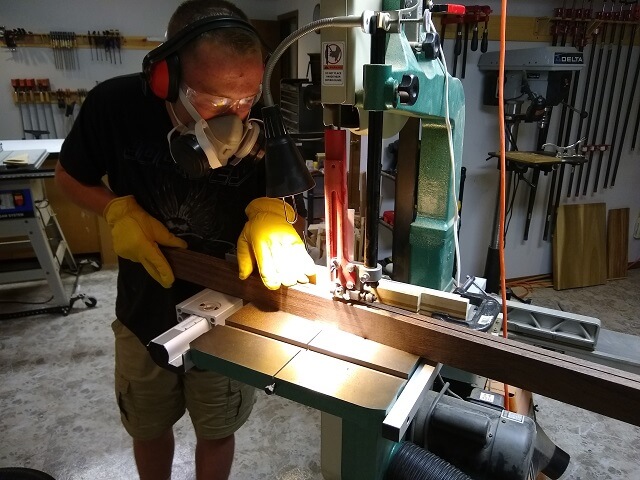
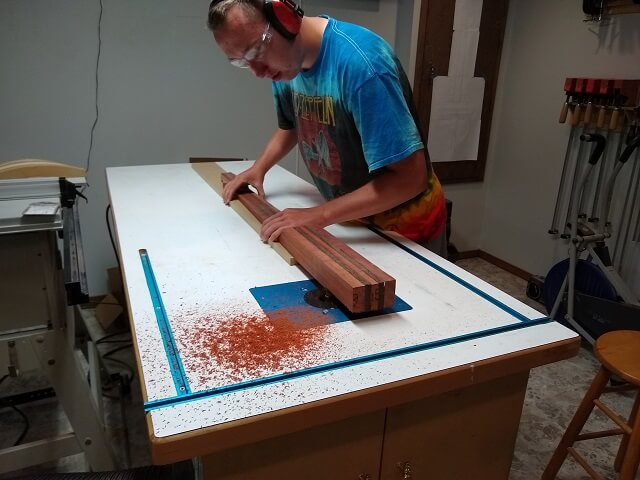
At this point, it was a simple matter of making the long straight cuts down the back of the neck blank to cut the headstock and neck area to proper thickness. Because of the size of the neck blank, he switched over to a resaw blade on the band saw which cut through the tough wood like butter.
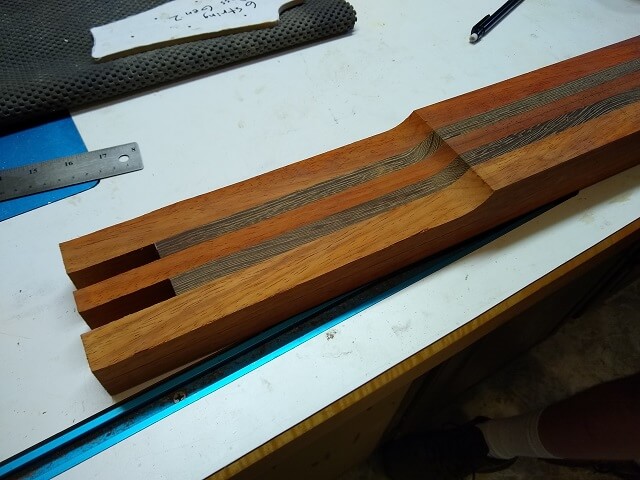
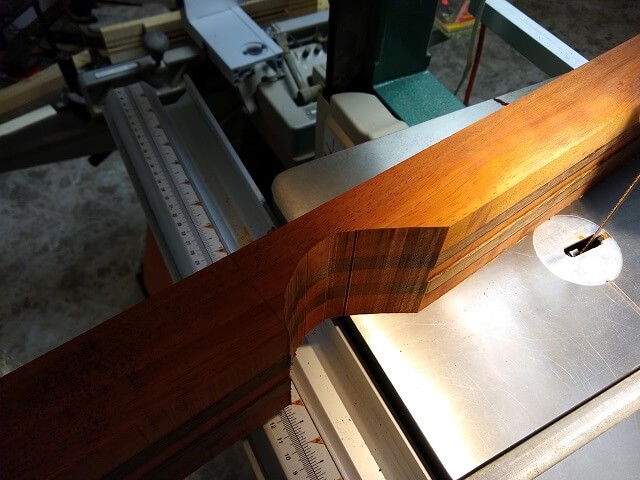
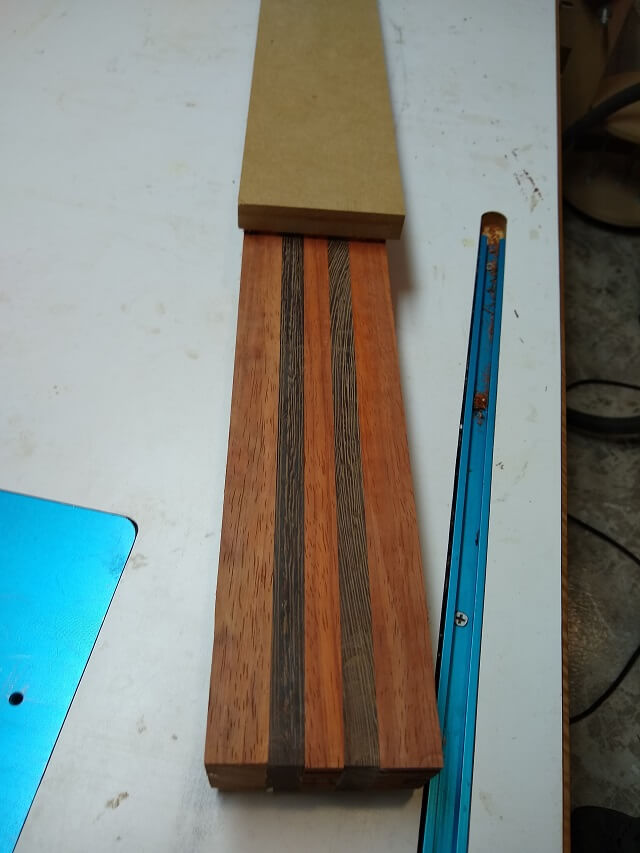
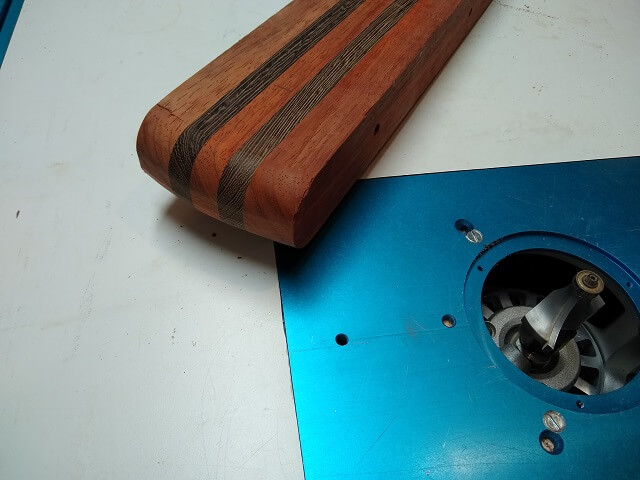
With the profile cut on the back side of the blank, it is starting to look a little bit more like a bass neck. The flat Fender-style recessed headstock is a lot more obvious now.
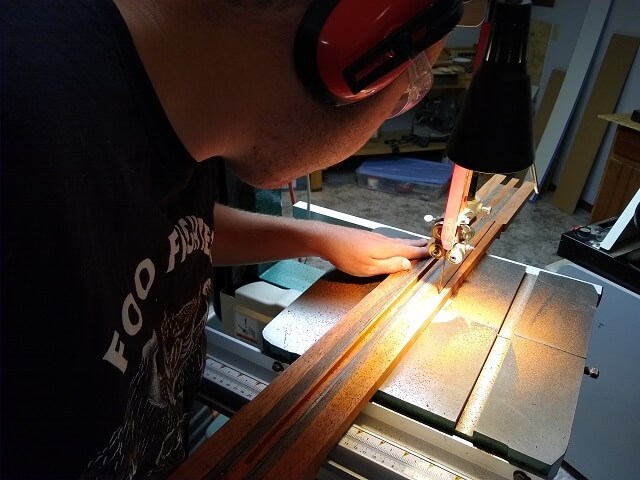
The curved areas behind the nut and heel were pretty rough from the band saw, so the Tundra Boy spent a few minutes cleaning them up. A lot of this wood would have been carved away later when shaping the neck, but the Tundra Boy wanted to smooth them out a bit.
One challenge with a recessed headstock like this is that it's easier to mark and cut the shape of the headstock on the back of the neck, but it's also easier to mark and shape the taper of the neck on the front side. The Tundra Boy started by cutting out the lower part of the headstock on the back of the neck. These are rough cuts at this point, as he will sand them to final shape later.

With those pieces removed, he then flipped the neck blank over and rough cut the sides of the neck taper. These cuts were about 1/16" outside the line and will be shaved right up to the line later using a straight edge and a flush cut bit on the router table.
It was almost quitting time on this particular evening, so the last thing the Tundra Boy did with the neck was to glue on the headstock "ears" on each side. The wood for these ears was cut from the extra wood at the top of each of the headstock strips. The hope was that by using wood from the same strip that it would be a perfect match, but what he has discovered with Padauk is that the color can vary greatly, even if the wood was cut from just a few inches down on the same board. Oh well, what can you do? The dark spots in this picture are wet areas where the glue was wiped away before it dried.
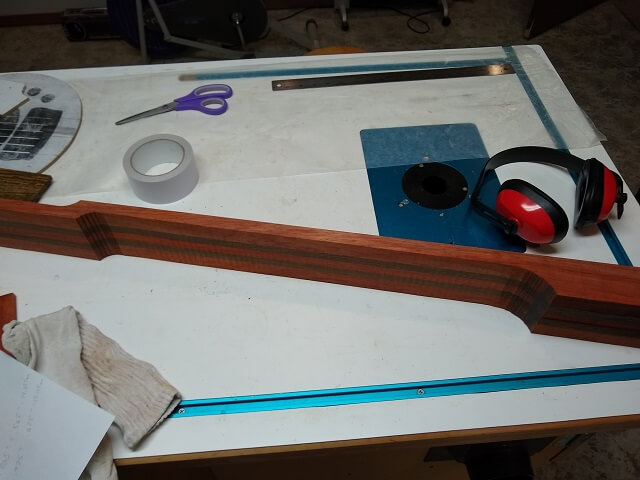
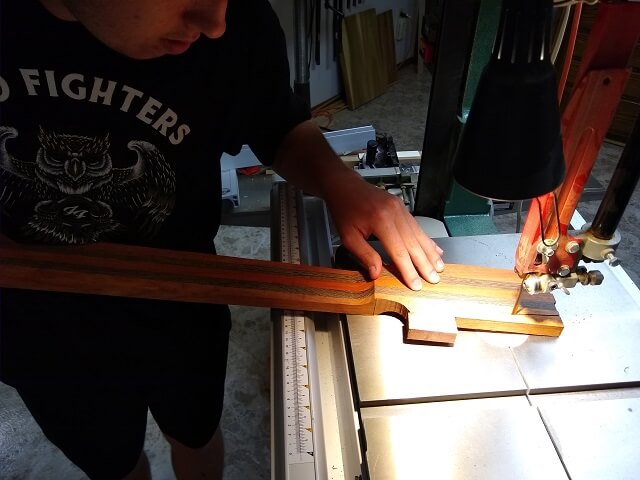
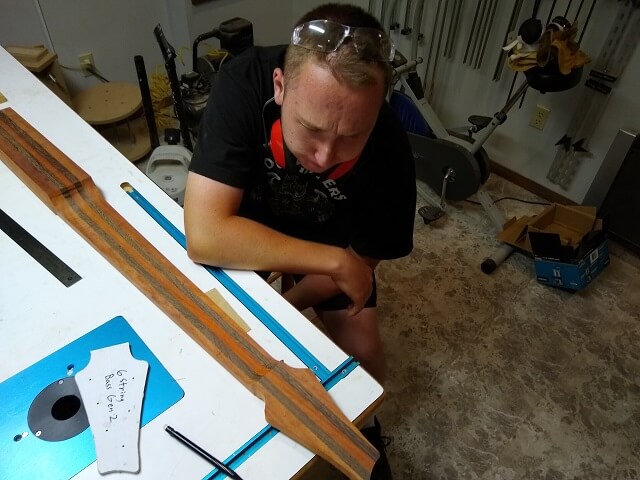
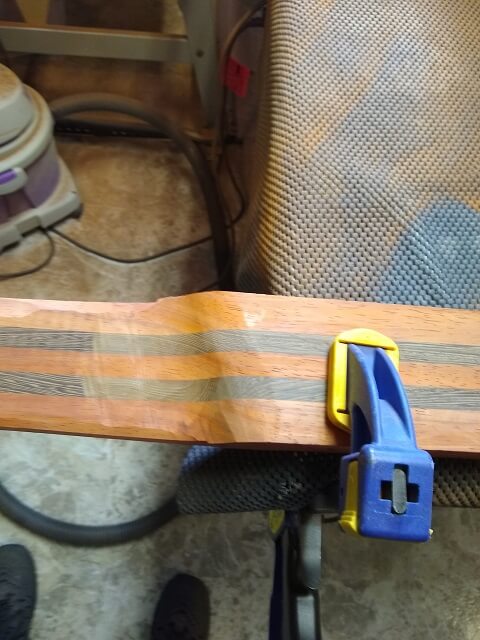
To bring the neck taper to its final dimensions, a piece of MDF that has a jointed edge was lined up exactly on the line marked on the neck, and held in place temporarily with double-sided tape.
A flush trim bit in the router table then brings the edge of the neck flush with the MDF. In addition to my normal advisory/photographer role, I was also manning the shop vac. We've learned that Padauk tends to turn everything in the shop orange, and I was trying to reduce this effect.

Now it was time to cut out the headstock. As usual, the bandsaw was used to do a rough cut just outside the line.
The sides of the headstock were then sanded exactly to the line using the orbital spindle sander. Well, that was the plan, anyway...
What actually happened was the Tundra Boy learned a valuable lesson. While sanding, he decided that he wanted to tweak the shape of the headstock. What should have happened at that point would be to use the template and tweak the shape on paper and/or a different template. That way, if it doesn't turn out the way it was envisioned, you're only out some time and some paper or hard board.
However, as most of us have done ourselves and learned the hard way, what actually happened was in an effort to speed up the process the Tundra Boy "went rogue" and just started reshaping the headstock by eye. Unfortunately, once he was done he learned he sanded off a lot more wood than he had intended. This caused him to sit for a while and contemplate what he had done.
At this point, he had two options available: live with the new shape of the headstock, or attempt to glue material back onto the neck and start over. I advised him to think about it for a while. There were plenty of other things that can be done on the bass in the meantime. Also, as it currently sat it wouldn't be too terribly difficult to cut off the sides of the headstock and then glue on some new Padauk so it could be reshaped. However, once the Tundra Boy drills holes for the tuning machines, the complexity of fixing the headstock increases exponentially. I think he's going to decide to live with the modified shape and a tough life lesson, but he's still going to wait for a while to drill the tuning key holes just in case.
This bass will not have a neck angle. To give clearance for the bridge, the face of the body needed to be recessed by 1/8". This was done using the router table.
To keep from routing into the neck portion of the blank, the face was glued to a scrap piece of MDF. A flush trim bit was used in the router table, and this kept the bit from cutting into the portion of the neck where the fretboard will be glued.
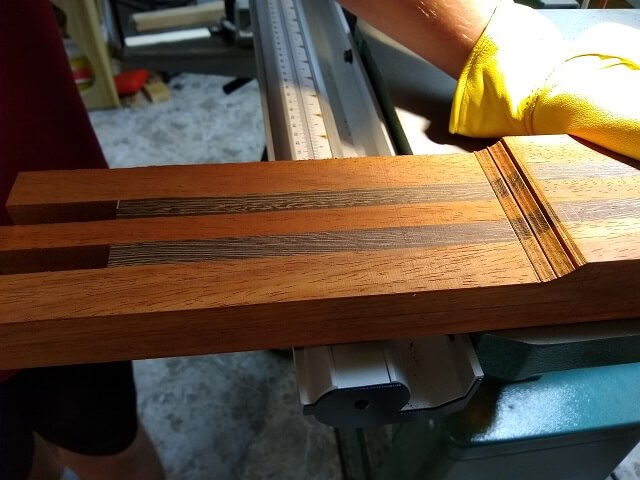
Here is the body end of the neck blank after the face was recessed 1/8".
Now that it was known where the face of the neck is, the back of the body-end of the neck could be cut to thickness. The Tundra Boy left this cut a little on the proud side, with the idea that it could be sanded flush once the body wings are attached.
Because multiple parts of the instrument are being worked on at the same time, but on my web site I group my pages into sections, sometimes there are places where the sections collide. This is one of them. Over on the "body" page, the Tundra Boy had already leveled the back of the neck with the body wings and rounded over the edges of the body wings. With those steps being completed, we jump back to this page where at the same time he rounded over the body end of the neck.
Now it was time to glue the fretboard in place. This is another instance where the multiple concurrent efforts of building the instrument don't match the linear nature of a web page. While you haven't yet gotten to the fretboard page (if you're reading all of this in order) we're already at the point on this page where it is ready to be glued to the neck.
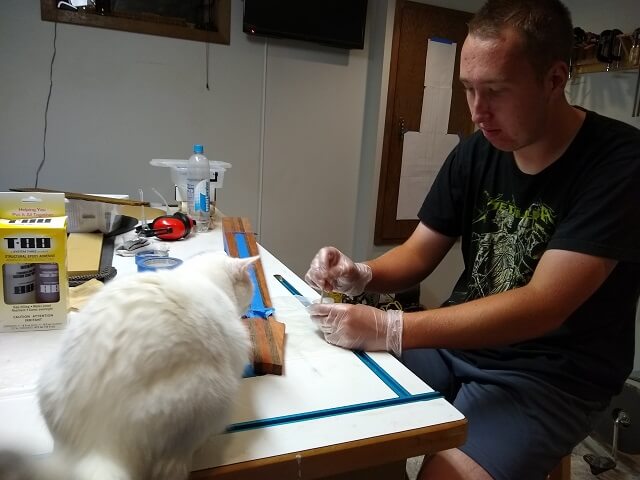
The Tundra Boy mixed up some slow-cure epoxy as Spot the cat looked on. Once we were ready to glue the fretboard down, Spot got taken out of the shop. A curious cat and a bunch of wet epoxy spread on the neck face is a recipe for disaster. The Tundra Boy mixed the epoxy for a full five minutes to make sure the chemicals were adequately combined.
The truss rod was placed in the channel in the neck (don't forget that step!) Then a piece of masking tape was placed over the length of the channel, and the mixed epoxy was spread over the face of the neck. Then, before the fretboard was set in place the tape was removed. The idea is that this will keep the glue from filling the truss rod channel and rendering the rod inoperable. The hope is that the glue will spread to the edge of the channel, but there won't be enough to fill the channel.
Clamping up a fretboard wet with epoxy can be tricky, as the fretboard wants to slide all over the place in the wet glue. I'm glad there was two of us working on this operation, as I held the fretboard in position while the Tundra Boy added clamps.
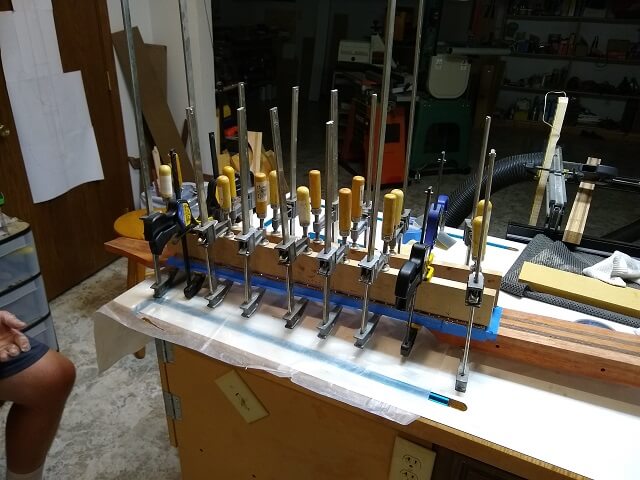
He let the fretboard dry for about 21 hours, then removed the clamps. Overall, it looked like the gluing was a success.
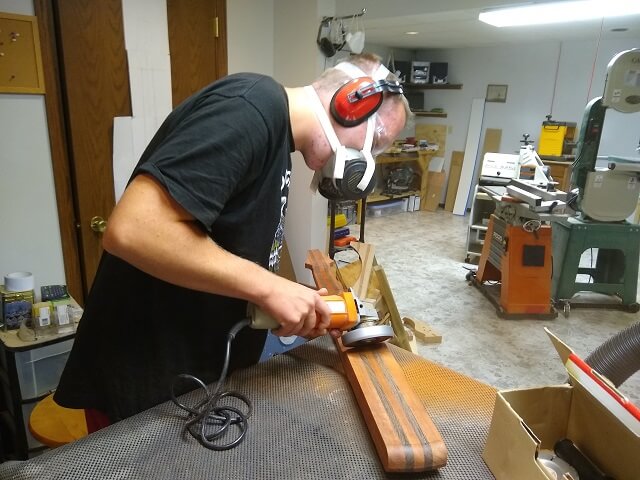
Now the Tundra Boy turned his focus to carving the back of the neck. He wanted to do this before gluing the body wings in place, as access to the neck is a lot easier without the horns in the way. In the heel area, there was a lot of wood that needed to be removed. Rather than using the dragon rasp for the whole carving operation, he used my angle grinder with a flap sanding disk. This quickly removed a lot of the extra wood. The idea was to get it close with the grinder, then he would switch to the dragon rasp to bring it to final shape.
Then it happened. I was across the room running the dust collector and trying to keep some of the orange sawdust spewed by the angle grinder in check. I turned around just in time to see it, but not in time to do anything but watch. It was a split second of inattention, but in the wood shop that's all that needs to happen to have dire consequences.
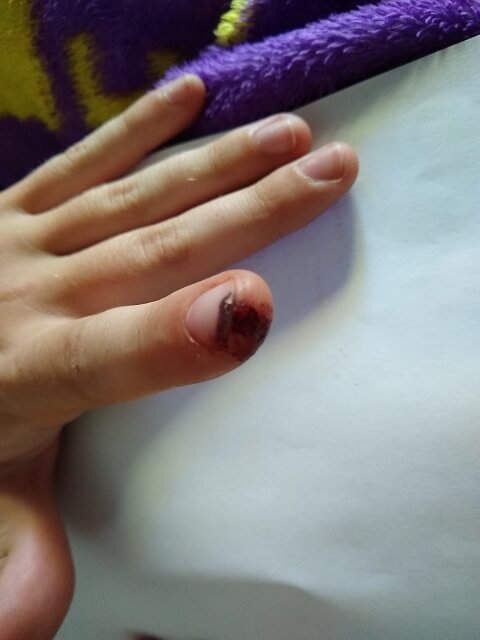
The Tundra Boy had noticed me monkeying with the dust collector, and wanted to tell me something. He stopped grinding for a minute and went to flip the switch on the angle grinder to turn it off. As he held the grinder with his right hand, and reached for the switch with his left, somehow the tip of his left index finger came in contact with the flap disk instantly removing the tip of his finger.
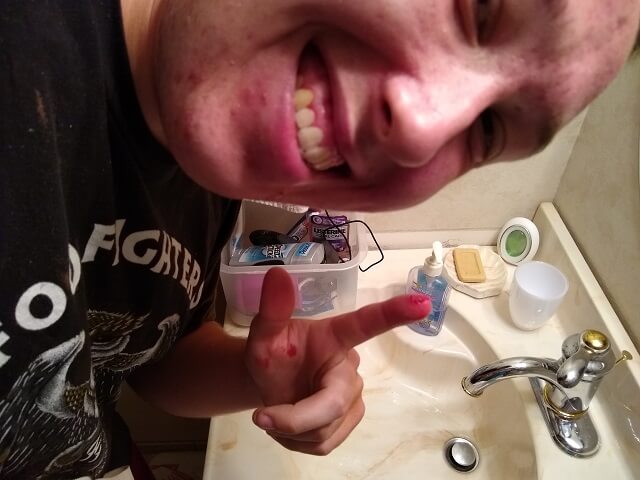
I heard a short "thunk" from the grinder. The Tundra Boy winced, knowing what he had just done. He quickly turned off the grinder, and had a "how could I be that stupid?" look on his face. Meanwhile, blood started to pour out of the wound.
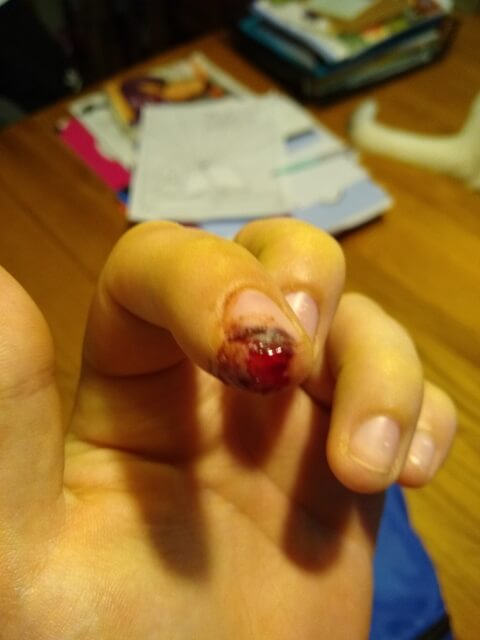
I quickly ran and got some tissues to wrap around his finger and keep the blood from getting on the carpet outside the shop. He then went into the bathroom and rinsed his finger. Thankfully the injury had just removed meat, and didn't go deep enough to hit any bone. I think the shock of what had happened hadn't yet hit, as at this point the Tundra Boy wasn't feeling a whole lot of pain and still felt like hamming it up for the camera.
For the next hour, however, the injury bled. Not hemorrhage amounts of blood, but the kind where any time he took pressure off the wound it would start oozing again. Also during this hour his brain caught up with what happened and the pain hit. He spent a lot of that hour with his hand elevated and his head on the table. Several times we waffled about taking him to the ER, but right or wrong, ultimately decided not to. There wasn't anything to stich up, just a really, really deep abrasion.
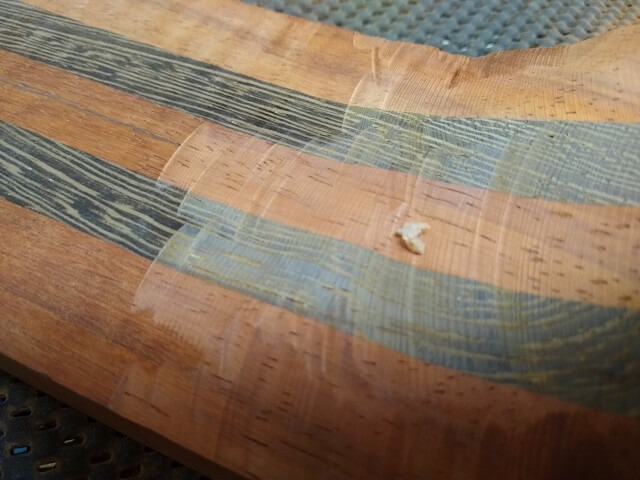
The Tundra Girl was nursing him, so not knowing what else to do, I went back down to the shop and proceeded to clean up a little and shut things down for the night. As I was cleaning, I looked at the heel end of the bass and was surprised to see a chunk of the skin removed by the grinder sitting there. I sure there were other chunks that had gotten flung around the shop as well.
Back when the Tundra Boy started building his first guitar, I remember giving him a lecture about shop safety. I told him that a second of being careless can easily end a musician's career. He learned this lesson the hard way. While I don't think the injury will be career ending, I do think it's going to take a while to heal and probably always leave a scar to remind him of this day. Some lessons we learn the easy way, and some lessons we learn the hard way. This was a hard one.
Any of us who have worked in a shop have done it. Injuries, to a degree, are inevitable. If you work with tools long enough, eventually something is going to happen. I've hurt myself numerous times, thankfully not severely. Power tools are dangerous, but I've also lost count of how many times I've stabbed myself with a screwdriver or pinched myself with pliers. In fact, sometimes the tools that we think of as more benign are the ones that get you, because we tend to let our guard down around them. So lets all take a moment right now to remind ourselves of the importance of shop safety.
Thankfully, young people heal quickly (a lot quicker than us middle-aged people, which is weird to think of myself as one.) After about three days of keeping it bandaged, the Tundra Boy stopped wrapping it up. He was able to play bass later that week, albeit with a lot of pain and wincing. About a week after his injury, it was still quite visible but only hurting when he touched it in certain spots.
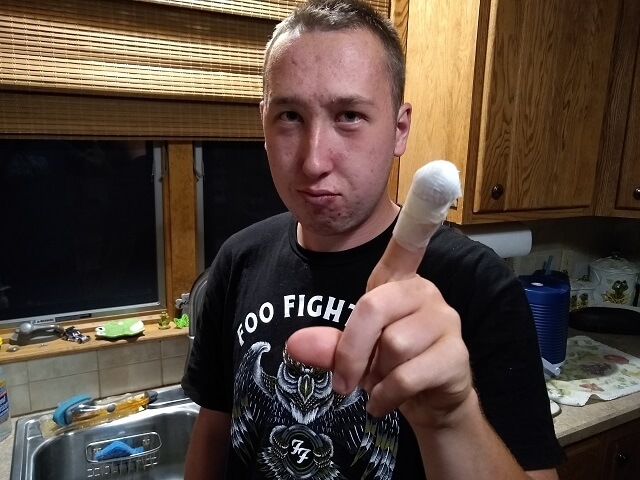
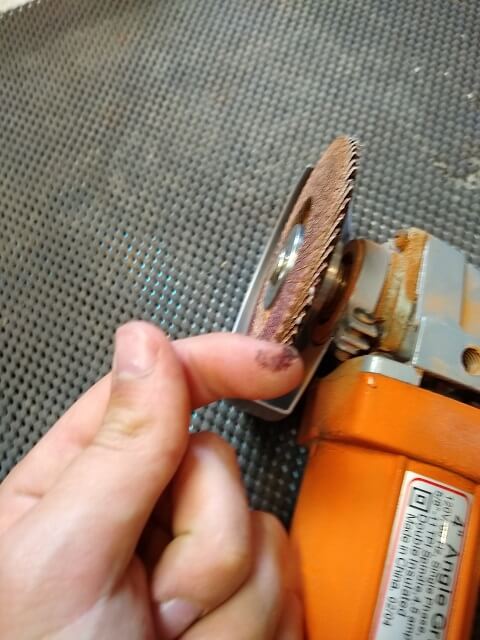
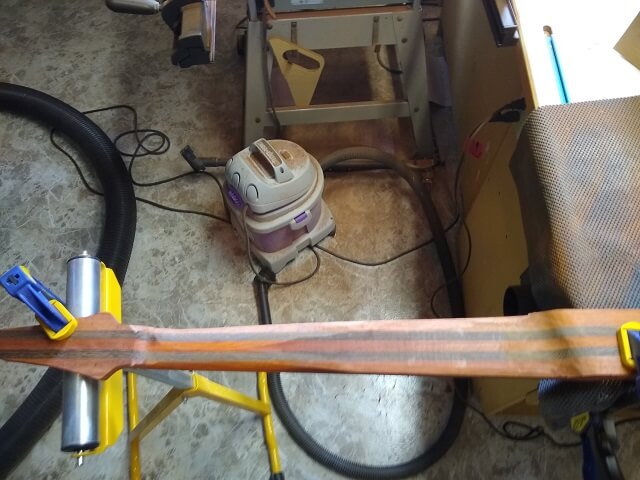
The old saying is, "when you fall off a horse you need to get back on." In this case it's more like, "when you cut off your finger you need to pick the angle grinder back up." After a bit of healing, it was time for the Tundra Boy to resume work. He snapped this photo as a tribute to the tool that caused him so much grief.
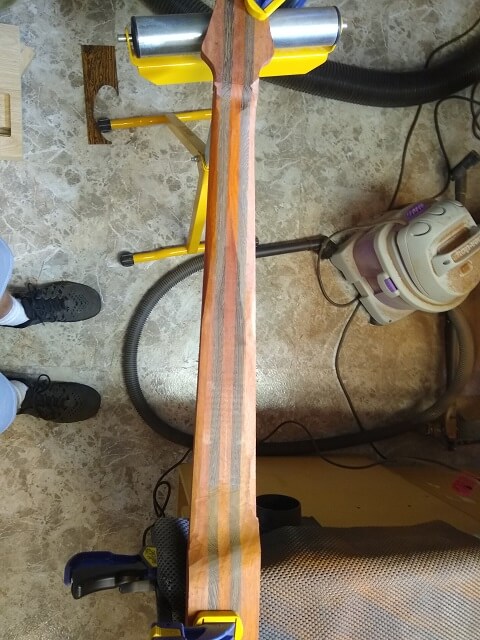
The Tundra Girl and I went out of town for a few days on an anniversary weekend getaway, and left the Tundra Boy at home. He had to work every day while we were gone, but in his non-work time he finished carving his neck. He also had the presence of mind to snap some photos of the progress, as I'm usually the photojournalist.


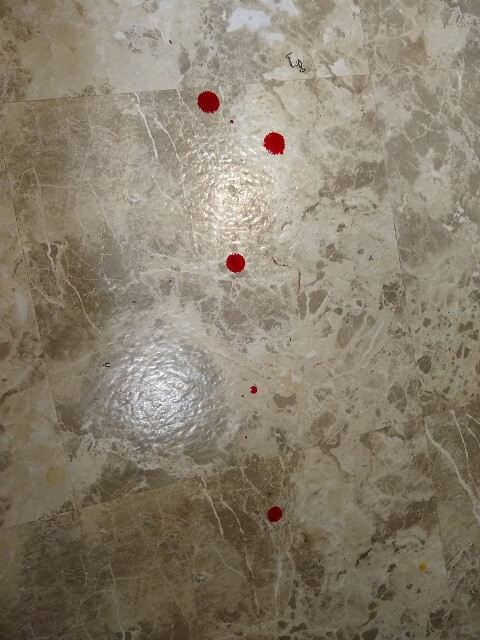
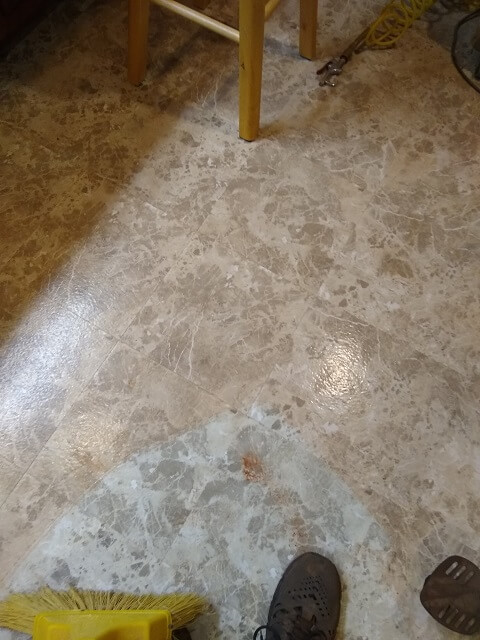
One thing that became very apparent as the Tundra Boy was carving the neck (especially when using the flap sander) is that Padauk is a very dusty wood. The entire shop wound up with a layer of orange dust covering everything. Before the Tundra Boy starts applying shellac during the finishing stage, we're going to have to have a long shop cleaning session. Literally everything in the room has an orange tint to it. Here's a small area of the shop floor after the broom cleared a section so the contrast can be seen. I think this stuff is just as bad as drywall dust.
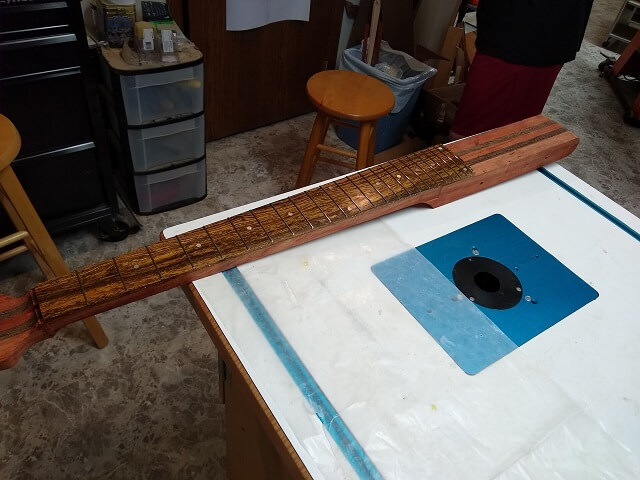
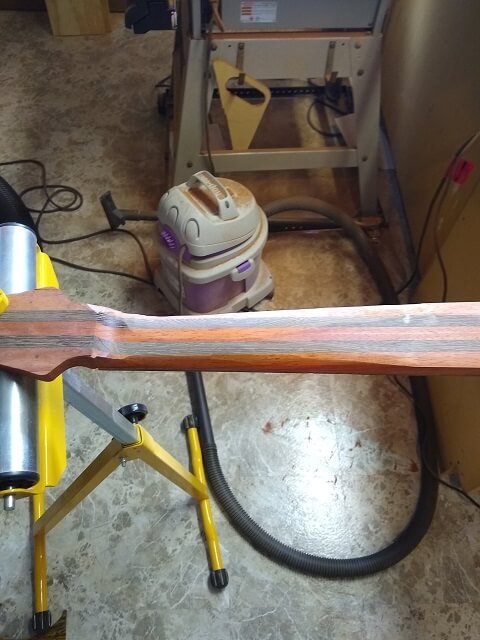
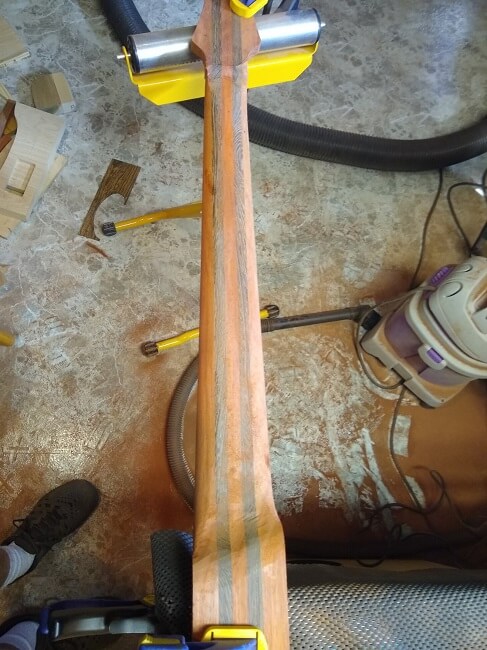
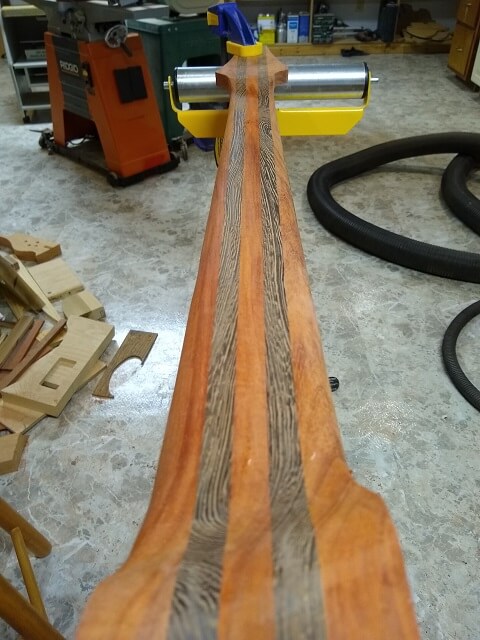
When the wife and I returned, his neck carve was pretty much done and sanded. It's a bit of an asymmetrical carve, which is a fancy way of saying the neck isn't equally round on the back. In his case,the bass side of the neck is rounder and the treble side is flatter. Also he went much flatter in the lower 7 frets, and more round in the upper registers. It's a bit of an unusual carve, but he absolutely loves the way it feels in his hands. Seeing as he's the one who's going to play it, that's the only opinion that matters.
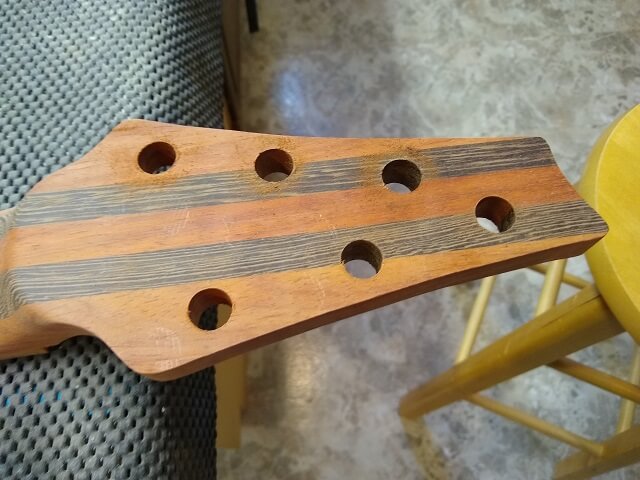
He had put off drilling the tuner holes until he decided whether or not to attempt to fix the headstock shape. He decided that what he wound up with wasn't that bad, so he would live with it. With that decision made, he drilled the holes for the tuning keys.
All six holes were drilled. It was easier to drill these holes before the body wings were glued in place and the instrument became even heavier.
It was almost time to glue the body wings in place. Before he did this, he decided to be a little proactive. He had learned on his last guitar that with the sharp areas where the body wings meet the sides of the neck, it was very difficult to sand those areas after everything was glued together. This time around, he went ahead and sanded them and put on a coat of shellac prior to gluing the wings to body.
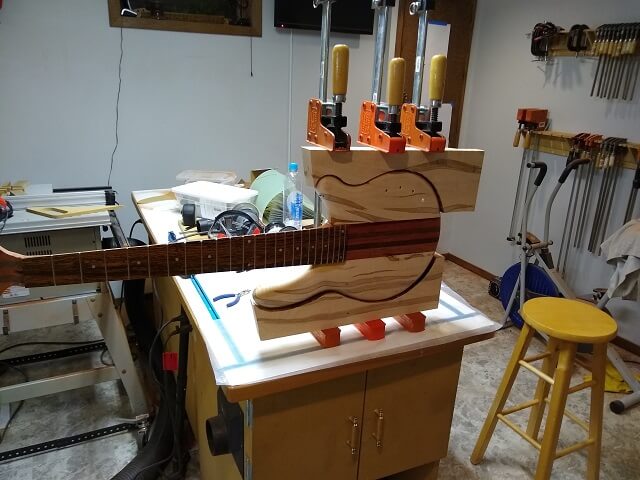
The body wings were glued in place with epoxy. Blue tape was put down all around the joint just to try and control some of the squeeze-out, and reduce the amount of clean up after everything dried. The scraps from cutting out the body wings were used as cauls in order to give the clamps a flat surface on which to apply pressure.
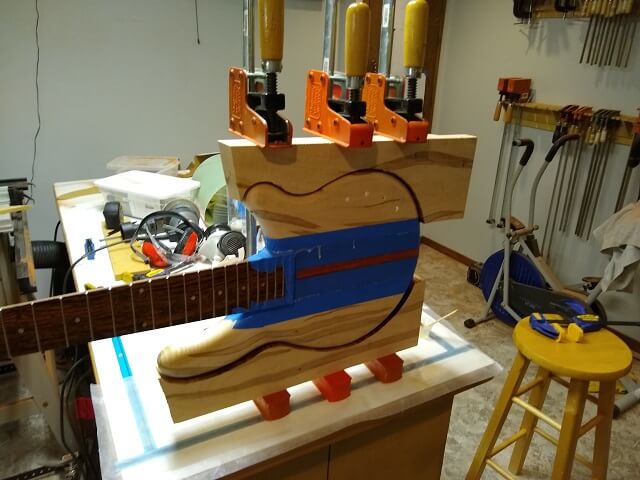
Speaking of pressure, as the Tundra Boy was cranking down on the clamps we heard a disturbing crack. We really were hoping it was one of the cauls cracking and not the body. In any event, he decided that was enough pressure. We never did figure out what made that noise. After the glue had a little time to start setting up, we removed the blue tape which also removed a lot of the excess drips.
Now with the body wings attached it was time to make the cavities so the pickups had a place to sit. While the Tundra Boy was doing other things, I had built a rather makeshift routing template for his pickups. It looked a bit sketchy, but actually fit the pickups so snug it was almost too tight.
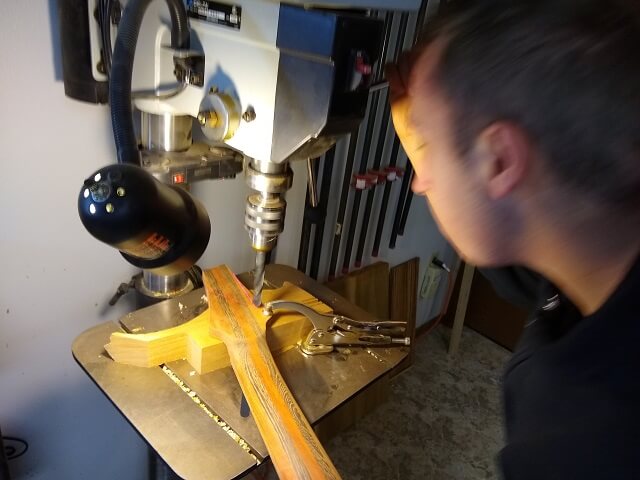
Like normal, to reduce the strain on the router he started by drilling out a lot of the waste wood with the drill press.
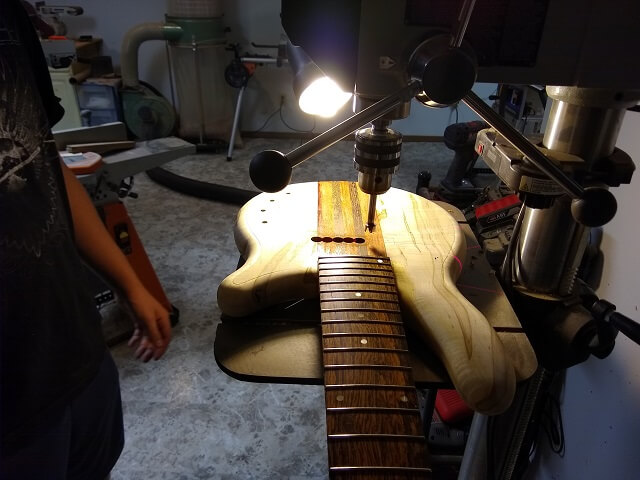
Both cavities were drilled out.
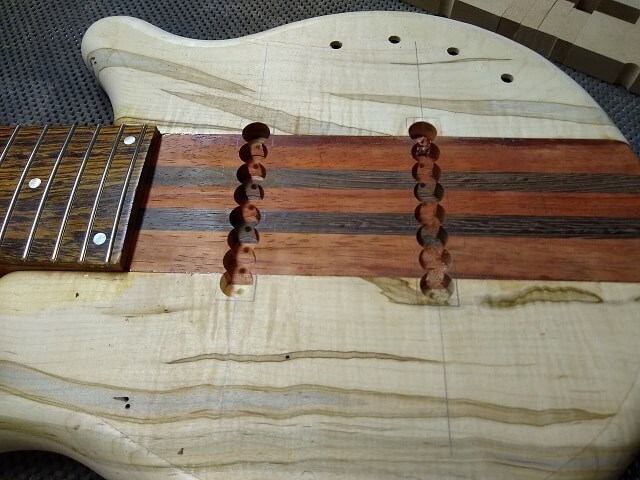
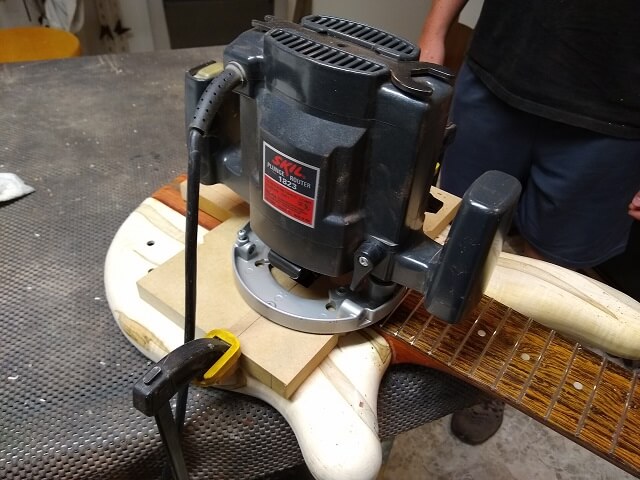
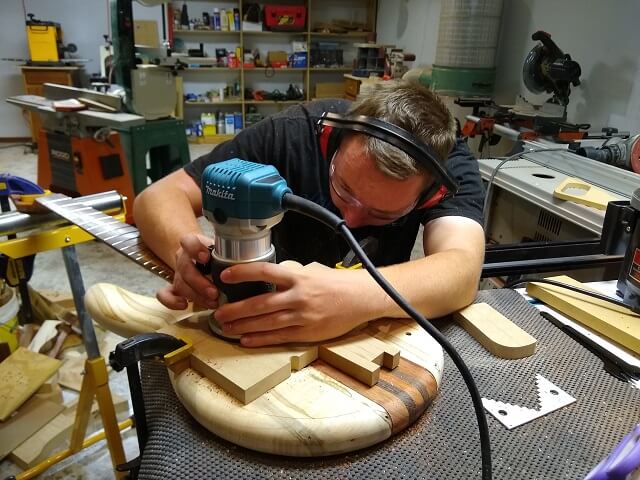
The routing template was then attached to the bass with double-sided tape and then clamped down for extra measure. My old trusty router was used with a pattern cutting bit to rout the cavities to shape. With the router lowered into the cavity there wasn't a whole lot of room to see what he was doing, so a lot of the routing was done by feel.
My standard pattern cutting routing bits have a radius of 1/2". Many pickup corners have a tighter radius of 1/4" or even 3/16", so I had recently purchased some micro-bits of this size. You don't want to rout the entire cavity with these tiny bits, but instead just use them to clean up the corners after the bigger bit does the heavy routing.
Unfortunately, the pickups that the Tundra Boy selected actually had square corners. I'm not sure why a pickup manufacturer would make square cornered pickup covers as that makes installing them a royal pain in the tookus. Round router bits can't make a square corner. In any event, the pickups were bought so the Tundra Boy had to deal with it. He decided to start with the 3/16" flush trim bit to get the corners as close as possible to square.
Here's the neck pickup cavity after routing was done. You can see the corners are close to square, however after test fitting the pickups they weren't quite square enough.

So the Tundra Boy had to go old school on the pickup cavity corners and square them off with a chisel. It actually went surprisingly faster than either of us had anticipated.
In about 15 minutes he had all eight corners squared off and the pickups were fitting nice and snug.

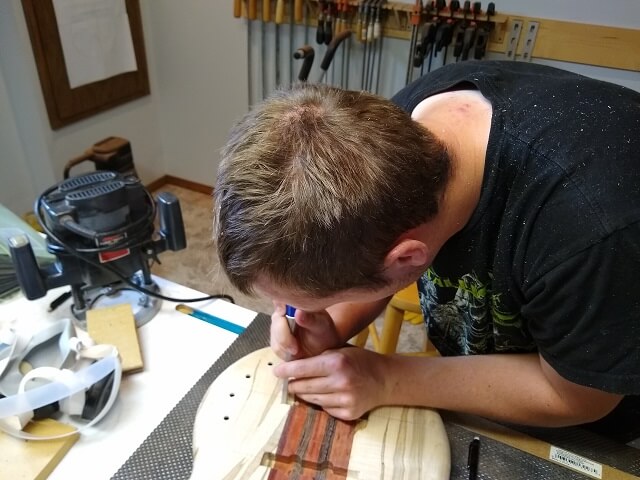
Now it was time to drill the screw holes that will hold the pickups in place. They were marked with an awl, then drilled out at the drill press so that they were completely perpendicular to the body.
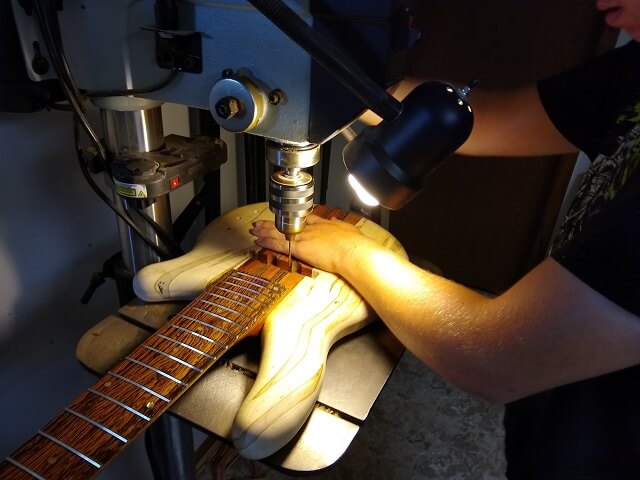
In the middle of drilling these pickup screw holes, the Tundra Boy reached up to turn off the drill, flipped the switch... and the drill kept running. The switch had broken. At least it broke in the "on" position, so he could finish drilling the holes. I just had to be in charge of stopping and starting the drill press by plugging it in and unplugging it, which was surprisingly counter intuitive and meant the Tundra Boy was often staring at me with either the drill press running or not running, and needing it the opposite.
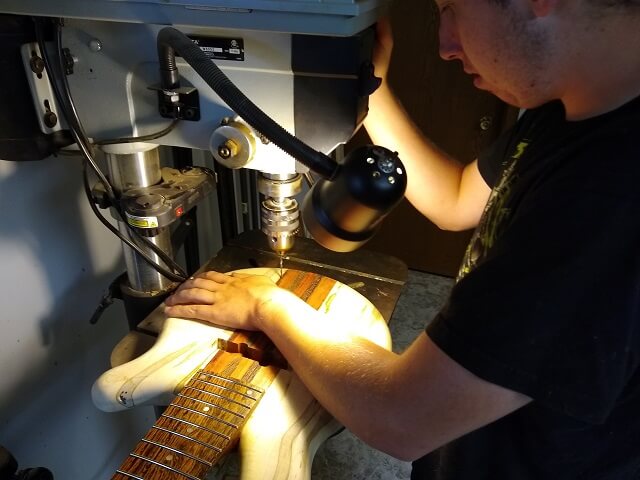
Only a few last things to do and the construction would be complete! One of the remaining items was to drill holes from the pickup cavities to the control cavity so the pickup wires can pass through them.
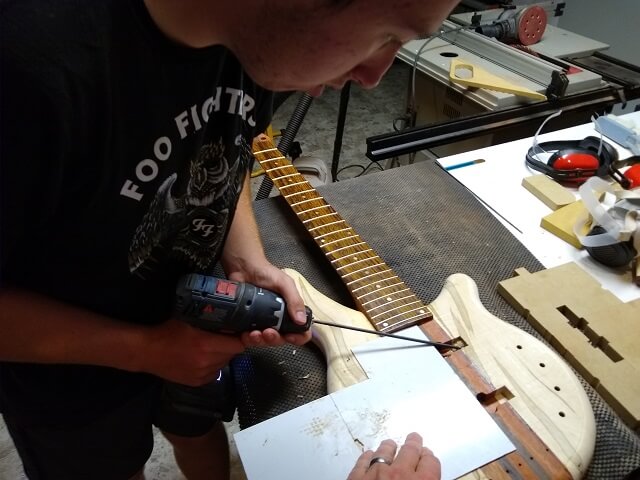
The holes for the bridge mounting screws were drilled, and then a hole for the bridge ground wire was drilled from under the bridge into the control cavity. The end of this wire would get fastened down into a bridge screw hole, so the Tundra Boy used the Dremel tool to route a short channel to connect the two holes and allow the wire to sit slightly below the surface of the bass.
The last thing the Tundra Boy did before declaring construction complete was to drill a couple holes for the strap mounting pegs. I didn't get photos of this, but it was just some holes so you're not missing much by not seeing it.
You've already seen the fretboard when the Tundra Boy glued it to the neck, but on this page you can see how he built the fretboard.
Return To The Main Music Gallery
This page last updated on 09/28/2021