


So I had this nice finished neck sitting on the shelf. That's half a guitar, right? So it shouldn't be too difficult to build the other half, right?
Well, yes and no. I labored for quite a while about what kind of body to build. Some of my ideas wouldn't work with a bolt-on neck. Some of my other ideas I decided wouldn't work with a 25" scale length. Thankfully I had other projects in the works so I had plenty of time to mull it over by the time I came up with this idea.
I envisioned in my mind a new way of putting a top/bottom on a guitar. I came up with something completely different. Something I haven't seen anyone else do. Not to say that nobody else has ever done this, just that I don't remember ever seeing it done. Basically I wanted to inlay a majority of the top into the body.
In mulling over how to describe what I want to do, I can't really seem to explain it in a manor that is very clear. So instead, I'll just show you the process. At a certain point in the pictures you should be able to put the puzzle pieces together.
It all starts with wood. My neck was already built with walnut, maple laminates and a maple fingerboard. I wanted a body that would complement the neck, so I decided that the "base" of the body should also be made out of walnut. I went out to the garage and pulled a 6/4 slab out of the rafters. This board came from my grandfather's stash (mother's side) cut from timber on his land.
Two things about this board. First, it was rough and dirty. All of the wood I brought back from my grandfather's land had been sitting in his shop air drying for years. And raccoons had been using it as a toilet for much of that time. So there was decades of dirt and raccoon poop covering the board.
The second thing about this board was it's odd size. Normally for a guitar body you want to use 8/4 wood, which means it starts 2" thick and is milled down to a final thickness of 1.75". This piece was only 6/4 so the rough thickness was 1.5". Once sanded and planed it would be closer to 1.25", which is too thin for a guitar body.
Normally in order to use a piece of this odd thickness I would just cap it on both sides with a couple of decorative .25" thick slices of lumber and everyone would be happy. However, this board had a lot of defects. And when I say a lot of defects, I mean a LOT of defects. In fact the reason it was still sitting up in the rafters unused is because of all the defects.
Most people would look at it and see firewood, especially when considered for guitar-use. However I have enough of my mom inside of me that I couldn't bear to just throw it in the burn pile. So when I came up with my plans for this guitar I realized my unique design would allow this funky board to be used. The beautiful parts of the wood could be salvaged, and all the knots and rot could be discarded. Again, as we start looking at the pictures hopefully you'll see where I'm going.
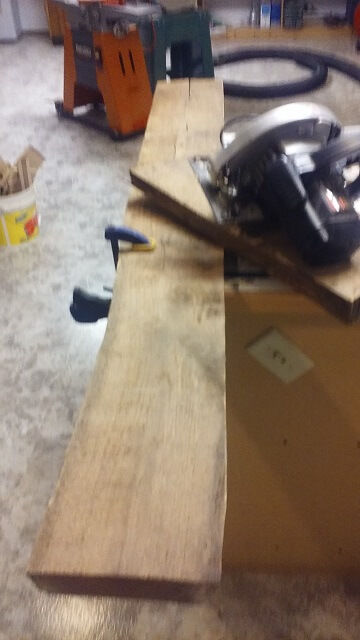
So I pulled the board down and started to clean it up. The original board was about 7 feet long. I didn't need any pieces longer than 20", and a board of this size is a bit unwieldy so I began by just cutting the long board into four shorter sections with my circular saw. Not precision cuts, just something to make the pieces smaller.
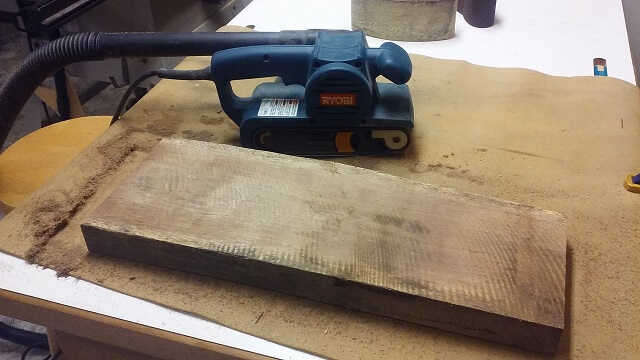
If left on the boards the dirt and poop would have dulled my planer blades. It was easier to sacrifice a sanding belt than to replace blades, so I gave all the boards a go-over with the belt sander. It made a mess that I had to clean up afterwards, but that was still easier than replacing planer blades. I wasn't trying to get the boards perfectly smooth at this point, just remove most of the "grit" embedded in the wood surface.
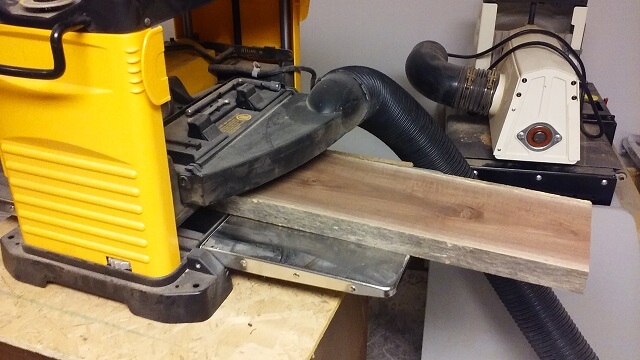
With the boards a bit cleaner, I could now run them through the planer. At this point I wasn't concerned with planing them to a specific thickness, just trying to get the surfaces smooth on both sides. There were lots of saw marks left over from when the mill originally planked the lumber out years ago. You can see nice walnut hiding under that rough surface as it comes out of the planer.
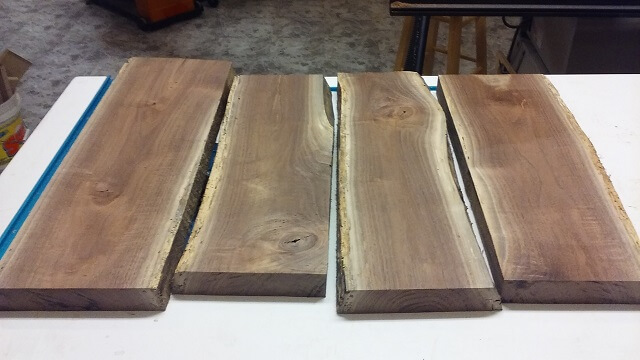
Once everything was planed smooth you can see that the wood is already looking better. You can also see all the defects that I would have to work around. No problem though. I have a plan...
Now here is how I am dealing with the odd size and the defects in these boards. First the odd size: the planed boards were about 1.25" thick, a full half inch thinner than I wanted this guitar to be. So instead of using the boards in their current orientation, I set my table saw fence at 1.75" (actually a hair wider to allow for sanding) and cut all the boards into strips. With each strip cut to the same width as the desired thickness of the guitar body, all I had to do was turn each strip on edge and glue them together. Voila! The board is now thick enough.
However there was still the issue of the defects. There were lots of knots, worm holes, sap wood, etc that I didn't want to include as features in the guitar. I don't mind little defects as I think it gives the instrument character and makes it feel more "real". However these boards had big gaping defects that could even become structural issues if I didn't properly deal with them.
So, this is where my design comes into play. This is going to be a hollow guitar. The walnut body that I'm constructing from these strips will actually only be .75" wide around the instrument's parameter. A good portion of the wood will be cut away and discarded. So I only had to worry about arranging the wood pieces in a way where the defects will fall in the scrap areas.
This was kind of like putting together a puzzle. I spent some time arranging and re-arranging the strips so that the best wood would be included and the nasty stuff would get cut away. I cut some of the strips down because the entire center section of the body would be hollow, and there wasn't need to have wood in that area only to be discarded later. One of the pieces had some sap wood on one edge that was structurally sound, but didn't have the color of the rest of the walnut. I placed that piece in the area where the neck pocket would be cut out, so it won't be visible.
Once I had everything oriented in the best way, I glued all the strips together. I then wiped off the excess glue while it was wet so I didn't have to deal with the dried bits later.

With the glue dried I removed the clamps. Now I had a very odd looking chunk of wood.
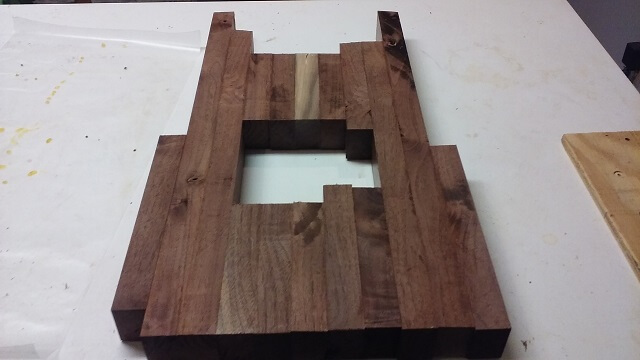
While gluing the pieces together I tried to line up the boards so that they were as smooth as possible, but glue-ups are rarely perfect. This is why I cut my strips slightly wider than 1.75". I could now run the body blank through my wide belt sander. This leveled all of the strips so that the surfaces were smooth, and also brought the body to the final perfect thickness of 1.75".
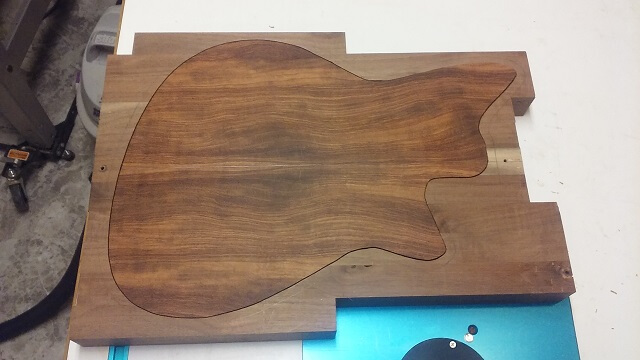
Now I had a smooth, but still odd looking chunk of wood. I marked center lines on it and traced the outline of my template so I could get an idea of what parts of the blank were guitar and what were destined for the scrap pile.
I shifted my attention over to the front and back pieces. I had some bubinga boards in my wood stash. I looked through them and chose a very interesting looking piece to be used for the front, and a slightly less interesting board to be used for the back. Both of them were .75" thick, and about 7-8" wide. First I jointed one edge of each of them, then I proceeded to resaw them at the band saw so that I could glue them together into wider bookmatched pieces.
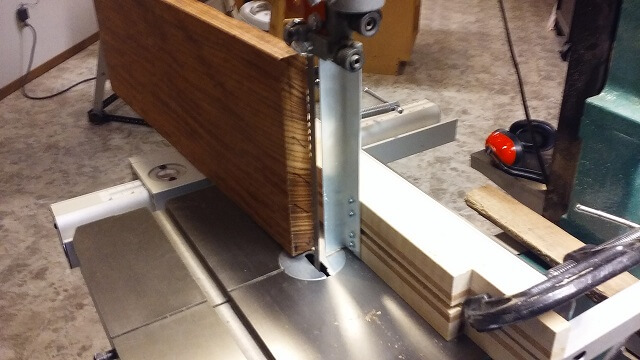
The band saw blade doesn't provide a perfectly smooth cut. Also it's pretty tough to cut a board down it's thickness without having a little bit of wander in the blade, so the two cut sides aren't perfectly flat. After the boards were cut I ran them through the thickness sander to smooth out the saw marks and bring them all to an equal thickness. I then glued together the two pieces that would make up the back. The dark spot is where I wiped away the excess glue with a wet rag.
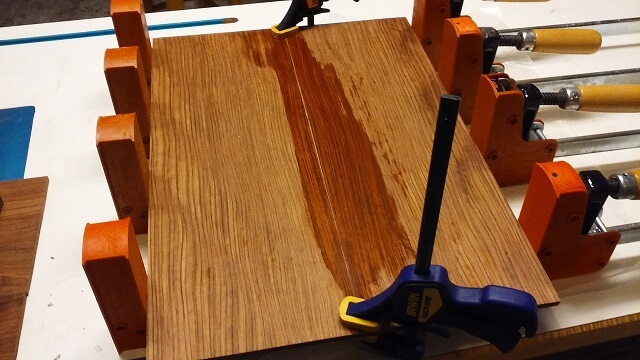
Once the back was dry I removed it from the clamps, then used the clamps to glue the front pieces together.
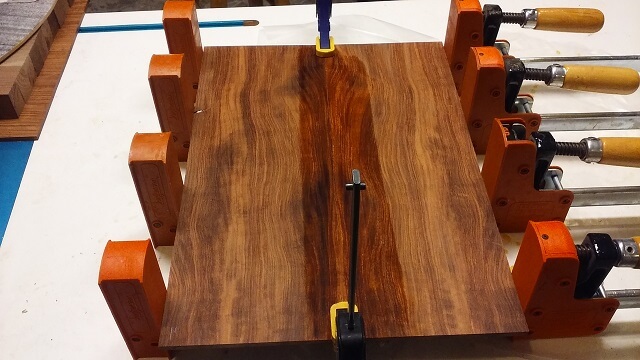
After that, I spend a little bit of time with the random orbital sander to smooth up the glue joint.
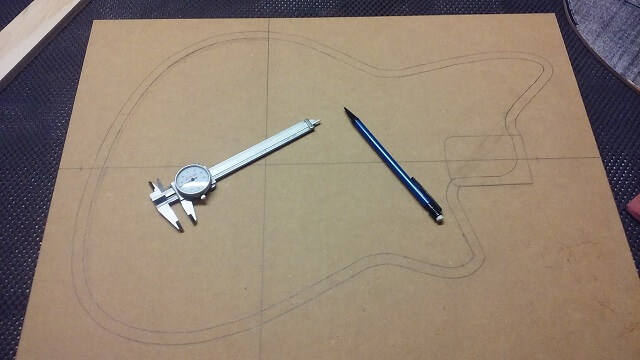
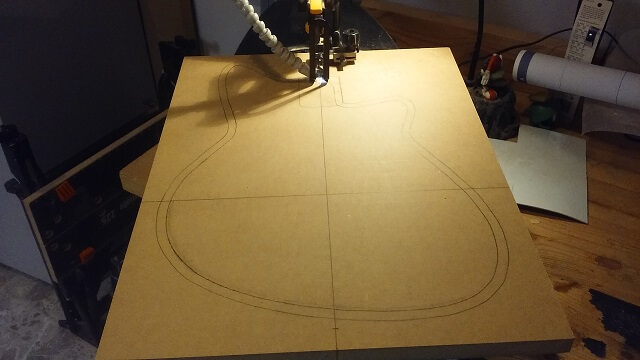
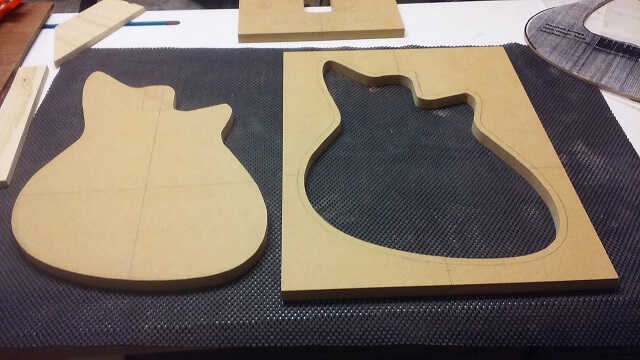
Now I had to do some work creating a jig to be used to inlay the top. I began by taking a piece of MDF, drawing some center lines and tracing the outline of the guitar from the template I made when building the original Banana Pudding guitar.
For this guitar I wanted an inlaid top, with 3/8" of exposed the walnut outlining the front and backs. This meant I had to create another template which was 3/8" smaller than the original on all sides. There may have been other ways to accomplish this, but the only way I came up with was to set my dial calipers at 3/8" and slowly draw an outline all around the inside of my tracing. It was tedious and I spent a lot of time erasing and re-working sections until it looked right to my eye.
With the line drawn, I moved to the scroll saw and very carefully cut down the center of my scribed line. I had to be careful as I will need to use both the outside and outside of the template.
After the cutting was done you can see both pieces of the template.
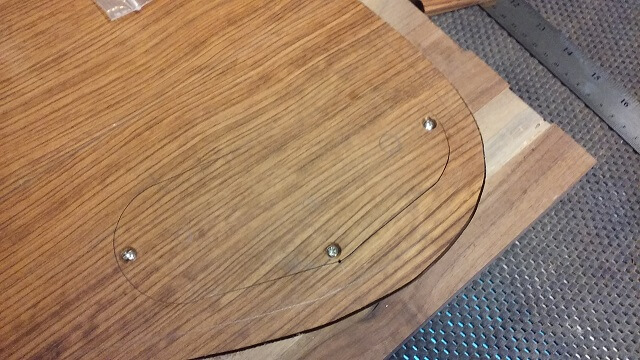
Carefully lining up the center line of the new inlay template with the center line of the body blank, I screwed the template in place. The screw holes are located at spots that will be scrap.
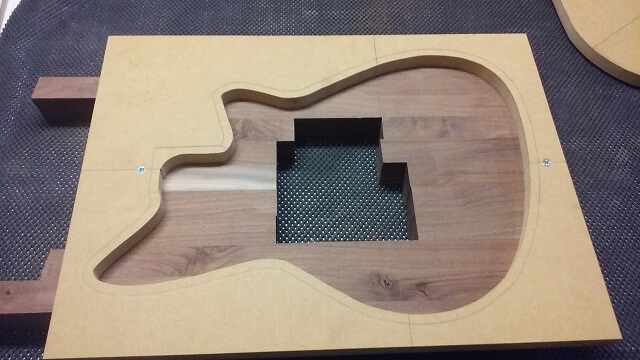
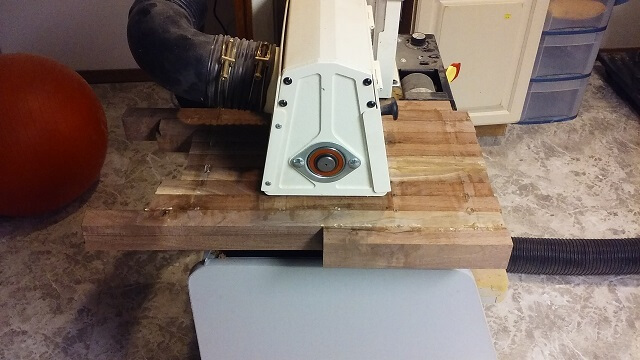
I then put a pattern cutting bit in my router, set it to the exact depth of the bubinga top and routed an outline in the face of the body. This outline will form the "ledge" that the top sits in when it is finally glued in place.
Now I needed to do the same thing to the back side of the body. I was able to simply flip the template over and screw it into the same holes I had drilled when I routed the top. By doing this the front and back routes lined up exactly.
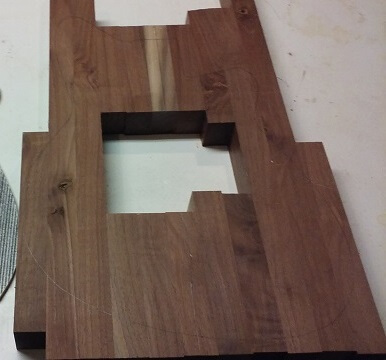
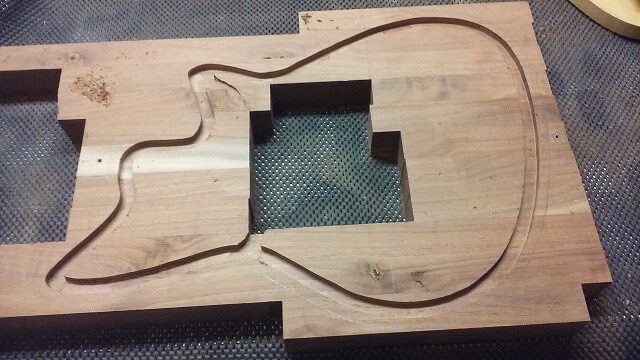
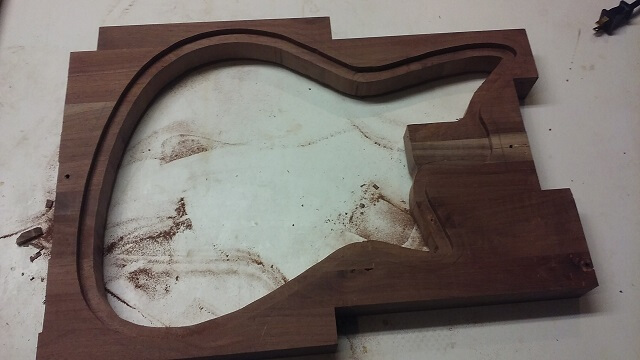
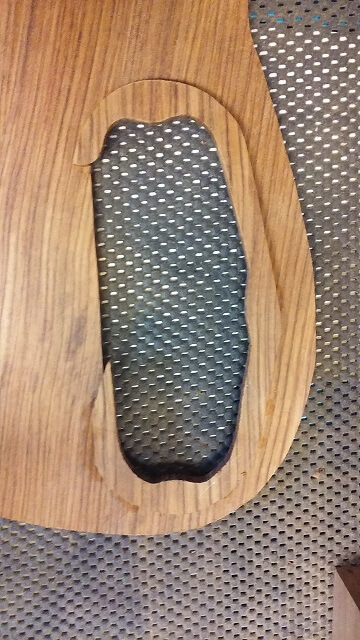
After routing the mirror-image inlay channel on the back side of the body blank, I then took the piece back over to the scroll saw. I carefully cut right on the inside edge of my routes in order to remove the center scrap. This left a ledge just slightly less than 1/2" all the way around both sides of the body blank. Now I'm hoping you can start see how the top and bottom pieces can be cut to fit into these outlines.
Next, it was time to fill that hollow portion with the top and bottoms. I traced my template onto each of them (making sure to flip it upside down on the back.) I used the bandsaw to cut out the shape, staying about 1/16" outside of my marked line. I'm didn't bring them to exact size yet, just removing most of the excess.
Trying to cut out the top/bottom pieces that will be inlaid by using a saw would be tricky at best. Instead, I taped each piece to my template and used a flush trim bit on the router table to cut off the extra wood I left when I rough cut the shapes at the band saw. Now I had a front and back that matched the templates exactly.
You can see with my test fit of each piece, they slide right into my walnut body. There is a gap of .020 all the way around, which corresponds with the kerf width of my scroll saw blade. I'm going to deal with this gap by filling it with a strip of .020 ABS binding. This will not just fill the gap, but will add some decorative flair. Yes, I said "flair."
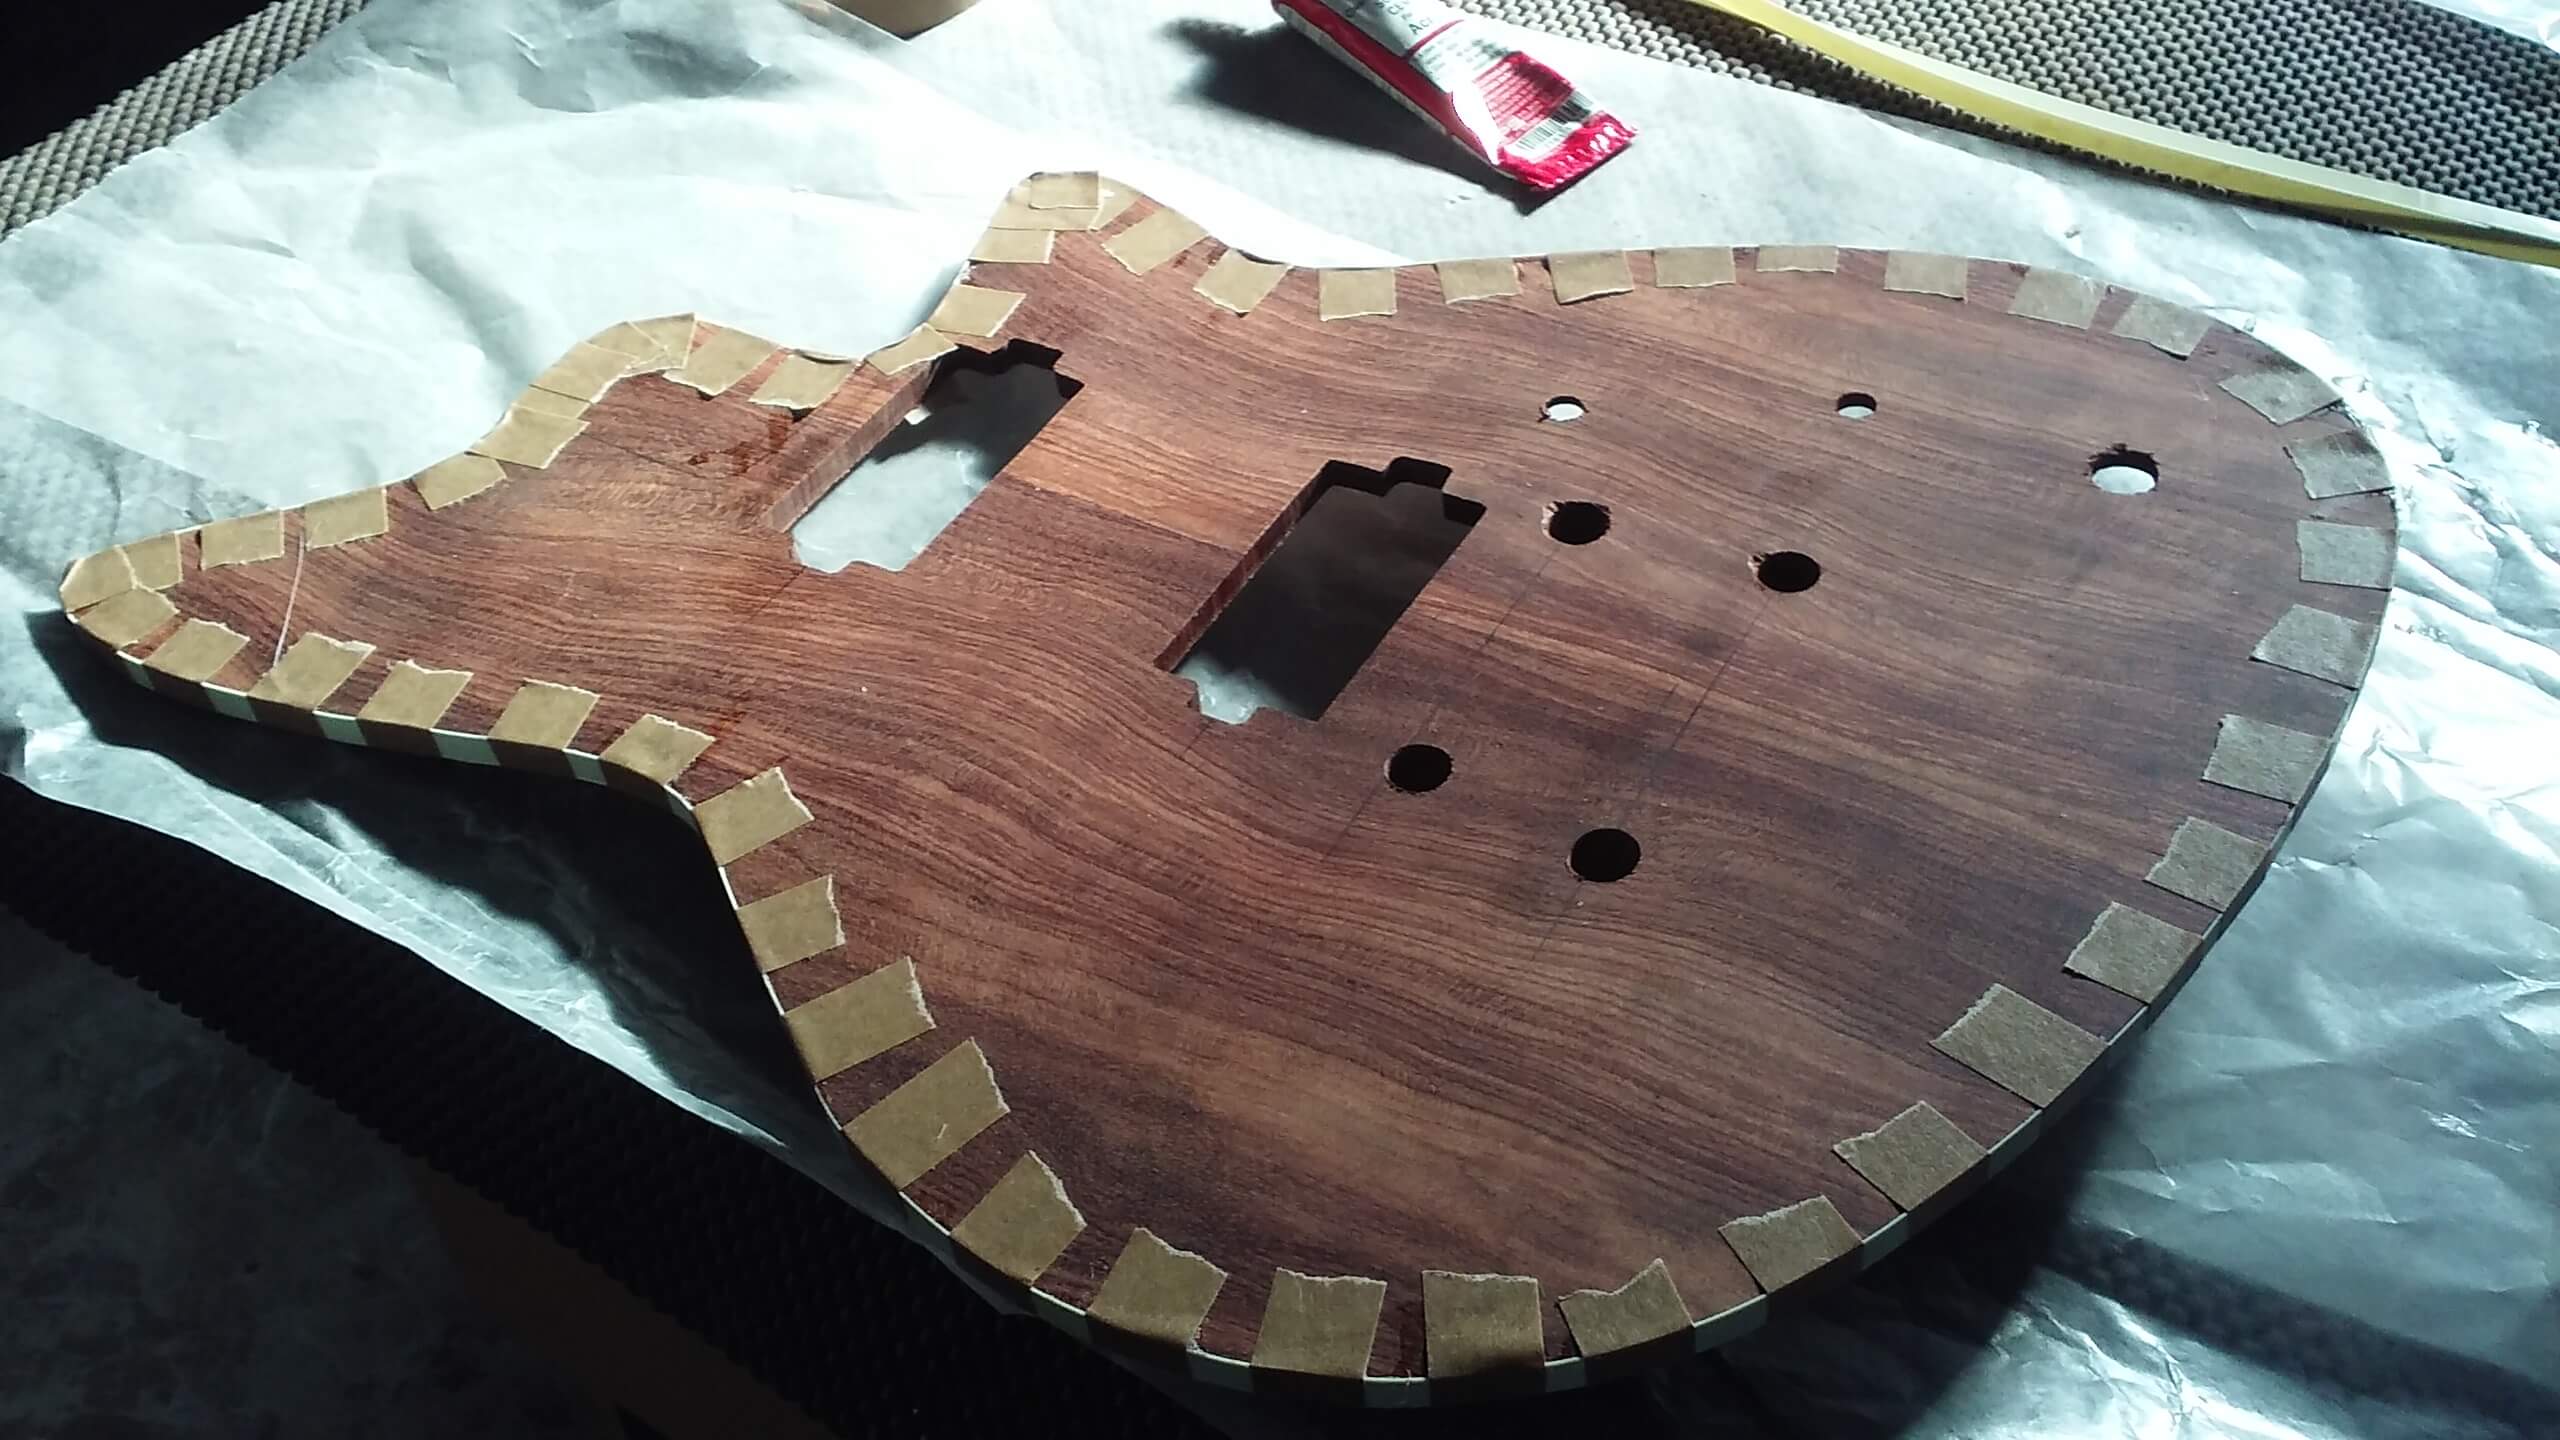
Now that I had the top shaped, I spent some time with my ruler, triangle, pencil and erasure marking the various locations of things. The first thing I marked was the bridge location. From there I marked the tailpiece location 1.75" behind the bridge. Then I laid out the pickup hole locations and made marks where the control switches will be located. I moved things around a couple times, tweaking locations until I was satisfied.
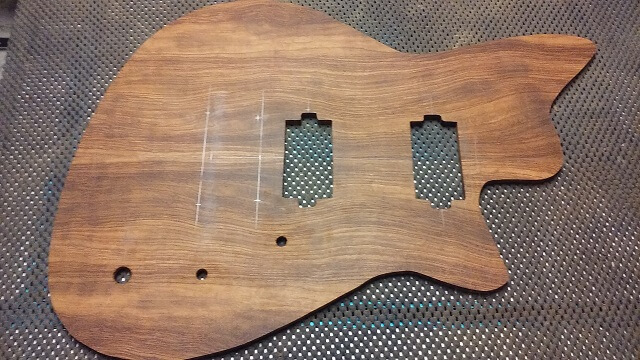
With the top marked up, I drilled the holes for the controls and cut out the holes for the pickups using my scroll saw.
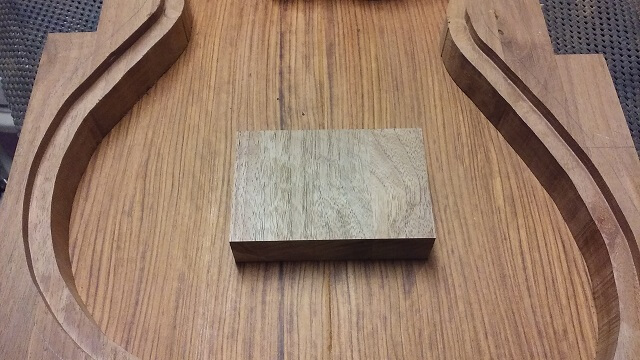
In order to hold the posts for the tune-o-matic bridge and stop tail piece, there needed to be some solid wood underneath the bridge area. I cut a piece from some of the walnut scraps to create a block.
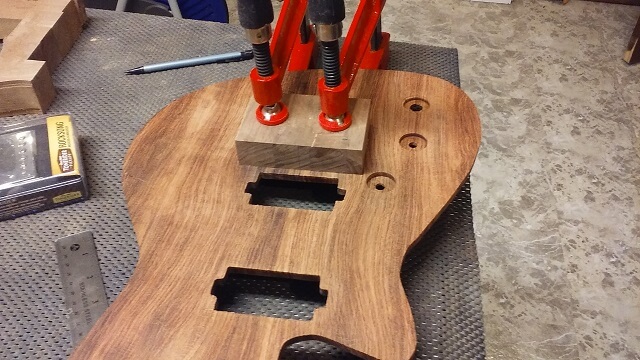
I went ahead and glued that block in place to the back side of the top.
On the back, I cut out the cover for the control cavity. The advantage of doing it this way is I can use a wood cover that matches the grain perfectly, versus a plastic cover that doesn't match, or a similar wood cover where the grain is close but not perfect.

The cover needs something to sit on to keep it from falling into the guitar, and to hold the screws. I cut a piece from the scrap bubinga to form this ledge. It's kind of a funny shape because the bridge block will be intruding slightly into the cavity cover area so this ledge is cut to allow room for that block.
Here you can see how the bridge block invades the control cavity space. The back of the block will provide the ledge for the control cavity cover in this area.
Holes for the control cavity cover screws were drilled and countersunk. Here's a test fit of the control cavity cover.
Next, it was time to glue the binding around the perimeter of the top and bottom pieces. I used a specialty glue for ABS plastic called "Weld On". I'd do a section and then tape it in place with paper tape used especially for attaching binding.
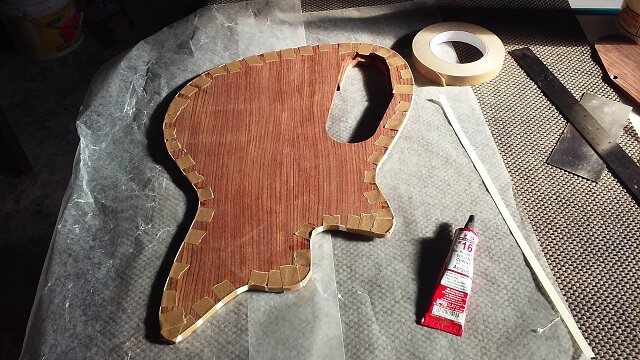
After I had the binding taped in place, I left it to dry. Then I spent a couple hours peeling Weld On glue off my fingers.
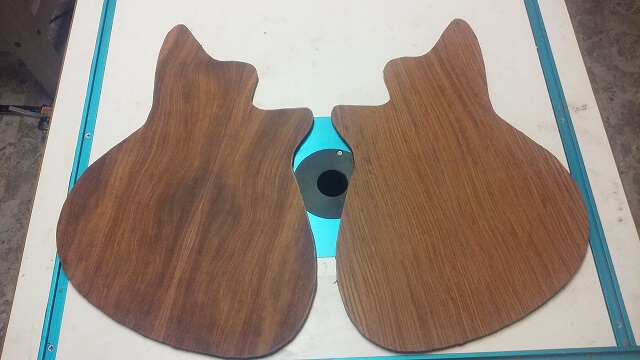
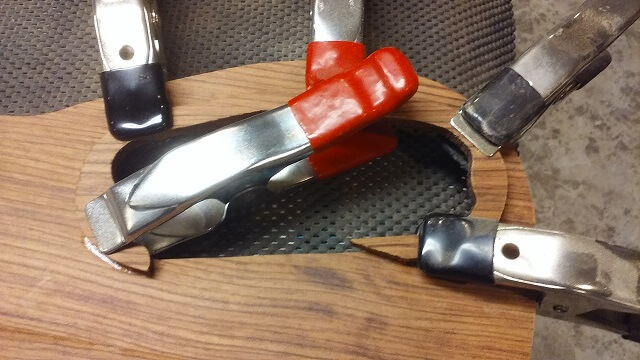
With the tape removed I was able to test-fit the two pieces into the body blank. They fit nice and tight like they should.
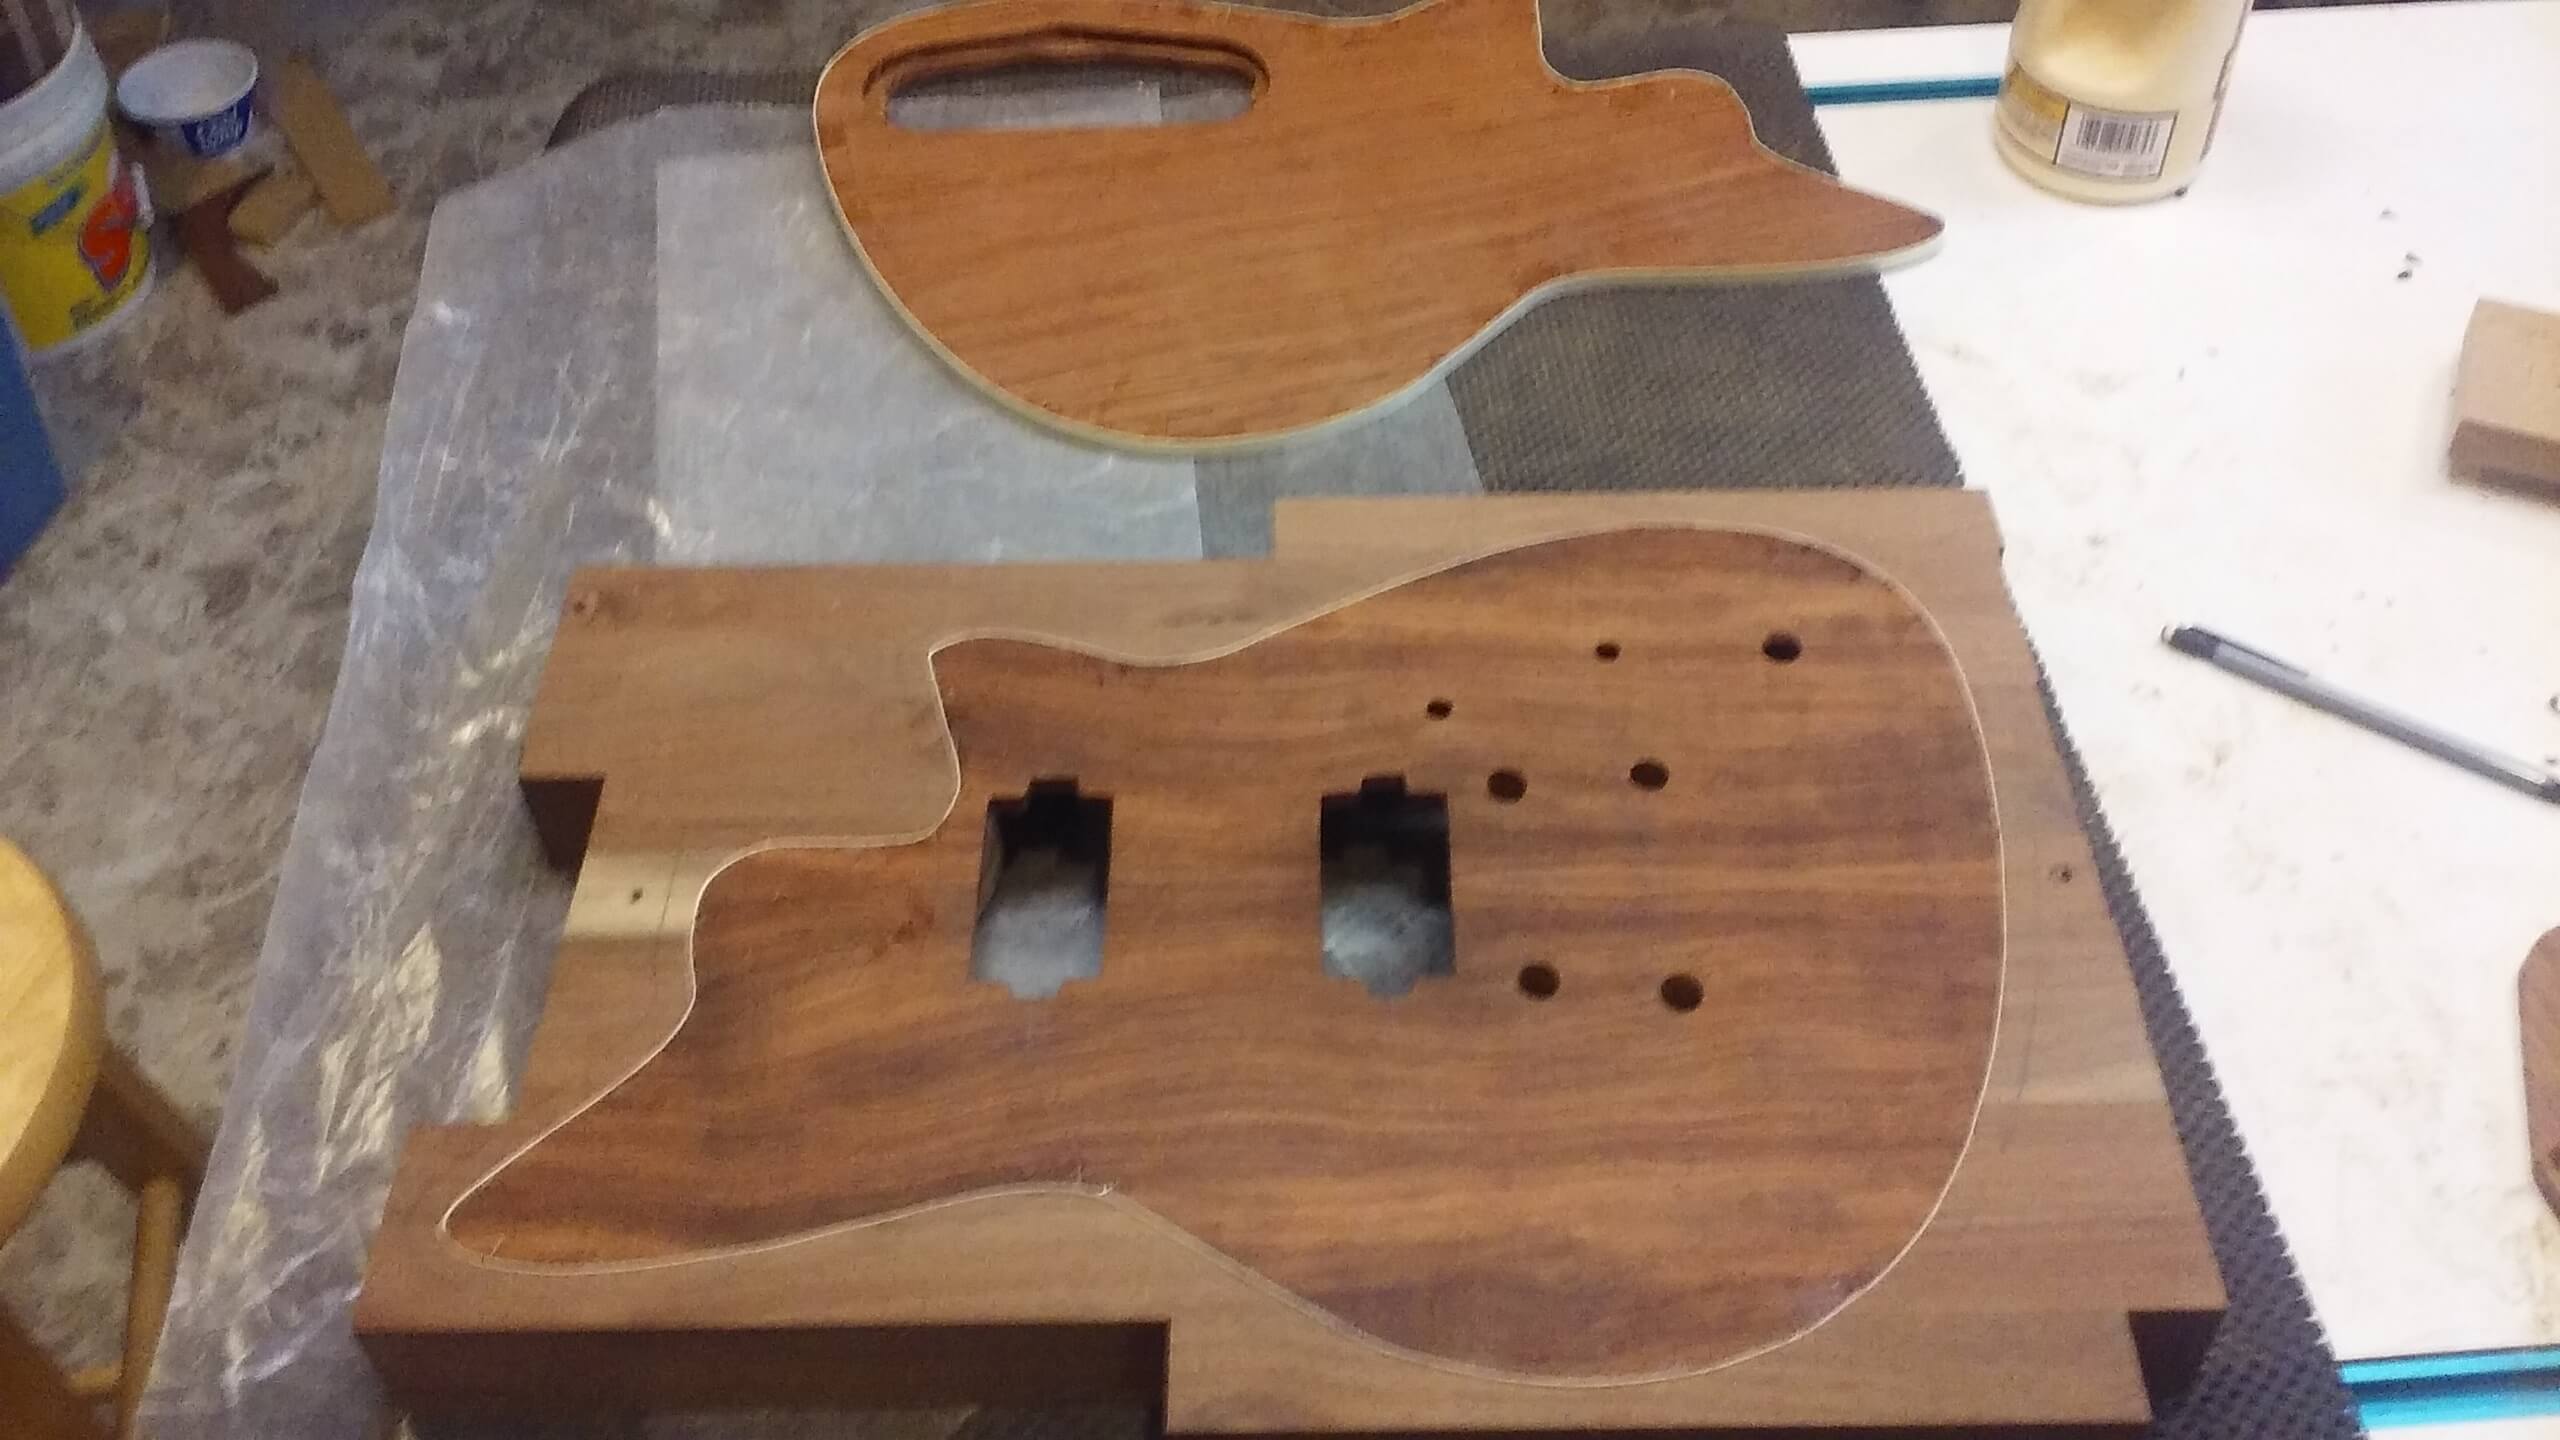
With the binding glue dry, I removed the tape (which took longer than I thought it would due to the sheer number of pieces I had used.) I then took a scraper and leveled the binding on the back sides of the two pieces. This also removed the extra glue squeeze-out. I wasn't worried about the front faces right now as the binding/extra glue would be smoothed when I sanded the top after gluing. Right now I just needed the back sides of the pieces smooth so I could glue them in place on the body.
I started with the back piece. Mainly because if I managed to screw something up it would be on the back side and hopefully I would figure out how to avoid the same problem when doing the front side. No worries, though, as I didn't screw anything up.
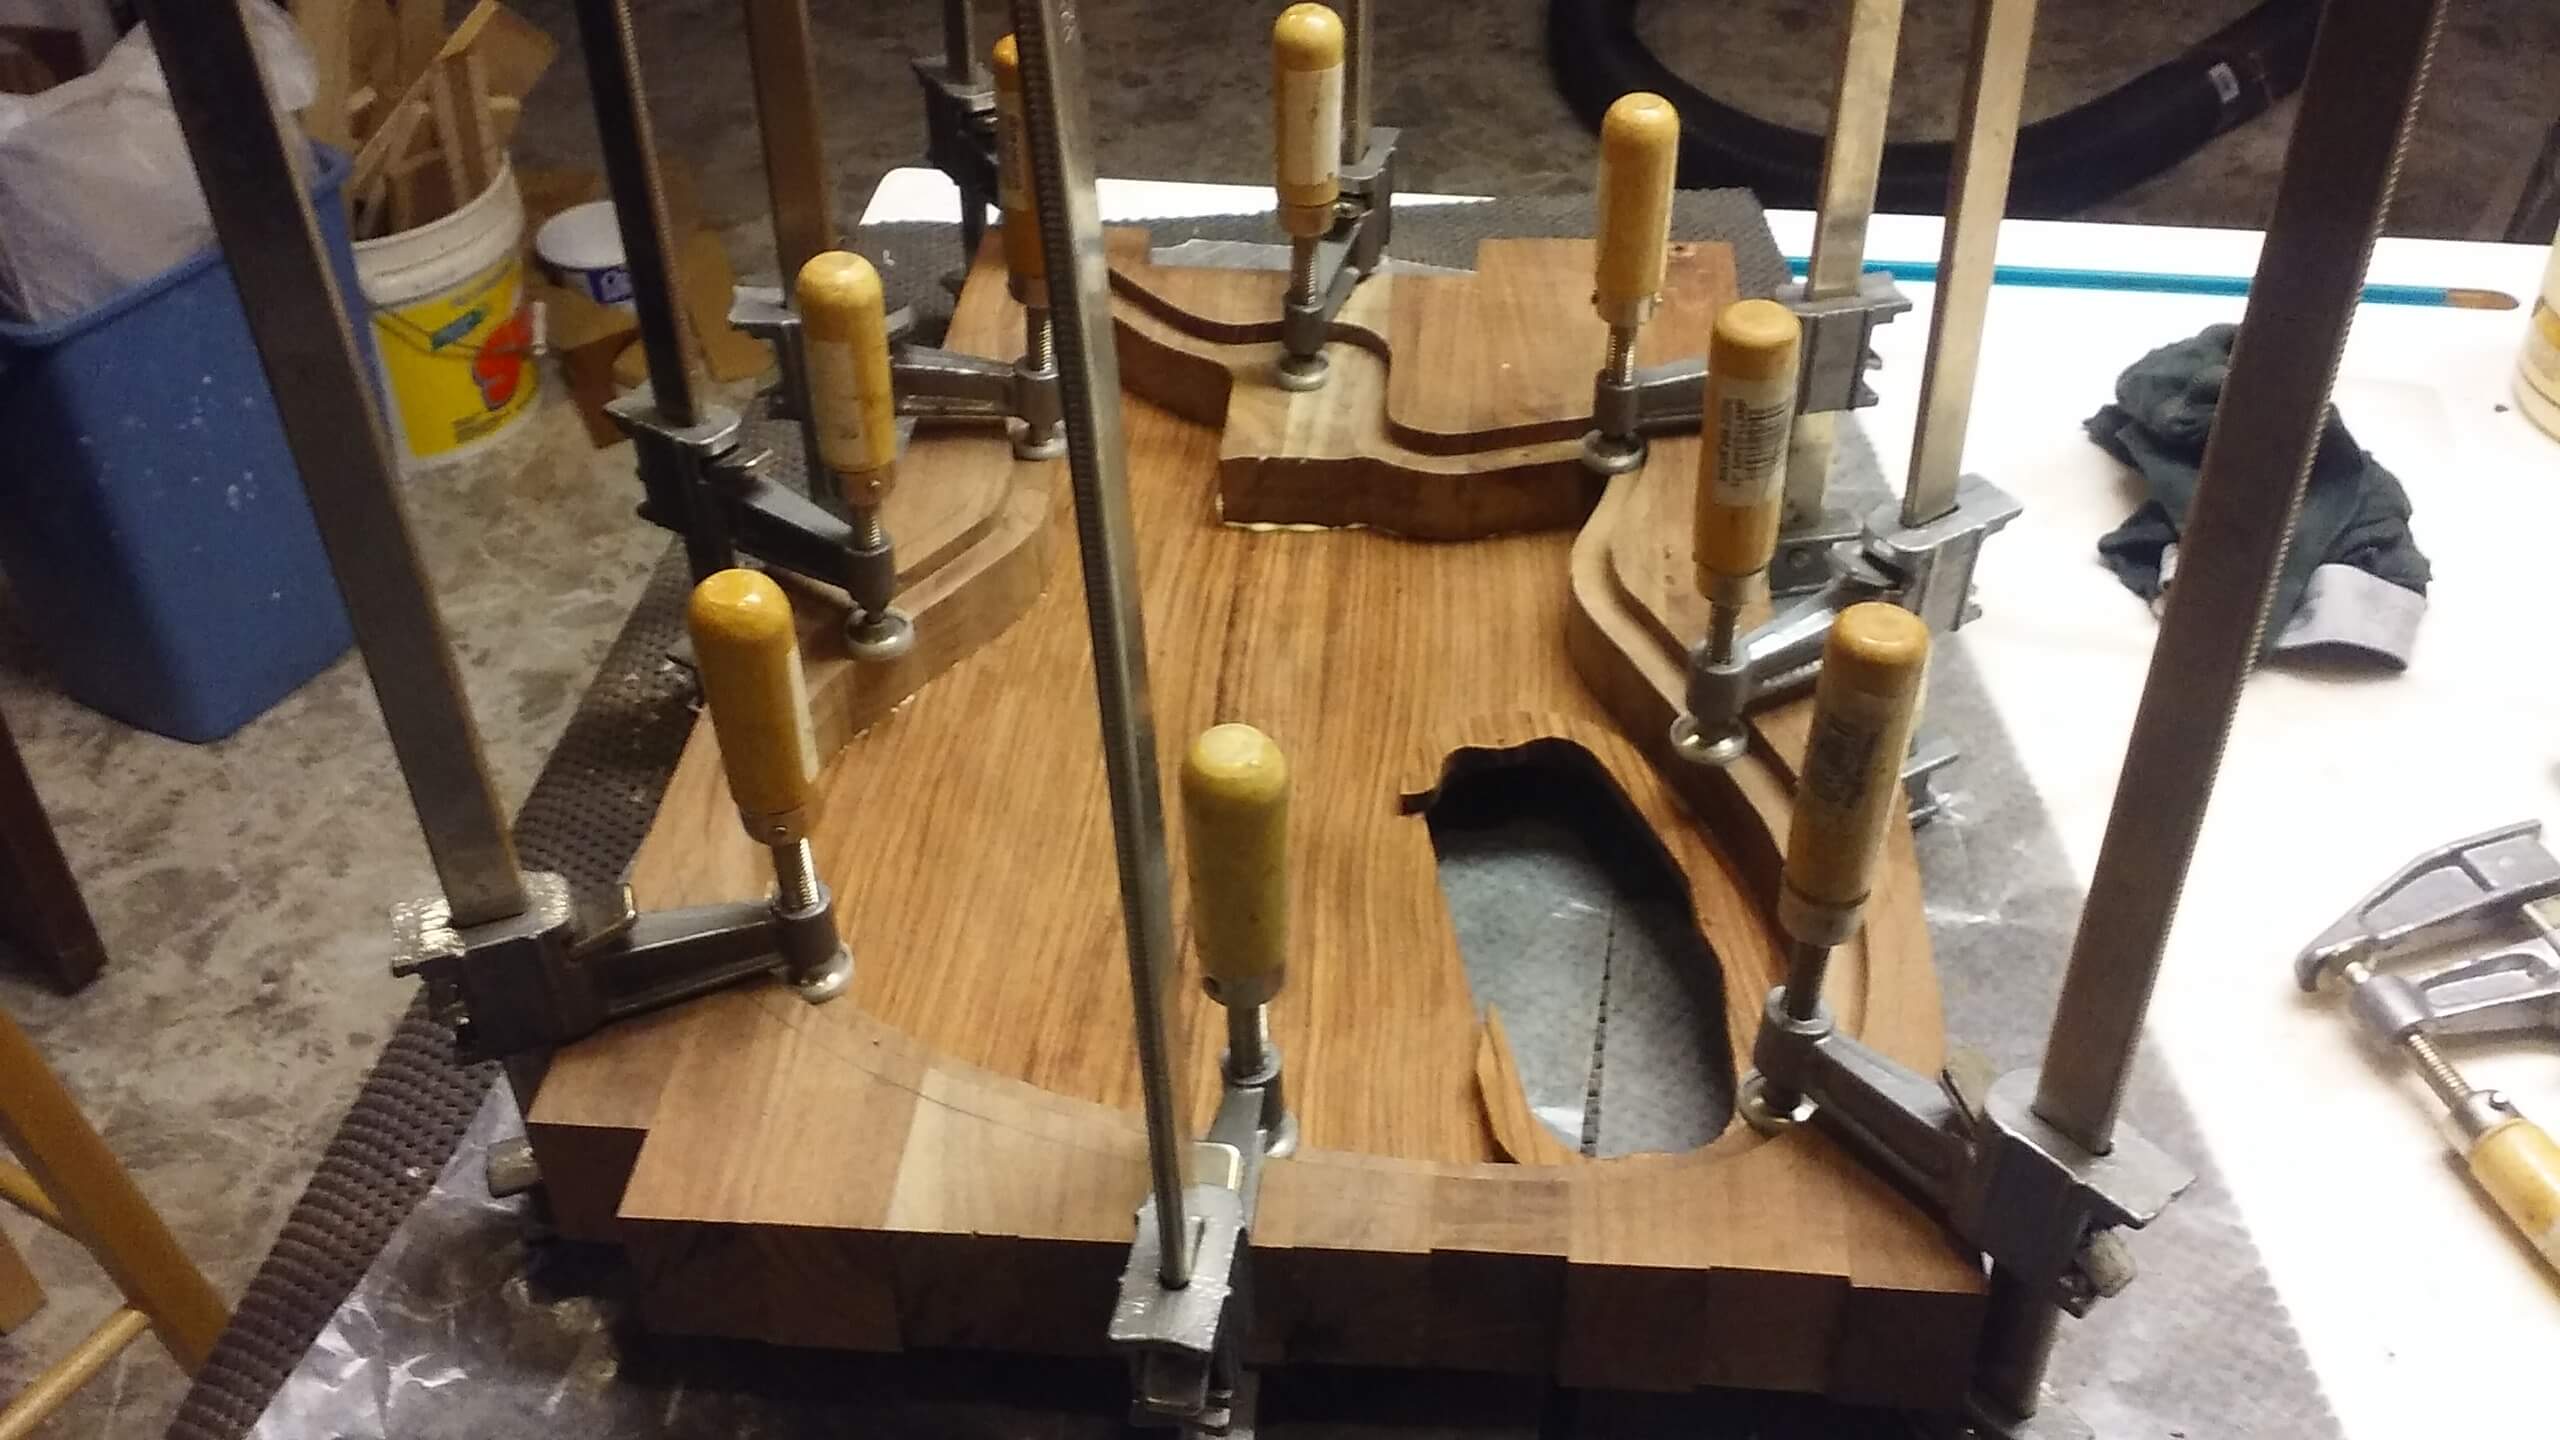
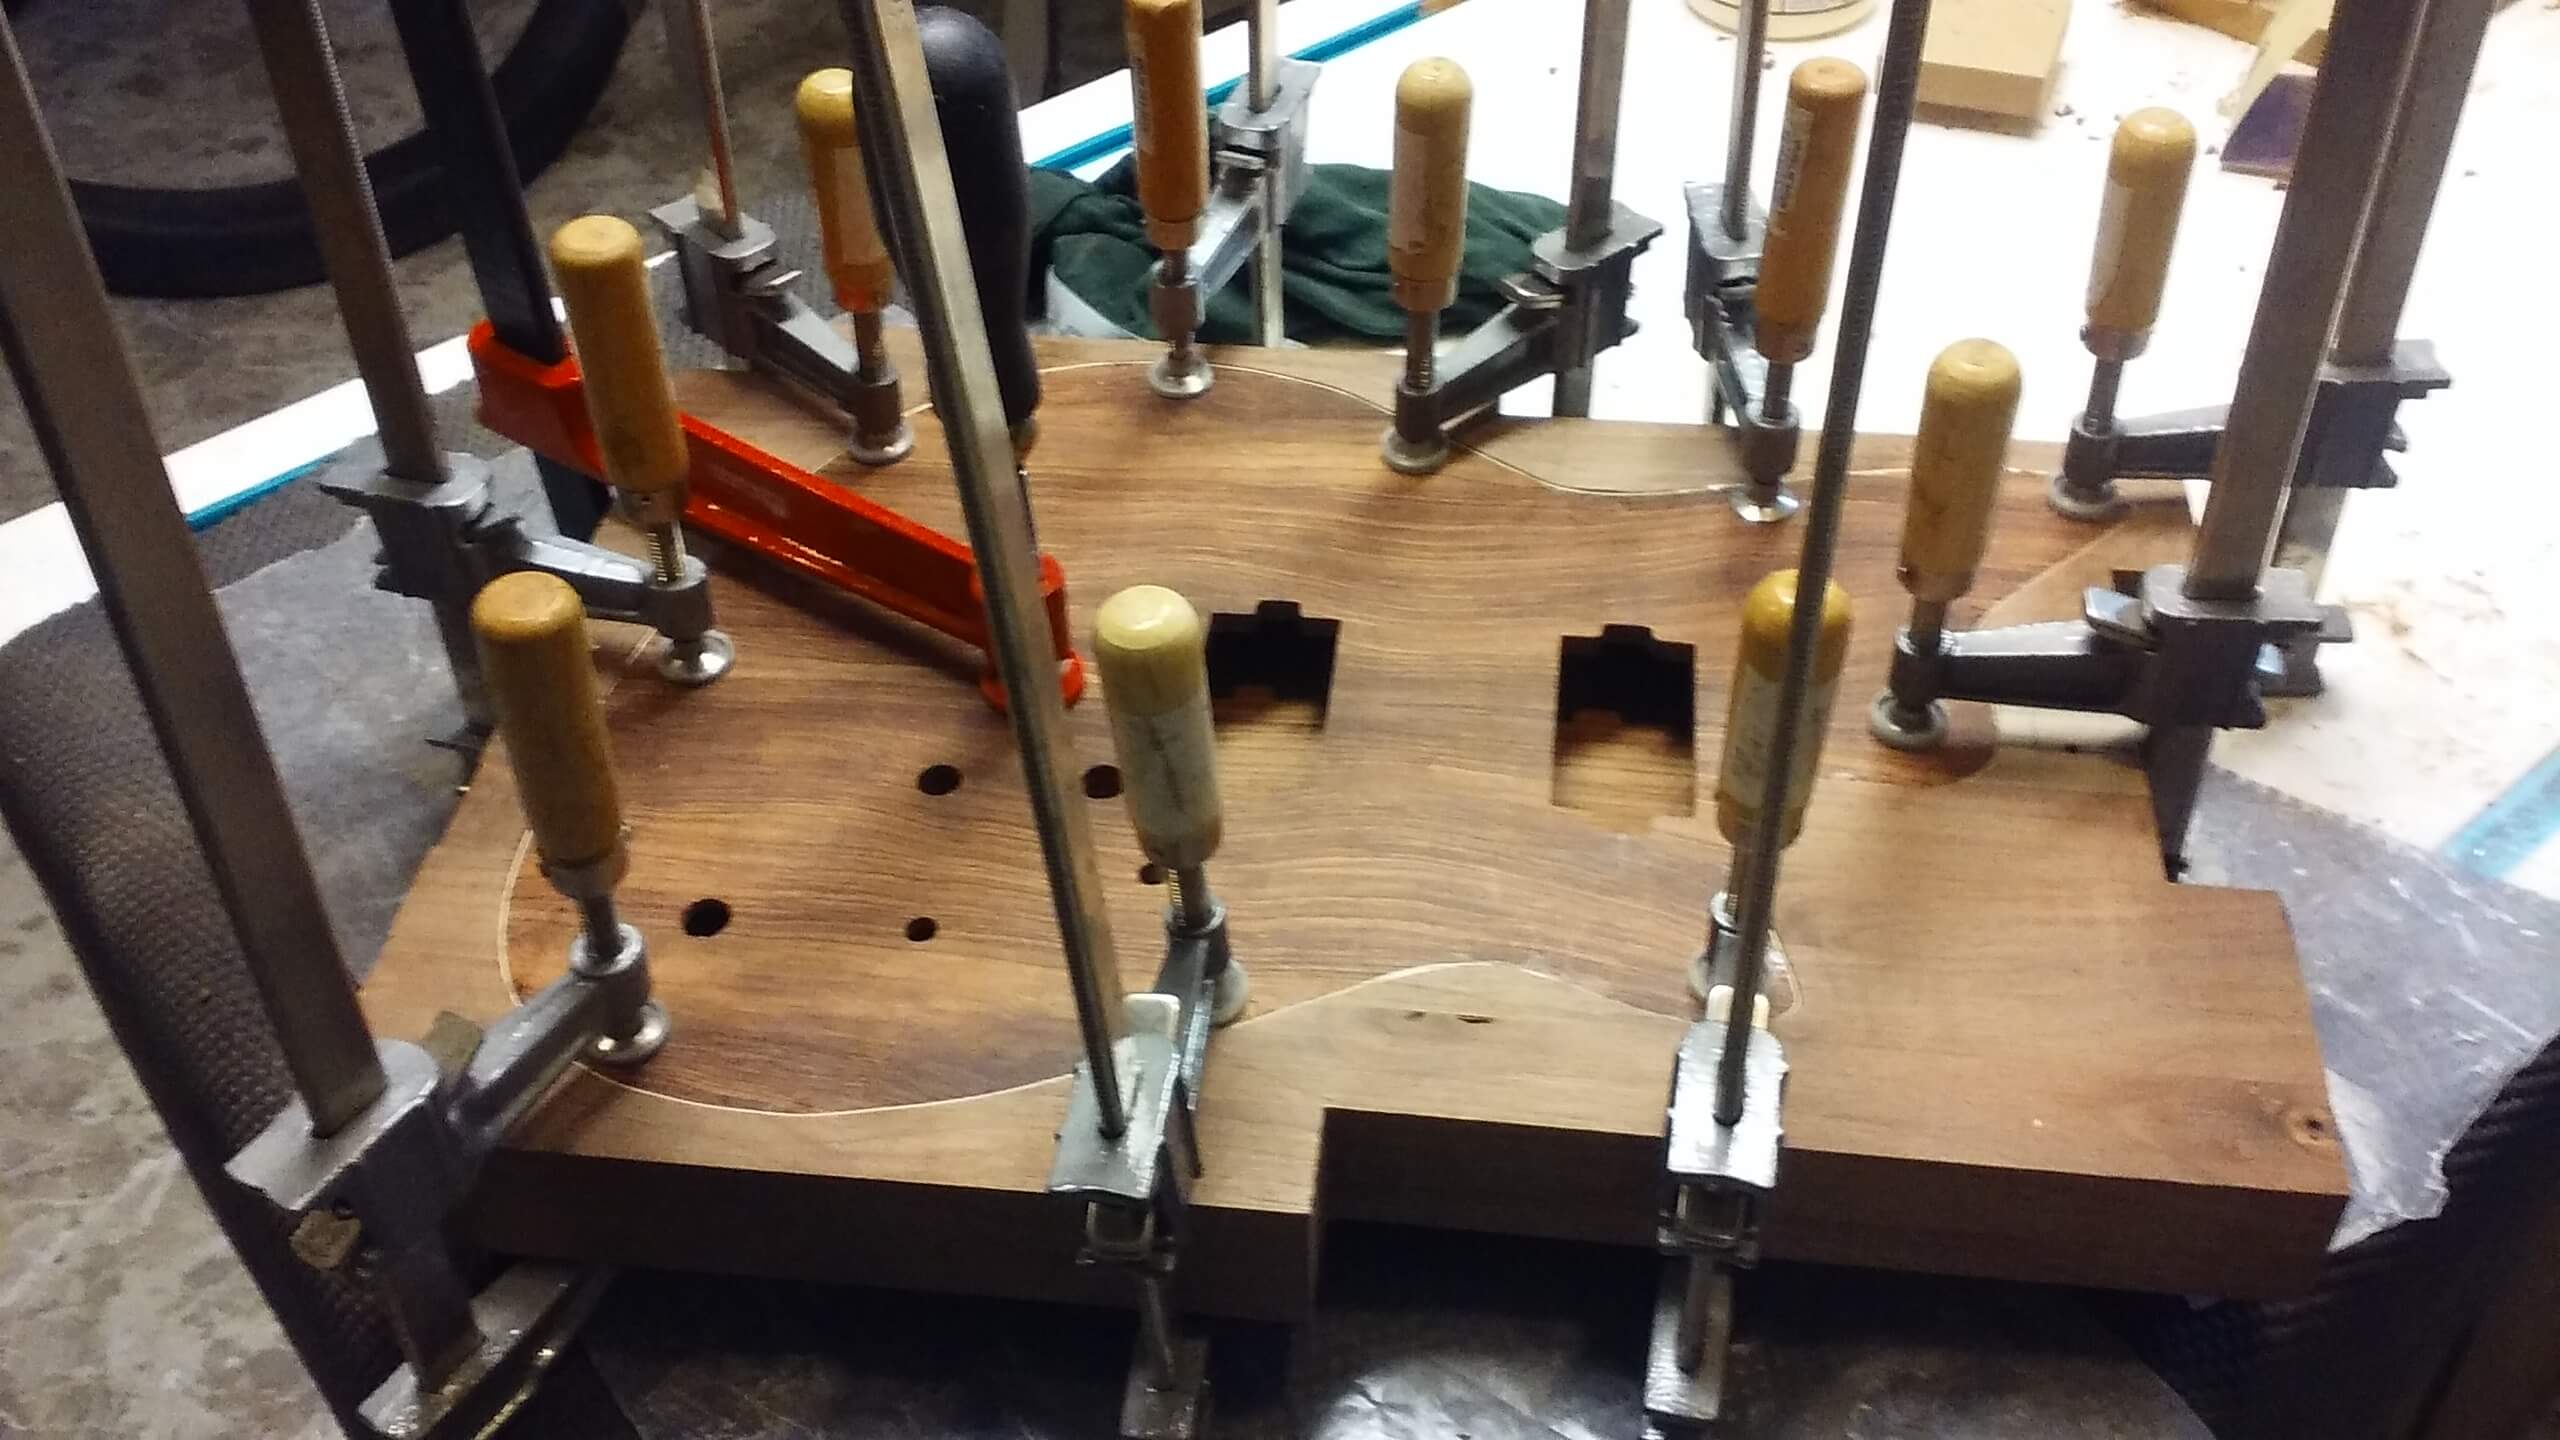
It was a pretty easy glue-up. I just ran a light bead of glue around the routed ledge, smeared it out with my finger and then placed the back into the body blank. A series of clamps placed around the outside would hold it until the glue dried.
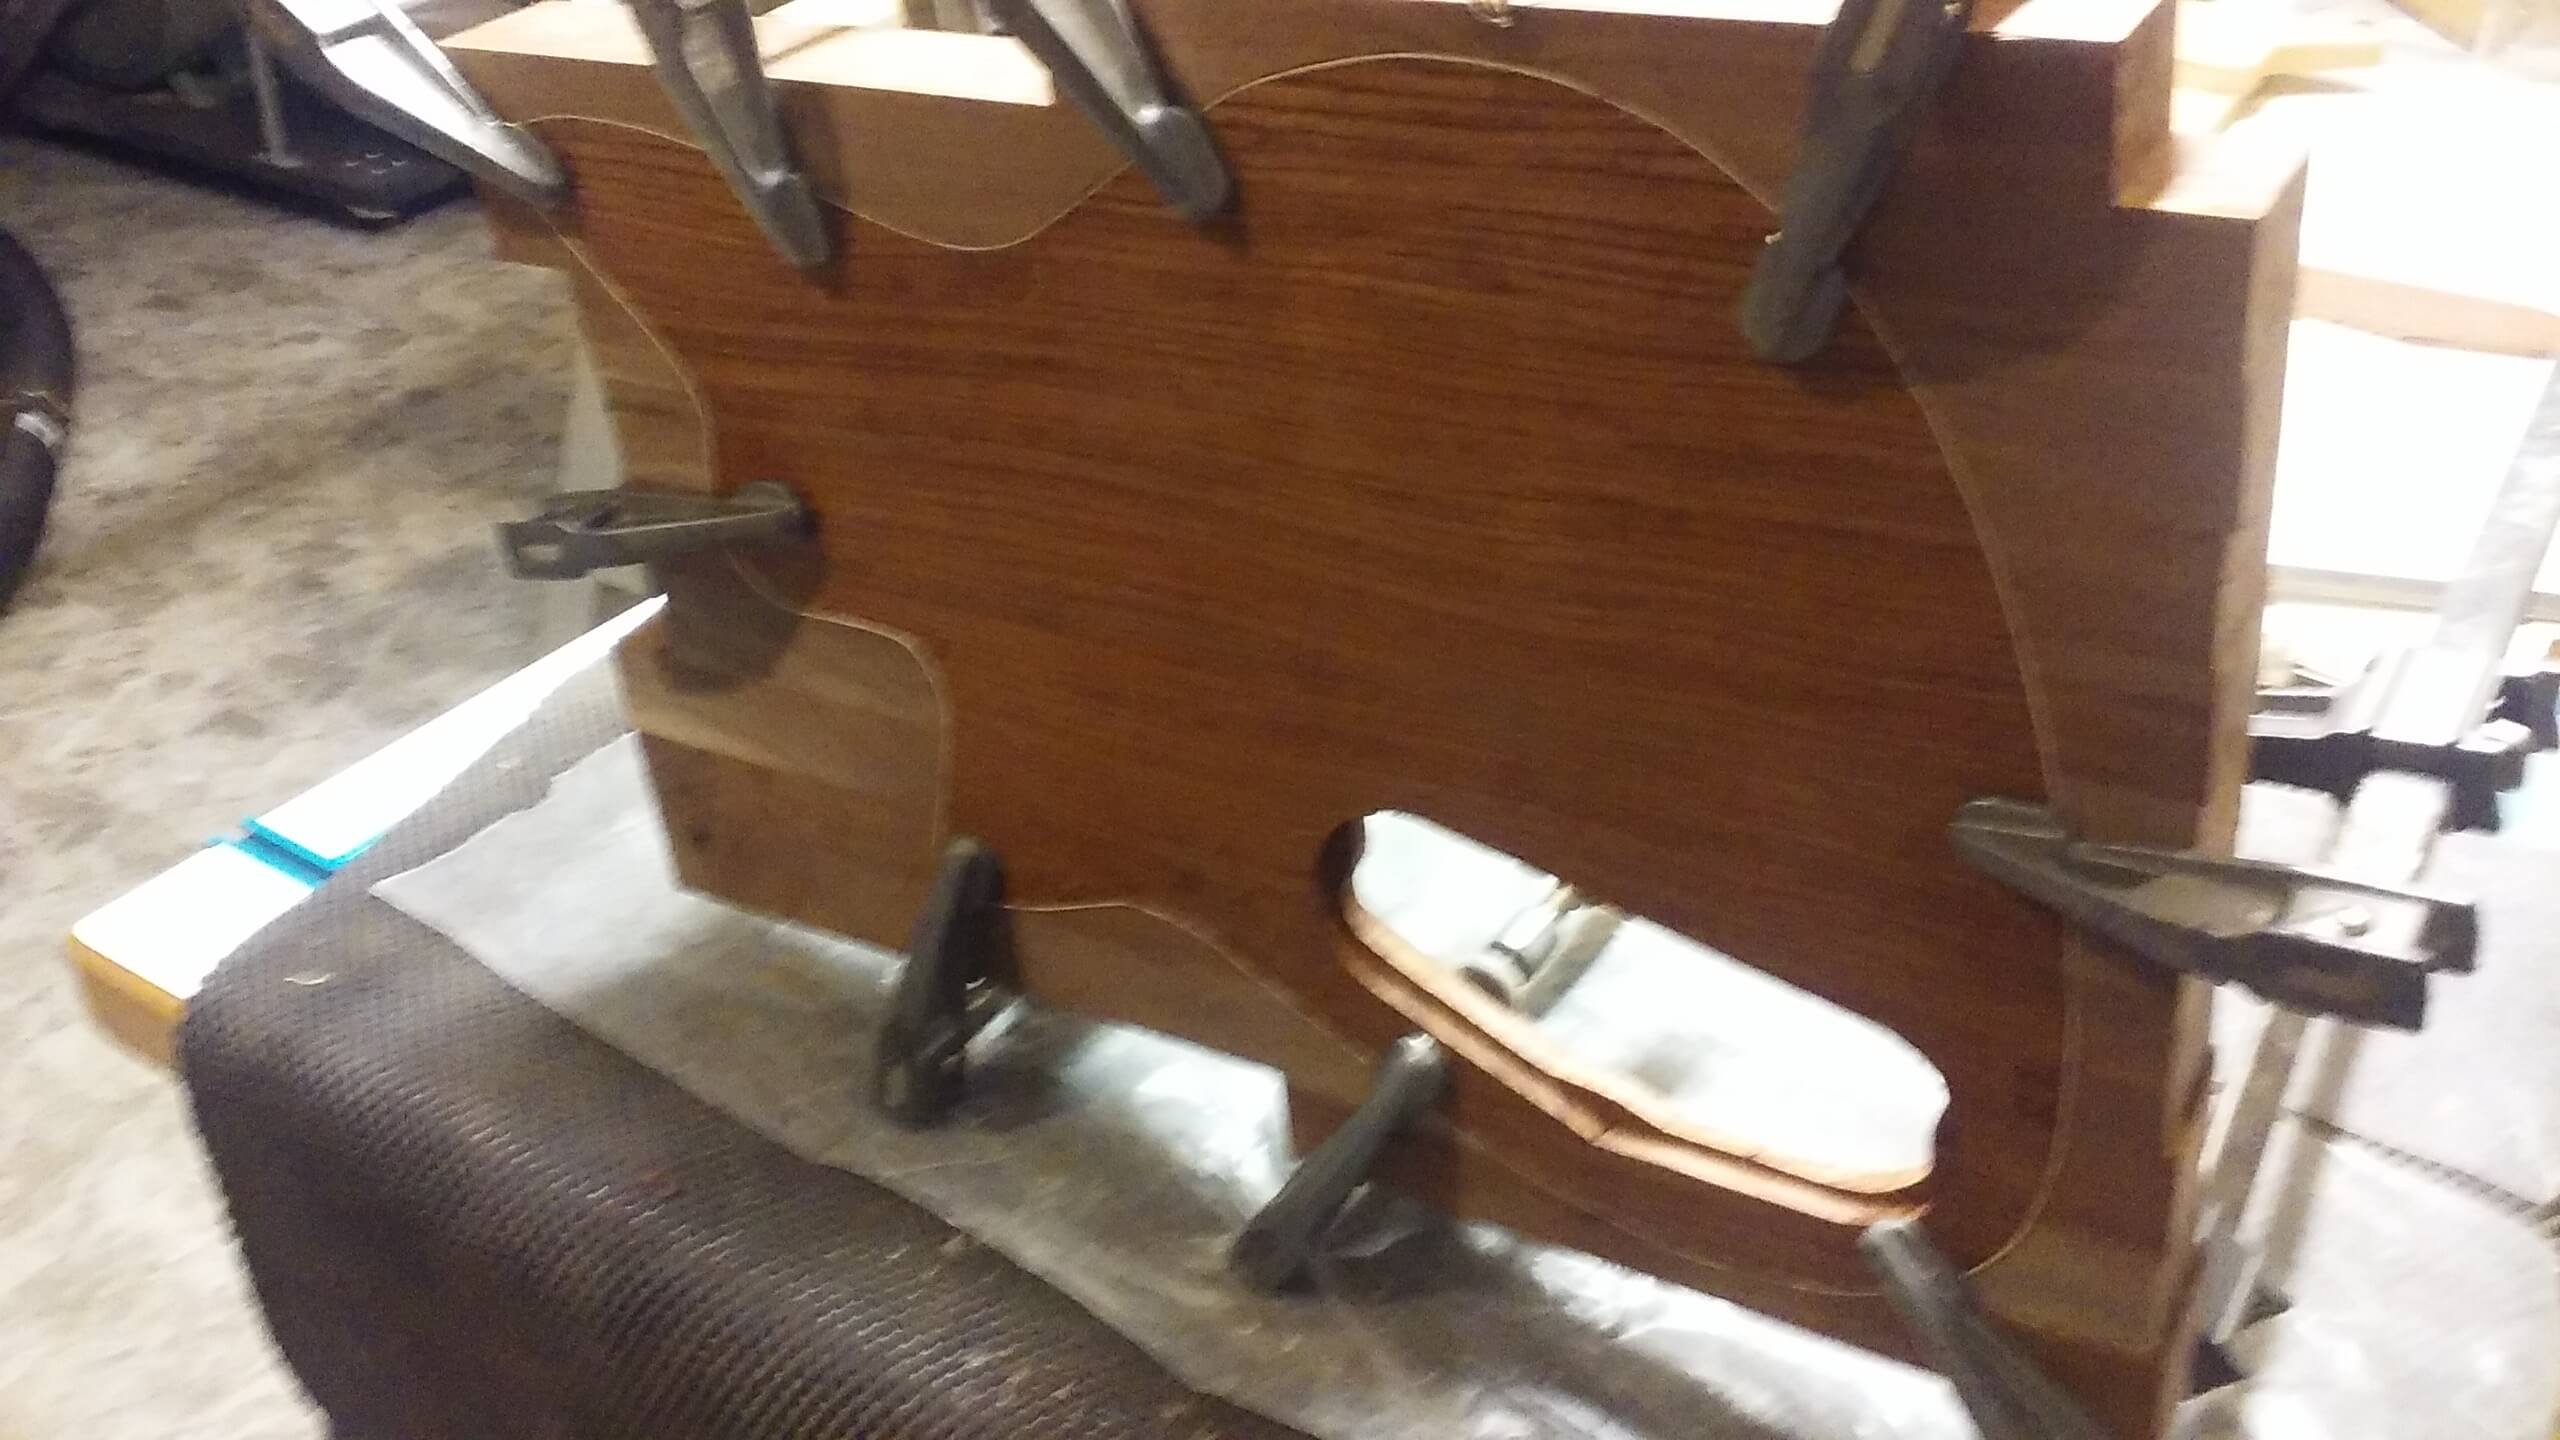
After the back had dried overnight, I repeated the process and glued the front piece in place. The only difference was the front piece had the block behind the bridge area that also needed to be glued/clamped to the back. But it was also a relatively simple gluing operation.
With the top and bottom in place, I decided I wanted to rout the neck pocket before I cut out the body shape. By doing this I could screw my neck pocket jig into the scrap area of the body blank, which is more secure than the double-sided tape I frequently use.
However, before I could rout the neck pocket, I had to figure out how to deal with one small issue: the tune-o-matic bridge. This kind of bridge sits higher than a traditional Fender-style bridge. If you were to install a tune-o-matic onto your typical Strat with no other modifications, the strings would be very high above the fretboard, even with the bridge adjusted to its lowest position.
So when using a tune-o-matic there are three ways to handle this problem. 1 - the bridge can be recessed into the face of the guitar. 2 - the neck can be raised higher above the face of the guitar. Or 3 - a neck angle can be employed. If you're unfamiliar with neck angles, rather than going into it here you can head over to my Neck Angle Calculator page and scroll to the bottom where I explain neck angles in detail.
Which option should I use? Option 1 is used occasionally, but it leaves a distinctive low spot in the face of the guitar (see examples of this on Google Images. Option 2 is used less often (although the Gibson SG is one example) but personally I don't think it looks good. So option 3 is my choice. Entering all my parameters into my above linked angle calculator it spit out a neck angle of 1.442 degrees. For rounding purposes I'm just going to go with 1.5. There's enough wiggle room with adjustable bridges to account for the variance and that's a pretty small difference in angle.
Years ago I built a neck pocket jig that I've used many times. The challenge with this guitar, how do I use my jig to rout the pocket at an angle? I mulled over various methods of trying to clamp my jig to the face of the guitar while propping up one end of it. Attempting this would be tricky to both keep the jig stable, and to make the angle accurate.
So I decided to create a new neck pocket jig specifically for this 1.5 degree angle. Once created I could throw it on my jig pile and maybe re-use it for any instruments I build in the future that need an angled bolt-on neck.
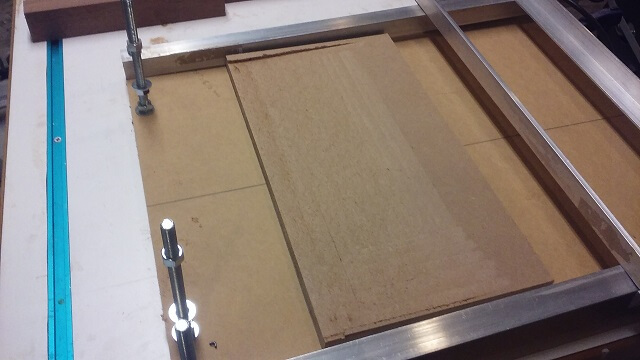
To begin building the jig I cut out a piece of MDF 15" wide by 8" long. This will give me plenty of surface area to attach the jig to a guitar. I wanted the bottom side of the jig to remain flat, so that meant the top side needed a 1.5 degree angle planed across its face. This is easier said than done.
Thankfully a while back I created a jig specifically designed to allow me to cut shallow angles across broad surfaces. I usually use it when planing a face of a carved-top guitar, but there's no reason it couldn't be used to plane an angle in my jig. So I'm using a jig to make a jig. At least I'm not dancing the jig, 'cause ain't nobody got time for that.
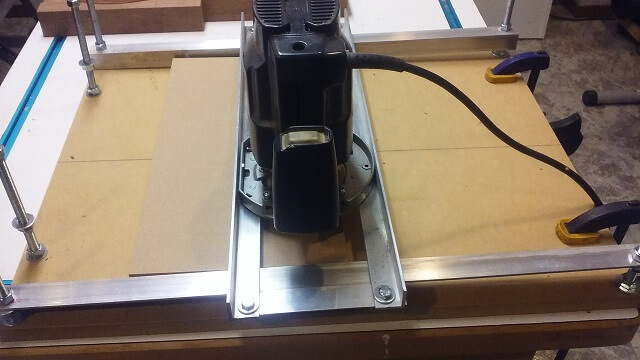
My jig is comprised of two outer rails that can be adjusted to hold a specific angle. Across these rails is a "sled" that slides forward and back. On that sled, a router can slide perpendicular to the rails. So by moving the router back and forth on the sled, and moving the sled down the rails, I can plane very shallow angles. I spent many weeks laying in bed trying to fall asleep, and instead my brain was churning away to come up with this design.
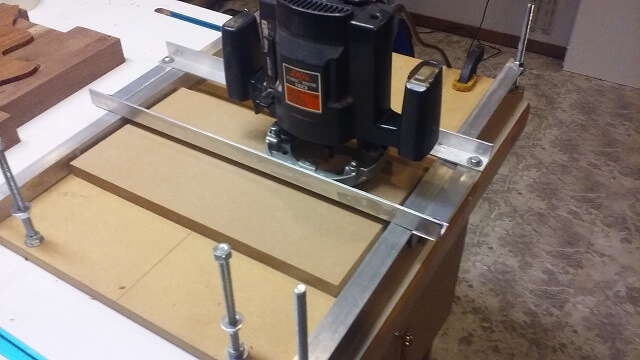
I began by setting the rails perfectly level. Then I raised the back side of the rails a precise amount to set it to 1.5 degrees. This adjustment is made by turning nuts under the rails. Each full turn of the nut changes the angle of that rail by 0.158 degrees. By doing a little math I calculated that my desired angle of 1.5 would mean I have to turn the two nuts each exactly 9.5 turns. I have a mark on one side of the nuts to make it easier to see when I've completed a turn.
I used double-sided tape to hold my workpiece down on the surface. I set the router bit height to make contact about 2" from the back of the jig. This will give me 6" of angled surface, which is plenty to keep the router stable. By not angling the whole 8" I'm able to keep plenty of wood available on the shallow end to guide the router bearing later on when I'm actually routing a neck pocket.
Then I turned on the router and started the process. I went slow, just taking off maybe a 1/16th with each pass. It took a while. Also MDF is nasty dusty stuff. Apparently it was getting cloudy with dust and smoke in the shop because my smoke alarm went off out in the hallway. Of course, I had ear protection on and the router going full blast so I didn't hear the alarm. My wife and son did though, so they got a bit annoyed when it started going off and I just kept working.
After the smoke cleared and my routing was done, I hit the surface I'd just planed with my orbital sander to smooth out the very slight imperfections left by the router bit. It didn't take much: less than a minute. The imperfections were very feint. It took longer to get the sander out and hooked up than it did to sand the surface.
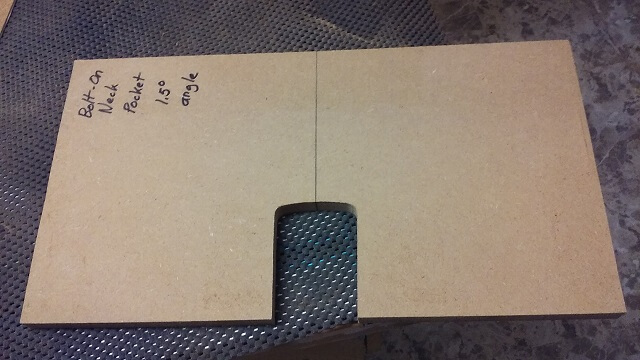
Now that I had an angled top to my new jig, I attached my old neck pocket jig to the new one and used a pattern cutting bit in the router to make an exact duplicate of the neck pocket. So there we go: I now had a jig that would allow me to cut angled bolt-on neck pockets. I used a marker to clearly indicate the angle so I can re-use it in the future, or not re-use it if I'm looking for my usual jig without an angle.
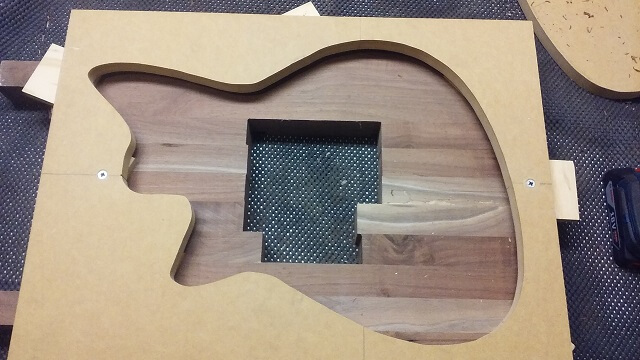
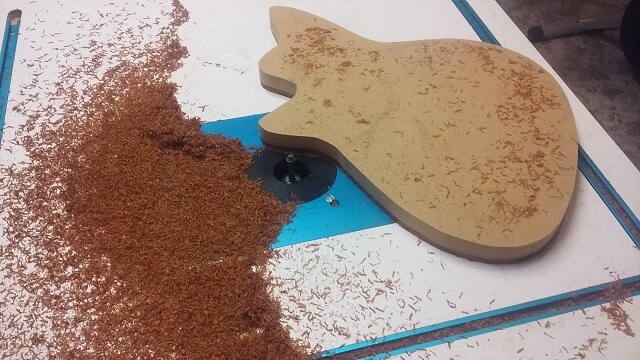
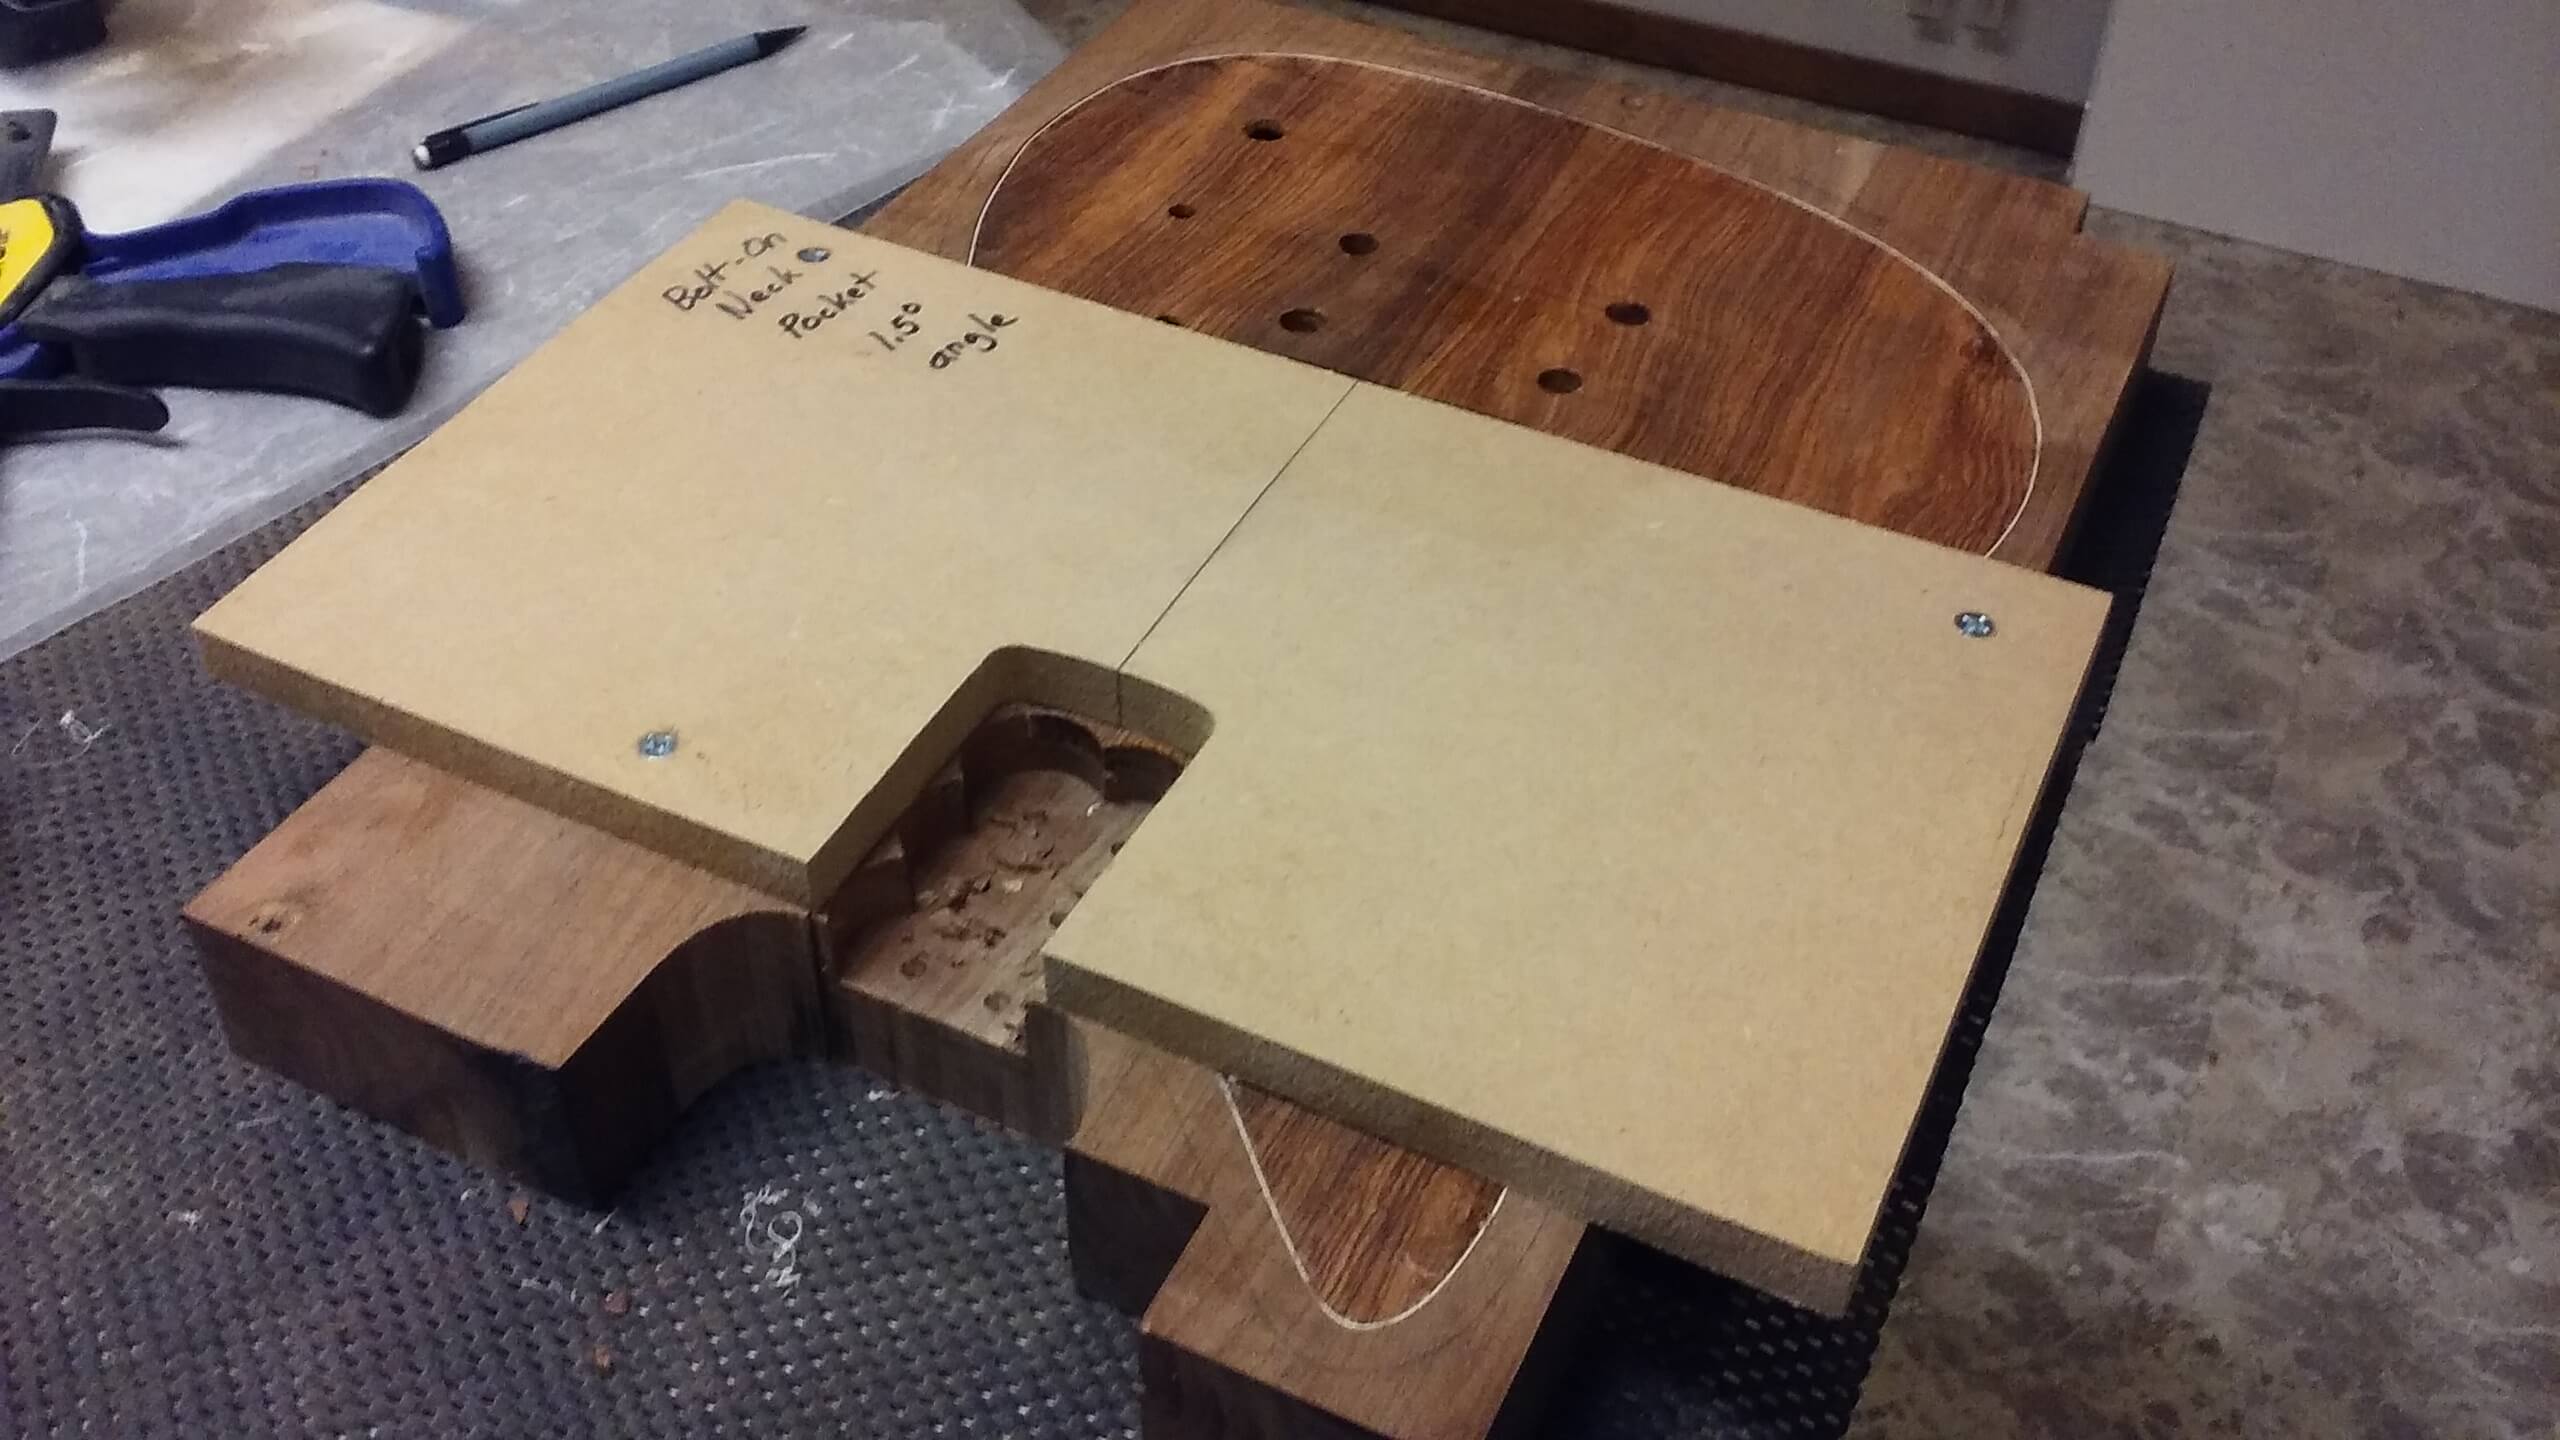
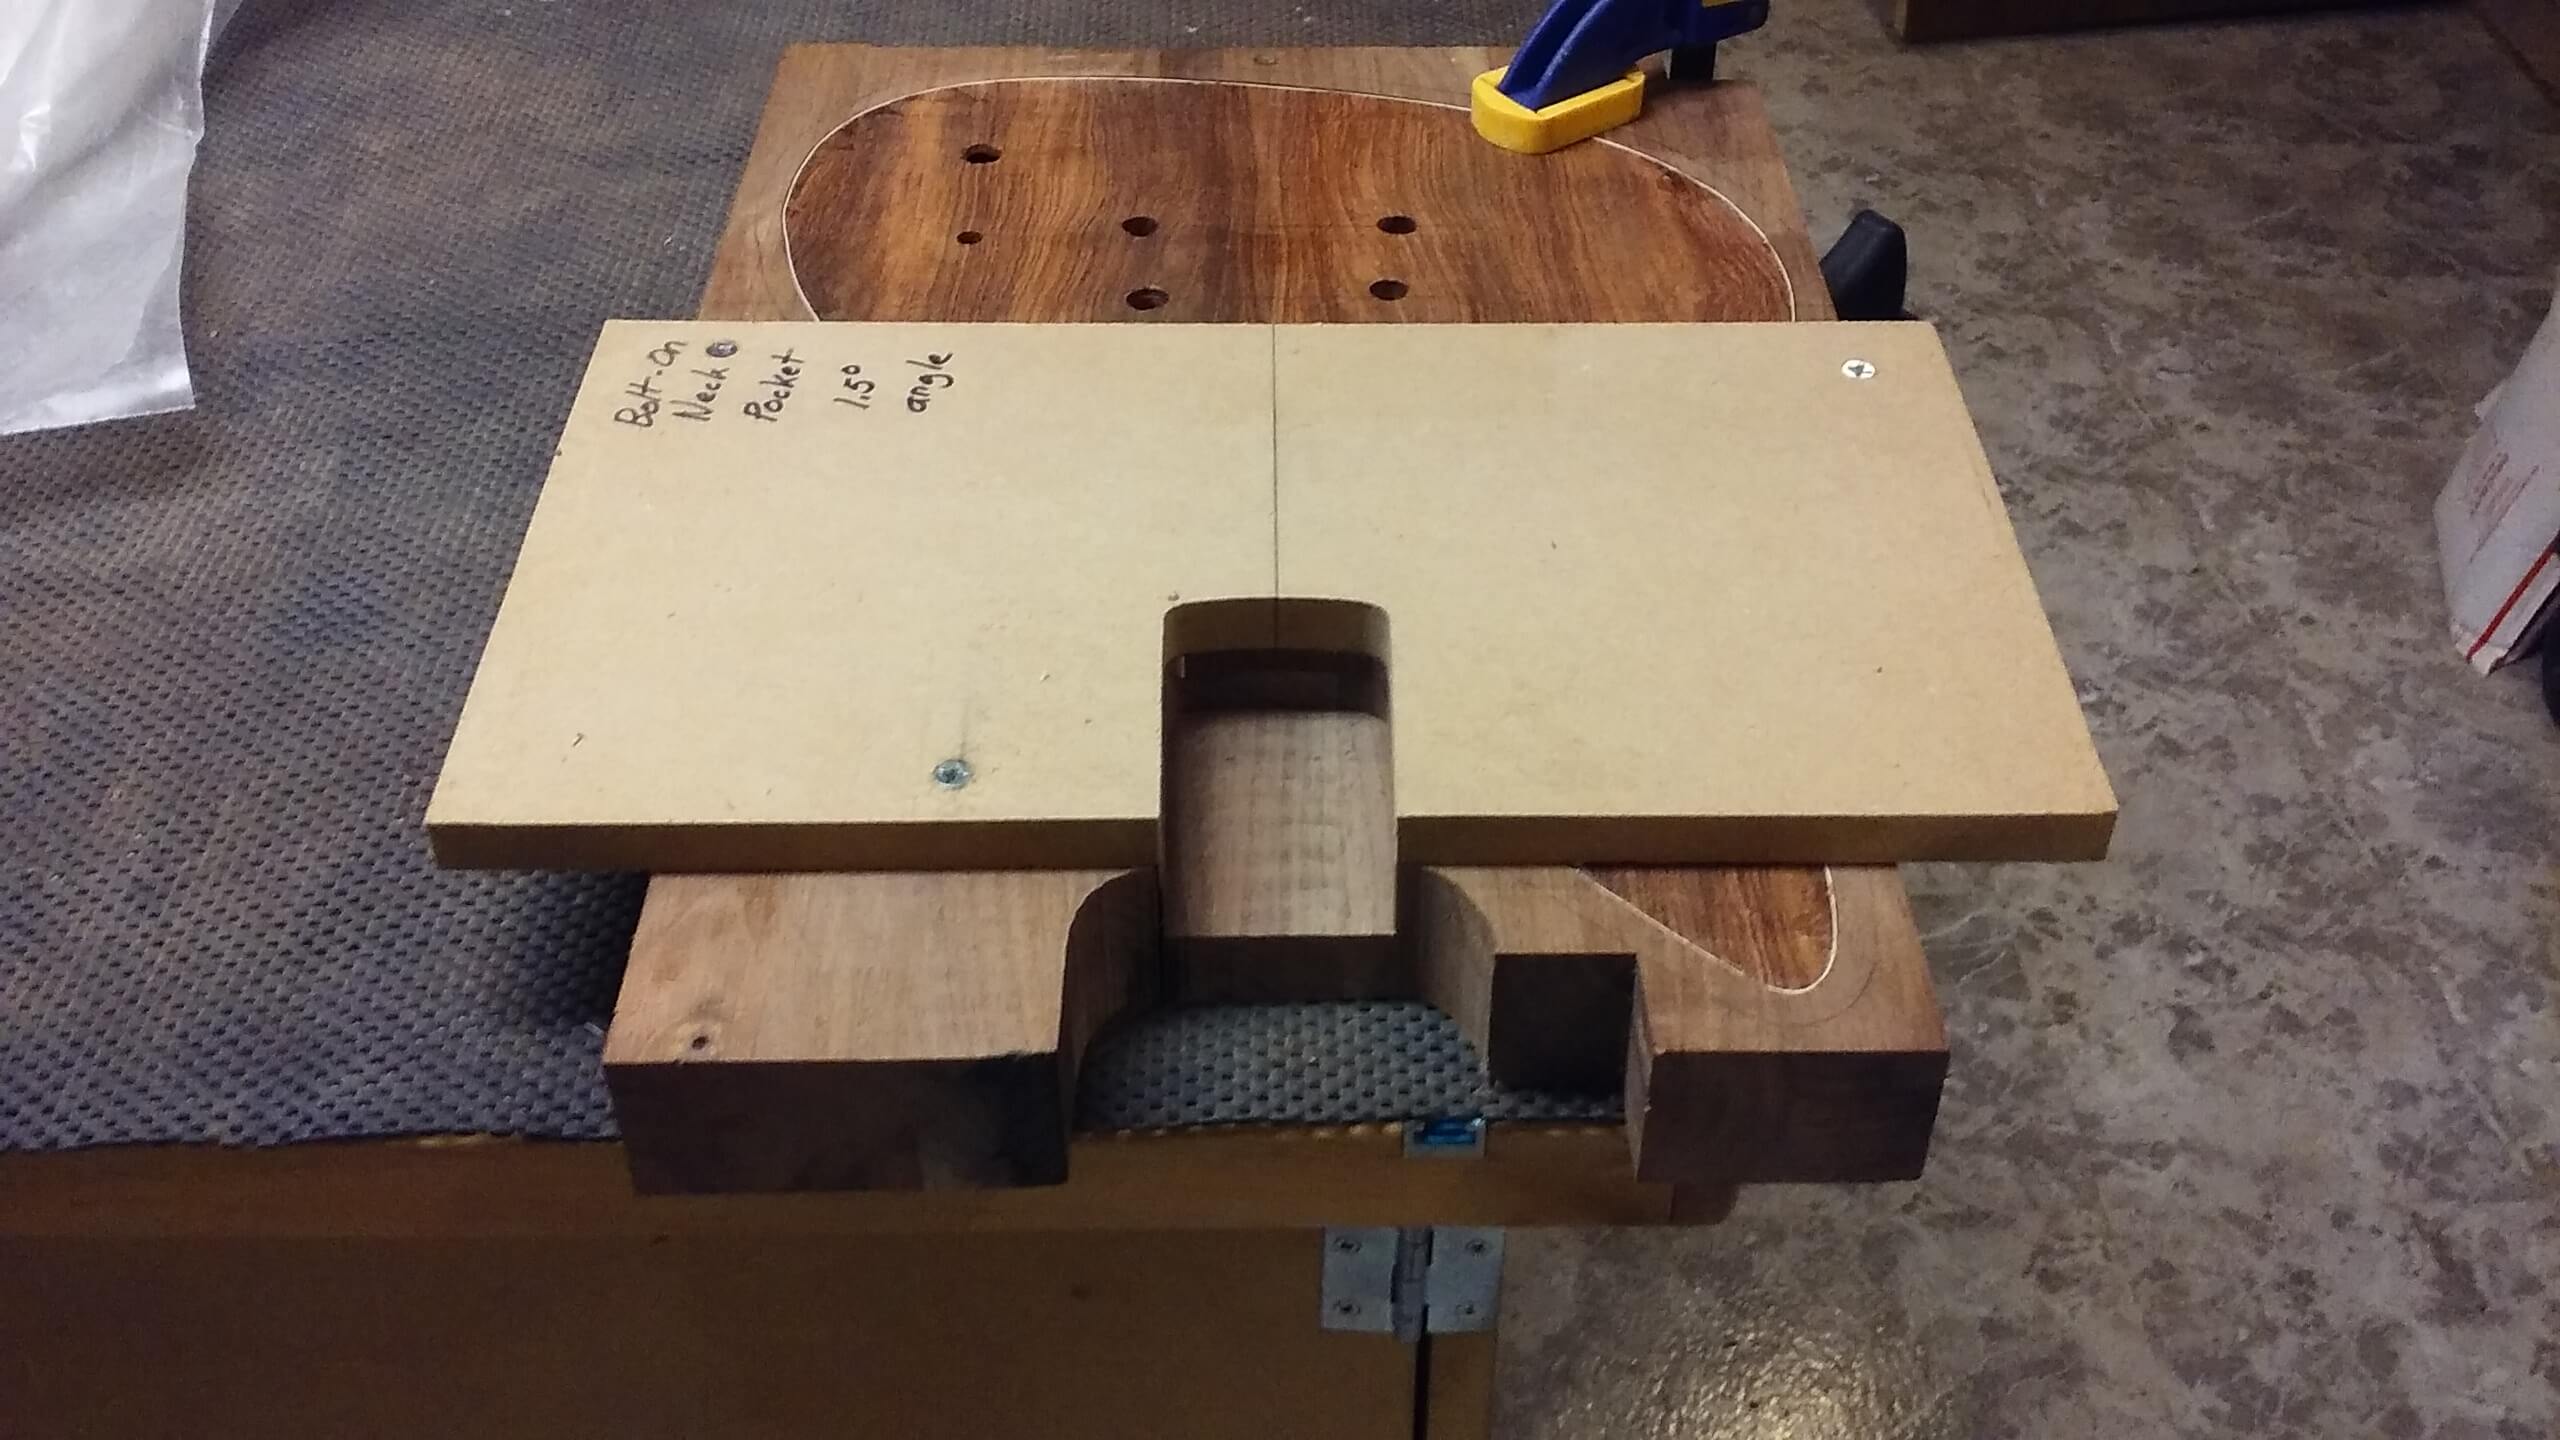
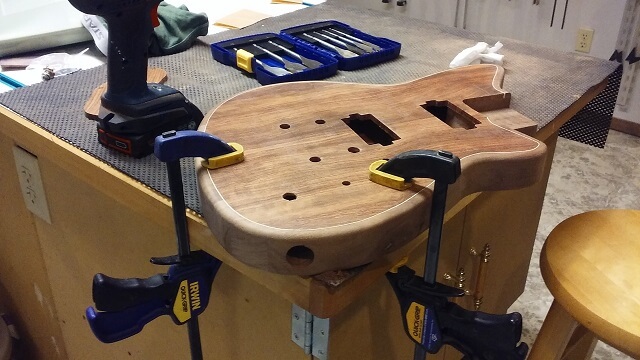
So with my jig complete, I screwed it into the body blank in the proper location. I then used the drill press to remove a lot of the extra wood in the pocket. I also used the band saw to remove the scrap in front of the pocket. This would save wear and tear on my router bit, and also reduce the amount of wood shavings the router would cover me with.
Then I just used my pattern cutting bit to finish routing the pocket.
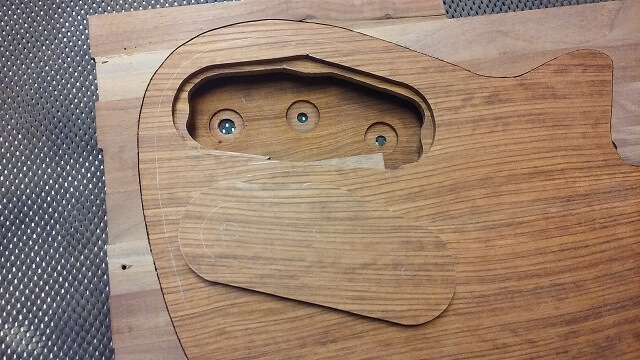
With the jig removed you can see the completed neck pocket along with where the screw holes were drilled in the scrap parts of the body.
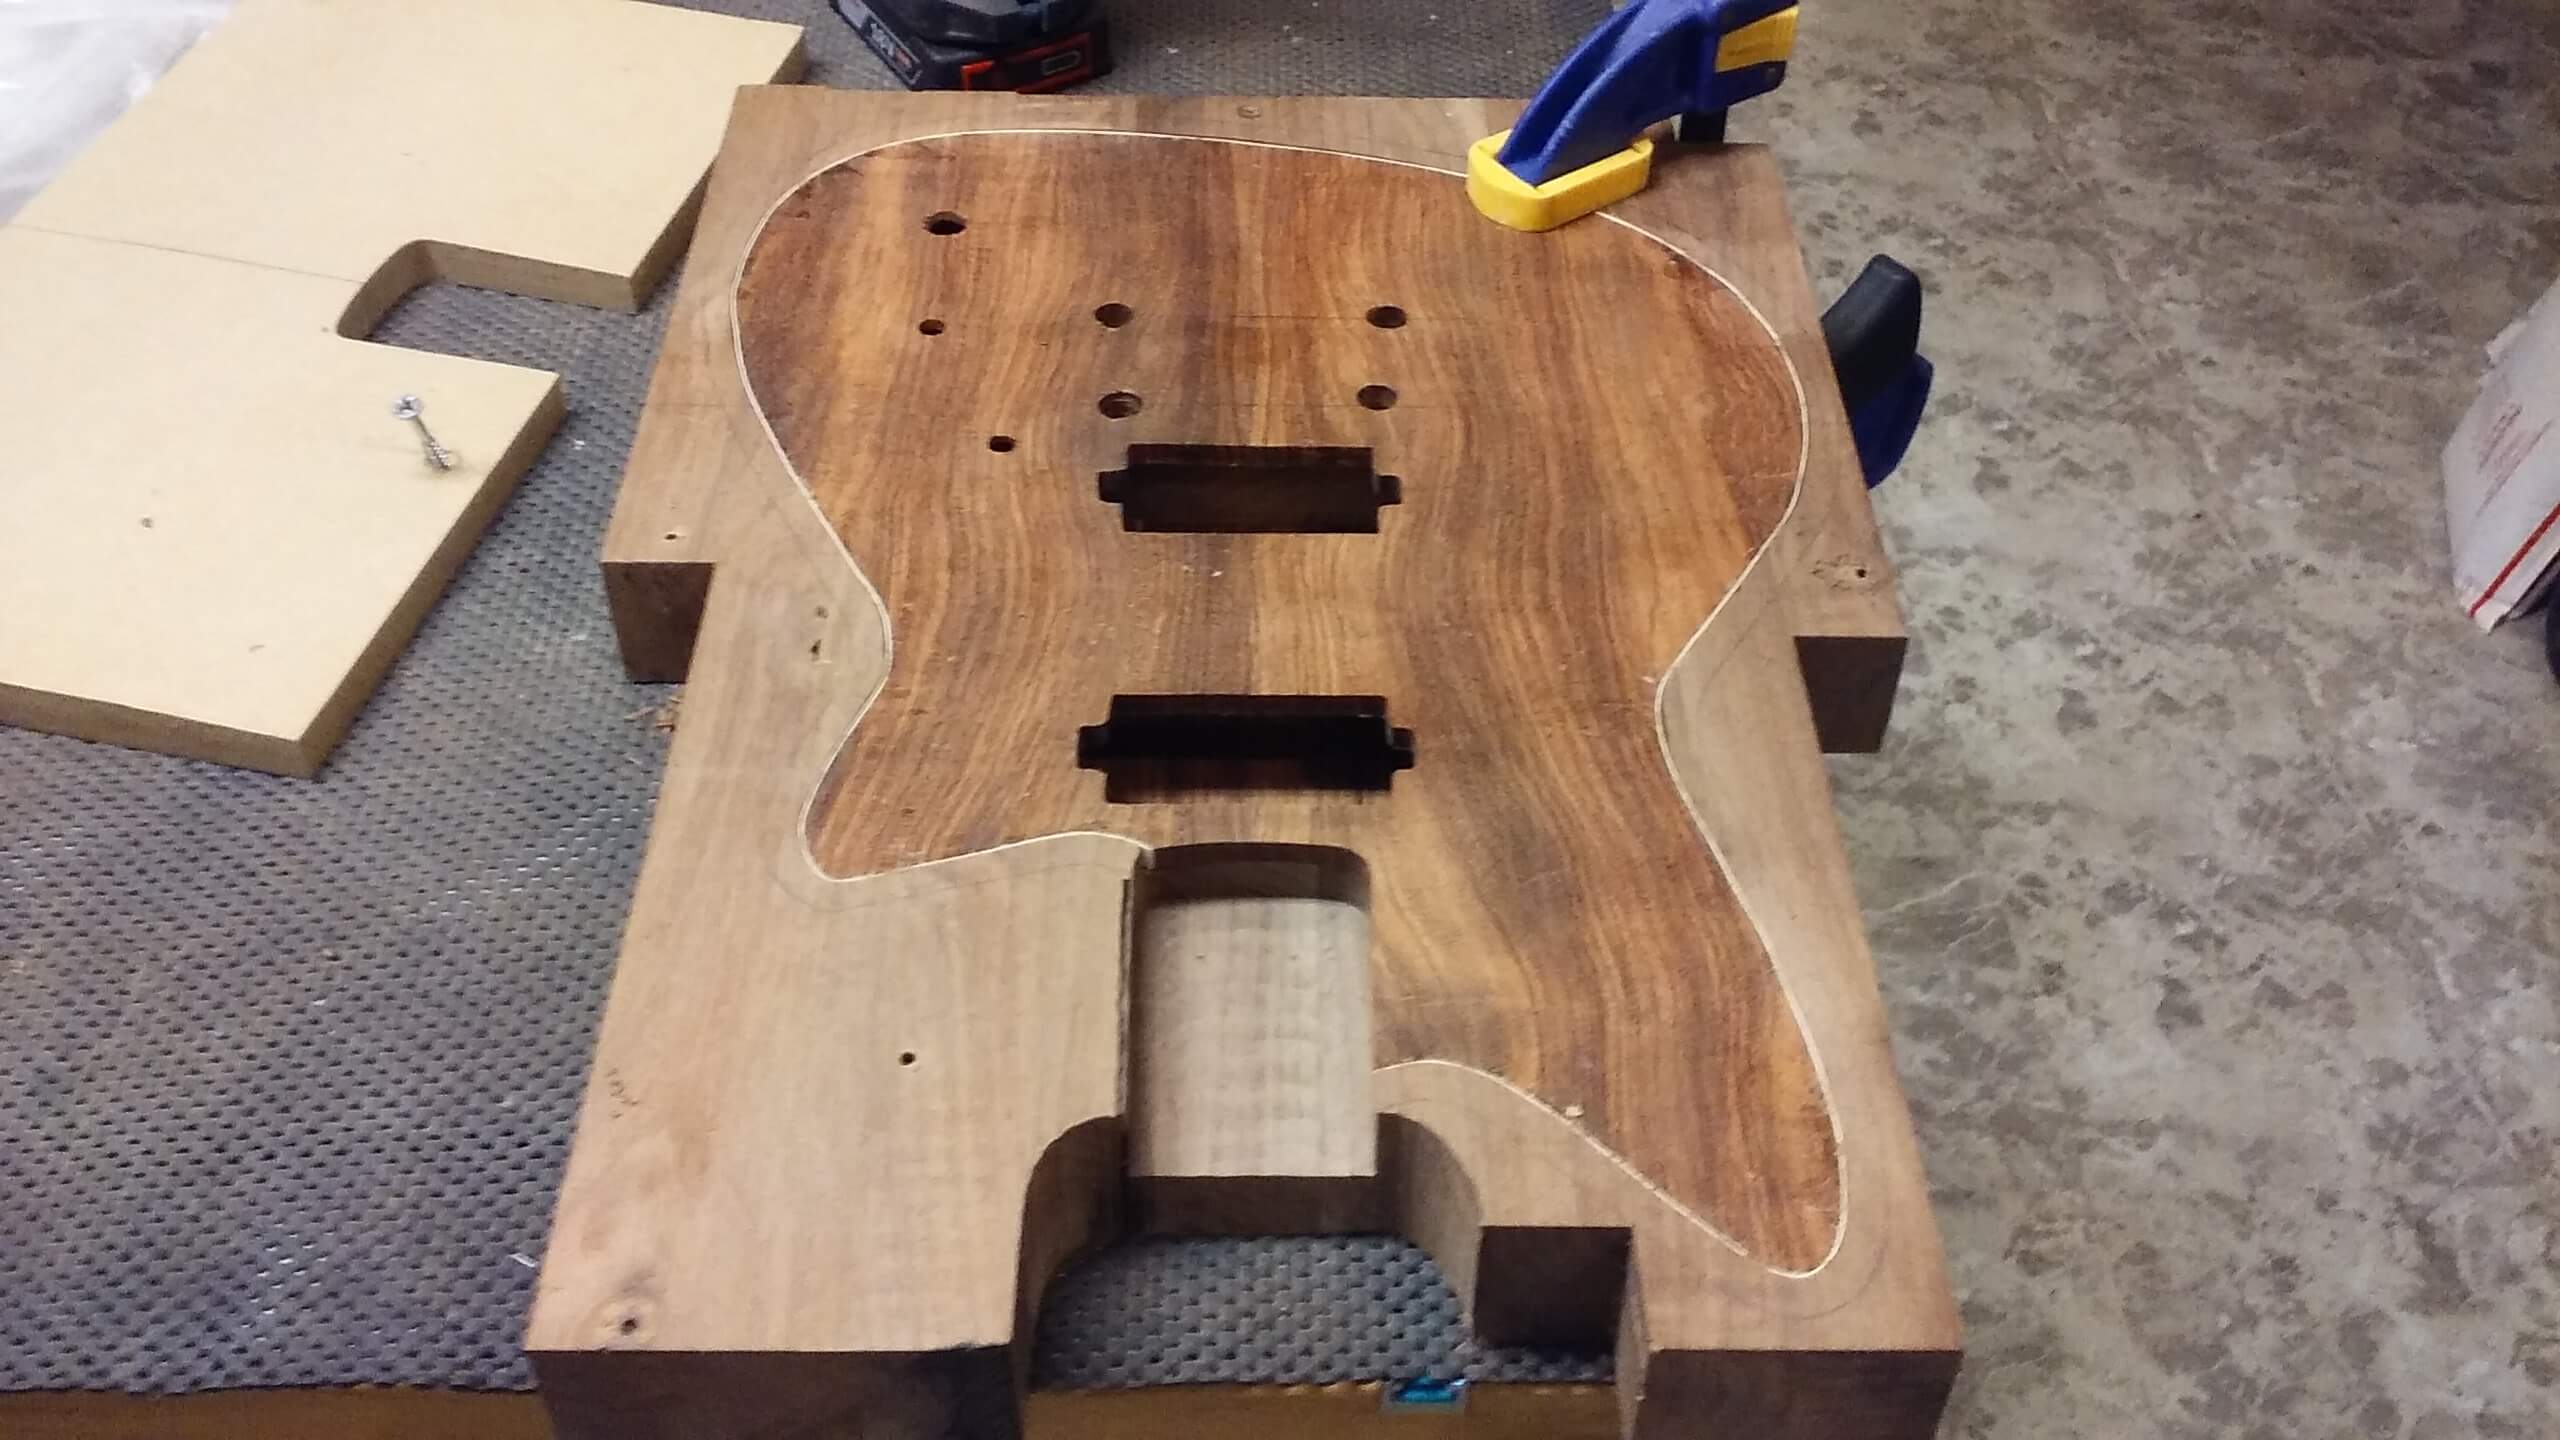
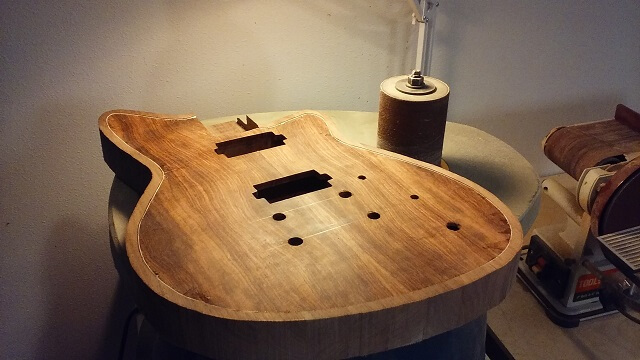
Now came the step that did the most to transform this into what looked like a bizarre woodworking project into what now looks like a guitar: using the band saw I cut the body shape out from the the blank. I stayed just outside my scribed line. I wasn't looking to make it perfect just yet, but to remove most of the scrap.

At this point many builders use their template and and flush cut router bit to do the final shaping on the body. I've done this in the past but have had too many instances of the router tearing out chunks of wood. Any more I just do the final shaping by hand on my oscillating spindle sander. I just slowly sand up to my scribed line using only my eyes as a guide. To me, the end result is indecypherable and I kill two birds with one stone by sanding the body edge smooth at the same time.
Next I spent some quality time with the orbital sander smoothing the top and bottom. There was some glue squeeze-out from the binding. The binding itself wasn't perfectly level. And there was a very slight height transition from the body edges to the top/bottom. So a little time with the sander made both faces look real good.
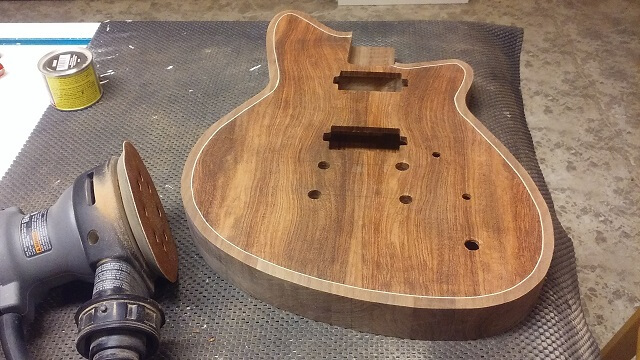
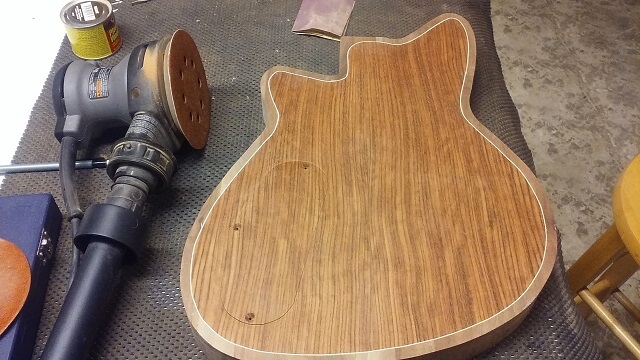
Now it was time to remove the sharp edges on the body. I used a 3/8" roundover bit in the router table and went all around the edges of the guitar on both sides.

After the edges have been rounded over, now it is time to drill the hole for the output jack. It is very important to do these last two steps in this order. Reversing the order would be catestrophic as the bearing on the router bit would fall into the output jack hole, and well, ruin your day.
By the way, some people call the hole where you plug the cord into a guitar the "input jack." It's not an input jack, it's an output jack. The signal from the guitar is output to the amplifier through this jack. If you catch anyone using the wrong term, you have my permission to smack them with a Nerf bat.
At this point there was no way around the fact that it was time for my least favorite part of building an instrument: grain filling. I'll save my rants on this topic for the other build threads where I've whined about it incessently.
More or less, grain filling is the act of filling in all the little pores in wood so that you are left with a completely smooth surface on which to spray the coat of lacquer. Grain filling is probably the part of the finishing process most responsible for making a guitar look professional, versus a guitar that looks like it was made in your basement. It's also a royal pain in the butt, but I said I wasn't going to rant.
It's OK to build a guitar in your basement. I build all of my guitars in my basement. I just don't want it to look like I built it in my basement. So I have to face the fact that I must grain fill my guitars even though I loathe the process. Wait. I said I wasn't going to rant.
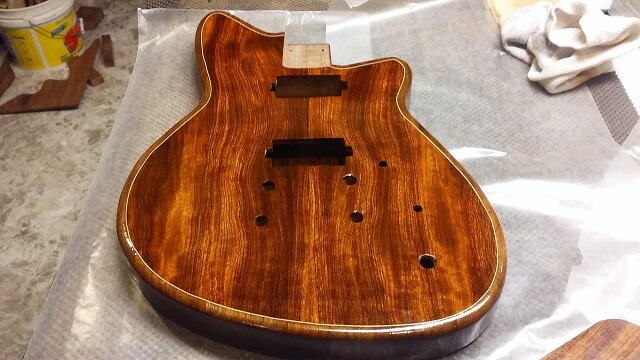
I've tried lots of methods, all of which has advantages and disadvantages. This time around I'm going to use CA glue (superglue) to fill the grain. I started by laying a base coat of shellac down on the instrument's body. This coat seals everything and will help the glue sit in the pores and fill them up instead of soak into the wood. Another great thing shellac does is brings out the rich color of the wood.
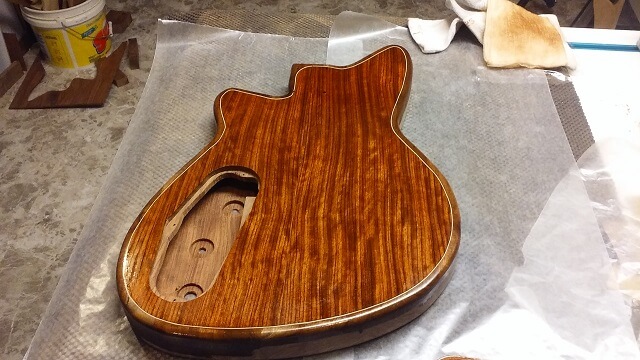
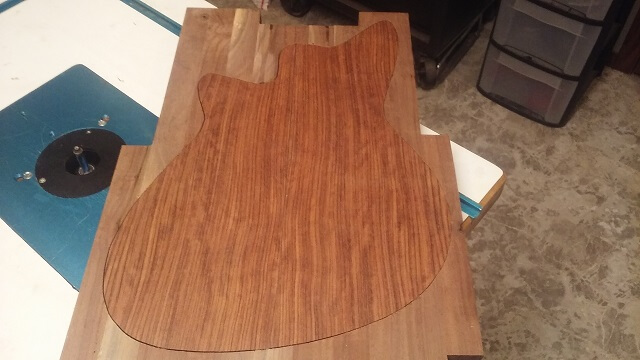
And here's the front with a coat of shellac.
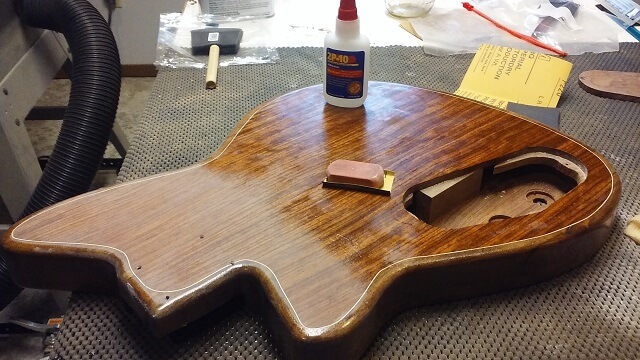
The process of grain filling with CA is to pour a small bit of medium viscoscity CA glue onto the surface of the instrument. I work in about 3" x 3" sections at a time. I use a razor blade as a form of squeegee and push the glue around until it fills in the pores in that section. Then I usually retreat from the room for a few minutes as the fumes from the CA glue start to burn my eyes and nose. Then I come back and repeat until the whole instrument is covered. Then I let everything dry for at least a day.
Once the glue has dried, I take a piece of sandpaper and start leveling the glue. It is pretty lumpy when it dries. I use a something as a sanding block (on this day it was a rubber eraser) and smooth the surface out. Great care needs to be taken not to sand too far, otherwise new pores will get opened up and we'll repeat the process eternally. To prevent sanding too fast and too far, I use a very fine grit paper in the 400 range. The downside is the paper tends to clog very quickly.
It usually takes two or three times through the whole filling/sanding process until all of the pores are completely full. At this point I'll lay on another layer of shellac to prevent any compatibility problems with my top finish, give it a final fine sanding and I'm ready to spray lacquer.
Now it's time to apply a finish and put it all together. Click here to see how it all happens.
Return To The Main Music Gallery
This page last updated on 05/04/2020