


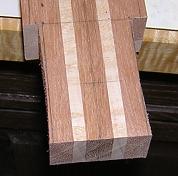
So, with all my new-found knowledge of neck building, I began the process of creating a second neck. I already had the neck blank created, albeit a slightly different version using mostly mahogany with maple veneers. The mahagony in this neck didn't match the mahogany in the body (darker) but I'm hoping that once the piece is finished it will even out, color-wise.
With this neck, I wanted to address the following issues I ran into when creating the last neck.
First, having not been through the process previously I didn't have my neck blank marked optimally. I want to be more accurate in my markings this time to better utilize the wood (i.e. so this time I don't have to scab on a piece of scrap to make the headstock long enough!)
Obviously, from the tuning machine clearance standpoint I'm going to have to re-design my headstock to give more room.
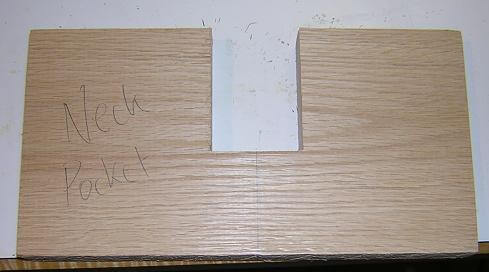
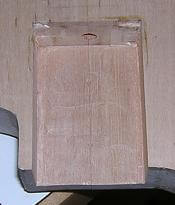
Not really a "neck" issue, but related: the neck pocket I routed in the body was not straight. Rather than cutting the new tenon to address the crooked neck pocket, I want to try and address this properly from the body end.
The order in which I created the neck pieces didn't work that well for me. I'm going to rearrange the order to try and overcome some of the obstacles I ran into with the order I used in the last neck.
Seeing as the neck to body join is the most important join on the guitar, and seeing as the join turned out pretty sloppy on the last neck, I'm going to cut the tenon early in the process this time. This will allow me to start over with (yet) another neck blank if this join goes south again.
My last neck had a headstock angle of 10 degrees. While I like the strength this gave the neck (less angle = more strength), I found it to be a little shallow. I had concerns with there not being enough string break angle to prevent buzzing over the nut (the main reason headstocks have an angle.) Also, the truss-rod adjusting hole was going to come out fairly high on the headstock. Moving this new neck's headstock angle to 12 degrees should help address both of these issues.
I really didn't like how many challenges I ran into when doing the scarf joint on the other neck. I used method "A" as demonstrated on the previous page. For this neck I'm going to try method "B" and see if it works any better. That way for future guitars I'll know which one I prefer.
Speaking of scarf joints (and I was,) I cut the last one on the table saw. Frankly, I wasn't happy with the accuracy I got on that cut, as there were too many variables to try and control. Many luthiers make this cut on the band saw, so I believe I'm going to try that the second time around, although to roughness of the bandsaw cut may mean I have to spend more sanding time. I think (hope, pray) I can get a more accurate cut using this method, as no math should be involved in determining the angle, which in all reality I was probably off when doing the last neck.
I'm going to triple-check the router guide screws before trying to cut the trussrod channel on this neck. Also, changing the order of assembly should help me avoid running into the overhanging headstock when routing this channel.
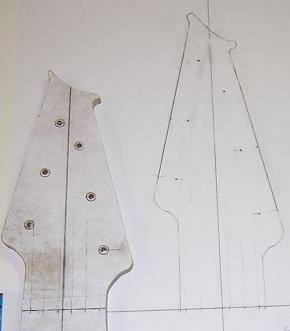
I began the rebuilding process by re-doing the headstock design. I drew the design out on paper, and increased the tuning machine spacing from 1 1/2" to 1 3/4" This should spread things out enough to give proper clearance for Sperzel tuners. Just to be sure, I grabbed my tuners and held them in place to test their placement. On a normal 3 on a side headstock where the strings break at an angle after the nut, the tuning machines don't have to be as far from each other. However, I wanted to taper my headstock to give a straight string pull over the nut (better tuning stability) so this is why I ran into clearance problems with the first headstock. More or less, I kept the original shape of the headstock, but stretched it by about an inch and a half. In the following picture, the original headstock design is on the left, and the new one is on the right.
Now I completely marked my neck blank with all of the cuts I would be making. I decided to mark them all ahead of time, rather than marking each step as I go like I did with the last neck. This (hopefully) would allow me to take into consideration how all the different design elements interact, rather than having to react to them at each step. I took a picture of the marked neck blank, but it's difficult to see the pencil markings on the dark wood. If I posted the picture, it would actually just be a side view of the neck blank, and you have better things to do than look at that. Actually, at times it's difficult to see the pencil marks in the dark wood when you're staring at the actual work piece!
As mentioned above, I wanted to start by cutting the tenon on the blank right away, so that I could make sure that this join is exactly the way I want it. The first step in this process doesn't deal with the neck, but in straightening out the crooked neck pocket I had previously made (remember, in real life I'm not doing these steps concurrently, so even though you haven't gotten to the body page I've got a large portion of the body complete at this point.)
The original shoulders of the neck pocket were 3/8" wide. By making a new jig that allowed 1/4" shoulders, I could widen the neck pocket enough to straighten it out but still have enough wood around the pocket to make the joint strong. My previous jig was cut using my scroll saw. Obviously, by using that method I was able to create a jig that looked straight to the eye, but wasn't when measured with a caliper. For the new jig, I decided to cut it at the table saw. I clamped the jig on end to the miter fence and ran the blade through at the 2 1/2" height mark. I could cut each side of the pocket, then nibble away the scrap between the two points. I raised up the blade and used my square to ensure it was exactly 90 degrees, then cut the jig. This gave me a new neck pocket jig with perfectly square sides. I also made sure to mark the centerline accurately so that when I align it on the body the pocket will not be crooked.
With the jig ready, I mounted it on my body with double-stick tape, and used the pattern cutting bit to plow out the new neck pocket. If you look closely in the picture prior to routing, you can see the slightly crooked shoulder that was giving me fits with the last neck.
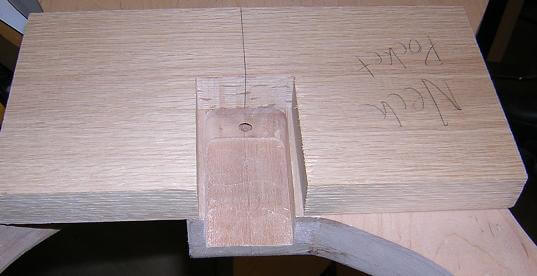
My old neck pocket had rounded sides. I discovered on the last neck that it was difficult to accurately round off the sides on a tenon with a 2 degree angle, so I decided instead to square up the mortise on the guitar blank. Quick, easy work with a sharp chisel. For some reason in the picture it looks like I took chunks out of the top corners of the mortise. Just to clarify that I'm not a complete monkey with a chisel (just a partial one) there isn't any actual chipout on the real workpiece.
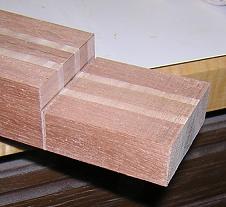
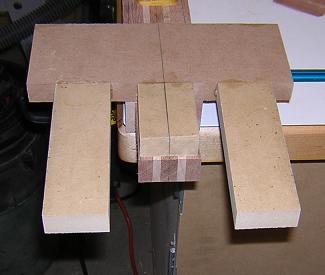
Now that I had the pocket straight, I could move on to create a new neck tenon jig. I nibbled away on a piece of MDF until I had one that fit precisely in the pocket. This would be the template for the tenon. To allow the router some support in which to ride, I used a pocket screw to attach this template to a larger piece of MDF, then created two "wings" on either side to aid in supporting the router. The center tongue of the jig actually contains the neck pattern. The jig can be seen a few steps down when I attached it to rout the tenon.
With the jig created, I began to work on the neck tenon. I started by cutting the shoulders on either side of the tenon. On the last neck I had used my dovetail saw, and discovered that my accuracy with a hand saw isn't that good. I decided to use the band saw this time. By tilting the table 2 degrees in either direction, and using the miter gauge on the band saw, I was able to cut each shoulder.
Then I returned the band saw table to flat, tilted my miter gauge to 2 degrees and cut the bottom shoulder of the neck tenon, to join the two shoulders cut in the side.
Next, I used the bandsaw and cut the bottom of the tenon. This also had a 2 degree slope to it, with the neck side of the tenon being 7/8" thick (the depth of the neck pocket.)
I would use the jig I built to do the final width and length dimensions of the tenon, but to save wear and tear on the router I sawed off some of the waste.
Then I mounted the jig and routed the tenon. Here you can see the odd looking jig I was talking about above.
The final step in creating the tenon was to cut the end of it at a 2 degree angle. Again, I went back to the band saw and miter gauge swung two degrees off of perpendicular. This cut was so minor that I didn't even include a picture.
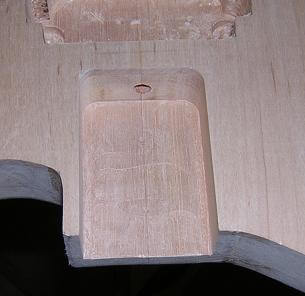
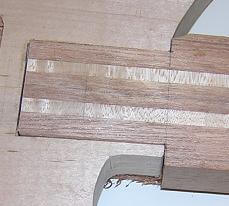
And what resulted was a much better fitting neck tenon than the last time. No filler will be needed here; once the glue is added to the joint is should be good and tight. The shoulders are much closer and the minor gaps are small enough to be filled by the glue when attaching the tenon. Whew! I'm glad I got one of the difficult parts out of the way!
Now, I wanted to move on to the other tricky joint on the neck: the scarf joint. Actually, this joint is probably trickier to make than the body-join tenon, but slightly less critical. I say slightly because while this joint doesn't have near the effect on tone if it's sloppy, it does have quite the effect on the sturdiness of the headstock if the guitar falls over. The headstock is the most common place for a neck to break, so you want to make sure this area is as strong as possible.
As mentioned above, I am trying a different approach with this neck versus what I did with the other neck. I already had all of my cut lines laid out from when I first was marking the neck above, so I just had to follow the lines. I started by bandsawing in along the top of the blank, until I reached my scarf joint line. This piece, once removed, will become the top portion of the headstock after it's rotated and glued on. I thought it would be easier to make this cut prior to the main scarf joint cut, as I would have a lot more wood to hold on to, and wouldn't be forced to get my hands uncomfortably close to the blade. Although Phil Keaggy can play guitar with only four fingers on one hand, I don't want to prove that I have that ability as well.

Along with that cut, I wanted a good flat area at the bottom of the angle where I could graft on the top piece. I could use a band saw to make that cut as well, but it would be much rougher. Instead, I just did a stop cut on the table saw, which should give me a nice flat area to glue. After I snapped this picture, I took a handsaw and removed the waste at the bottom.
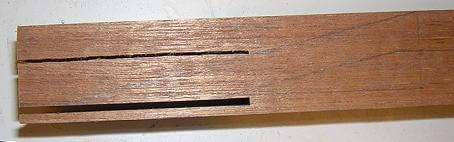
It was now time to make the main scarf joint cut. I was a little nervous about this cut, as it had to be pretty accurate, and my bandsaw skills are still in the infant stage. I went slow and tried to follow the scarf line the best I could. Once the cut was complete, I was happy to see that it was much more accurate than the one I did on the last neck, albeit rougher because I used the band saw instead of the table saw.
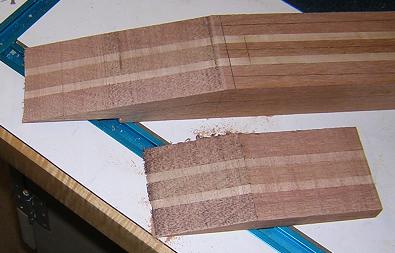
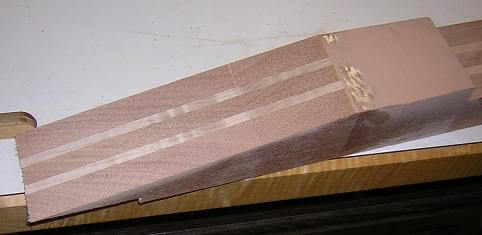
On the last neck, I smoothed the scarf joint angle by hand-rubbing it on sandpaper on my work table. This worked, but took a lot of effort. Seeing as the cut on this neck was even rougher, I had no interest in repeating that process. I had picked up a cheap belt/disk sander on sale, so I decided it was time to give it an inaugural run. You can (barely) see in the photo how I used clear packing tape to temporarily join the two pieces that will make up the scarf joint. I can then use the sander to sand the cut smooth and (hopefully) wind up with the exact same angle across both pieces.
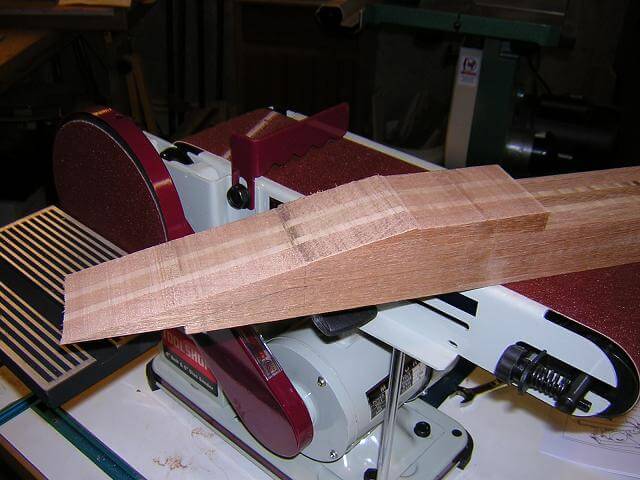
I'm happy to report that this worked very well, and was way easier than the manual method I used on the last neck. In addition, because by hand sanding I would repeatedly pick up the neck and set it down, the chance for error was much greater. With the belt sander I just laid the piece down on the belt, held it flat across the joint, and let the sander do the work. It took about 2 minutes, but the resulting joint is very smooth and accurate. This sander has already paid for itself!
The final headstock thickness was going to be 3/8" plus a 1/8" maple veneer for a final thickness of 1/2".
At this point in time I made the veneer piece, which you can read about here.
If you missed how we got to this point, you can go back to the first attempt at building the neck.
Return To The Main Music Gallery
This page last updated on 06/28/2018