


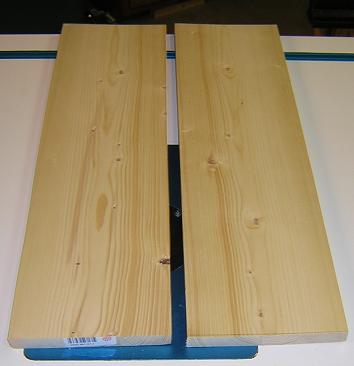
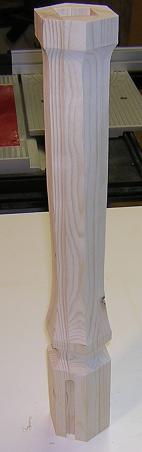
Now we're at the part of the project that frankly, I was most worried about. I'd never done a six sided column before, never mind one that included compound cuts to define a profile. The column, though, is one of the things that drew my eye to the project in the first place. Getting a nearly 2.5" diameter column out of and eight foot 1x6, and still having enough material left over for the rest of the table would prove to be a challenge.
Unfortunately, because I'm working with a limited amount of stock, my column won't be as fancy as the one in Woodsmith. First off, their column tapers to a much slimmer profile in the middle, by cutting away up to 5/8" of wood on each face of the column. Because my stock isn't as thick, I can't go deeper than 1/4" before I risk cutting through to the inside. Second, they miter and glue in some molding strips. I don't have enough stock to make these strips.
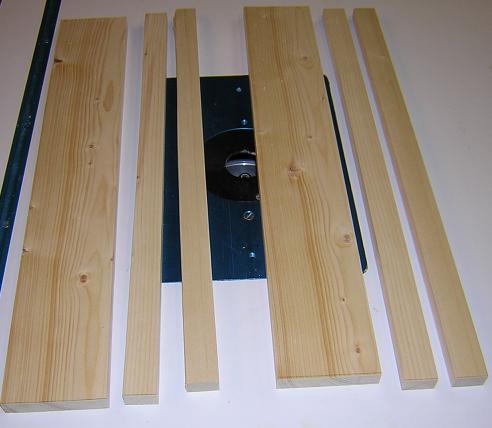
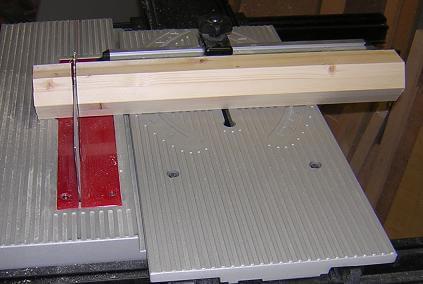
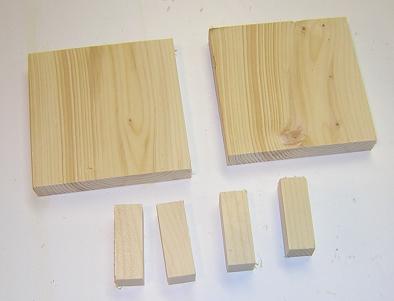
Nevertheless, I shall forge on unhindered! I began by cutting two piece of my stock that I will laminate into my column.
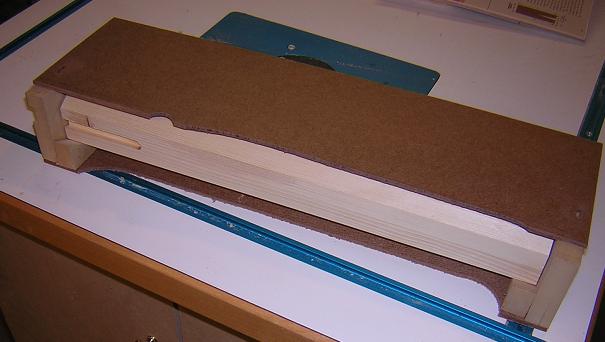
To get the required thickness, I was going to have to stack the stock 4 layers high. This meant that I had to trim each piece into three pieces in order to get my six pieces for the blank.
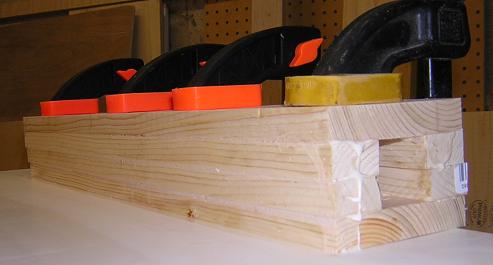
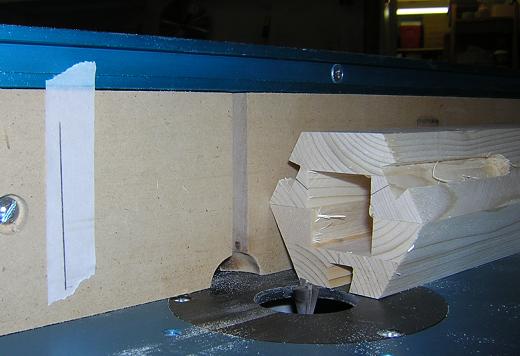
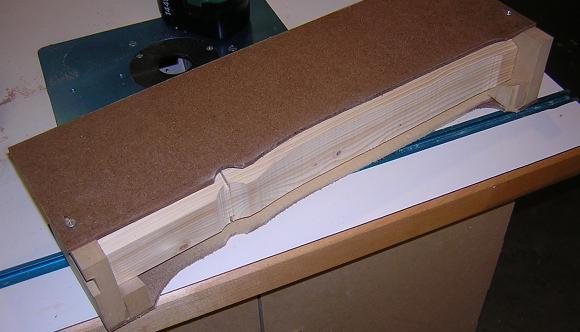
In the next photo, you can better see how the six pieces went together to form a square blank. This was a challenging glue-up, as everything wanted to slide out of place. In retrospect, I probably should have done this step in smaller sub-glue ups to make things easier. I didn't think about it, though, until I had glue on all the pieces and was trying to muscle the clamps in place. In any event, I finally got everything aligned "good enough".
After the glue had dried, I had to turn my square column into a hexagon. I did this at the table saw, setting the blade to 30 degrees and creeping up on the width until I had it right. To get the tilt correct, I had to move the fence over to the left side of the blade. Because the back side of my fence isn't smooth, I slipped my auxilary fence over the top to keep from having the workpiece "fall" into a hole in the fence.
With the blank now a hexagon, I trimmed both sides flush, with the second cut bringing it to final length.
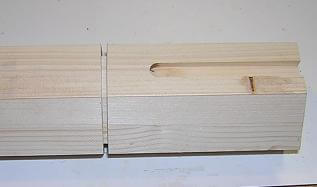
The legs of the table will be held in place by sliding dovetails. For dovetail joints, these are pretty straightforward. I chucked a 1/4" dovetail bit in the router and set it to the proper depth. Then I made a mark on my fence from the far side of the bit as a stop line. This would allow me to stop the workpiece at the proper place to ensure the correct length of the dovetail slot. After that, I moved the fence over to center the bit in the column.
With everything set up, I simply cut each dovetail slot on the appropriate side of the column.
Once the dovetail sockets were done, it was time to rout the pins on the feet. It is very important at this point to not change the height of the router bit! You want it at exactly the same height as that which cut the dovetail sockets.
To rout the pins, I moved the fence over the bit so just a little of the cutting edge was showing. I put a featherboard in place to keep the stock tight against the fence, then I ran the legs through on end. I had to run them in both directions in order to cut both sides of the dovetail pins. Then I test fit the dovetail in the socket on the column. Because I started intentionally shallow, my first attempts were obviously too tight to go in. I then nudged the fence out a hair to expose more of the bit, then routed all the pieces again.
I repeated this process until the pins were cut small enough to give a good fit. I wanted to sneak up on the setting in order to prevent the pins from accidentally being routed too loose.
After all the pins had been routed, I did a little fine tuning with the chisel until everything fit together well.
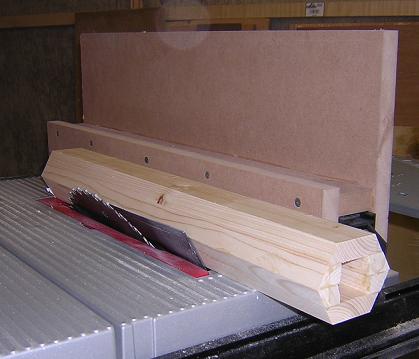
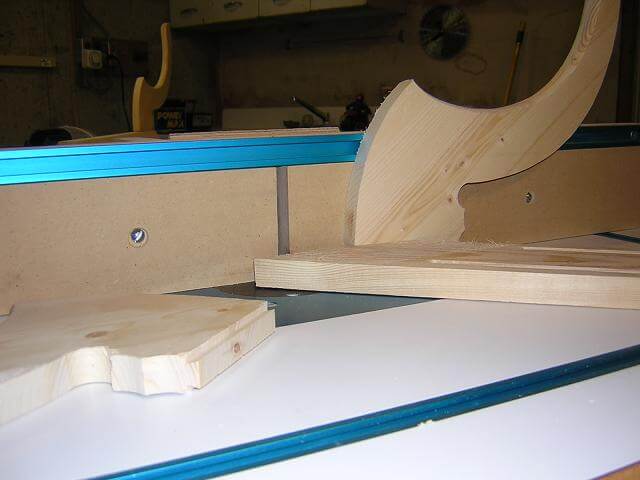
Now comes the fun part: cutting the profile in the column. Because this is a hex column, I needed a way to hold the piece on edge while cutting each face. In order to do that, I had to build a jig.
I didn't spend a lot of time on this jig, as it's sized and applicable to this project only. Once it was used to cut this column, it would be discarded as it really had no other use. This is unfortunate, as even though I kept the jig simple, it still took about an hour and a half to make, which was about three times as long as it took to actually make the cuts in the column!
The pictures below hopefully explain how the jig works. The column will sit inside the jig, between the two end pieces. There are wedge shaped pieces just inside each end that will hold the column in the proper orientation.
The top piece has the profile cut out that I am going to use. This will get screwed onto the top of the jig, and will hold the piece in place. The profile gives me a guide line to follow on the band saw.

The lower portion of the column was to have a fairly sharp profile cut. To make this easier, I made a relief cut on the table saw around the column. This way as I cut through the column, the pieces could break free and not bind up the band saw blade.
I just had to be careful not to accidentally cut the top profile while making each cut. The trick was to follow the template as close as I could without cutting into it. I cut the first side..
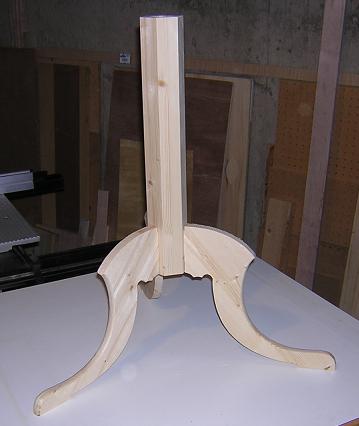
The unscrewed the top of the jig, rotated the column and screwed the top back in place. I did this for each of the six sides. When I was done, I had a rough profiled column.
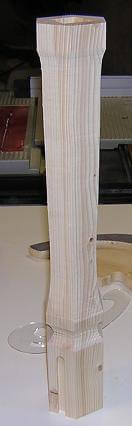
Now I had to sand out the bandsaw scratches. I took the top off my jig and used it to hold the column while I smoothed out the cuts on my oscilating spindle sander.

After the spindle sanding was done, it took a little more hand sanding to tweak the profile and make it look good.
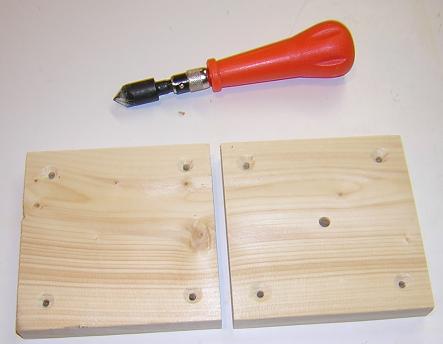
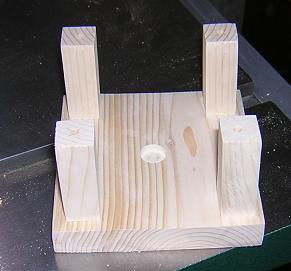
We need a way for the top to sit on the column, that allows it to both rotate and tilt. This is traditionally done by something called a "birdcage". More or less, it is a two part contraption. The bottom part bolts to the column and allows the rotation. The top part is then fastened to the top of the "cage" and holds the tilting and locking mechanisms. I took some of the (now dwindling) pieces of the 2x6 and cut them to size.
I selected a piece to be the bottom of the birdcage, and drilled and countersunk a hole in the center. I made sure to drill the hole large enough so that it wouldn't bind on the screw in order to allow the top to rotate freely.

Next, I drilled four holes in the birdcage top and bottom for the screws that would attach the posts. These had to be screwed in place rather than glued, as the birdcage has to be disassembled to install/remove the top.
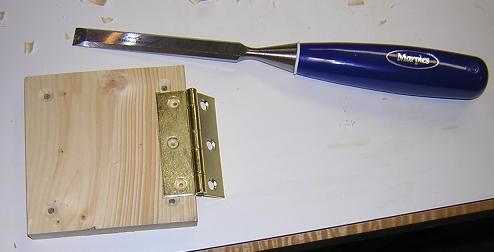
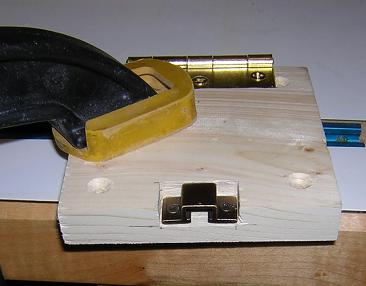
The top of the table will be attached with a hinge in order to allow the table to tilt. The top of the birdcage needs a mortise for the hinge to sit in. When doing a single mortise, or in small pieces like this, I find it just as easy to cut it by hand with a chisel, rather than getting the router out.
To keep the table top from tilting when we don't want it to, a sliding lock will be installed. The top of the birdcage needs a pocket cut where the catch will sit. I did this with a chisel as well.
At this point, the birdcage columns can be screwed to the bottom of the birdcage assembly. The top won't get screwed in place until we assemble the table.
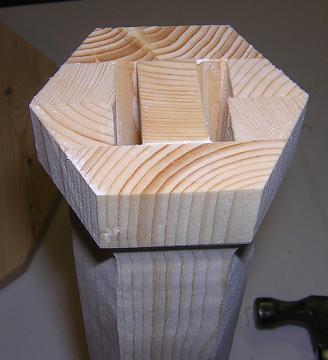
Because the column is hollow, a place is needed to attach the birdcage. A piece of stock was cut so that it would be a snug fit inside the column.
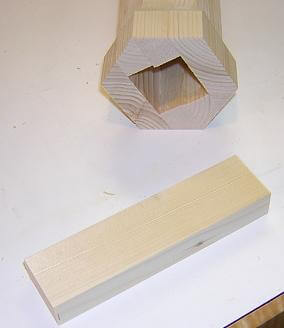
Then the stock was simply glued in place. The fit was snug enough that no clamping was needed. After the glue dried, a hole was drilled for the screw to attach the birdcage.
With the column done, we need something to place on it. Let's build the top.
Or you can return to the page where we built the feet.
Return To The Main Wood Gallery
This page last updated on 06/28/2018