


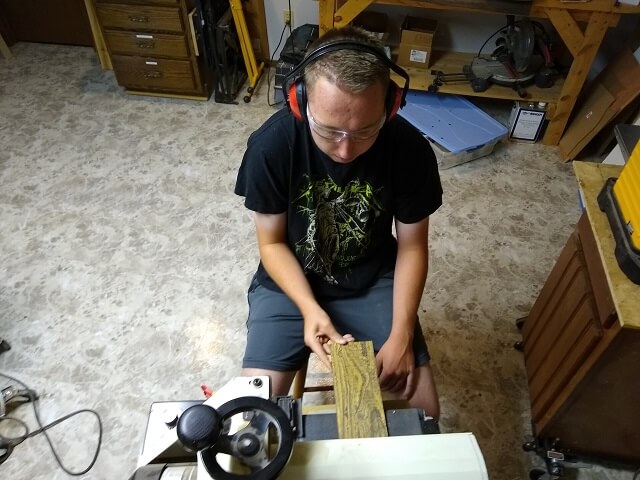
The body on a neck-through instrument isn't a single piece like most other guitars, but instead consists of two "wings" that get glued to the neck section that runs the whole length of the instrument. As a result, the construction method is a bit different than on other instruments. In the case of this bass, it started with a nice piece of Ambrosia Maple. Ambrosia Maple is a type of maple that had been infested with the Ambrosia Beetle. This beetle bores into the tree, and carries a fungus that then penetrates the tree sap and causes streaks of discoloration in the wood. This discoloration, while technically a defect, is also considered visually pleasing by many people. The board that the Tundra Boy selected also featured a nice "flame", which is a type of figuring that sometimes happens in wood.
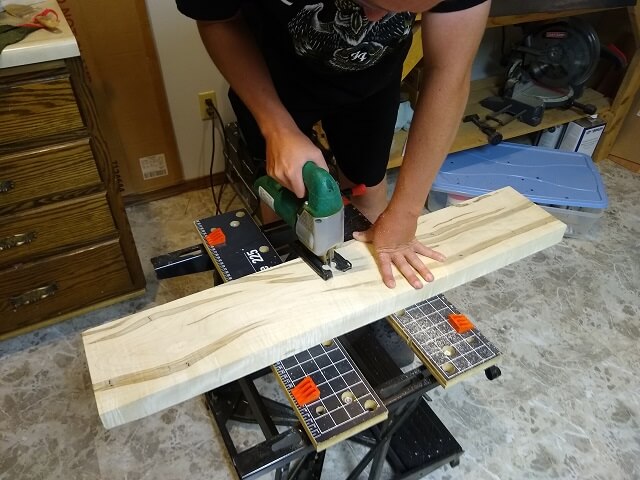
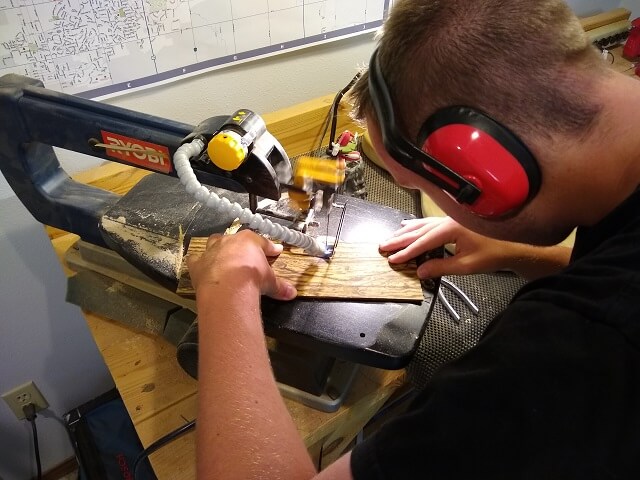
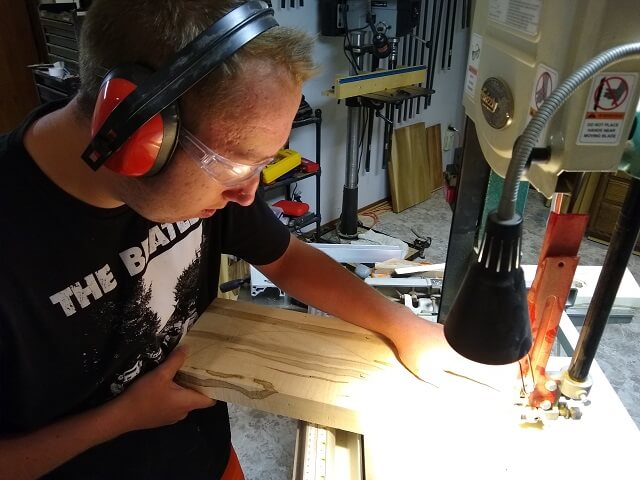
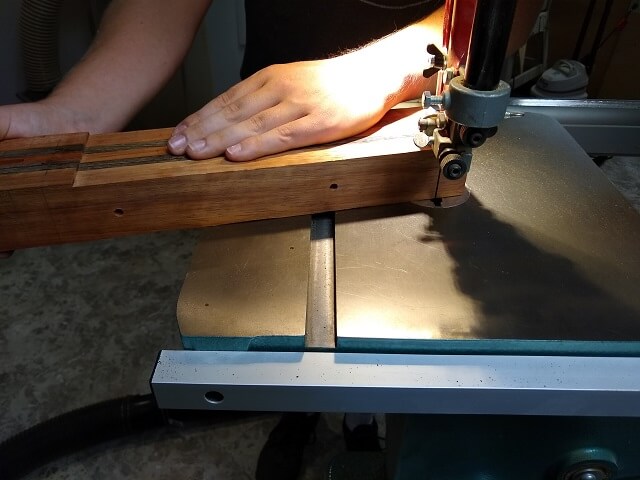
The Tundra Boy traced out his wing shapes on the board, positioning them to best highlight the ambrosia streaks. Then he started the construction process by cutting the board in two. Because this cut wasn't a right angle (due to where he drew the body shape outlines,) the table saw wasn't an option. The band saw was also eliminated as the board was too long to fit perpendicularly through the tool. Because this wasn't an unusually precise cut that had to be made, he grabbed the jigsaw and used that method.
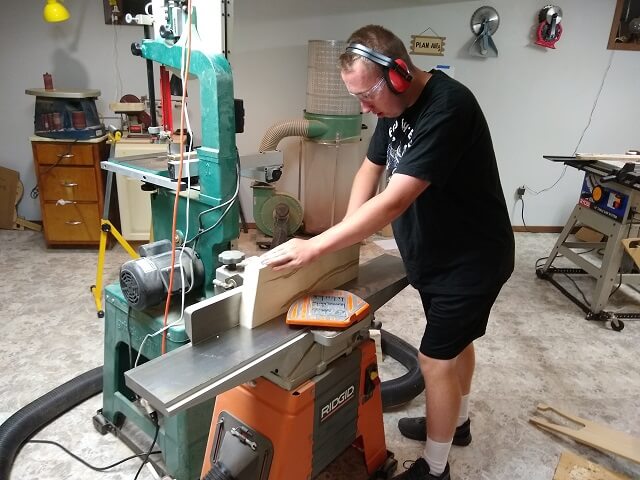
The sides of the body wings that are to be glued to the neck need to be straight, so the Tundra Boy ran those edges through the jointer.
The material for the body wings came 1.9" thick. A normal guitar body is around 1.75" thick, but for purposes of weight reduction the Tundra Boy wanted the body wings on this bass to be 1.625" thick. To remove more than 1/4" of material quickly, it was decided to use the planer. He actually wanted the bass a little thinner at 1.5" thick, but we calculated the clearance for the push-pull pots he is using for the controls and determined that 1.625" is about as thin as he could go.
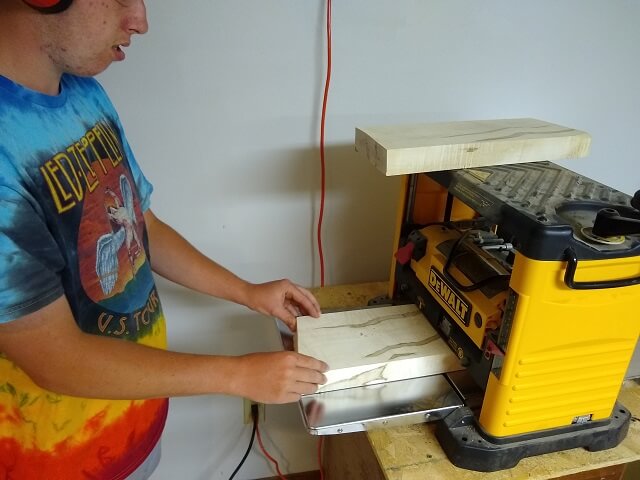
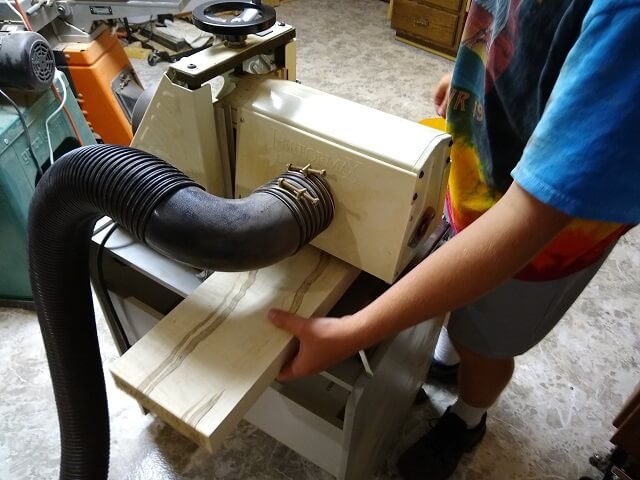
After the first run through the planer, it was discovered that the maple was tearing out rather badly. This isn't unusual with figured maple, as the same thing that makes the grain interesting is also what causes the planer blades to catch and rip out little chunks of wood. So rather than dealing with this problem, the Tundra Boy switched to the drum sander to sand the wings to the thinner size. It takes a lot longer, but it removes the risk of tearing out the wood.
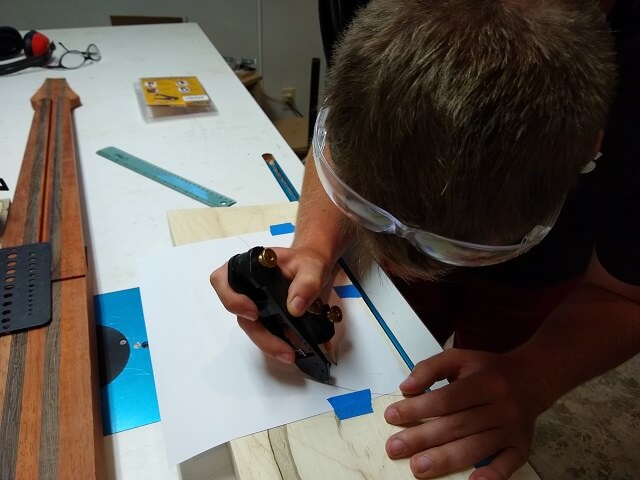
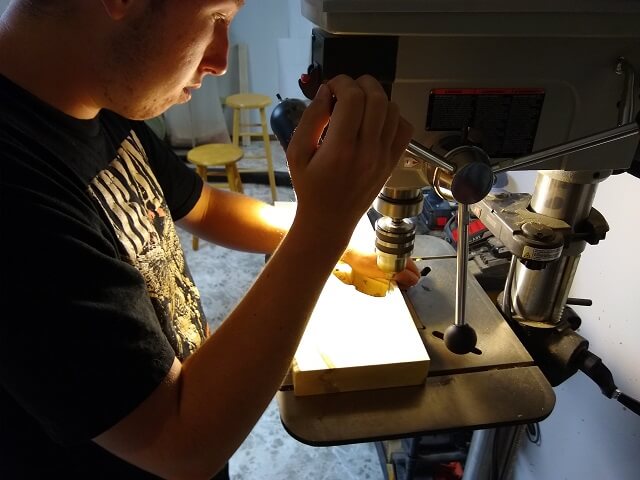
After a bit of spirited debate, the Tundra Boy agreed with my thoughts that it would be easier to build the control cavity before the body wings were cut out, and certainly before they were glued to the neck blank. To begin this process, the body shape was traced onto the wing material and the location of the controls was marked. Then, the holes for the controls were drilled all the way through the body material. This would allow the location of the controls to be easily visible from the back side of the body, and the proper sized control cavity could then be designed and located around these holes.
A piece of paper was taped to the back side of the body wing. The Tundra Boy then proceeded to design a control cavity
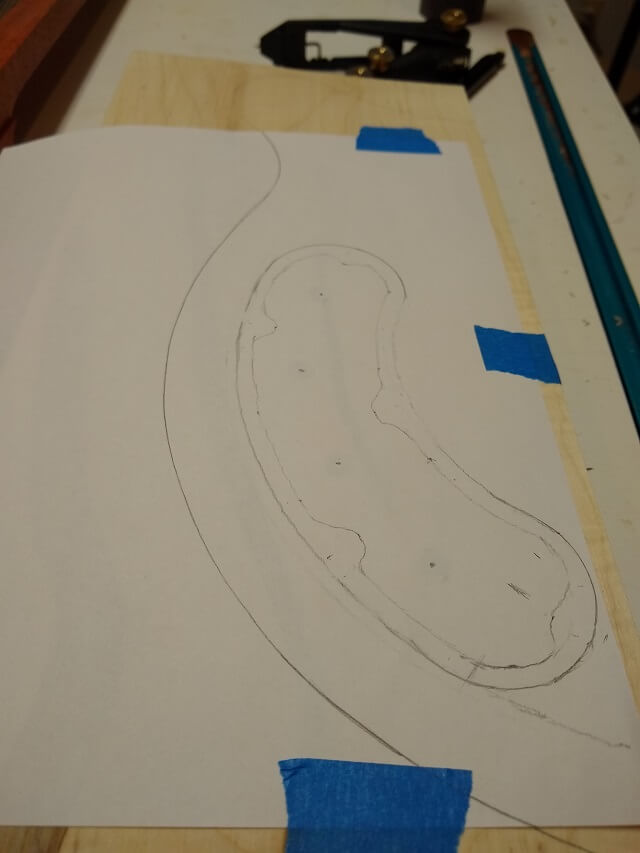
Here is the control cavity design with which he came up. Yes, I went to great lengths not to end that sentence with a preposition.
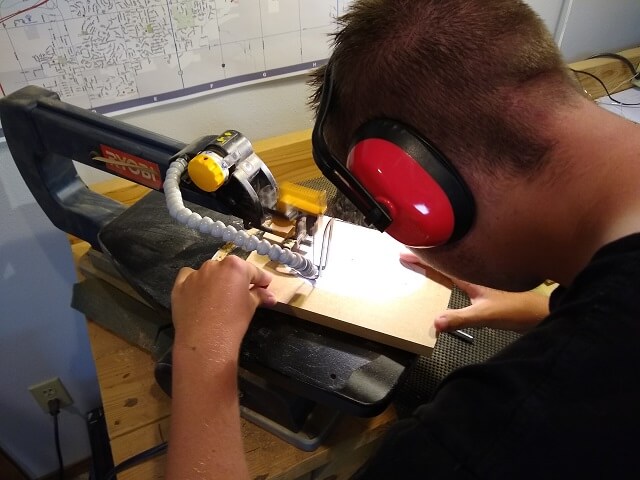
This "plan" was then glued to a piece of MDF and the Tundra Boy cut out a template using the scroll saw. This template had two layers. One for the inner deeper section where the electronics will reside, and another layer not as deep that will hold the cavity cover.
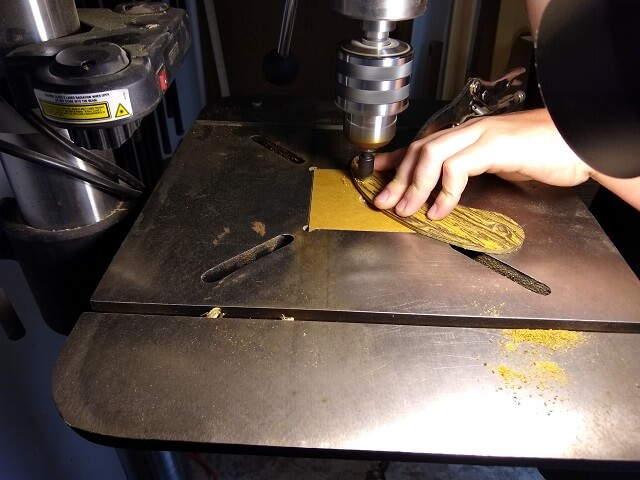
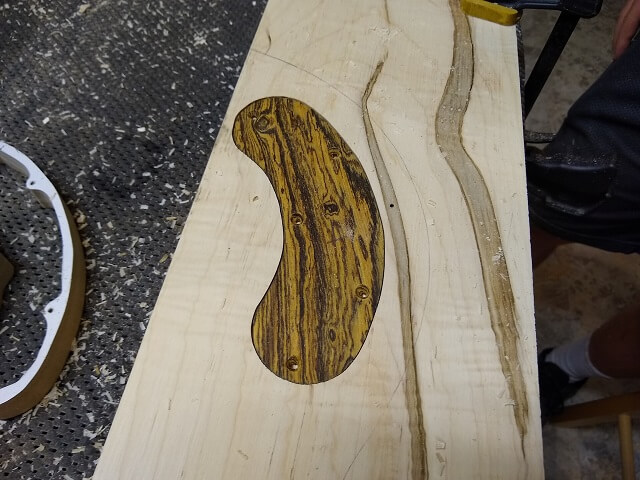
Ideally, the Tundra Boy wanted a perfectly matching control cavity cover cut from the maple removed to make the cavity. Unfortunately, this pretty much impossible to do on solid (non-laminated) pieces of wood. He (very) briefly thought about using some scrap maple to create the cavity, but quickly came to the conclusion that it would always bother him that they didn't match. I suggested black plastic, as many, many instruments use that material for their cavity cover. He didn't want plastic on his guitar. Ultimately, he decided to go the contrasting route and use the scrap Bocote from his fretboard to create the cover. He started by sanding the cover to 1/8" thick at the drum sander.
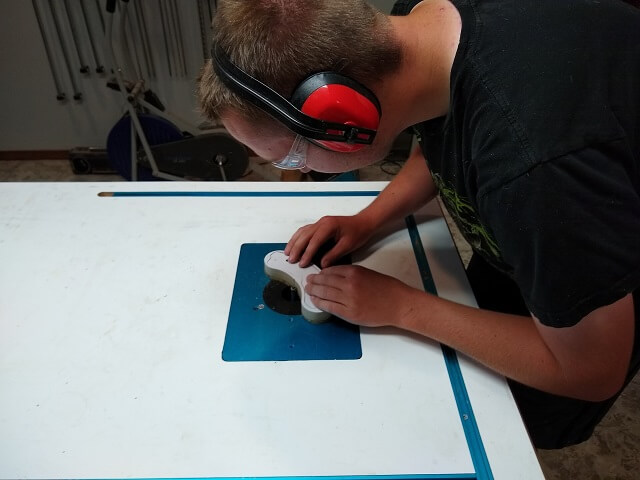
The cover would be flush routed to size using his template, but he removed the excess wood at the scroll saw.
The Bocote was taped to the template and he routed the cover to final shape at the router table. One has to be very careful when doing this, as taking more than a hair of material off at a pass can cause the router to grab the piece on the end grain, at best taking a chunk out of the wood and at worst taking a chunk out of the fingers. The Tundra Boy and I agree that this operation is one of our least favorite. Eventually I would like to get a "robo-sander" that does the same thing as a flush cutting bit at the router table, only does it with sanding drums on the drill press. This would eliminate the danger of using the router table in this fashion.
While the Bocote was still attached to the template, the holes for the mounting screws were drilled using the holes in the template as a guide.
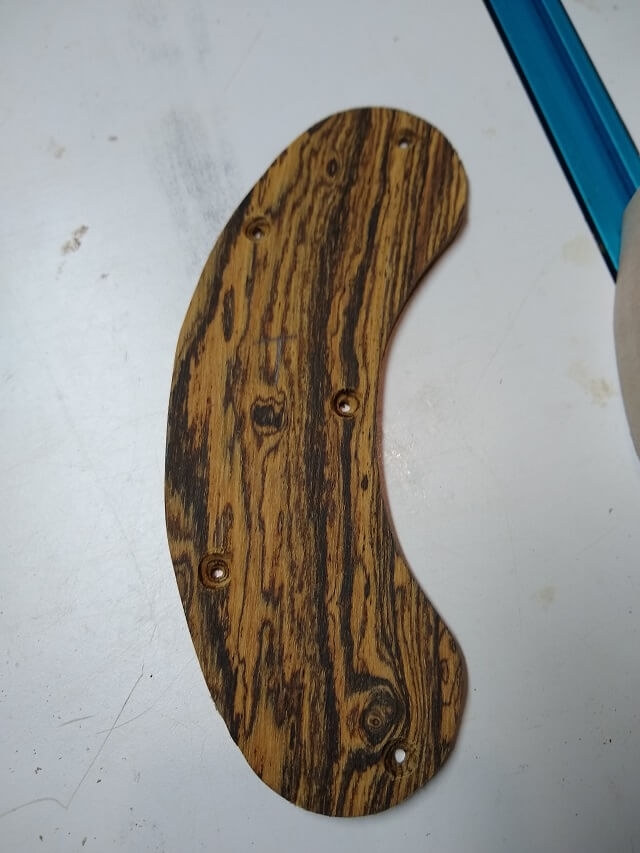
With the template removed the screw holes were then counter-sunk so that they would look good when the cover was attached.
Here is the completed control cavity cover.
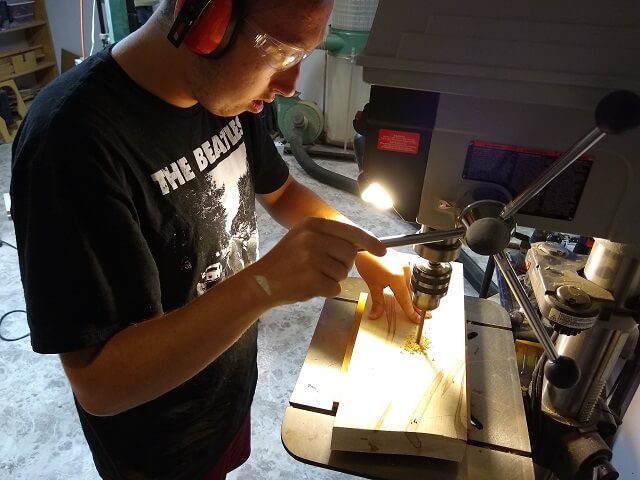
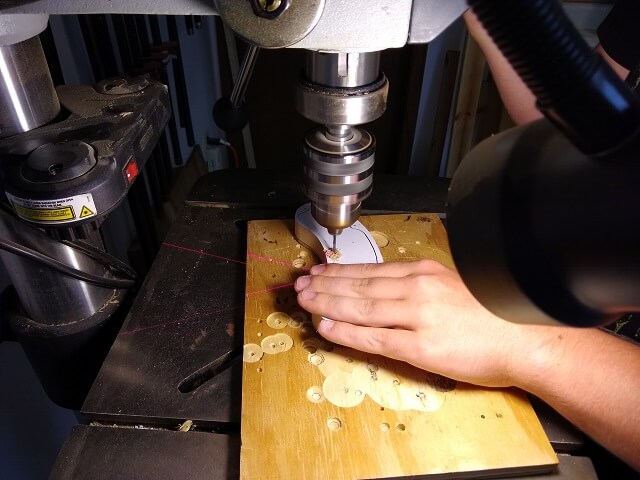
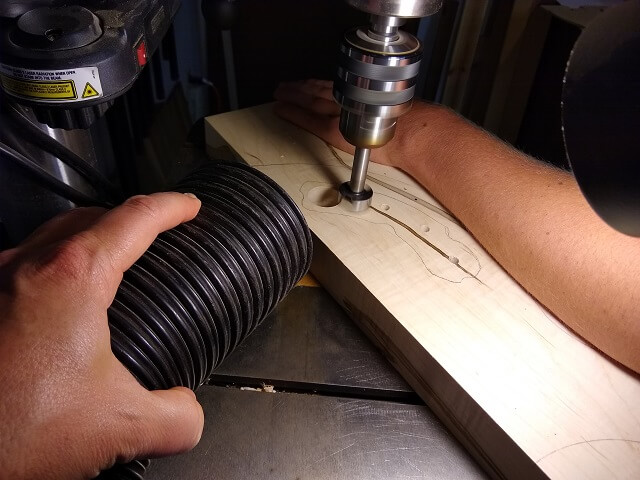
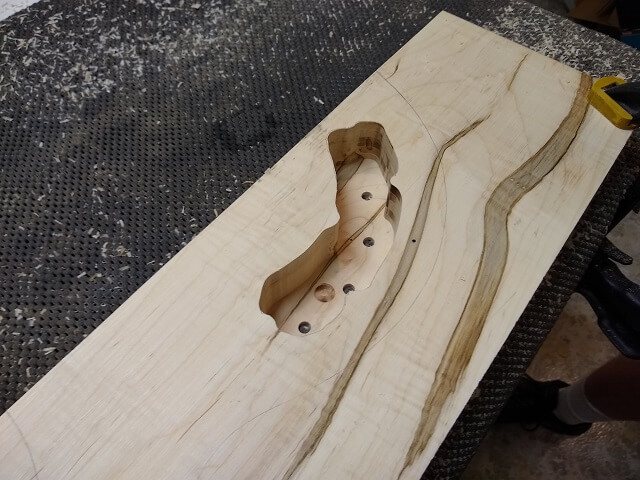
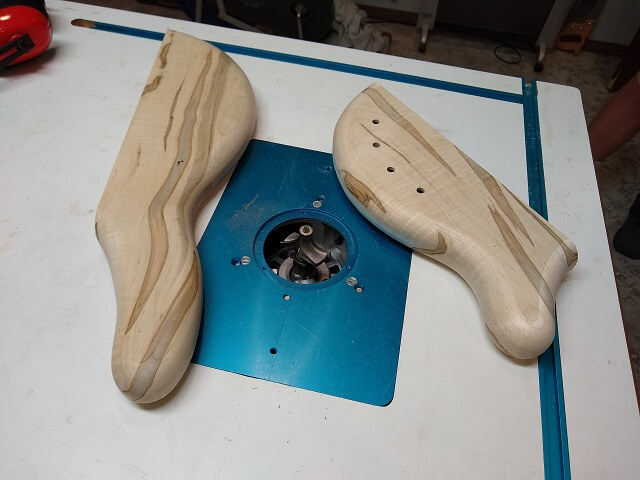
Now it was time to create the control cavity itself in the body wings. As usual, the bulk of the wood was removed using the drill press. This saves wear and tear on the router bit, and also doesn't fling sawdust everywhere. As the Tundra Boy drilled, I was manning the hose for the dust collector to suck up the wood chips.
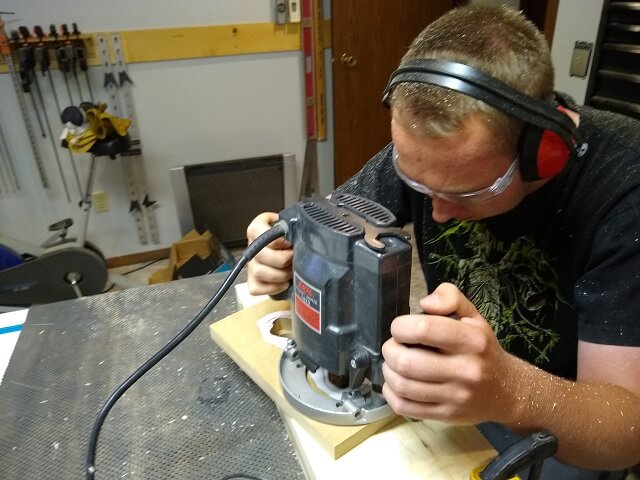
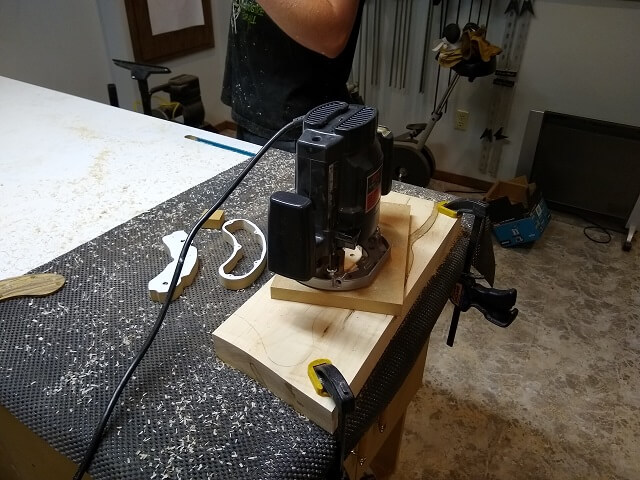
The template was attached to the body wing and the control cavity was routed to final shape. This took a while and covered the Tundra Boy in lots of sawdust. The wood chips have nowhere to go but straight up, which also happens to be the same place the Tundra Boy's face was usually located. When routing a deep cavity like this, visibility becomes difficult so there aren't very many places to look in order to see what's going on.
The router ran out of plunge depth before the full cavity depth was reached. So for the final pass the template was removed and the router bearing just ran along the already routed walls of the control cavity. Here is the inner portion of the control cavity after routing was complete.
The cover layer of the template was removed, and the template was taped back in place on the body wing. Now the recess for the cavity cover was routed.
Here is what the completed control cavity looked like after the Tundra Boy transfered all of that wood into his face and hair.
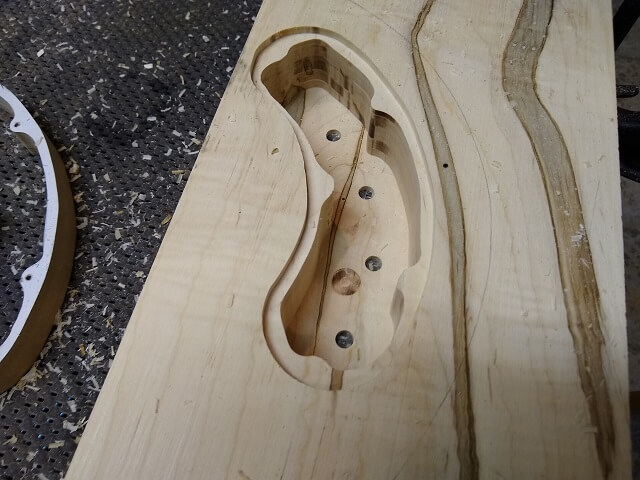
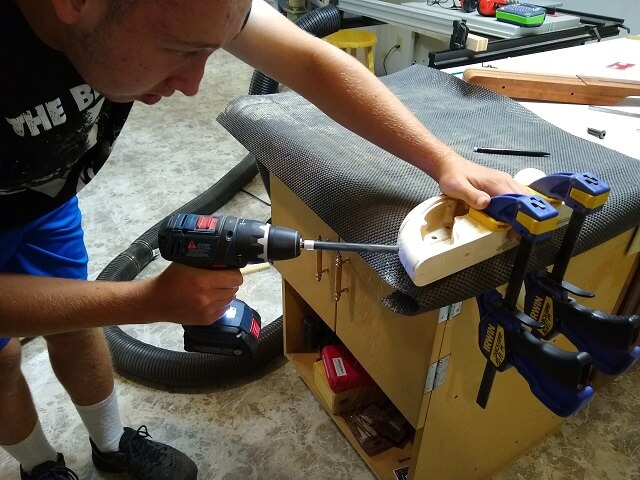
The Tundra Boy test fit the cover. Perfect! The screw hole locations were then marked using the cover as a guide.
Then the Tundra Boy used these marks to drill the holes for the cover screws.
The wings could now be rough cut to shape. The Tundra Boy did this at the band saw. It was during this process that I noticed my band saw blade had finally reached the end of its life. The cut speed reduced significantly, and you can see how bad the sides of the cut started burning. I made a mental note to order a new blade.
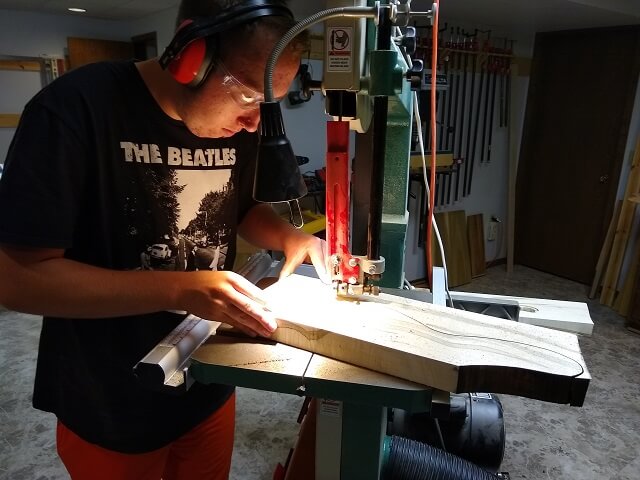
When cutting out the upper wing, I noticed that the wood "sprung apart" as the cut was made. Apparently this piece of wood has some impressive internal stress going on inside of it. It should be OK to use for a body, but I'm glad we're not using this wood to make a neck.
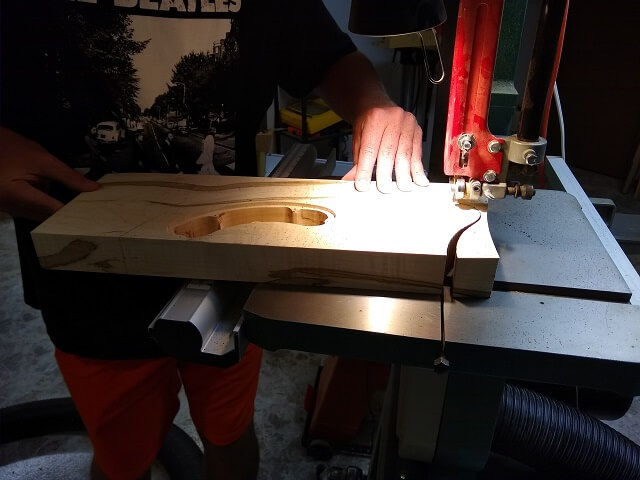
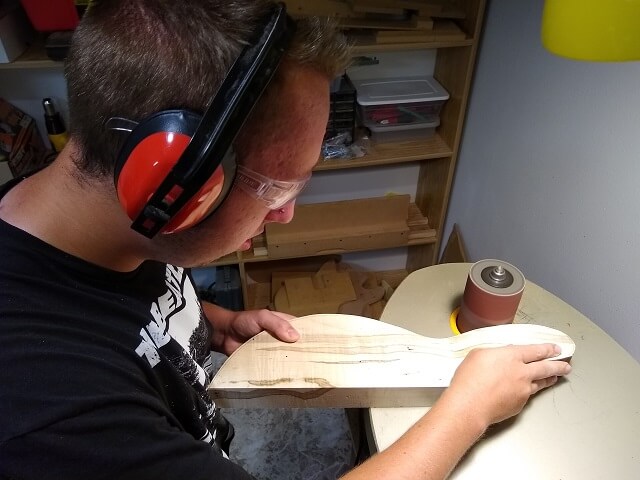
The Tundra Boy then sanded the body wings to his marked line. He made sure this time around not to "go rogue" and didn't go any further than his line.
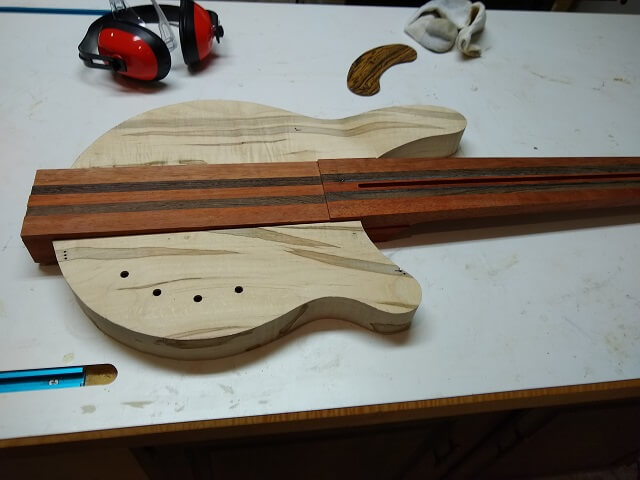
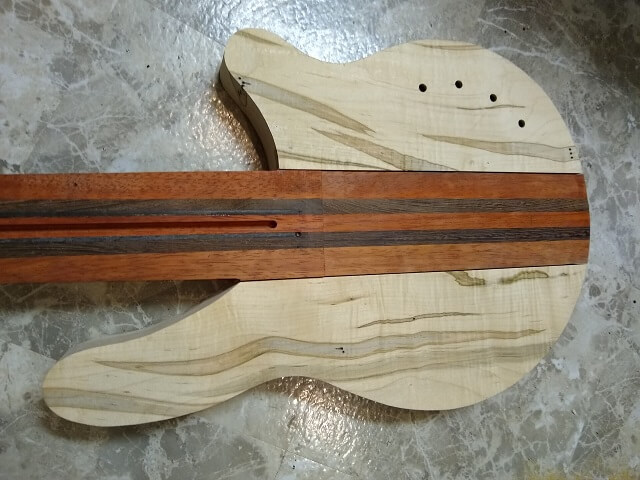
With the wings sanded to shape, they can be set next to the neck blank and we start to get an idea what the bass will look like.
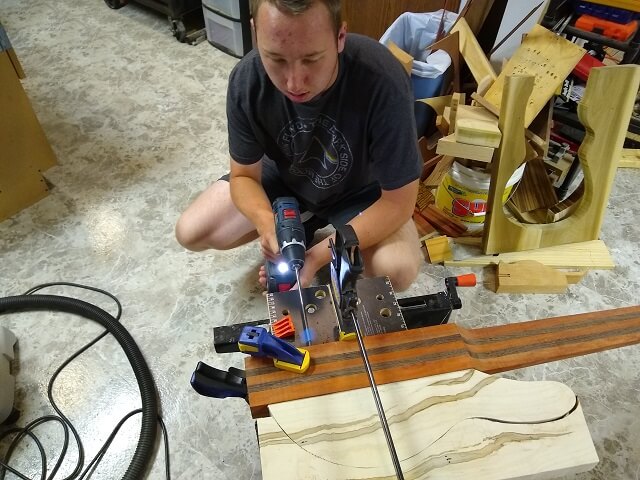
For neck-through instruments, I've found it helps to drill holes for dowels between the neck blank and the body wings. This isn't for strength, rather it's to make aligning everything much easier. Here you can see the Tundra Boy drilling the holes for one side of the body wings.
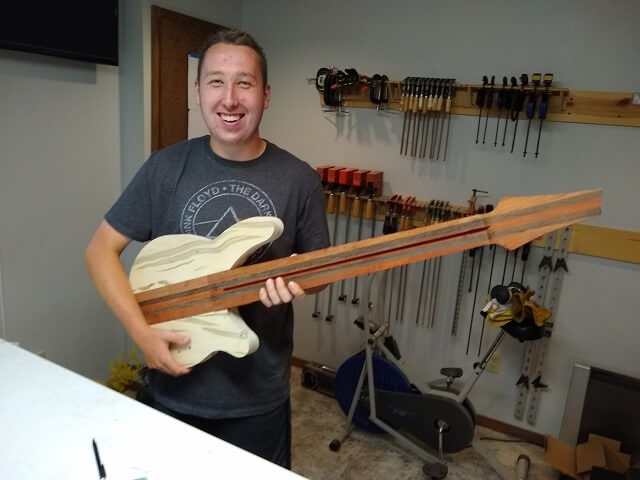
With the dowels temporarily holding the body wings in place, it's really starting to feel like a bass now.
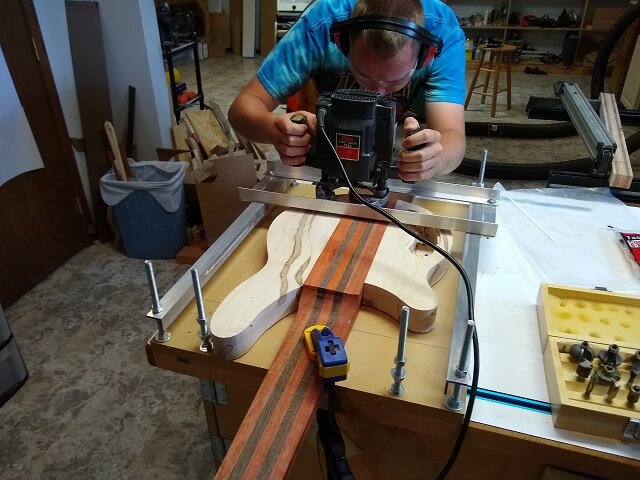
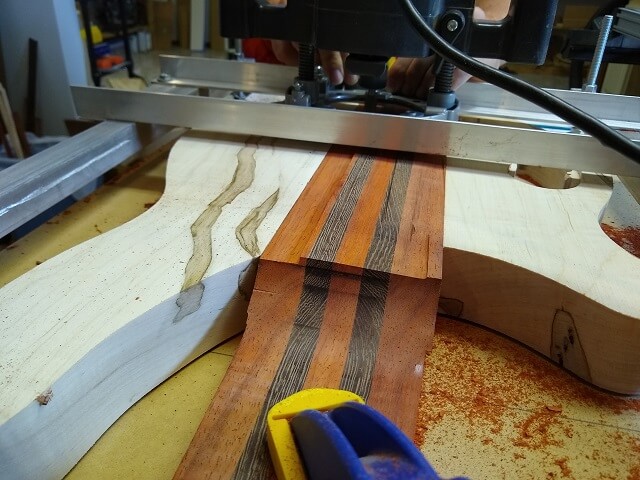
Now that the body wing location is known, the end of the body blank could be marked and cut to shape.
The next thing the Tundra Boy wanted to do was bring the back of the neck blank level with the body wings. The front was already level, as the dowels were drilled in a place to align the body pieces flush with the neck front. However, the neck had been cut intentionally thick and now had to be brought down.
The most obvious way to do this was with a belt sander. This method failed in two ways. First, it was super messy, turning the Tundra Boy and a good portion of the shop a bright orange. The second and more critical failure came in how uneven the sander was leveling it out. One corner was almost flush, while the opposite corner was still 1/4" proud, and there was a deep gouge in another spot that, if he hadn't stopped sanding, would have gone deep enough that it would have spoiled the neck.
So after a couple days' break to work at his part-time job and let me reflect, when we reconvened in the shop I had a better idea. I had already built a jig that I use to taper large areas of a body (i.e. the angled front of a Les Paul.) There was no reason we couldn't use that same jig to flatten the back of the neck.
The jig was set up and adjusted so the router bit was just a hair higher than the body at all four corners of the neck. Then the Tundra Boy simply made passes down the neck, taking a little bit of wood off with each pass until the back of the neck was level.
This was much easier, cleaner and, most importantly, more accurate than the belt sander method. The final result was the back of the neck being just as flush as the front of the neck.
Now the Tundra Boy turned his attention to rounding over the body wings. After using a cheap set of Menards round-over router bits for more than a decade, I had recently decided to splurge and purchase a nice set of Whiteside 1/2" shank roundover bits. This set included a huge 3/4" radius bit, and that's the one the Tundra Boy wanted to use.
The bit was too big to fit through the insert on the router table plate, so that had to be temporarily removed. Because this was such a huge bit and would be taking off a large portion of wood, the Tundra Boy slowly raised the bit and shaved off a little at a time. He probably made about 7 or 8 passes, raising the bit slightly between each, before he had the body edges completely rounded over.
Now the Tundra Boy could drill the hole for the output jack. I've mentioned it numerous times on this site, but it's extremely important to drill this hole AFTER rounding over the body edges. Otherwise the bearing on the roundover bit will fall into the hole and spoil your guitar.
This guitar is using a barrel jack with no plate, so it was simply a matter of marking the exact spot where the jack needs to be located, and drilling a hole.
All of the various construction activities have now been covered. Next, view the page where the Tundra Boy applies the finish and adds the hardware.
Return To The Main Music Gallery
This page last updated on 09/28/2021