


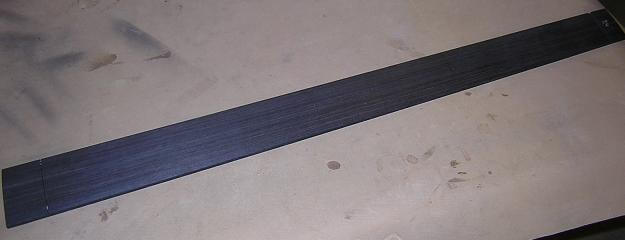
The ebony fretboard blank I had purchased had been pre-tapered, cut for a fender-style nut slot and had a strange fret slot cut where the 25th fret would normally be located on a 34-inch scale bass. It would need a little "surgery" before it was usable on Ed's bass.
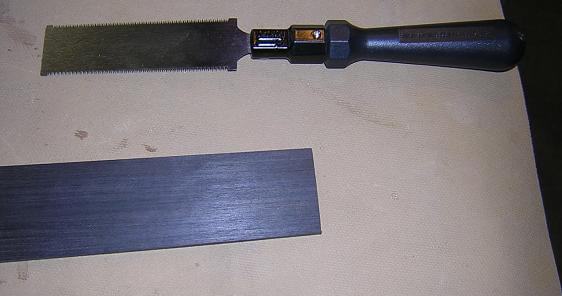
Seeing as this bass would use a Gibson-style nut, I began by removing the Fenderish nut slot. I took my razor saw and cut off the unwanted portion of the blank. A little sanding was needed to make the nut end nice and smooth.
Next, I needed to re-taper the blank to Ed's specs. I did this by building a tapering jig (1/4" piece of hardboard with the proper angles cut) and taping it to the fretboard. Using a flush-cut bit in the router table, I trimmed the fretboard to the new size.

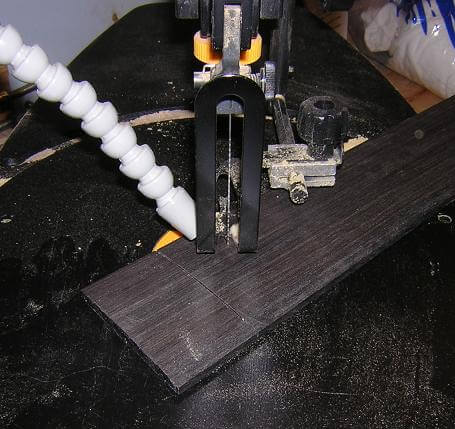
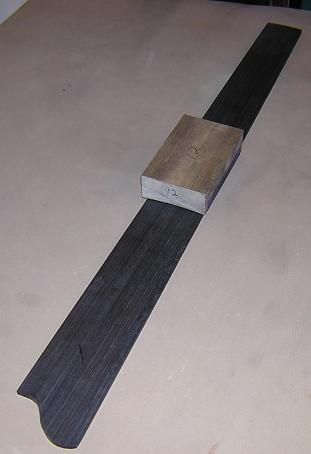
The bass was to have a decorative curve on the end of the fretboard, beginning just beyond the 22nd fret and extending down below where the 24th fret would be located. Making this cut would remove the "mystery" 25th fret slot. I made this cut on the scroll saw. Not the most used tool in my shop, but it really comes in handy for jobs such as this as the cuts are much smoother than a band saw would leave which means less sanding time for me. Yay!
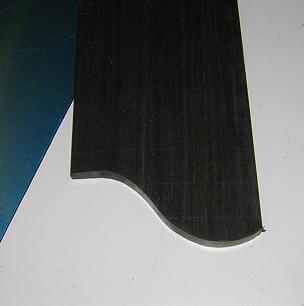
After the cut was complete, the end needed a little more sanding, especially to knock down the sharp corners.
This is going to be a fretless bass. Ed does not have much experience playing fretless, so he wanted some assistance. Some fretless basses have fret slots cut in the fingerboard with strips of maple glued into them to give visible position markers. This provides the sound of a fretless, but also gives the look of a fretted instrument. Ed wanted the look of a fretless as well, so we came up with the idea to put side dots on the fretboard at each fret position. The dots would mostly be 1/16" in diameter, with 3/32" diameter dots used at the positions where the "normal" dots would be located (3, 5, 7, 12, 15, 17, 19).
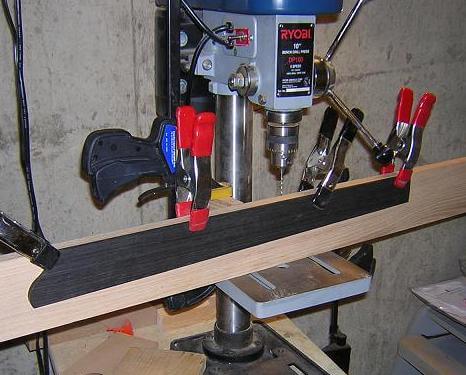
Drilling the dots can be more challenging than one would think. I marked the positions on the side of the fretboard. Next, I clamped the tapered edge of the board even with a straight edge of a scrap piece of wood, so the holes would be perpendicular to the edge of the fretboard. A fence was clamped to the drill press table and the depth was set to drill 1/8" deep holes.
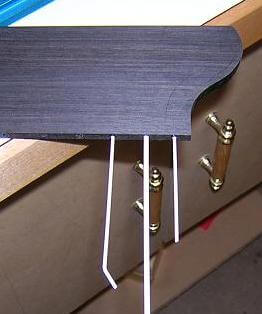
With all of the holes drilled, it is simply a matter of dropping a bit of CA (super glue) into the holes, inserting the white plastic rod and waiting for it to dry. Then the rod is cut flush with the fretboard edge and the process is repeated until all of the holes are filled. After letting the CA cure, I sanded the edge of the fretboard smooth.
The last part of preparing the fretboard is to sand the radius into it's face. Often times I will do this after gluing the fretboard to the neck, but for some reason I got the hankering to do it now. In the end, it makes no real difference although I'll have to take care to properly clamp the fretboard upon glue-up to address the radius. This bass was going to have a 12" radius, so I used my 12" radius sanding block and sanded until all was smooth.
The individual pieces are now ready to be assembled.
Click here to go back to the page where we built the neck.
Return To The Main Music Gallery
This page last updated on 06/28/2018