


Now that the individual pieces are (for the most part) done, it's time to put them together.
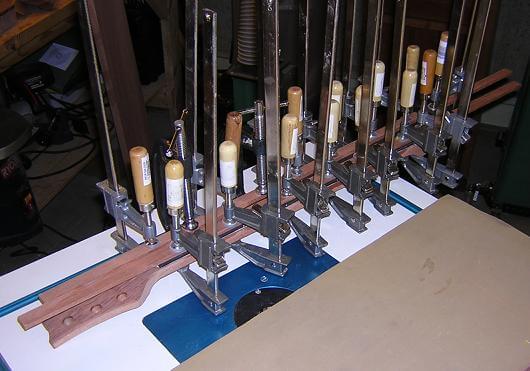
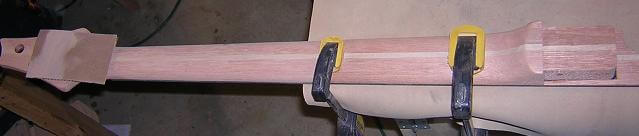
The first thing to do is glue the fingerboard to the neck. The truss rod is lubricated and placed in the channel, with a few spots of silicone caulk to keep it from rattling when the instrument vibrates. Glue is applied to the top of the neck, being careful not to place any where it will ooze into the truss rod channel and interfere with the operation of the truss rod. Then, the fretboard is positioned in place and carefully clamped to make sure it is evenly seated.
You'll notice in the picture that I used a couple of strips of wood on the top of the fretboard to protect the face of the ebony from clamp dents. Have I mentioned that I don't have enough clamps?
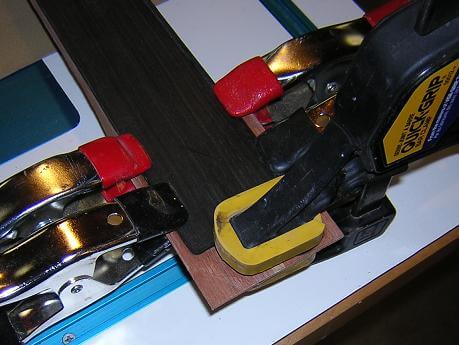
Because this neck will have a slight angle (about 1.5 degrees), the end of the fretboard will be elevated above the face of the guitar. To fill in this gap, a small wedge of wood was cut and glued to the bottom of the fretboard, above the heel. This will give support to the fretboard in the upper registers, and also look better than just having the fretboard "levitate" above the guitar body.
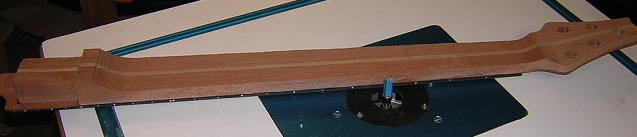
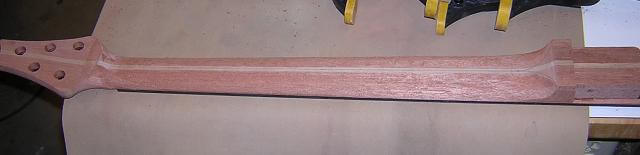
Now that all the glue was dry, I trimmed the neck and extension flush with the fretboard using a pattern bit in the router table. This sized the neck exactly to the fretboard dimensions.
Now it was time for one of my favorite parts of the construction process: carving the neck. Ed wanted a fairly thin neck. I had to be careful to carve enough wood away to make the neck nice and playable, but to leave enough wood to ensure the neck was strong. Now would be a heartbreaking time to accidentally carve into the truss rod or carbon fiber channels!
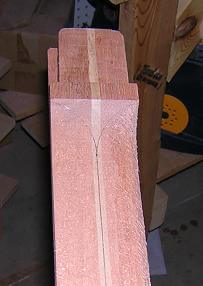
I started at the headstock end, defining the nut area and the volute. I used my surform and microplanes to do the carving. The wood is left pretty rough, but they get the job done.

With the headstock area defined, I worked my way down the neck until I reached the heel. Lots of carving and checking with my hand until everything "feels" right. No fancy router bit or CNC machine here, just old fashioned "take it slow until it sits well in my hand" carving. In the picture below you can see how I would work on one half of a section of the neck at a time.
After an hour or so, I had the rough carving done to the point where I was satisfied with the way it felt. In this picture I was pretty much finished, but I did go back and "refine" the heel area slightly.
Now came the tedious part: sanding. The surforms left the wood very, very rough. Another hour or two was spent with sandpaper smoothing everything out and fine-tuning the neck. Finally, the neck carve was done.
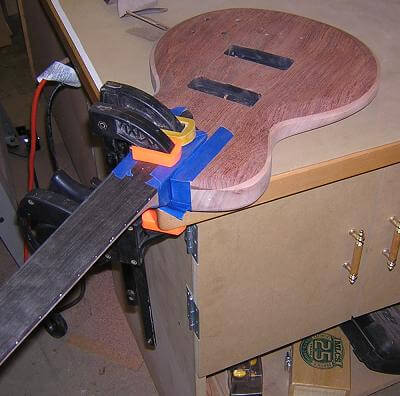
Next, it was time to make the two pieces one and glue the neck to the body. I used my old standby slow-set epoxy to ensure the neck joint was as strong as possible. I don't like any flex in this area of the instrument. I taped off the edges of the join to help me control the glue squeeze-out. Epoxy isn't as easy to sand away as wood, so it's simpler to tape off the areas. I just have to remember to remove the tape after about 30 minutes, otherwise the tape will get glued to the instrument and be a real bear to remove! The joint is nice and tight, so a couple of clamps easily hold everything in place. I leave this joint clamped up for at least 24 hours until the epoxy has cured.
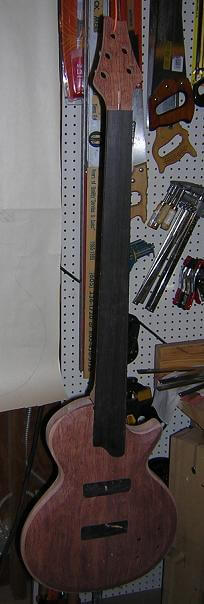
Once the glue was dry, we have a completely assembled instrument. We're now ready to apply a finish, add the hardware and do the final setup!
Let's move on and finish this instrument.
Or you can return to where we build the fretboard.
Return To The Main Music Gallery
This page last updated on 06/28/2018