


Once again, I found myself looking for some quick and inexpensive woodworking projects that I could give as gifts to family and friends. I came across this project in Wood magazine and it looked like a fun little project that wouldn't require much time or materials. I purchased enough walnut, maple and ceramic tiles to make 23 trivets.
Well, I was correct on it not taking much materials. In retrospect, I would have selected a different project, as these proved to be more labor intensive than I'd expected. Although I didn't work on them constantly, from the first evening I cut the stock until the morning I put the finishing touches on them, the whole project took about five months.
I started by ripping strips of maple to 1" wide to form the trivet sides. I cut an 1/8" rabbet in the back side (1/4" deep) to hold the hardboard bottom. Then, I ripped 1/4" strips of walnut to form the pieces that would be the leg botoms.
The original plans called for gluing the walnut strips the entire length of the maple blank. While this would have been much easier, I found that doing this would have been wasteful, so I wound up cutting the walnut strip into pieces slightly larger than the feet, and gluing them to the maple in the approximate location.
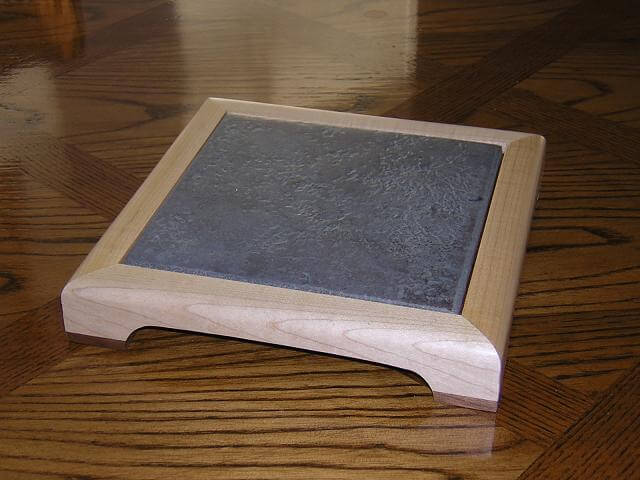
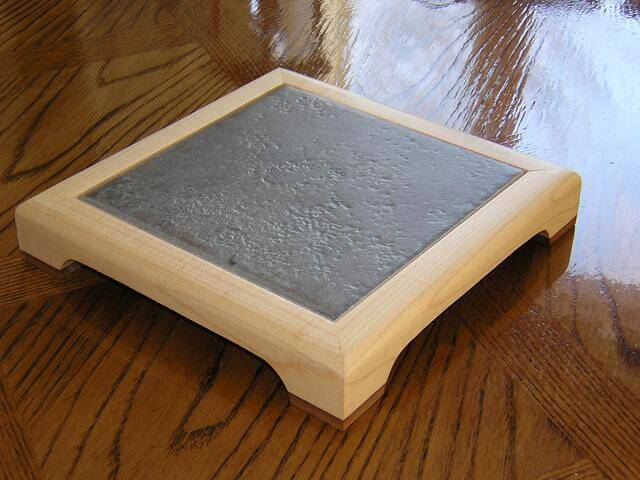
After gluing and clamping the walnut pieces, I spent time sanding everything to get the glue-up smooth. At this point I routed a 1/2" round over on the outside top of the maple strips (the opposite side of the rabbet for the bottom.)
I then took a measurement of the ceramic tile and figured out how large each side of the trivet should be. I set up a stop block on my CMS and proceeded to cut the sides to length, mitering the pieces at 45 degrees. I coded each piece so I knew which board it came from and in what order, so I could glue them up later and make sure the grains matched.
Then the real fun began. The plans called to cut the arch out of the bottom of the side pieces using a bandsaw, then sanding them smooth. Seeing as I had 23 of these, and my Ryobi band saw leaves cuts about as smooth as a washboard, I decided there was no way I could use the band saw and expect to be done by Christmas. So, my eyes turned towards my scroll saw. I made a template of the cut, and traced it on each piece. Then I spent many, many evenings cutting out the arch from each piece (92 of them to be exact.) The pace was monotonous, and I discovered that 3/4" maple doesn't scroll very easily. I lost count of how many blades I dulled. When I finally finished all of the arch cutting I was happy that the pieces needed very little sanding to clean up after the scrolling.
Now it was time to put the trivets together. I cut pieces of hardboard sized to fit in the rabbets on the back side of the trivet. I would glue up two trivets (I only had two band clamps) then wait until the next evening to glue up two more. It took almost two weeks to get all of the trivets glued. Now more sanding to smooth out the miter joints.
At this point I was finally ready for finish. I wanted something quick (we were only a couple weeks out from Christmas) so I opted for a spray poly. I gave each side three coats. Once the poly had cured, I was disappointed to find how rough the finish turned out. My original thought was to rub each piece down with steel wool, then give them all one more coat of a wipe-on poly. After rubbing the first one down, I decided that it looked good (think ultra-satin) and it was a smooth as glass. So, I spent many hours rubbing down all of the trivets and called it good.
Wow, I learned a lot on this project, but not necessarily what I had intended to learn!
Return To The Main Wood Gallery
This page last updated on 06/28/2018