


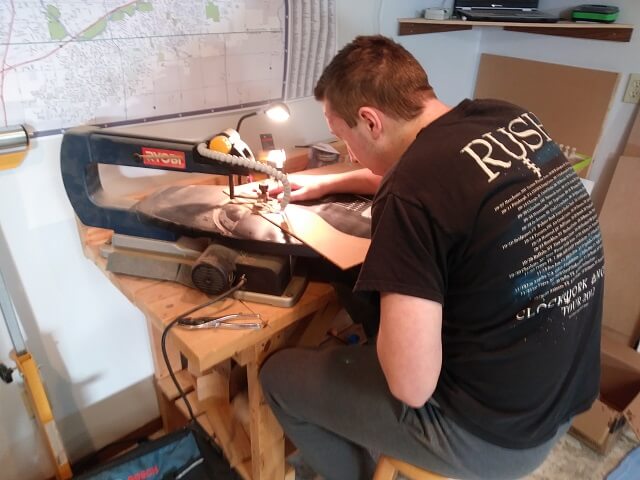
One of the challenges of building a neck-through instrument is dealing with the enormity of it. With a bolt-on neck, the neck and body can be built quite seperately and then stuck together right at the end. With a neck-through (and to an extent with set neck guitars) at a certain point you're wrestling forty or more inches of instrument. So one of the things that helps is to do as much of the construction as possible before you start gluing the various pieces together.
As with any instrument, it all starts with a good plan. We've already covered the plan failure several times on the previous pages so I'm not going rehash that again. But once we had the plan corrected, we could create a body template. Tundra Boy glued a copy of the plan to a piece of hardboard, then cut it out at the scroll saw.
Tundra Boy dug through my wood stash and picked out a piece of mahogany from which the body wings can be cut. He based his wood choice primarily on color, rather than any tonewood voodoo. He just wanted wood that would be a deep brown when finished, but not as dark as walnut.

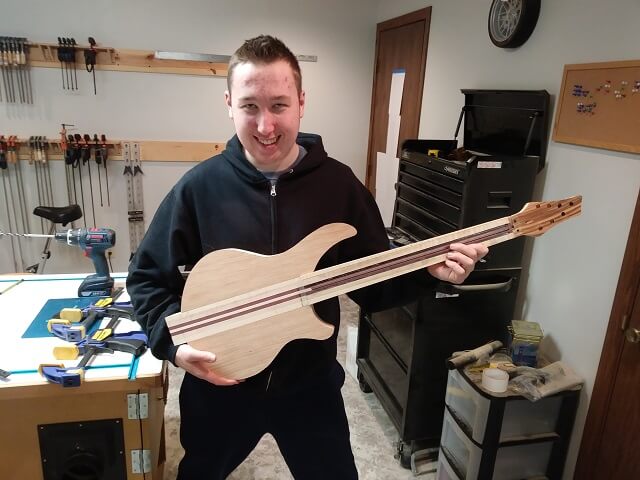
He based his guitar plan on the 2018 Music Man Majesty guitar, which is the John Petrucci signature model. Tundra Boy is a big Dream Theater fan. The Majesty features a large shield shaped inlay in the top of the body. The Music Man uses flamed maple for the inlay. Tundra Boy wanted his inlay to be made from zebrawood, so he sliced off a 1/4" wide piece from a larger billet.
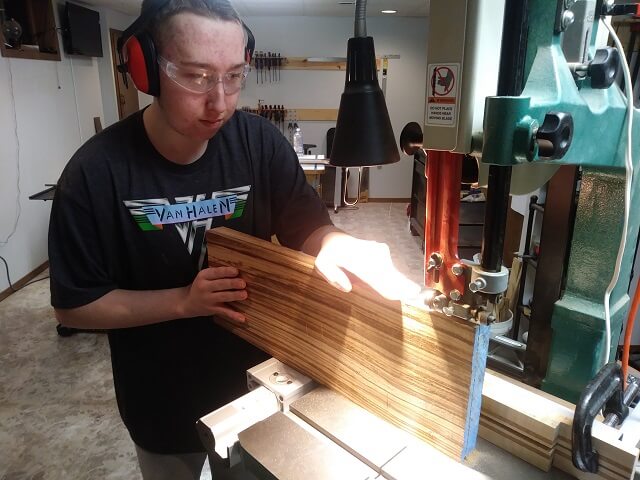
The zebrawood was then sanded smooth at the drum sander and brought to the exact thickness we wanted.

The Tundra Boy cut out the shape of the body wings at the band saw, then used the oscillating spindle sander to sand them to the exact size. Here's the body wings sitting next to the neck blank to give us an idea of what the instrument will look like.

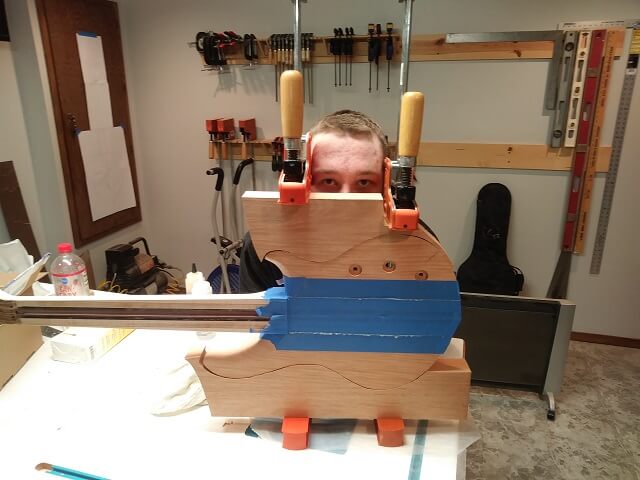
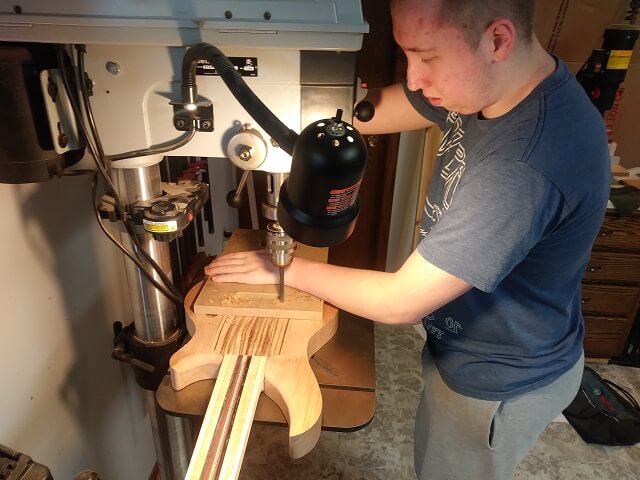
Because we wanted to be able to quickly attach and detach the body wings to the neck as we did various construction activities, we decided to drill some holes for dowels. This would allow us to easily position the two pieces in place.
We started by drilling two holes all the way through the side of the neck blank. Then, we clamped the face of the neck to my portable workbench, and clamped one of the body wings next to it. By placing the faces of both on the workbench we could be assured that the dowels would position the front of the pieces perfectly even. Then the holes we previously made were used to drilled through into the body for the dowel holes.
Then we did it again, but for the other body wing. You can see use used a long aircraft bit to make sure we could get deep enough into the body wing. A piece of tape gave the Tundra Boy a visual depth stop while drilling.
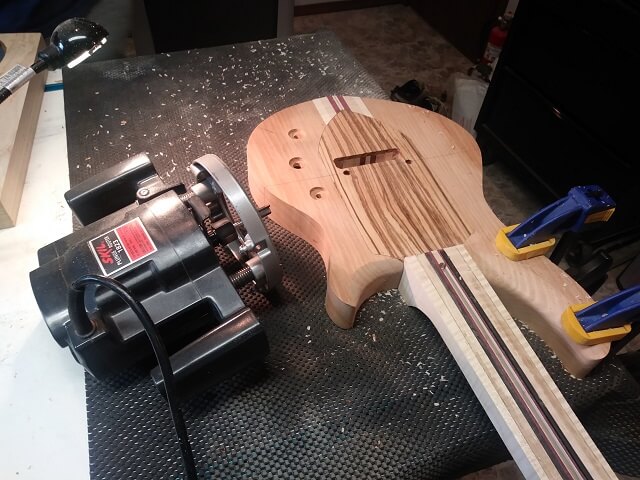
Here's the body pieces temporarily attached to the neck with the dowels.
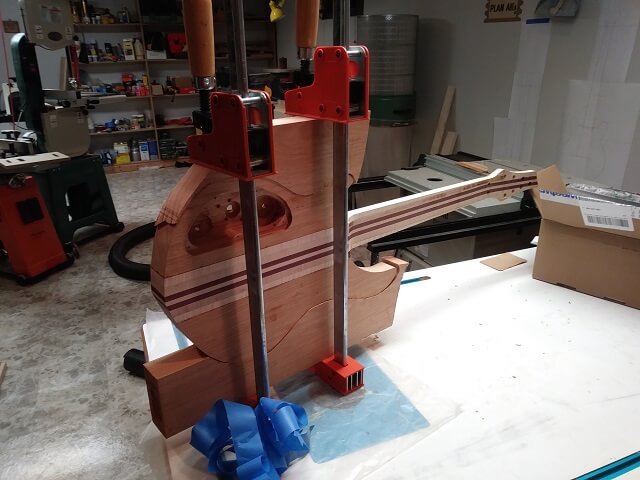
The body wings have a lot of carving on them. Some of the carving can't be done until they were glued to the neck, but the Tundra Boy started some of the carving now.
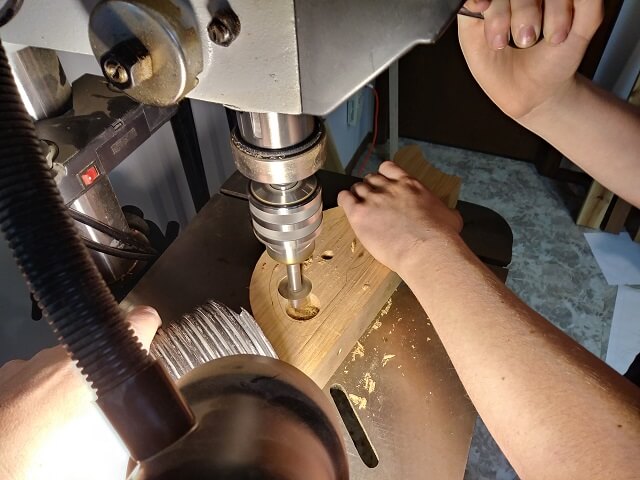
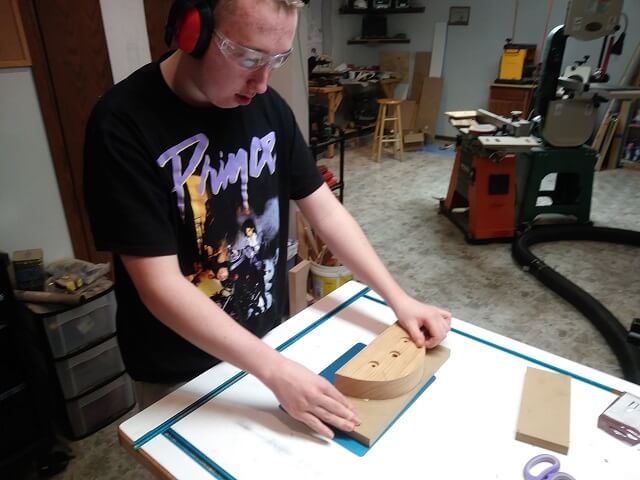
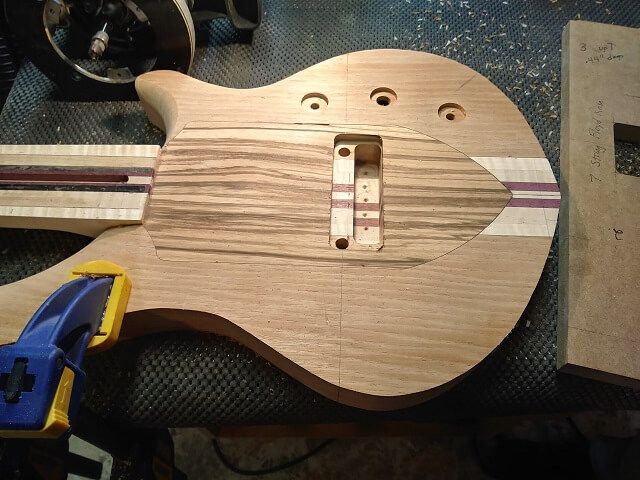
Holes for the two volume knobs were drilled into the front of the body wing. The control cavity wasn't yet routed, so these holes just went in about an inch.
Likewise, the hole for the three way switch was drilled.

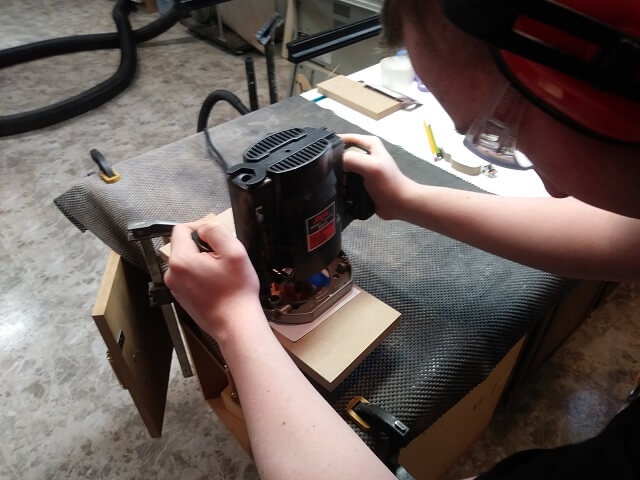
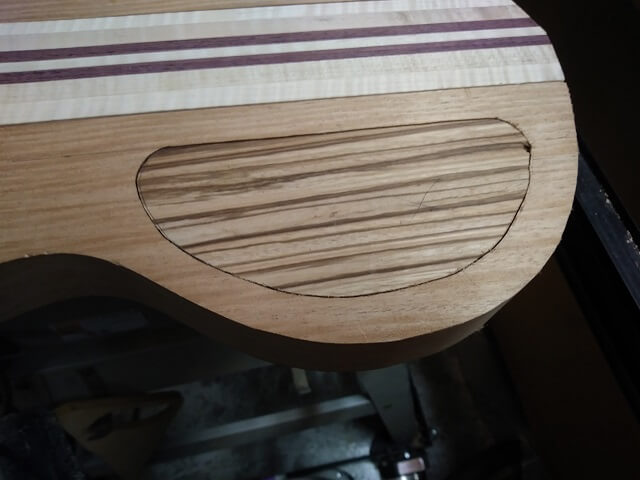
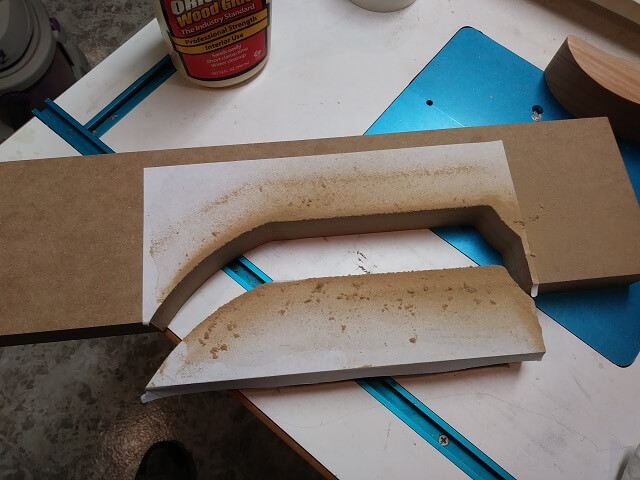
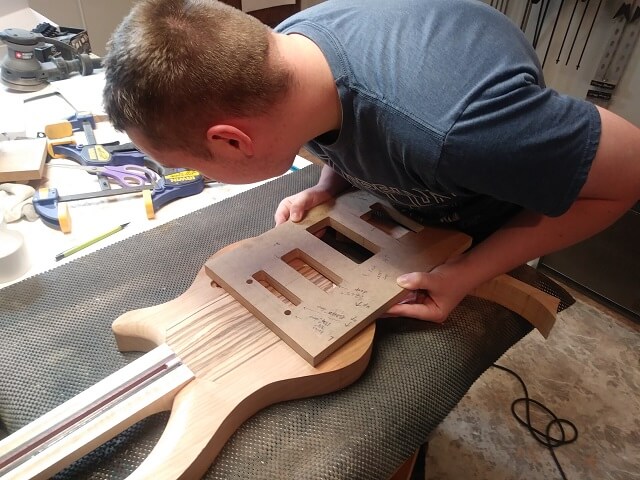
The Tundra Boy wanted the cover of the rear control cavity to be made out of zebrawood. In order to form the cavity, cover recess and the cover I designed a three piece concentric routing template and glued the plan onto some MDF. The Tundra Boy then cut out the template on the scroll saw.

The two inside pieces of the routing template were stuck to a piece of zebrawood for the cover, and the flush trim bit was used to trim the cover to exact size. It was at this point in time when we learned that zebrawood is a very tricky wood to route. I will expound on this more further down this page, but we wound up with a spot that tore out badly and would require repair later.
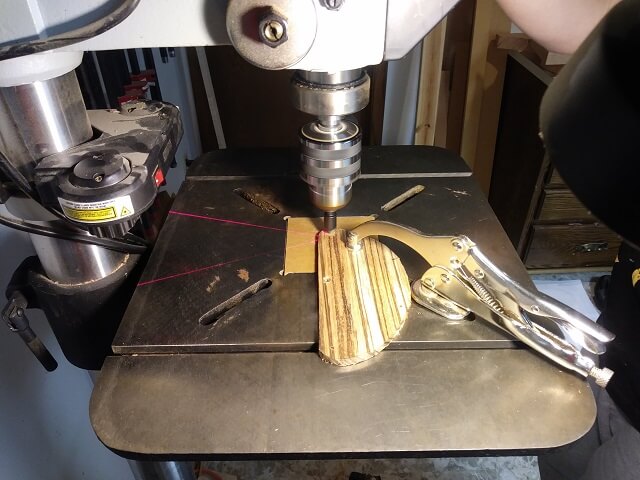
To save wear and tear on the router bit, most of the wood in the control cavity was removed at the drill press with a forstner bit.
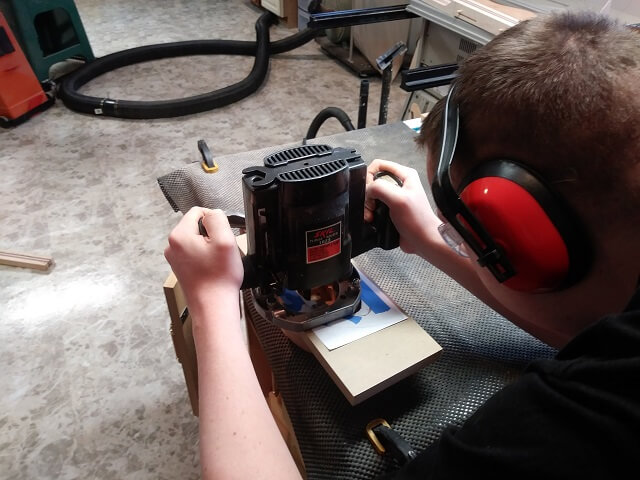
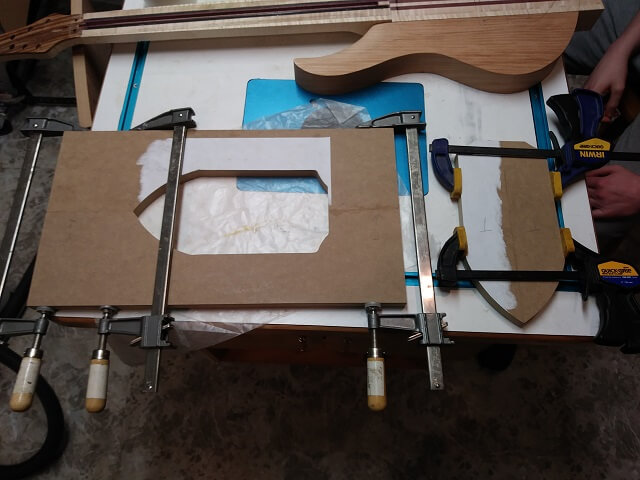
The two outer portions of the routing template were attached to the body wing, and the remainder of the control cavity was formed using a plunge router and a pattern cutting bit.
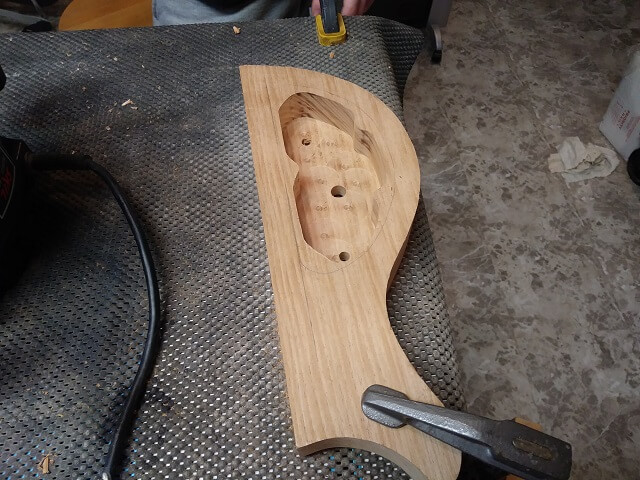
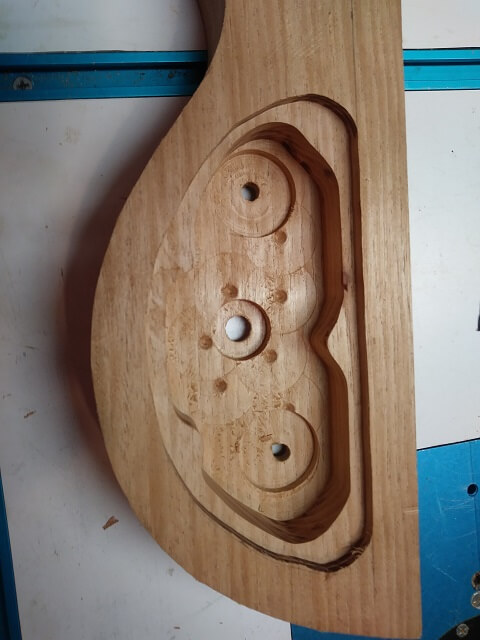
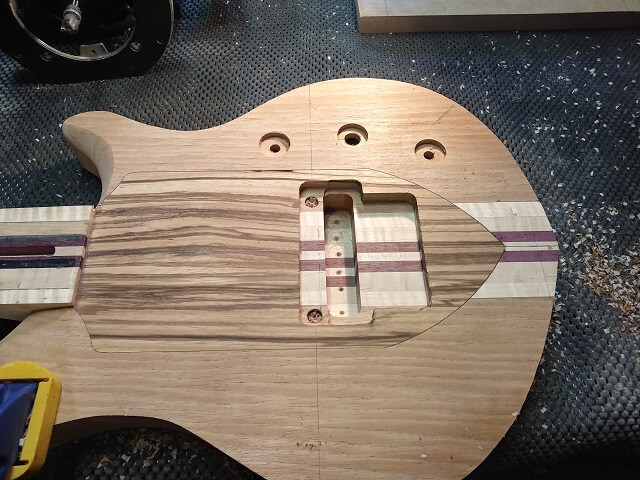
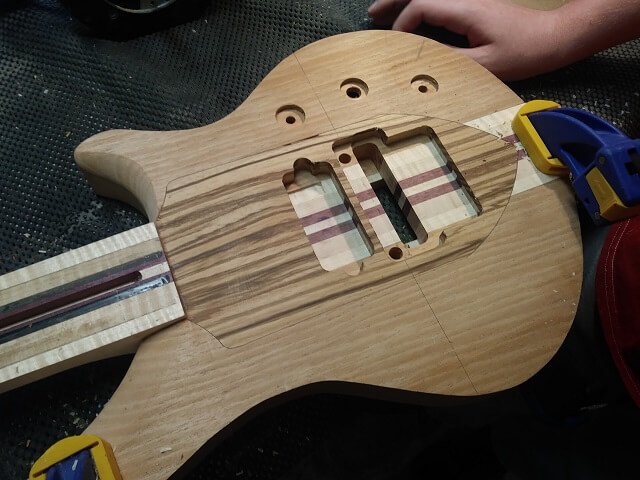
Here's the control cavity routed out. Note that the recess for the cover has not yet been routed.
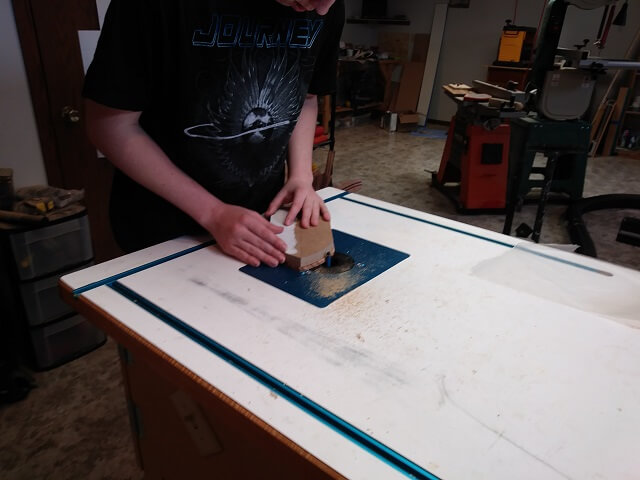
Next, just the outermost portion of the routing template was stuck back on the body wing. The pattern cutting bit was placed in the router table and the workpiece was placed over the bit. This meant that the Tundra Boy was cutting blind, as he couldn't see the progress until he turned off the router and removed the piece for inspection. The benefit to doing it this way is that there wasn't any danger of a plunge router falling off the side of the router template and wrecking the piece.
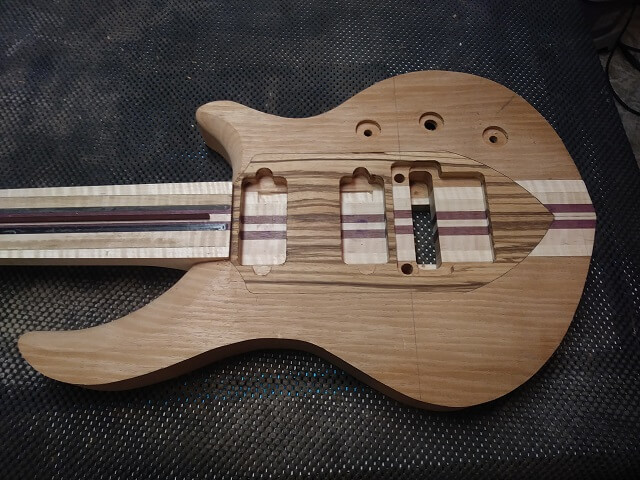
Here is the final control cavity, with the zebrawood cover set in place.
The control cavity cover needed some screw holes with countersinks, so that was the next thing we did.
Due to the amount of carving that was going to happen on the front of the guitar, there was a concern that if the control cavity was too deep that the front carve would run into the cavity and wreck the workpiece. So, after a bunch of careful figuring, we opted to route the cavity shallower than normal. However, this meant that there was too much wood on the top of the guitar to allow the controls to pass through. So in the area where the controls would be mounted we took out an additional 1/4" with a forstner bit.
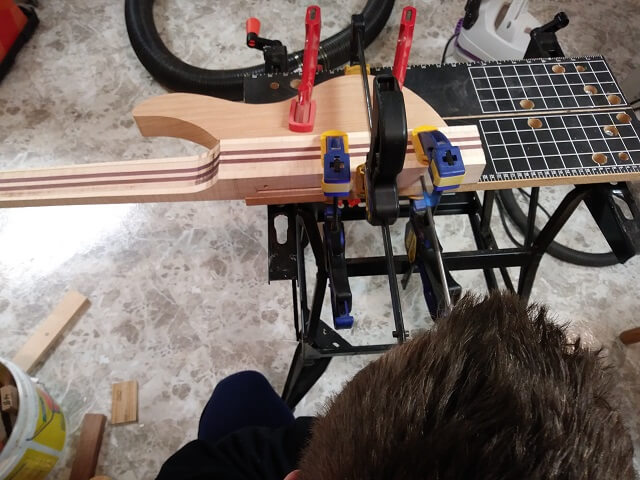
Now it was time to glue the body wings to the neck. The dowels made alignment pretty easy. The scraps from which the body wings were cut were used as cauls, so our clamps had nice flat surfaces to press on. Blue painters tape was added along the joints just to make glue cleanup easier later. After the glue was starting to set up the tape was peeled off which prevented us from having to sand it off after it had fully hardened.
Now it was time to do the front inlay. I'm pretty sure the original Music Man Majesty guitar uses CNC to cut out their shield inlays. I don't have that luxury, so I had to some up with a creative means of doing it with less automated tools. I started by creating a template. I wanted both sides of the shield inlay to be perfectly symmetrical, so I stuck two pieces of MDF together with double sided tape. Then I took half of the inlay from the plans and glued it to the MDF. From there, I cut through both pieces of MDF at the same time. I went really, really slow because any cutting errors would be mirrored on both pieces. Tundra Boy didn't feel his scroll saw abilities were quite at the level needed for this operation, so that's why I'm the one doing this portion.
I then "unfolded" the pieces and glued them together. This gave me two perfect templates to be used for the body recess, and the zebrawood inlay.
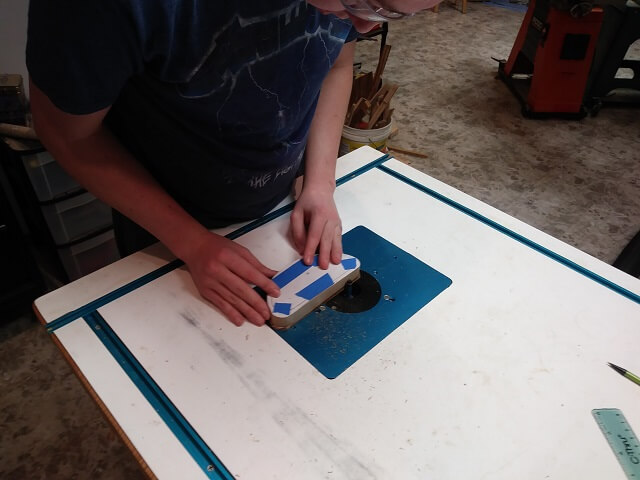
The zebrawood was cut to shape slightly larger than final size, then attached to the template with double sided tape. The Tundra Boy got tired of hearing the words "double sided tape" during this project, as I use that stuff a lot. With the template attached the zebrawood was routed flush. As I mentioned already, we discovered that zebrawood is a very tricky wood to route. Routing with the grain wasn't too bad, but when going across the grain anything more than just grazing the bit would cause the wood to grab and pull, which usually resulted in some splintered wood and a near heart attack from the person doing the routing.
After being startled numerous times and losing a few chunks of the zebrawood that would have to get glued back in later, the Tundra Boy got frustrated and gave up and had me finish routing the inlay. I wish I could say that my years of wisdom and experience allowed me to quickly and easily complete the inlay, but that would be lying. I too had trouble, and more than once the bit grabbed the workpiece and startled me badly. I too wound up with a section that needed repair afterwards, and PTSD that lingers to this very day.
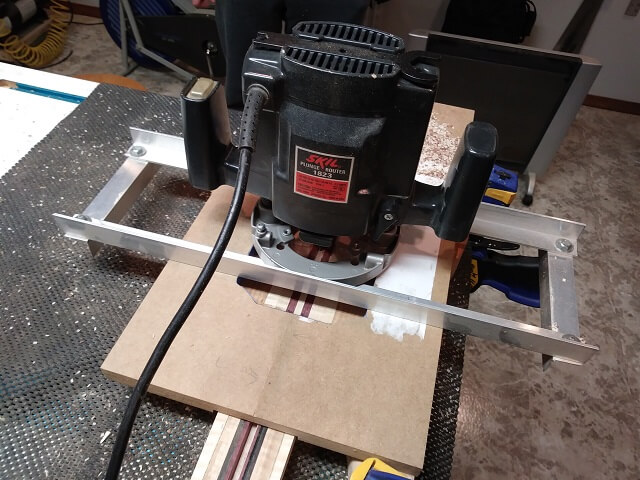
To route the recess on the body, the outer template was attached to the face of the guitar using double sided tape. I used some aluminum rails to keep the router from falling into the middle of the template and destroying the guitar and probably a few fingers with it. The Tundra Boy then routed the recess for the inlay. Rather than going to full depth all at once we did it in about 3 different passes, just taking out a little more wood each time. I ran the vacuum to try and keep the area as chip free as possible.
Here is the final recess, sized perfectly to the zebrawood inlay.
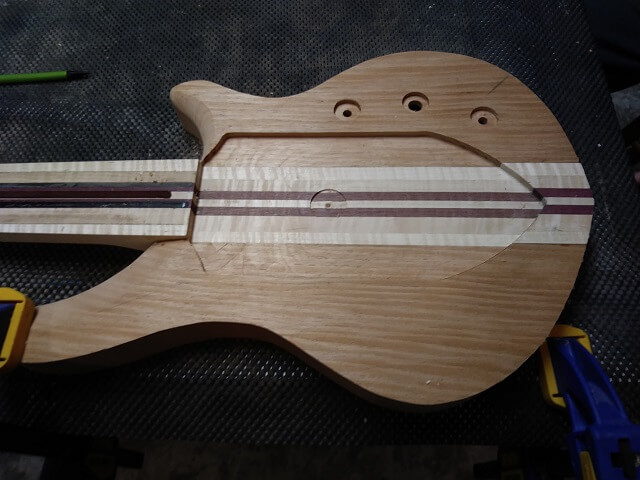
The inlay was then glued in place. We used epoxy so any tiny gaps around the edges might be filled in as the glue squeezed out.
Once dry, the inlay edges and any excess glue were sanded smooth.
Now it was time to do the bridge route for the Floyd rose. A Floyd route is tricky enough that I thought it would probably be best if I just purchased a routing template already cut. Well, I quickly learned that you can find them all over the place for a 6 string Floyd, but 7 string Floyd templates pretty much don't exist.
So using the really confusing PDF from the Floyd Rose website, I built my own routing template. The route consists of three different shapes at three different depths on the front, and a rear route that must be in the exact position relative to the front. I spent several hours building this template and trying to make it as exact as I could.
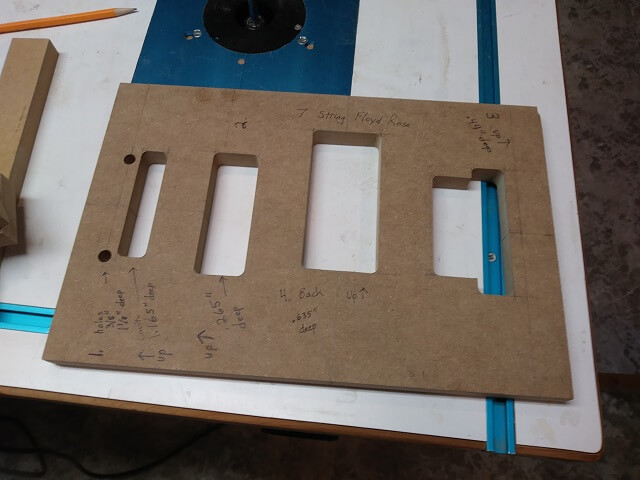
This was such a complex template and routing process that I decided it wouldn't be wise to do it for the first time on the actual guitar. Instead, I grabbed some scrap wood and walked through the whole thing. From this trial run I discovered one small tweak I needed to make on my template, but other than that it was successful.
A horizontal line was drawn across the body at the proper location of the bridge. The template uses this line as a reference point for all of the routes.We extended that line all the way around to the back side to that when we did the rear route it would be in the right spot.
The template was carefully attached using double sided tape.
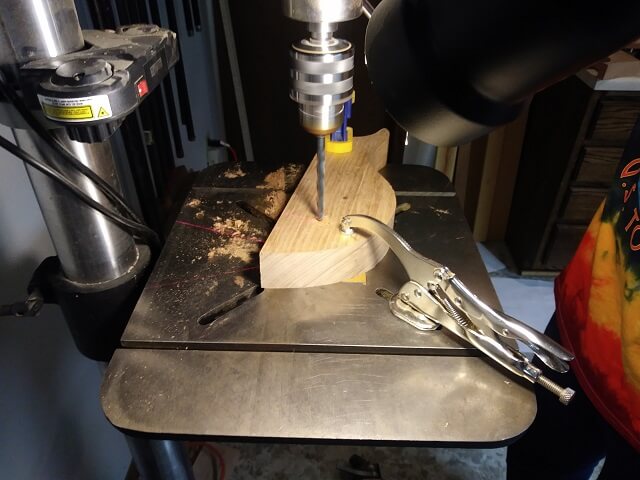
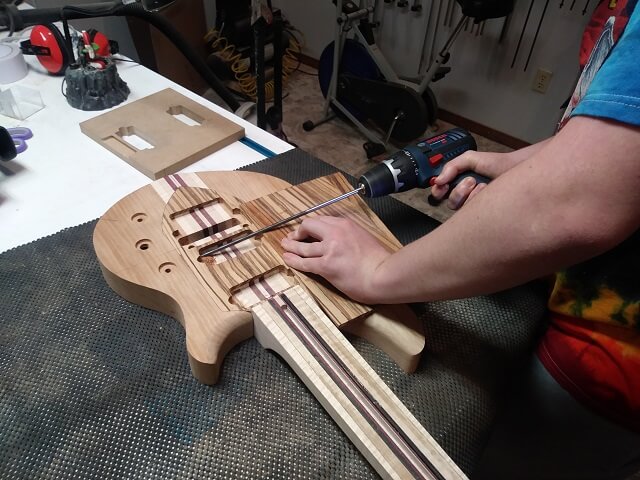
The holes for the mounting studs were drilled at the drill press using the holes in the template as a guide.
Then each of the tremelo routes were done in the order listed on the template. The template would have to be repositioned between each route, using the reference lines for that particular step.
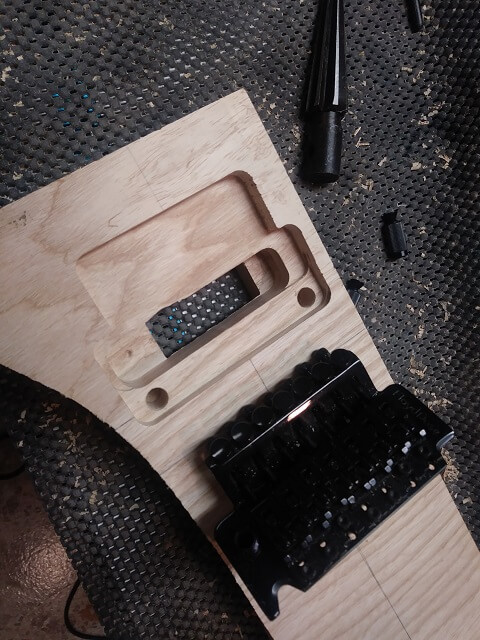
The Floyd route was a success. I breathed a sigh of relief, as this was a part of the process that I was very unsure about. Now it was time to route the holes for the humbuckers. I was a bit more sure with this operation.
I didn't have any 7 string humber routing templates on hand, so once again I had to build one. In addition, Tundra Boy didn't want to use any pickup rings which meant the edges of the mounting holes would be visible, so the template couldn't be sloppy.
Tundra Boy routed the two holes for the pickups, starting with the bridge hole first.
We already had a way to get the wire from the neck pickup cavity to the bridge pickup cavity. Now we needed a way to get the wires from the bridge pickup to the control cavity. An aircraft drill bit is the easiest way to accomplish this task.
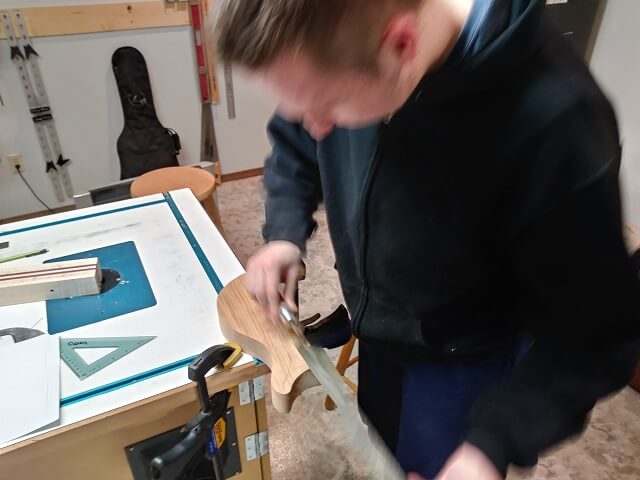
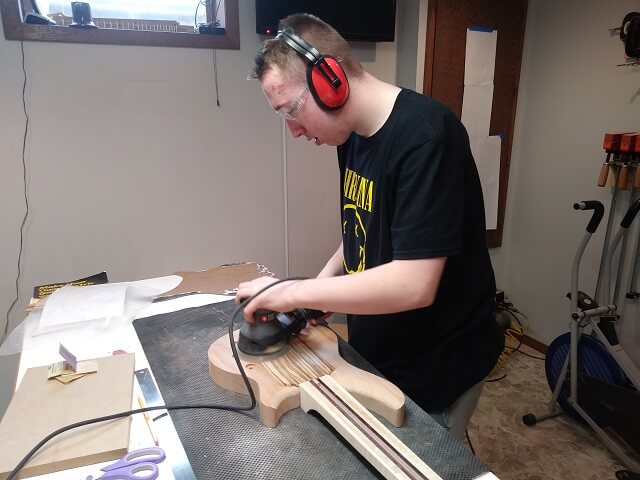
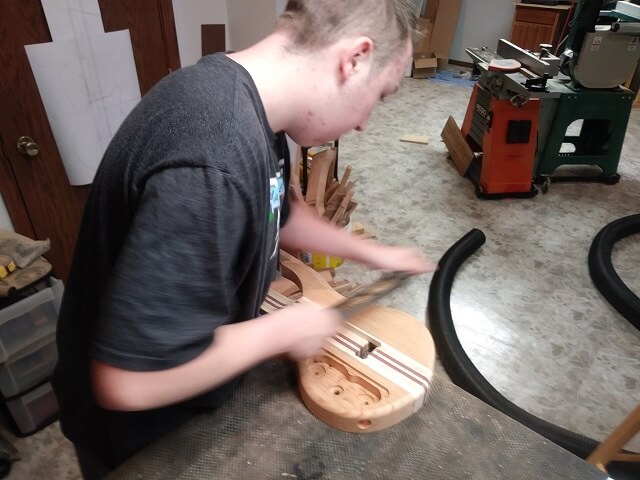
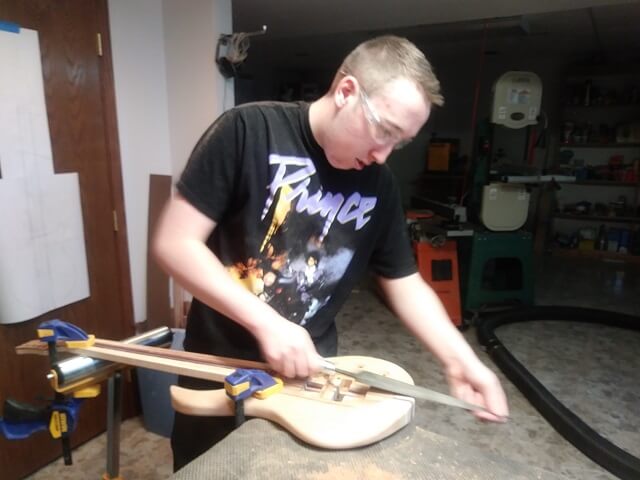
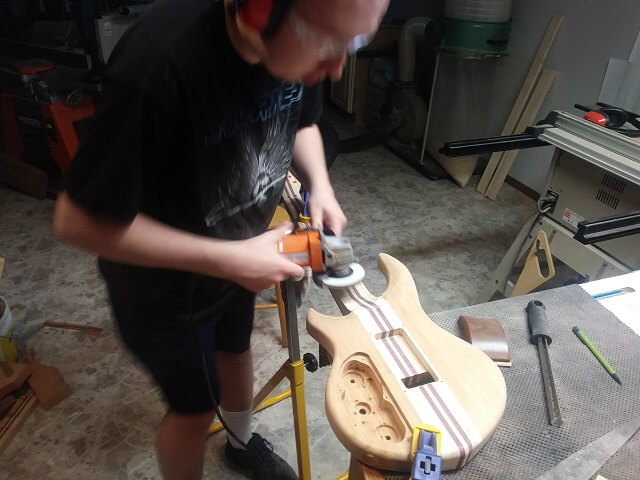
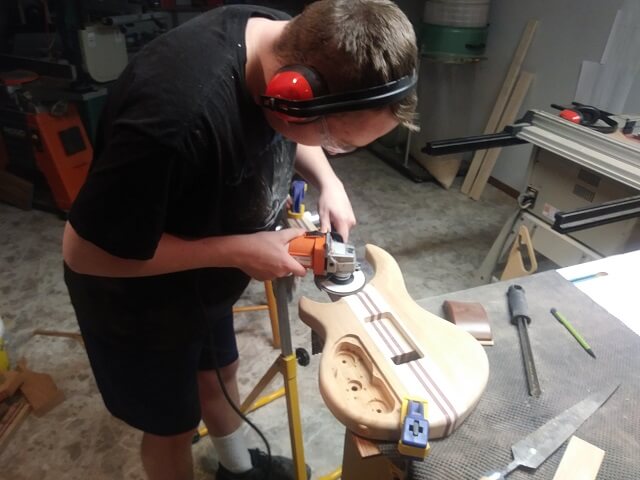
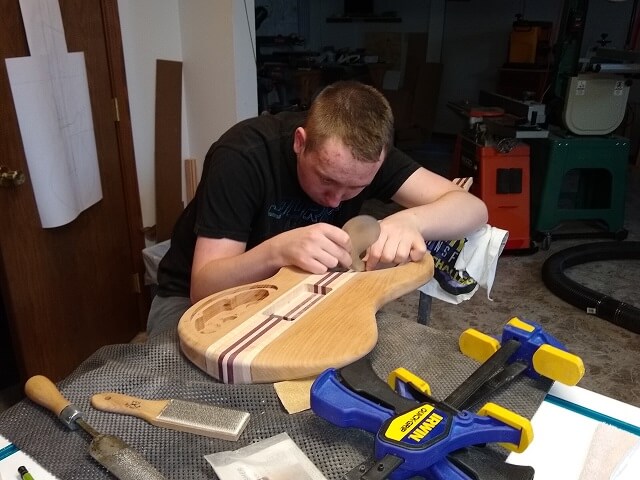
Now the rest of the body could be carved. The Tundra Boy spent many hours with a file and sandpaper refining the body contours until he was satisfied.
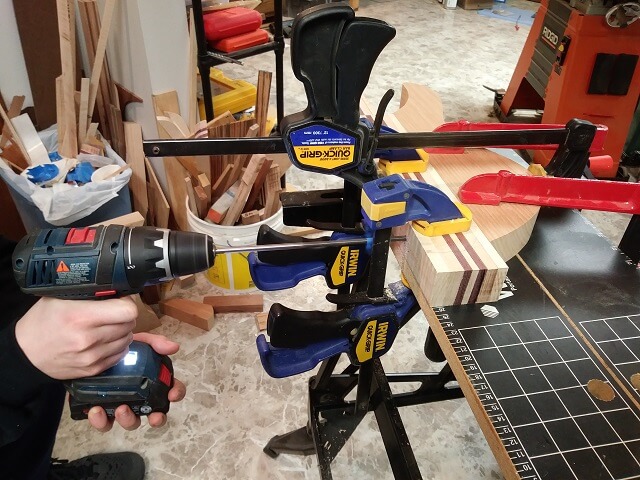
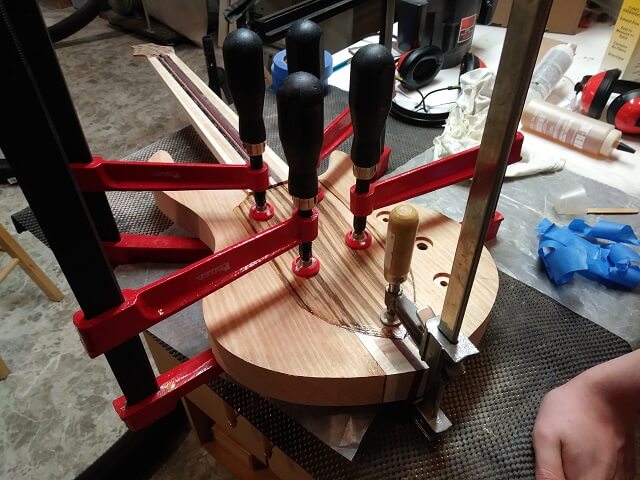
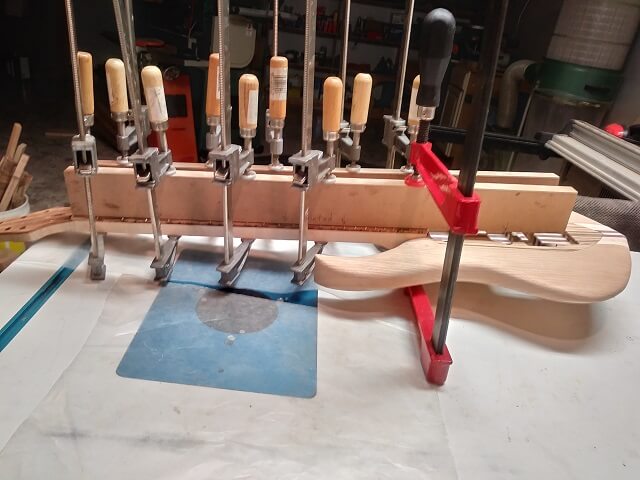
The fretboard could now be glued in place. The truss rod was placed in the channel first. Don't forget that! We used epoxy to attach the fretboard. Two long jointed boards provided clamping cauls to keep everything straight as the glue dried.
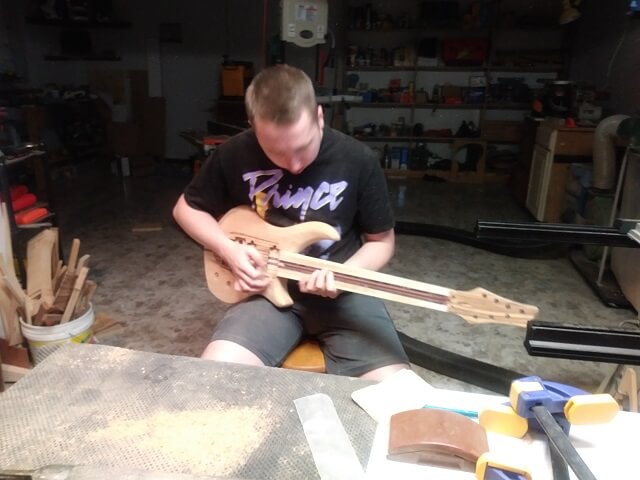
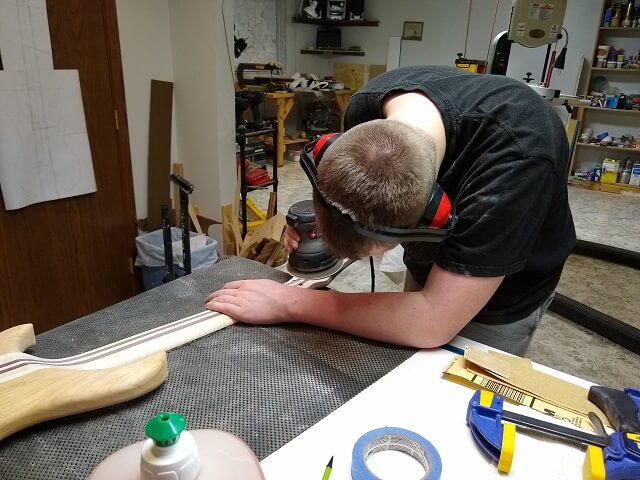
Carving the neck is my favorite part of building a guitar. The Tundra Boy discovered it is his least favorite part of building a guitar. He said it was too nerve-wracking for him to enjoy it. He was worried he was going to mess it up and make the guitar unplayable. My reassurances that even a messed up neck probably wouldn't make the guitar unplayable didn't help.
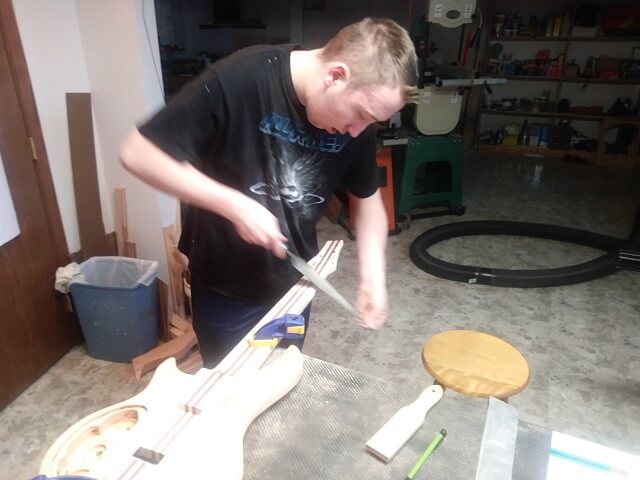
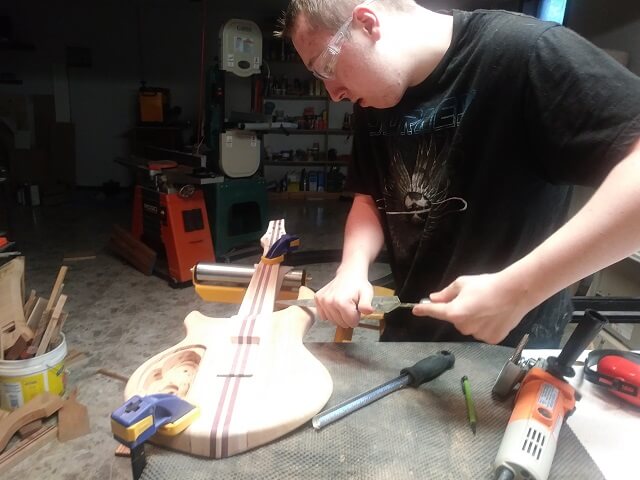
The transition from the neck to the body on this guitar were really tricky, so that took the Tundra Boy a long time. He used a flap sander on my angle grinder to help speed up some of the carving. That thing is pretty aggresive, though, so you need to be careful not to take away too much wood too fast.
During this time he took a six month break from the project. When he returned, he discovered to his dismay that elves hadn't appeared during his absence and finished the neck carve. So he had to keep working at it.
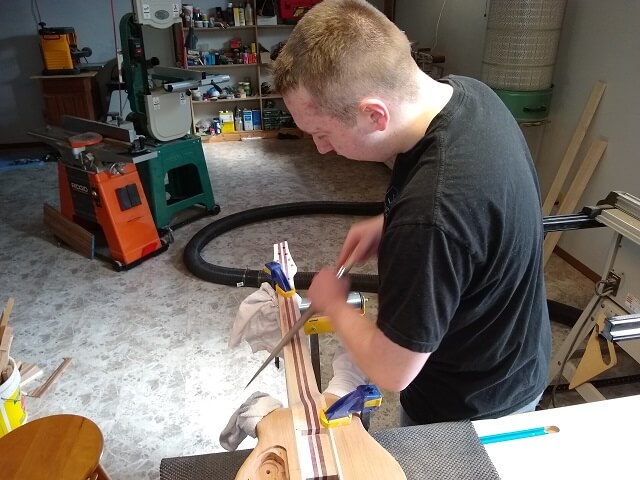
A card scraper was even employed to try and smooth everything out. It took a long time, but he finally got the entire neck done.
The back of the headstock was still pretty rough, so that was smoothed out with the sander.
The last little bit of construction was to create a truss rod cover. Tundra Boy sketched out one that looked like the shield inlay, only inverted. He cut it out on the scroll saw, and then refined it using the disc sander.

At long last we're ready to apply the finish and add the hardware.
Return To The Main Guitar Gallery
This page last updated on 05/04/2020