


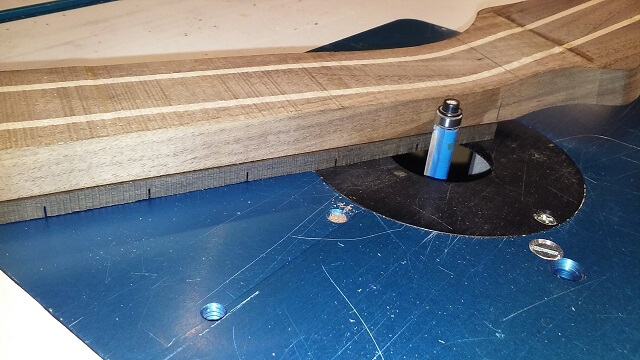
As with most of my guitars, I have multiple stages of the construction going on at once. A page on my site may only deal with one part of the instrument's construction at a time, but in reality they're all happening at once. So, in the midst of building the body and the neck, I also was working on the fretboard. So that's why you'll occasionally see other parts of the instrument lurking in the photos.
To begin, I obtained a nice piece of ebony. This piece was straight and without defect, but not as dark as what you traditionally think of with ebony. That's not a bad thing. Ebony is becoming scarce. The dark and streak-free pieces of ebony are most desirable and bring a premium price. Unfortunately, you can't determine the color of the ebony wood until after a tree is cut down. It was discovered that people harvesting the trees would cut them down, discover the wood on that tree wasn't as dark as they wanted, then leave the felled tree to rot and go cut down another. With the supply of ebony trees dwindling, the fact that a majority of the trees weren't even being sawed up for use was tragic.
When Bob Taylor of Taylor Guitars found out about this practice, he took action. He purchased the ebony industry. He then told the local harvesters that he would pay the same amount for light, streaky ebony logs as he would for the "premium" dark logs. On the other end of the industry, he informed the musical instrument manufacturers that they were going to have to use this wood once considered undesirable or else there wouldn't be any ebony left for anyone.
The only difference between the dark colored ebony and the lighter streaky ebony is color. They are structurally and sonically the same. So manufacturers could use the streaky ebony in two ways. One way is to embrace the streaky look like we do with most other types of wood. The other is to use a dye to color the wood so it looks like the premium ebony.
This piece of ebony, while not bad looking, isn't really that interesting to look at. So I plan to dye it a dark black.
So I grabbed my piece of ebony and my Stew Mac fretting template and got to work. I previously used a slotting jig that I had designed to cut the fret slots in my fingerboards. While it worked, the chance for error was great and the setup time was a bit slow. A couple guitars ago I decided to bite the bullet and buy the Stew Mac fretting template. It was a bit pricy, but it is dead-on accurate and built like a tank so it should last forever.

Here's the setup of the jig. My fret saw blade is installed in the saw (also a Stew Mac product; yes, I'm making them rich.) The template is stuck to the ebony with double-sided tape. An auxiliary fence is clamped to the miter gauge. This auxiliary fence has a small pin inserted into a hole which will match up to the slots on the jig. So the process is locate the pin in the first slot and make a pass over the blade. Repeat for slots 2-22 and we're done. It takes longer to set it all up than to actually cut the fret slots.
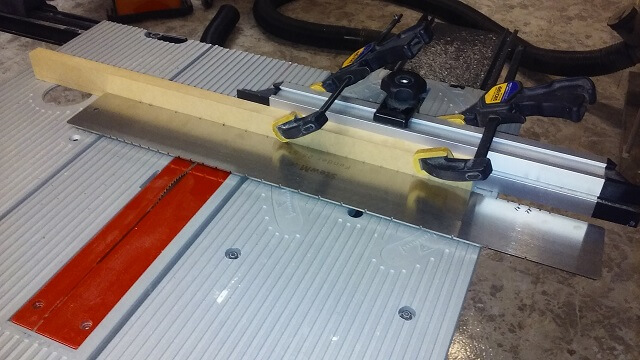
For those who are interested, here's a close up of the jig and the locating pin in the auxiliary fence.
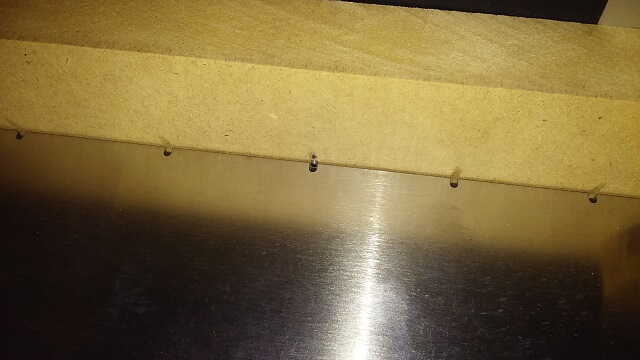
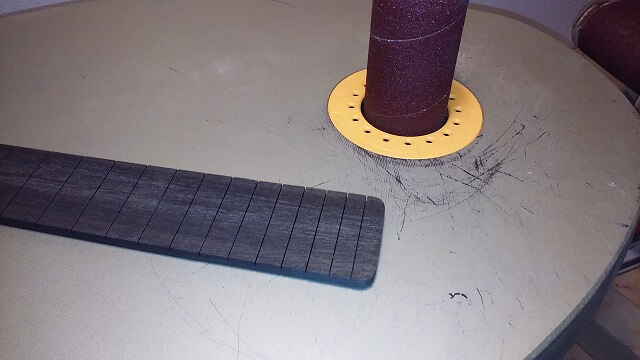
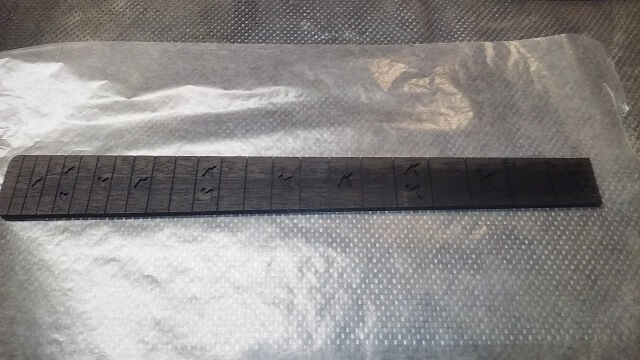
When I was done I had a perfectly accurate slotted fretboard blank. The wood looks darker in this picture than it does in actual light. I think the flash didn't go off on my camera. At this point I spent some time marking the fretboard up for the next step.
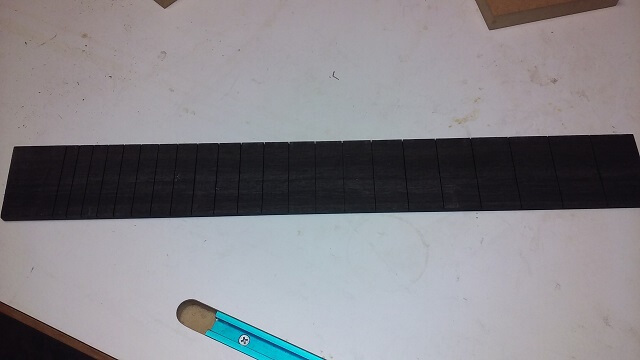
Now I wanted to take my square fretboard blank and taper it to match the neck. I began at the band saw rough cutting the fretboard close to the shape I wanted. It was kind of tough, as my pencil marks were hard to see in the dark wood.
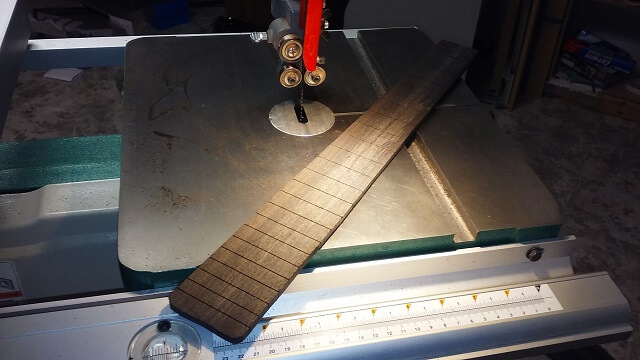
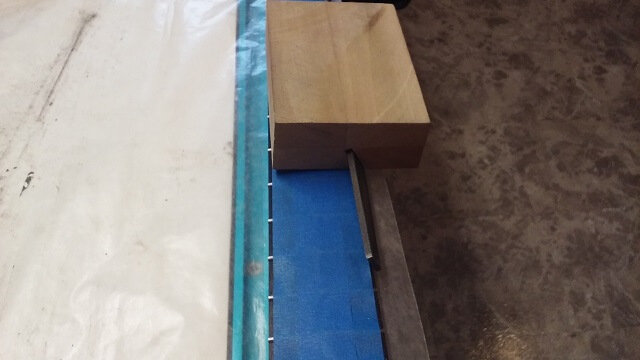
In order to make the fretboard the exact same size as the neck, I used double-sided tape to stick the fretboard in place and then ran the pieces across a flush-trim router bit. I use double-sided tape a lot. It sticks impressively well for temporary bonds like this. In fact, I have to be careful not to use too much as sometimes the pieces don't want to come apart and I risk breaking them.
One area that couldn't be shaped with the router was the end of the fretboard where it will overhang the heel of the neck. The 22nd fret will sit exactly over the end of the neck heel. There is about 10 mm of wood beyond this point that will hang unsupported. This is a pretty common situation and is how 22 fret Stratocasters and Telecasters are built. I shaped this overhang area by eye at the oscillating spindle sander.
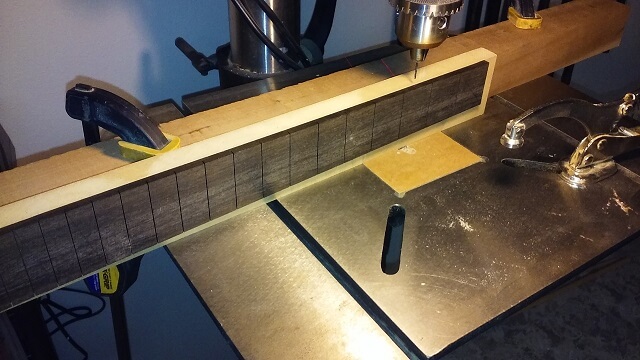
With the neck tapered, now I could drill the holes for the side dots. As simple as an operation as this is, I find it remarkably difficult to get the dots spot on so when you sight down the side of the fretboard they all line up exactly. I think it's because the tiny 1/16" drill bit likes to flex and wander in the rock-hard ebony. I went slow and got these pretty close. There might be a slight variance in a couple of them, but nobody but me would ever notice.
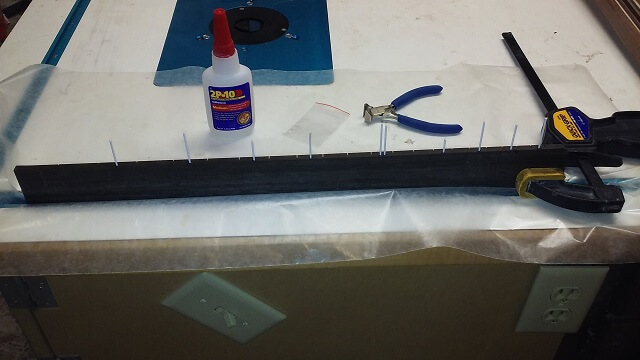
After the holes are drilled I can glue the "dots" in place. The dots really aren't dots. They're plastic rods inserted into the hole. When the glue dries I can cut them off and sand them flush. At that point they look like dots because all you can see is the side of the material. The rods are glued in place using CA glue (super glue.)
I used to put a drop of glue in each hole and then stick the rods in place, but I found that a drop per hole was too much glue. It would squeeze out and drip and make a mess that I'd have to clean up later (or get on my hands and fuse my fingers together.) Instead, I've discovered that if I put a drop on some waxed paper, then just dip the end of the material in the drop of glue, just the right amount of glue gets on the rod. I can glue in all ten of the dots with just a single drop of glue. By the way, the clamp is there just to hold the fretboard on its side while I'm pressing the rods into the holes.
Now it was time to put the inlays on the face of the fretboard. Many guitars feature simple dots. Fancier guitars feature blocks or trapezoids or some similar geometric shape. I decided I wanted something a little fancier for Doug's guitar.
I've done enough inlay cutting to realize a couple of things. First, I don't really enjoy it that much, and second, I'm not that good at it. Designing nice looking inlays takes artistic flair I don't possess. In fact one of the reasons I play music is because I stink at drawing. The inlays I've designed myself look like inlays I've designed myself. Even if I did have the ability to draw, I still would need to cut the inlay out. While I am more confident in my cutting abilities than I am my drawing abilities, it's still tedious and prone to error until a person has done it enough to gain the skill. If that wasn't enough, the shell dust is extremely hazardous to one's health. Really, a person should wear a respirator when cutting shell as the microscopic shell dust has jagged edges and once inhaled don't come out of your lungs.
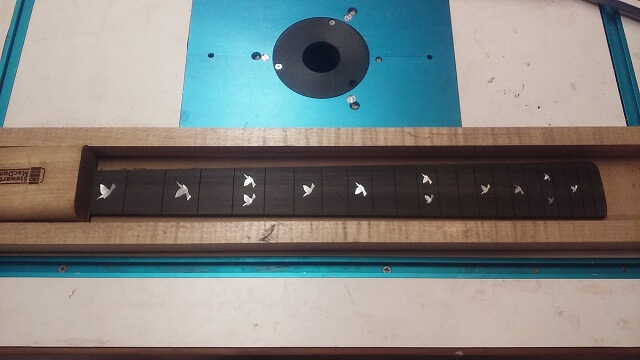
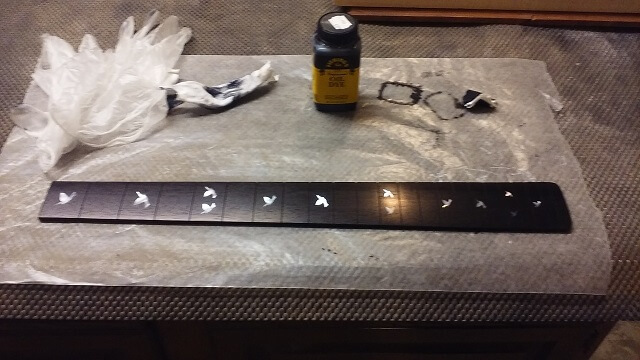
So because of all this, when I do inlays on a guitar I purchase my inlay material pre-cut. I have found a supplier who offers a lot of design and material options. The material is sourced and cut by artists in Viet Nam. Their prices, considering what you're getting, are quite reasonable. So, I can get nice looking designs that are well cut and no risk of Mesothelioma. Count me in. I purchased a set of inlays that look like doves in white mother-of-pearl.
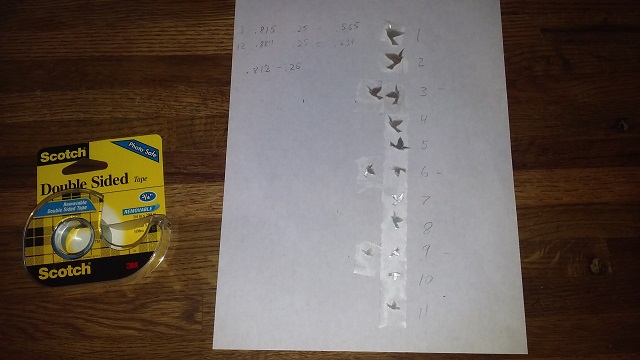
The inlays came shipped glued to a piece of cardboard. While it is difficult to see, each inlay is actually two pieces. The "rear" wing is a separate piece which gives the illusion of depth. So before I could begin the inlay process I had to remove the inlays from the shipping board. I started by running a piece of clear tape over the tops of all of the inlays, and then carefully cutting around the edge of the inlays leaving a layer of tape across the top. Doing this was recommended by the inlay supplier as while the multiple pieces of inlay are glued together, sometimes in shipping they will break apart. While the inlays are still usable, you now have a jigsaw puzzle trying to piece them back together. Running tape across the top holds the inlay together so that even if the glue joint came apart you can still treat the inlay as one piece. Indeed, I later discovered two inlays that had come apart and the tape did its job holding the pieces together.
The next step was to remove the taped inlays from the shipping board. The urge is to just grab them peel them off, but that is another recipe for broken inlays. Instead, the recommended procedure was to soak the inlays in hot water for a couple minutes until the water soluble glue releases and the inlay floats free from the cardboard.
Rather than just sticking the whole board in a pan of water and then trying to figure out what piece was what after fishing them out from the bottom of the bowl, I took a marker and numbered each inlay row on the cardboard, then cut the board into multiple pieces. Then the pieces were placed in bowls and boiling water was poured over them. After 5-10 minutes the inlays would float free of the cardboard. I did 3 sections at a time just because I had 3 bowls handy.
As the pieces released from the backing board I dried them with a paper towel, and then stuck them to a piece of paper with double sided tape and a number. This double sided tape isn't the same carpet tape I use to hold routing templates in place. That stuff is too sticky and I would definitely break inlays trying to pull them off the tape. This tape is pretty low-tack, about the same stickiness as post-it-note glue. In fact, if I held the paper sideways I bet most of the inlays would fall to the floor. My main goal for using this tape was to provide just enough tack to keep the inlays from sliding around as I carefully move the paper around the shop. I can still easily pull each inlay off and replace it as I work with the pieces.
Now it was time to lay out the inlays on the fretboard. I had marked some pencil guidelines earlier. I used a drop of glue called Duco to stick each inlay in the proper position. This glue reminds me of the glue I used to use when I was younger and building plastic models. Similar to the double sided tape I used above, this glue holds just well enough to keep the inlays in place temporarily, but easily releases when I slide a razor blade underneath it.
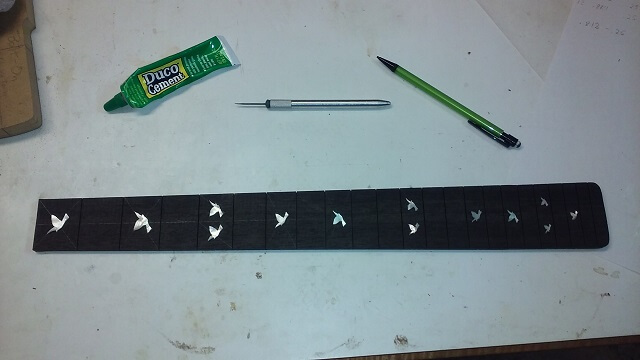
With the inlays temporarily glued in place, I took an x-acto knife and carefully scribed around the edge of each inlay. This created a small cut in the fretboard face that I could use as a routing guide. Then I peeled each inlay off and carefully scraped off any remnants of glue from the back of the inlay and the fretboard.
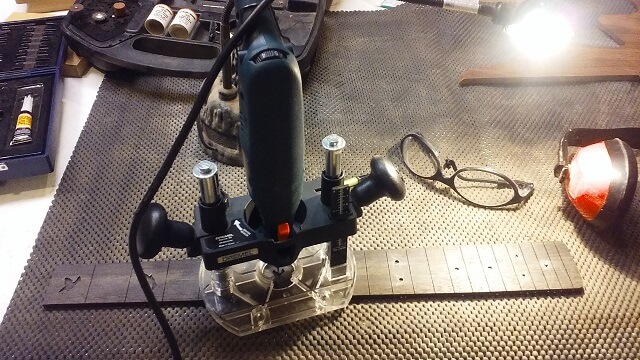
This left a fretboard with a feint outline of each inlay cut in its face. I took a piece of chalk and rubbed it across the face of the fretboard. The chalk dust filled in the scribed lines and made them much easier to see. Then it was just a matter of routing out the areas inside the scribed lines so the inlays could sit flush with the face of the fretboard. "Just." This process was very tedious. It took nearly 1/2 hour per inlay to slowly route away the wood using a tiny 1/32" jeweler's bit on my Dremel, stopping often to test my fit. The goal is to get the hole just big enough to fit the inlay but not so big that large amounts of filler are needed.
After many hours of tedious routing with the Dremel I finally had all of the recesses for the inlays routed. I gave the fretboard a good cleaning with naphtha to remove the chalk dust and any other unwanted bits prior to gluing the inlays in place.
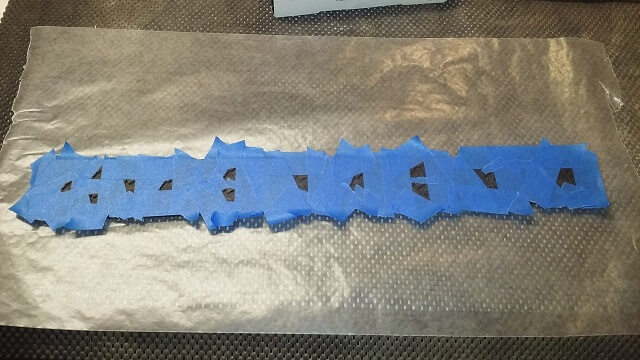
I spent a few minutes coating the fretboard with tape. This will keep the epoxy from going everywhere on the wood when I glue the inlays in place. I didn't want to accidentally fill in any fretboard slots with some glue that seeped out. Also, by limiting the glue to the areas where the inlays it should make level sanding the inlays easier because there will be less glue.
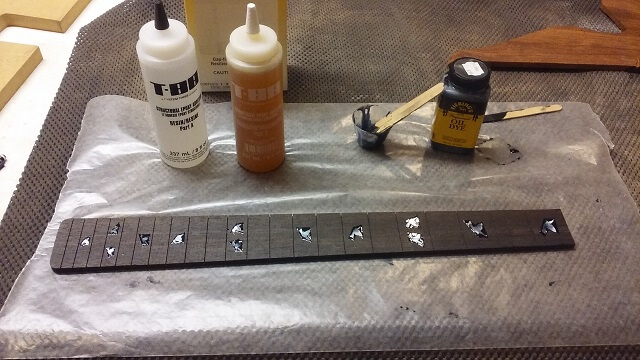
I mixed up some 60 minute epoxy along with a few drops of black ink. The ink will make the glue black and will hide any of the small areas where the hole was a little bit bigger than the inlay. The longer set epoxy has a couple of benefits. First of all, it's a lot stronger than the 5 minute kind which probably isn't a big deal in this case because inlays aren't subject to a lot of stress. Second and more importantly, it gives a lot more "open time" before it starts to cure. If I were trying to use 5 minute epoxy I'd have to do about 3 or 4 separate mixes as there wasn't any way I was going to get all of these inlays in place before 5 minute epoxy starts to set, especially since you need to stir epoxy at least 3 minutes to get it thoroughly mixed.
The down side to 60 minute epoxy is that no stores in my area carry it any longer. Everywhere I went they only had the 5 minute kind on the shelf. I guess more people equate faster with better and the slow stuff doesn't sell. I wound up having to order it online. As a result I got a 1 pint package which should last me a long, long time.
One by one I smeared glue in the recess and pressed the inlay in place using a popsicle stick. Once all of the inlays were set in place I then smeared more glue on top of them and worked it back and forth to make sure any gaps around the sides of the inlays were filled in with the epoxy. Then I scrapped all of the excess epoxy off the surface of the fretboard and removed the tape. If I waited until the glue was dry before attempting to remove the tape I would have wound up gluing the tape to the fretboard. The epoxy is supposed to cure in 24 hours but I let the fretboard set for longer to make sure it was good and hard before I continued on. There were plenty of parts of the guitar I could work on in the meantime.
With other things going on in my life I didn't get back to the project for nearly a week. In the mean time, that gave the epoxy more than enough time to cure completely. Now it was time to kill two birds with one stone: by sanding the radius into the face of the fretboard, I can also sand the inlays level.
I got out my radius jig, which is nothing more than a piece of hardboard with two maple guide rails. This keeps my radius block running parallel to the fretboard as I sand. If the radius block turns right or left while sanding (aircraft pilots call this "yaw") the radius that gets sanded will be flatter than desired.
Speaking of desired, I originally thought about doing a 12" radius on this guitar which is a typical radius used by Gibson. Then I started thinking that maybe I should do a compound radius. Then I decided to go back to a straight 12" radius. Then when I went to grab my sanding block at the last second I got an impulse and grabbed my 10" radius sanding block. My reasoning was that Doug is more of a chord player than a lead player. In general, smaller radii are more comfortable to chord and flatter radiuses are easier when playing single notes. This is a very broad generalization, as you can play solos on tight radiuses (ask Stevie Ray Vaughan) and you can play chords on flat radiuses (ask Alan Holdsworth.) Ok, so I picked two guys you can no longer ask, but hopefully you get my drift.
Anyway, I went with a 10" radius. Usually I loathe sanding radiuses into fretboards, especially ebony, as it seems to take forever and covers me and everything else in black dust. I end up filling Kleenexes with black boogers for several days afterwards (I have no photographic proof of this - you're welcome.) In fact I've researched various types of jigs I could build to make radiusing fretboards easier. I still haven't built one so at this point I was back to my old sanding block method.
What I did end up doing (completely by accident) that I discovered worked very well was I put the hose to my dust collector so the end of it was pointed upwards around my sternum. I then held it in place with my body weight as I leaned against the workbench. This did a couple of things. First, all the dust that I normally would have inhaled got sucked into the hose instead. Second, with the hose in a convenient spot, I could take 5-10 swipes with the sanding block and then smack the block against the top of the hose which removed any sawdust that was building up on it. Thirdly, after 30-40 swipes with the sanding block I could easily grab the hose and remove the sanding dust from the work piece.
Using this method I was able to not blow anything questionable out of my nose. Keeping the sanding block and workpiece so clean meant that the sanding went a lot faster. It took about 1/2 an hour to sand the radius into the fretboard, and in the past this has taken more than an hour for an ebony board. I still may investigate a radius jig of some sort, but in the mean time this was a lot better.
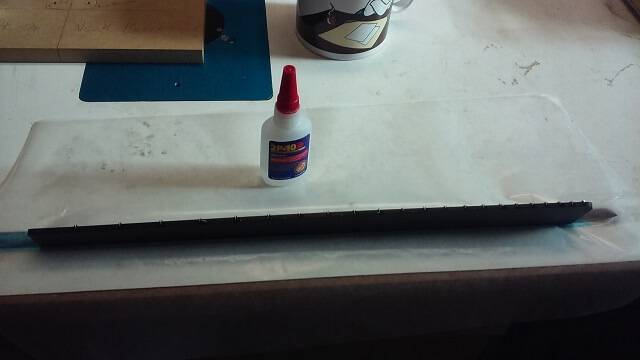
The fretboard now had a nice curve on the front and the inlays were completely level. Unfortunately, despite all the time I spent working the epoxy into place there were a few small pinholes in the dried glue around the inlays that were now visible. I filled the four offending spots with CA glue mixed with sawdust, let the fretboard dry overnight and then sanded the spots level.
When sanding the radius into the fretboard I used 100 grit sanding paper. Now I wanted to make the face of the fretboard like glass, so I spent about an hour working through grits of paper (220, 320, 400, 600, 800, 1000, 1500 and 2000) until it felt like glass and was somewhat shiny. Ebony fretboards are left unfinished so that's why I sanded to such a fine grit. It also is a lot easier to sand the fretboard before the frets are installed.
By the way, I learned something new: Spot the cat was roaming around the shop and whining for attention. She jumped up on the workbench between me and the fretboard demanding to be petted. I obliged, then realized you should never pet a white cat while your hands are dirty from sanding black ebony. Oops.
The fretboard was nice and shiny and felt great. The down side was the sheen revealed how unflattering this piece of ebony was. The streaks in the wood were pronounced enough to look ugly, but not pronounced enough to be interesting. I already talked above about how suppliers are now selling ebony that previously wouldn't have been used because they aren't visually appealing, and how I fully support this. So I got out my black wood dye and wiped a coat on the face and edges of the fretboard. After a couple of minutes I took a rag and wiped off the excess. The inlays aren't porous so the dye came right off of them. The end result was the dark parts of the ebony didn't get much darker, but the light streaks did so the fretboard was now a nice, even dark brown color. Sorry about the slightly out-of-focus picture.
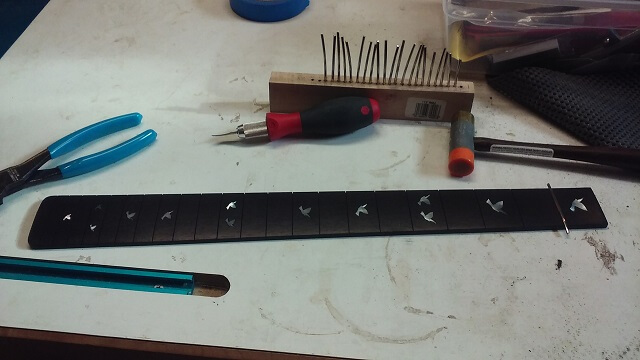
Before the fingerboard is glued to the neck, I wanted to install the fret wire. While this could also be done after the piece is glued to the neck (and I have done it that way) I find it easier to pound the frets into place when the board is sitting flat on my workbench. In the end, the results are about the same so it really comes down to the builder's preference. I'm not going do a final leveling and polish just yet, but I do want to get them installed.
To prepare, I got the fret wire ready. It comes in straight pieces about two feet long. To do a standard guitar fretboard, I use about 5 feet. Before I can use it, though, it needs to be bent to match the radius of the fretboard (actually, a touch smaller radius.) To accomplish this, I use my homemade fret bending jig. It's pretty much a piece of wood cut in a semi-circle, with a groove cut in the end that will allow the fret tang to slip into it. I bend the fretwire around this jig. The jig has about a 4" radius, but the fret wire springs back after I bend it and winds up with somewhere around a 7" radius in the wire. My fretboard has a 10" radius. Over bending the fret wire will help keep the fret ends down once the frets are installed.
I then cut pieces of fretwire to length and placed them in a little holder I built years ago. It's just a block of wood with 24 holes drilled in it and numbers printed next to them. I try and cut the frets a little longer than their respective slot by about 1/4" so that I have 1/8" of wiggle room on either side.
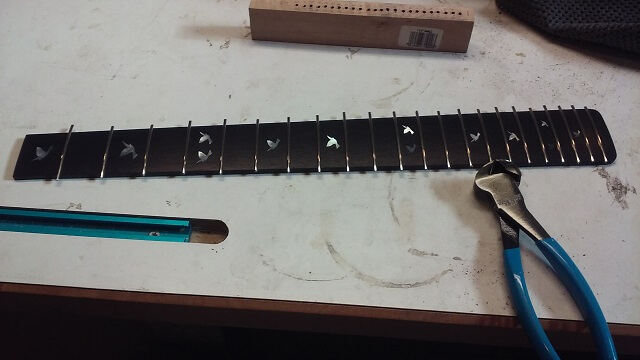
Then it's just a matter of installing each fret. Some people have developed fancy fret press systems, but I use the traditional hammer method. It may not be as slick as the fancy systems, but it's cheap and given the cost of the fret press systems versus how many guitars I build, it's hard to justify the expense.
I start by running my cleaning blade down the fret slot just to make sure there's no extra sawdust or other debris that has fallen into the slot and would interfere with the fret tang from seating. Then I place the fret in place and tap each end down using the plastic face on my hammer. Then I hammer back and forth, moving closer to the middle of the fret. This flattens the fret down in the slot and the slight horizontal movement causes the barbed tang to dig into the wood a little better. Then I just repeat the process until all of the frets are installed. In this case, I repeated it 22 times.
With the frets installed, now I can trim the extra bits of the fretwire that overhang flush with the fretboard.
After all of the frets are trimmed even with the fretboard I ran a file along each edge to remove any little bits of fret tang that might be sticking out and catch the player's finger.
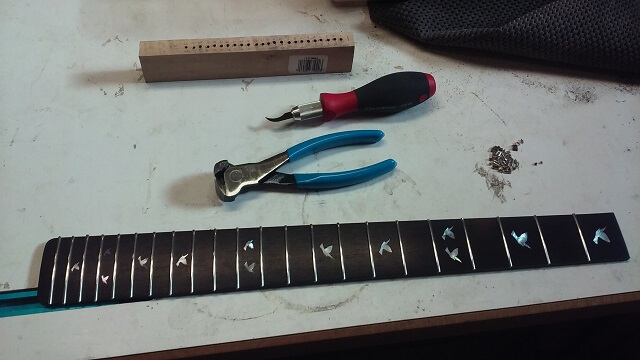
Next, I used my fret rocker tool and did some checking for any grossly high frets. I'm not trying to perfectly level them at the moment, but I found a couple sticking up slightly that needed another whack or three with the fret hammer. After that I put a drop of superglue on each fret end to help keep them seated and not spring loose down the road as the weather changes.
If you look at a guitar, you'll notice that the ends of the frets aren't cut off at a 90 degree angle. They have a bevel on them in the 60 degree range. This helps them look nicer and also reduced the tendency for a player's fingers to catch on the fret ends as they're moving their hand about the fingerboard. I filed the bevel into the edges of the frets using my homemade fret beveling jig. I put some tape over the frets just to keep from scratching them up as the block moved back and forth.
Now that the fretboard is complete, I need something to which I can attach it. Let's continue on where I build the neck.
Return To The Main Music Gallery
This page last updated on 06/28/2018