


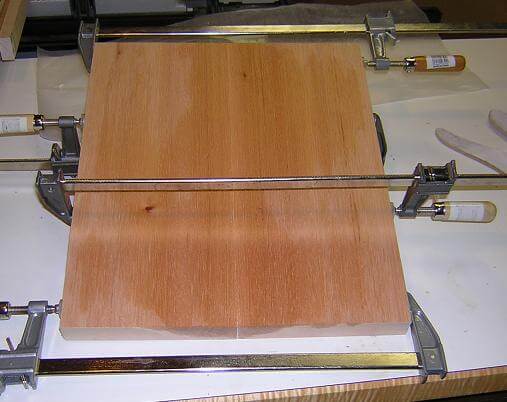
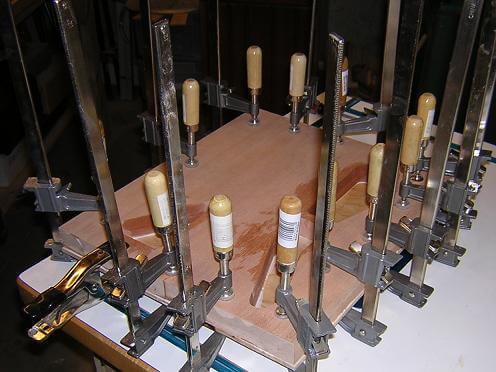
The body of the guitar is going to be made up of layers of different wood: maple top and bottom with piece of mahogany in the middle. Kind of a wood "sandwich". This is a picture of me gluing together the pieces of mahogany that will make up the middle layer of the body. Mmmm... sandwich!
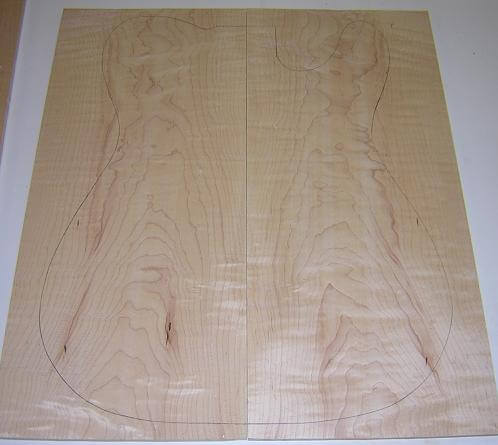
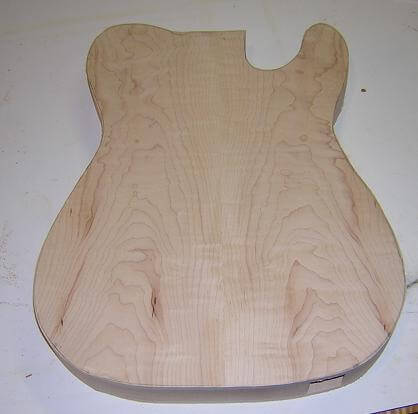
The top of a guitar is the focal point, so I wanted it to be very eye catching. Because Paul wants a clear finish and really likes the natural look of wood, I hunted through the boards at my local hardwood supplier and found a great piece of maple with a lot of character. I cut a chunk off the larger billet and bookmatched it to make the top. The picture below was snapped before I glued the two pieces together; I drew the outline of the body on it to give an idea of what the finished top will look like. Actually, in this picture I think the grain is slightly subdued compared to what it looks like in person. This piece of wood has a lot of character.
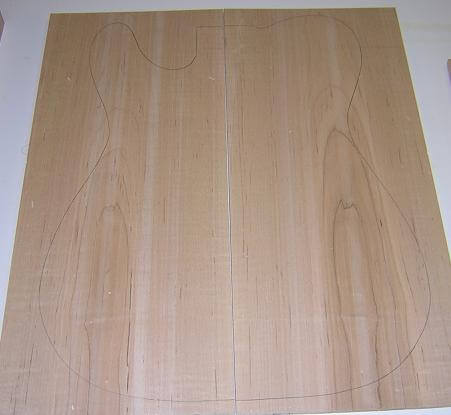
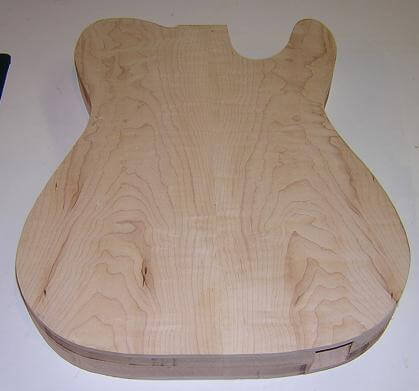
The bottom of the guitar is not seen as often, but I didn't want to relegate it to "B" stock. I took a nice piece of maple to bookmatch for the back. Actually, this wood came off the remainder of the board I used for the very first guitar I built!
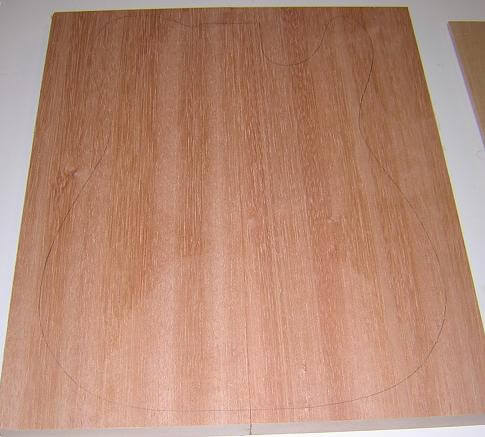
The next photo doesn't really add much to this disussion, but I really liked how it showed off the color of the mahogany so I included it. This is me beginning to work on the middle layer of the body. It's almost a shame that a majority of this beautiful piece of wood will never again be seen once the top and bottom is glued in place!
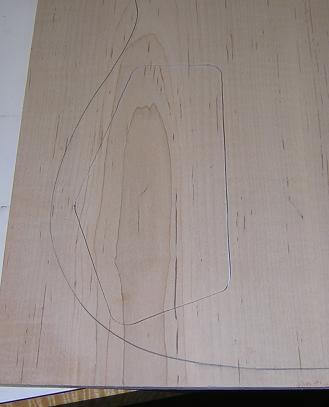
During my discussions with Paul about the guitar's construction, I got the impression that he really liked the natural look of wood and wanted to highlight the wood grain whenever possible. To help in this manor, rather than using a standard, plastic control cavity cover, I'm going to cut the control cavity cover from the piece of wood that will be glued onto the back. This way, the grain will match perfectly. To do this, I must remove the wood for the control cavity from the middle layer of mahogany prior to gluing the layers together. Then I can trace the cavity shape onto the maple back, and use it as a guide to cut out the control cavity cover. I intentionally made the control cavity large on this guitar, because with the piezo pickup system there's going to be a lot of electronics jammed in there.
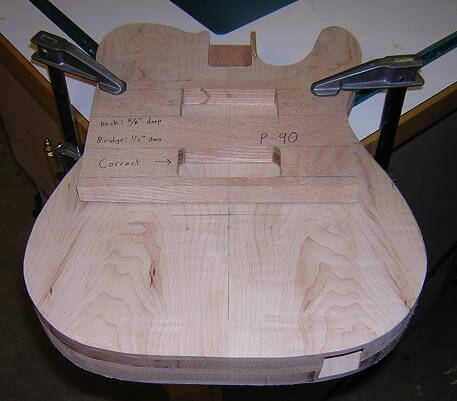
Also, the weight of a mahogany and maple body can get pretty heavy. To help aleviate this, I'm going to remove some wood from the mahogany to create a semi-chambered body. Because the Tundracaster shape can tend to get a little neck-heavy, I marked the chambers towards the top of the body. Leaving the body solid towards the bottom will help "leverage" the body as it hangs on the strap to help reduce the neck from dropping to the ground whenever you let go. Also, there's been reports that removing too much wood from behind the bridge can kill a guitar's tone, so to prevent this from happening I'm leaving it all there! Here's the mahogany marked for all the cut-outs:

One thing I had to be careful about when laying out where all the cavities would be is to make sure I didn't put them anywhere where I might accidentally cut into them when milling the other areas of the body (i.e. the pickup cavities, or the cheese-belly recess.)
Another thing I'm doing on Paul's guitar is making an angled output jack. The cutout for this can be seen in the picture below, along with the control cavity cutout and the chambers.
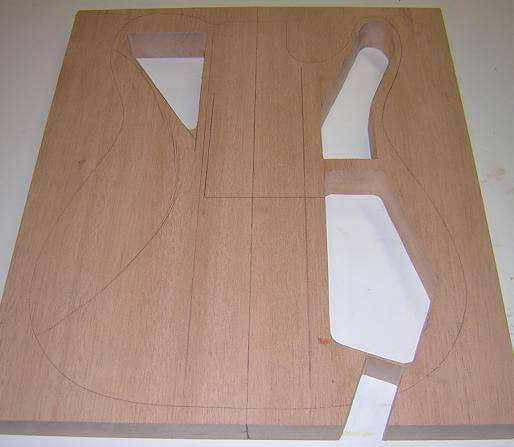
In addition to the chambers in the mahogany section of the body, I'm also going to rout out the channels for all of the wiring prior to gluing on the top. This will save me the hassle of trying to drill weird angled holes to run the wiring later. The channels should be exposed when I rout out the pickup cavities.Note the extra large channel that will hold the wires to the piezo bridge saddles.
As mentioned above, rather than using a traditional plastic control cavity cover, I wanted to cut the cover from the piece of maple that will be glued onto the bottom so that it would match perfectly. Here's a picture of the control cover after being cut out.
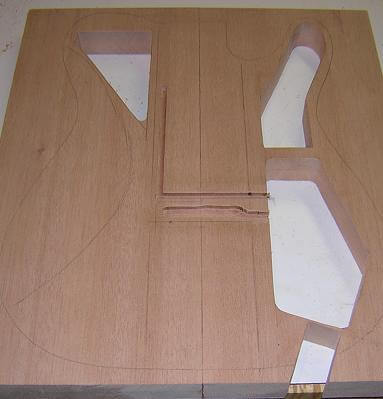
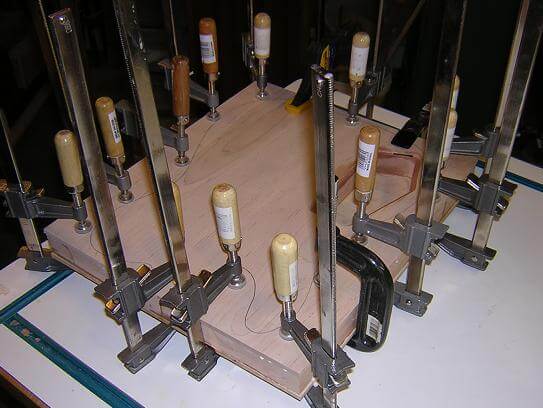
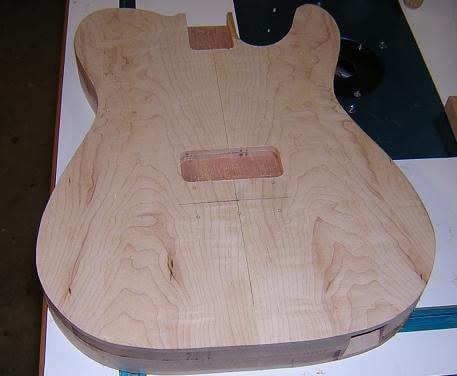
With all of the prep work done, it was now time to build the "sandwich" that will make up the body blank. I started by gluing the maple top to the mahogany center. Lots of glue and clamps hold everything together. I used a wet rag to clean up the glue that squeezed out into the chambers and control cavity, just to keep things neat. Have I mentioned that you can never have too many clamps?
After everything was dry, I repeated the process with the bottom. Again, the wet rag addressed the squeeze out issues around the control cavity cutout. Had I not removed the glue now, it would have looked sloppy and interefered with the cover fitting properly.
After tracing the outline onto the body blank, I rough cut the body shape at the band saw staying outside the line by no more than 1/8".
Then I attached the template to the rough-cut body blank and trimmed it flush using the router. This gave me a final body shape that matches the template exactly.
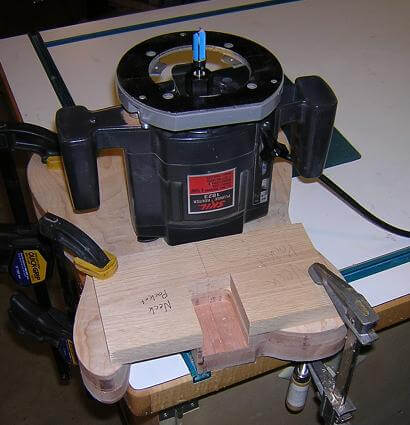
Next up, we need to rout the pocket for the neck tenon. This guitar will not utilize a neck angle (the fretboard will sit 1/8" proud of the top of the body) so the tenon and pocket is very straightforward. I used double-sided tape and a clamp to fasten my neck pocket template to the top of the guitar in the proper place. To begin with, I used a forstner bit to drill out a majority of the wood (makes life easier on the router.)

Then, using the router and a flush-cut bit I routed the pocket to exact size.
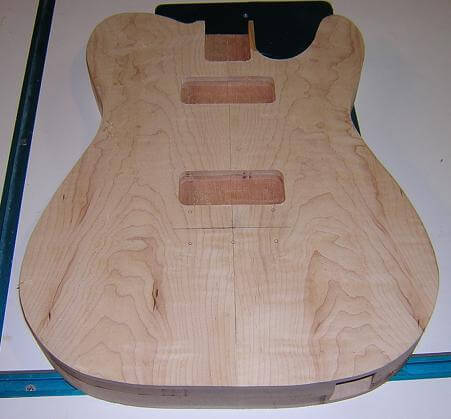
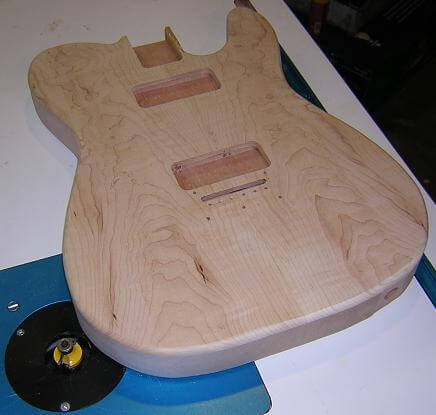
I had already built a template for a P-90 pickup back when I build the first Tundracaster, so I taped and clamped it to the body in the correct position for the bridge pickup. Notice that the template has another pickup outline cut in it, with instructions on which one should be used. I goofed up the first pattern, but rather than throwing away the wood I just tried again on the same piece of scrap. It works fine as long as I follow my own directions and rout the correct hole!
Again using my pattern-cutting bit (probably my most useful bit in guitar making) I routed both pickup cavities.
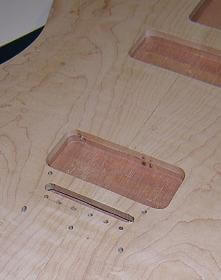
Prior to gluing the maple cap on the body, I had routed a channel for the wires that will come out of the piezo bridge. I routed a small slot that will allow the wires to pass into this channel and then into the control cavity.
Next, I used a 1/4" round-over bit in the router table to ease the edges on the front and back of the guitar.
This guitar will have a "drop top" or what is also called a forearm cutaway. It makes the guitar much more comfortable to play, as the edge of the guitar isn't digging into your arm (as much, anyway). I like to cut these on the table saw, as it gives a very smooth cut that doesn't require a lot of sanding. To accomplish this, I tilt the blade to the appropriate angle (13 degrees if I remember correctly), then I clamp the guitar in the correct position to a long, flat board.
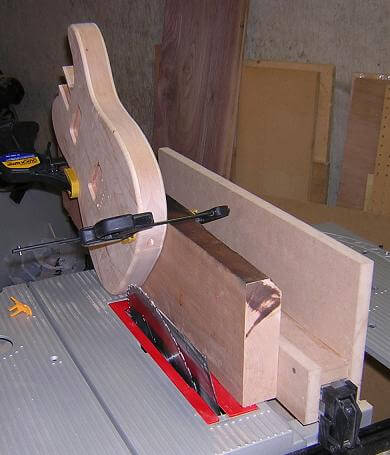
After that, it's just a matter of turning on the saw and giving it a push.
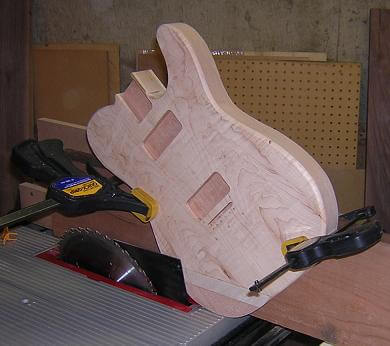
Here's the finished cut. A little sanding and rounding over of the edge (to match the rest of the body's round over) and we have a completed drop top. Nice and easy!
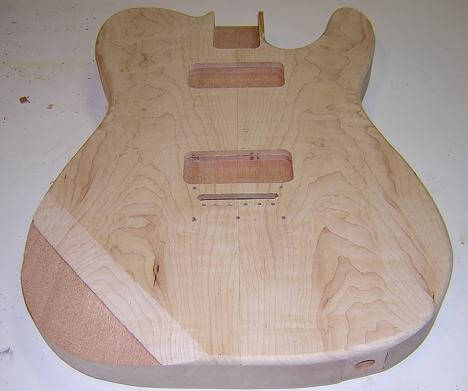
Now it's time to do the cheese-belly cutout. I begin by marking the outline of the cut with a pencil.
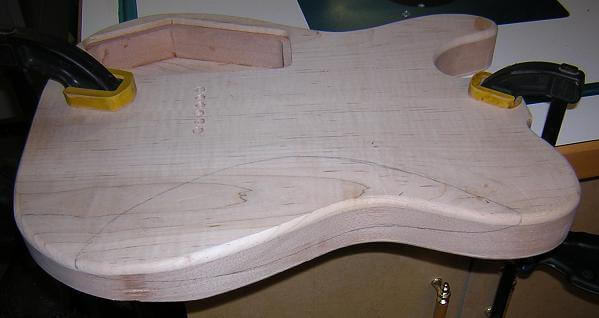
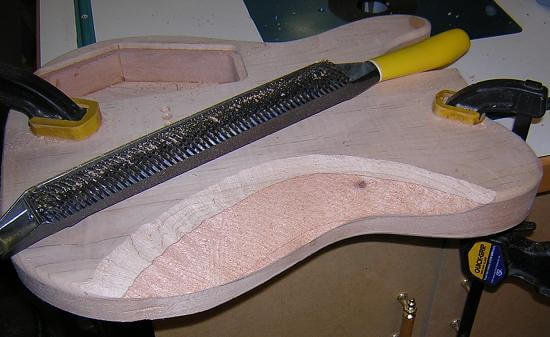
Then I go to town with a surform and make a lot of sweat and sawdust. After about fourty five minutes, I have a rough cutout.
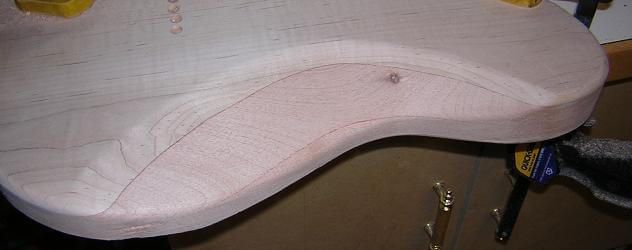
With a little sanding, the cheese-belly cutout is done!
Next up, I drilled the holes for the controls. This guitar will have two volumes (magnetic and piezo), a 3 way switch for the two magnetic pickups and a mini-toggle to switch between piezo and magnetic (or both.)
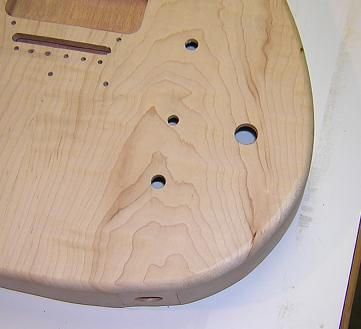
The maple top of the guitar is a full 1/4" thick. Most electronics are designed to mount in a surface that is around 1/8" thick, so I had to drill some recesses in the control cavity to allow the proper depth for mounting .

The last thing to do before pronouncing the body "finished" is to do the little remaining items that I would want done prior to applying the finish. I drilled the holes for the strap locks, pickup mounting and output jack. I didn't take any pictures of these steps, as it's pretty much just a drill bit in wood, and not too exciting.
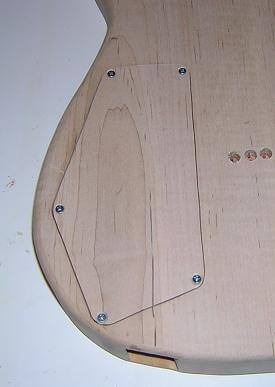
I did drill and countersink the holes for the control cavity cover. Here's a picture of it being test-fitted. Once the guitar is finished, I'll paint the screws black to match the rest of the hardware.
Next up, we build the neck.
Or, you can go back to Paul receiving the guitar.
Return To The Main Music Gallery
This page last updated on 06/28/2018