


The individual pieces of Paul's guitar were for the most part done, so it was time for the final assembly steps. The first step is to glue the fretboard to the neck blank. It's very important not to forget to install the truss rod before gluing the fingerboard on. To forget that detail would really ruin your day. The truss rod is cushioned with a few squirts of silicone caulk to keep it from rattling, and care is taken not to let glue seep into the channel when putting it all together.
The assembly is clamped up, with a piece of scrap wood covering the fingerboard and protecting it from the clamps. I put a piece of waxed paper beween the fingerboard and scrap wood, as I didn't want any glue squeeze-out from accientally sticking the mahogany binding and scrap wood together. I don't know things like this because I'm smart!

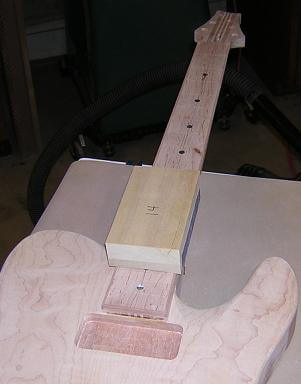
The fretboard on this guitar will be raised above the face of the body approximately 1/8", ala Fender (although Fender accomplishes this feat by using a bolt-on neck where the neck heel is the same size as the fingerboard.) Because the tenon on this guitar is smaller than the fingerboard, I had to build a little "extension" that would fill the gap between the end of the fretboard and the body. Here's a picture of that extension prior to being glued in place.
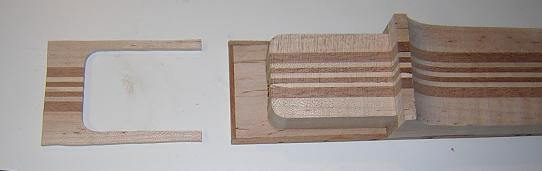
A little glue, some clamps and a few hours later the extension is in place. I left the edges of the extension intentionally proud of the fretboard. They will be trimmed flush along with the rest of the neck in the next step.

As mentioned, the neck (and extension) were cut wider than the fretboard. Now these were trimmed flush using a pattern cutting bit in the router table. It's a lot easier to do it this way then to try to get the pieces sized exactly right, then hold them perfectly in place while trying to get everything glued together.

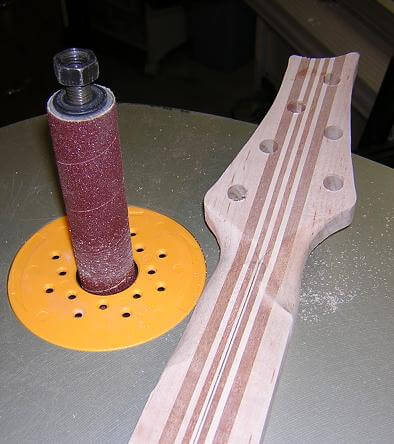
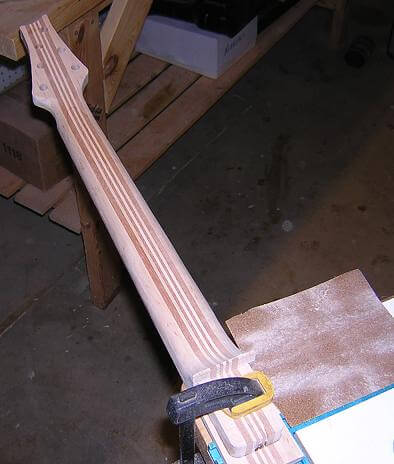
With the fingerboard attached, now my attention could turn to carving the neck. Previously, I have always done this with a surform which I was initially planning to do with this neck as well. I happened to have my oscillating spindle sander set up for tweaking a spot on another guitar I was working on concurrently when I had an idea.
One of the trickier parts (for me, anyway) of carving the neck was to get the neck to headstock transition carved smoothly. There seem to be angles running in every direction, which are difficult to get carved and sanded and still look good. I thought it might be worth a try to use a smaller diameter drum on the OSS and carve these transitions that way. This would also avoid the tearout that is a common occurence when using the surforms.
So, I decided to take a risk and sand the transition using this new method. Thankfully it went well, although it wasn't as fast as I had originally thought it would be. I did like how the transitions looked, though, and it was nice to not have to do near as much hand sanding to remove the gouges the surform would have caused.
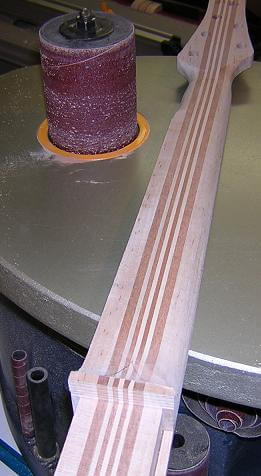
Well, in order to carve the transition with the OSS I had to also form the top portion of the neck carve. I then had the thought, "what if I used the OSS to carve the entire neck?" I'd never done that before but it seemed like an interesting challenge. I decided that if I started and it wasn't going well, I could always switch back to my original surform method.
I put a large diameter drum in the OSS and went to town. Unlike using the surform where I can quickly switch back and forth to carve both sides of the neck at once, with the OSS it was easier to just work on one side at a time. Again, it took longer than I had thought, but I was quite pleased with the resulting surface. Here's a picture of half the neck carved.
I repeated the process with the other half of the neck. The OSS did a nice job on the heel transition as well.
Once the rough carving was done, it was time to switch to hand sanding. The OSS didn't leave the gouges and missing chunks that the surform would have left, but the overall profile had lots of surface anomalies that weren't visible by eye but could be felt with your hand. I spent a good chunk of time sanding the neck by hand until everything was smooth and felt "right." The neck carving was done, and I hadn't used a single carving tool.
So would I use the OSS to carve another neck versus my traditional method of the surform? Quite possibly. I originally thought I would save quite a bit of time using a power tool versus the old fashioned "knuckle dragger" tool. This didn't prove to be the case, as it took me at least as long (if not a little longer) to do it with the OSS. I would suspect I would get a little faster as I practiced.
The big thing I liked was how nice the head and heel transitions turned out, and the absence of gouges that the OSS left. On previous necks carved the traditional way I've always had at least one spot where a gouge was so deep that in order to remove it I wound up with a low spot that your fingers could feel. This neck didn't have any of those low areas, which was nice.
I'll have to do at least one more neck with the OSS before I decide whether or not to abandon the surform method.
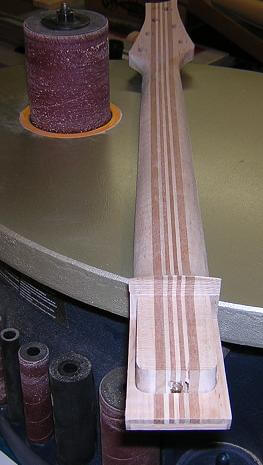
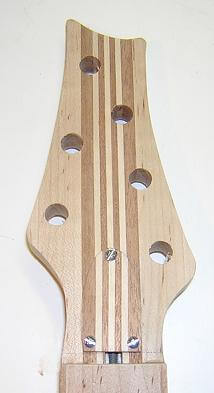
Next, I wanted to do something about that unsightly notch in the headstock where the truss rod adjusting nut sits. Most guitars just use a plastic cover in this area. Seeing as I'm not making "most guitars" (if all the other guitars jumped off a cliff, would your guitar do it too?) I wanted to do something special. I took a piece of scrap from the neck blank and cut a piece about 1/16" thick. Wood this thin isn't very strong, so I gave the back side a good coat of epoxy to strengthen it up. Then I marked and cut out a cover on the scroll saw.
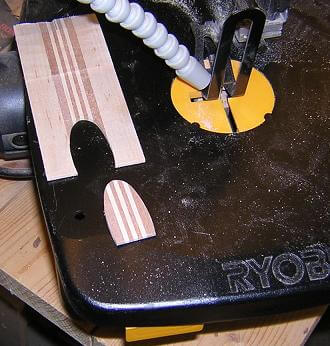
I carefully marked and drilled the holes, then test-mounted the cover on the neck. The space between the top of the fretboard and the bottom of the cover is where the nut will be glued. Also, once the guitar is finished I'll paint the mounting screws black to match the rest of the guitar hardware.
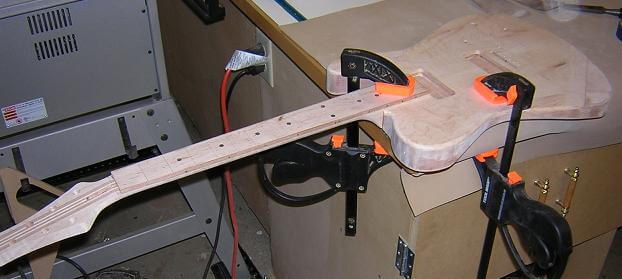
Now comes the pinnacle moment in building my guitars: gluing the neck in place. Up to this point, if you really botched something the worst that would happen is that you have to start over on half of the guitar. Once the neck is in place, you're beyond the point of no return.
I like to use slow-set epoxy in my neck joints, as this is a critical join. Epoxy is gap-filling, so if there are any irregularities in the neck tenon or pocket, it will fill these areas. Plus it's stronger than truck-stop coffee. If one of my guitars fail, I will almost guarantee that it's not in the neck join area! The joinery was fairly tight, so one clamp was more than sufficient to hold it in place while the epoxy cured.
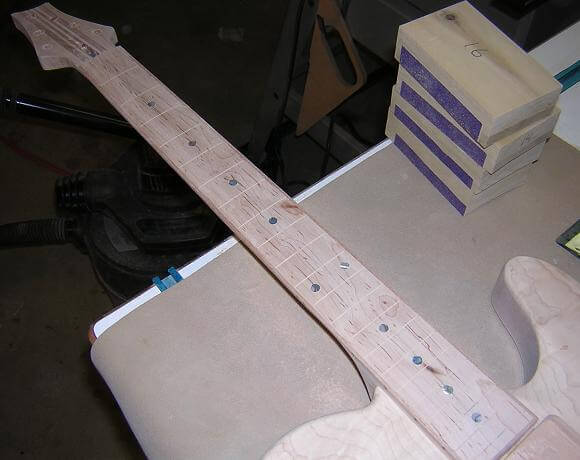
With the neck glue dry, I took this opportunity to radius the fretboard. Paul's guitar will have a compound radius, starting at 16" at the body end, and flowing to a 10" at the nut end. Here's a picture of my radius sanding blocks lined up on the fretboard to give you an idea of the area they will cover.

Then it's just a matter of sanding each area of the fretboard with the respective radius block. I put a pencil line down the center of the fretboard. When this line disappeared, I knew it was time to stop sanding in that area.
Here's the finished radiused fretboard. You really can't see the radius in the picture (too subtle) but I wanted to post something to prove I wasn't just sitting on my kiester. It took about 15 minutes or so to sand the entire fretboard radius.
Next, I flipped the guitar over and carved the neck heel so that the transition from the neck to the back of the body would be smooth. This will facilitate easier upper-fret access.

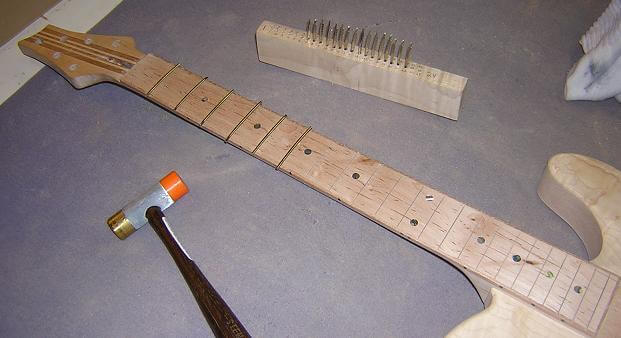
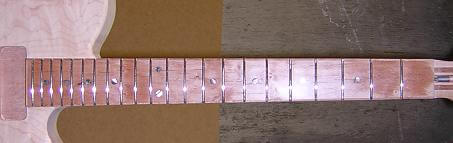
Now I wanted to install the frets. I'll do the basic hammering, trimming and beveling now, then do the final leveling and crowning after the finish has been applied. The frets are initally cut long and hammered into place. Because this is a bound fretboard, I had to trim off the tang on either end of the fretwire so that it would fit in the slot between the binding.
Next, I trimmed the overhanging edges of the frets flush with the edge of the neck.
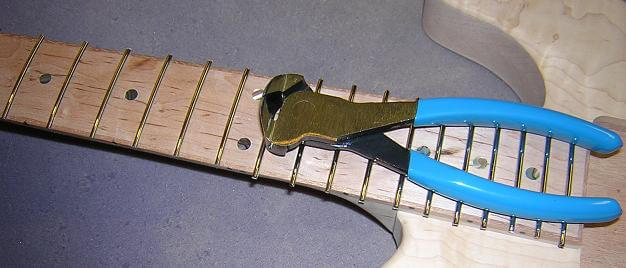
Finally I beveled the edges of the frets to a 35 degree angle, and called the fretwork done for the time being.
Next up, we apply a finish and install the hardware.
Or, you can go back to the fretboard building page.
Return To The Main Music Gallery
This page last updated on 06/28/2018