


The fact that the neck had already been finished, with the fretwork done and the nut installed really reduced the amount of work it took to wrap up this guitar. I sprayed a nitrocellulose lacquer finish on the body, and did this at the same time I sprayed the finish for the Vintage Tundracaster and Doug's Guitar. As long as I had the spray equipment set up, why not?
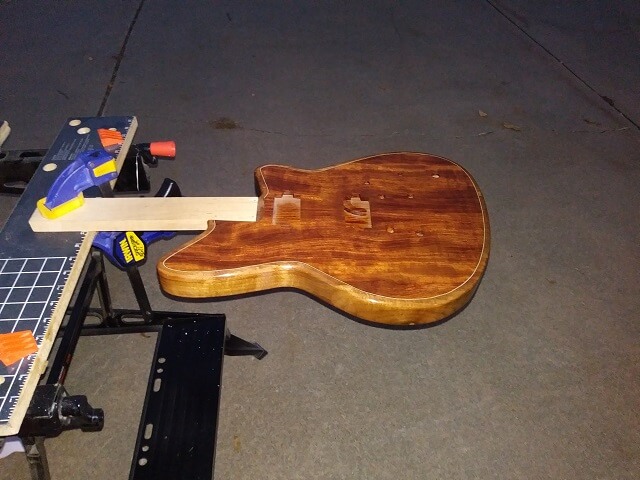
After spraying I hung the body in my shop closet so the lacquer could cure. It needs to dry for at least two weeks before you attempt to level sand and buff the finish. Like what usually happens, life got in the way and 18 months later I finally pulled it out to continue work. At least I knew the lacquer had definitely gassed off by that point.
I did the usual process of wet sanding, starting with 800 grit, then proceeding to 1000, 1500 and 2000 grit paper. It's a slow process, but one that is necessary to turn the guitar into a mirror.
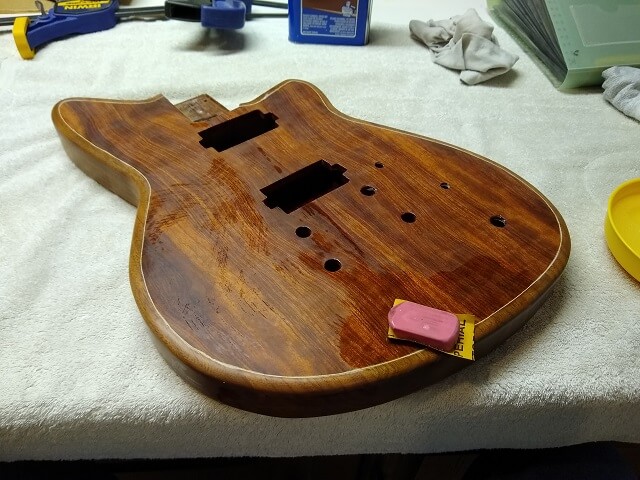
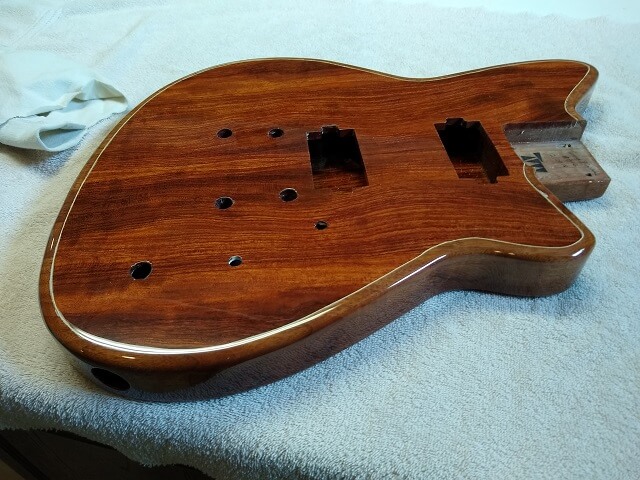
After level sanding, I let the guitar sit for a couple of days for the finish to dry from the wet sanding and then I buffed it to a mirror shine. This is when I noticed some issues hiding under the finish. I'm not sure if it was the glue I used to attach the binding or the binding material itself, but whatever it was it made areas all around both sides of the guitar that look like the finish is chipped. Rubbing your finger over the area reveals it to be glass smooth, so the "chips" (for lack of a better term) are underneath the lacquer. In most areas it depends on the angle in which you hold the guitar as to if you can see them or not. There is one area on the lower bout by the neck pickup, however, that is quite visible all the time.
It was a little disheartening. Unfortunately the only way to fix it would be to strip the finish off the body and start over. However, not knowing the true cause of the issue meant that I could refinish the guitar and have the exact same thing happen again. I decided to just live with the finish imperfections. The flaws wouldn't be visible up on stage, and I am intending this guitar to be a player rather than a piece of wall art, so it is what it is.
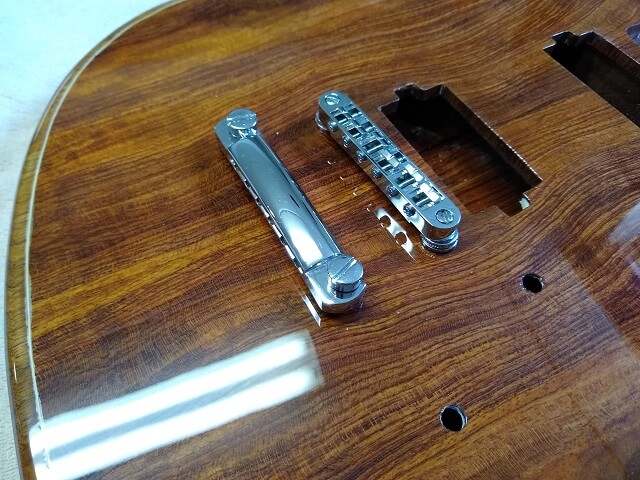
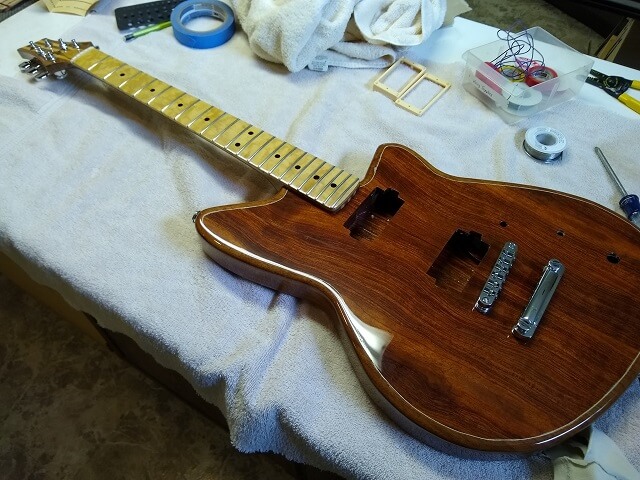
Next up was to install the bridge. Getting Tune-O-Matic bridge posts and the stop tailpiece posts pressed into place always seems like a bit of a Rube Goldberg process. There are probably special tools that allow you to do it elegantly, but I always wind up doing it with a deep jaw clamp, some wood blocks balanced on the posts, some towels to protect the finish and a lot of sweat rolling off my brow. But I got 'er done.
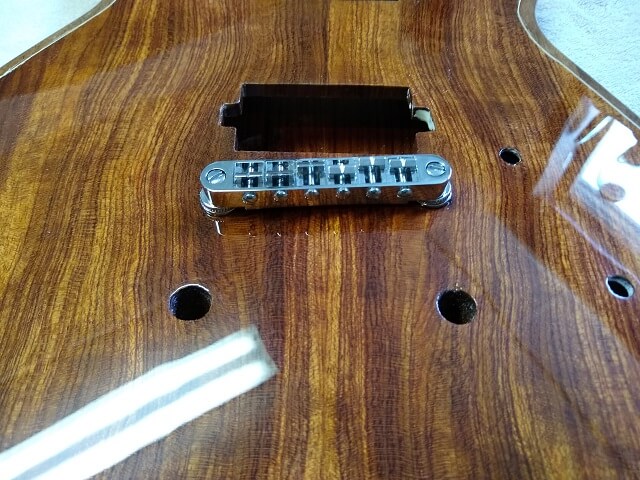
With the bridge installed I repeated the process for the stop tailpiece.
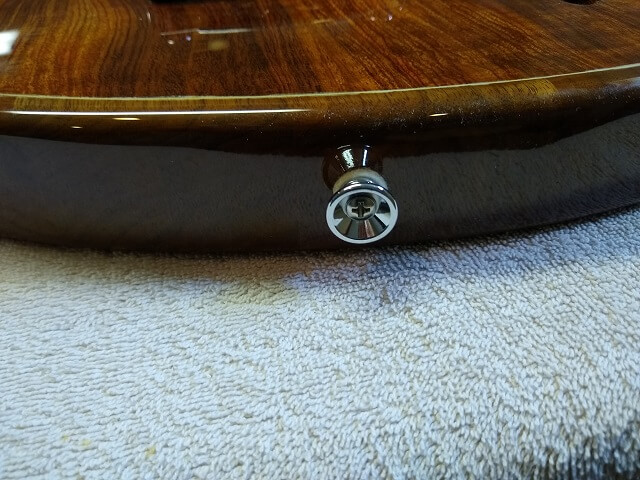
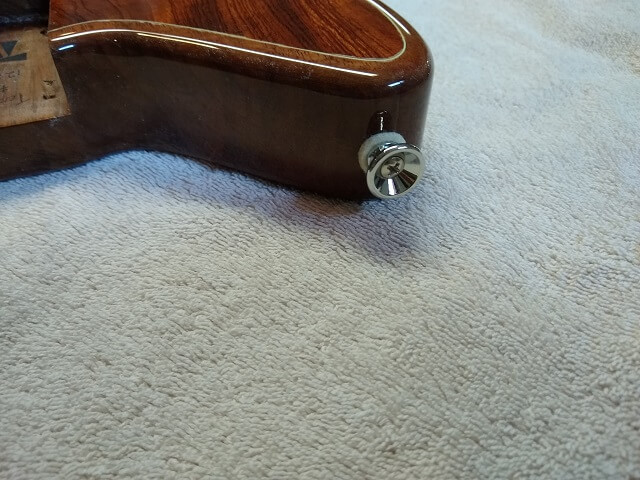
I hadn't pre-drilled the holes for the strap buttons before I sprayed the finish, so I did that now. Then I screwed the buttons into place.
Because this was a salvage neck which had already been installed on another guitar, it had holes drilled for the neck screws. Unfortunately, those holes weren't in the exact spot needed for this guitar. Close, but not close enough. I filled them with glue and dowels, then cut them off level so I could re-drill the holes in the correct location for this body. Then I installed the neck.
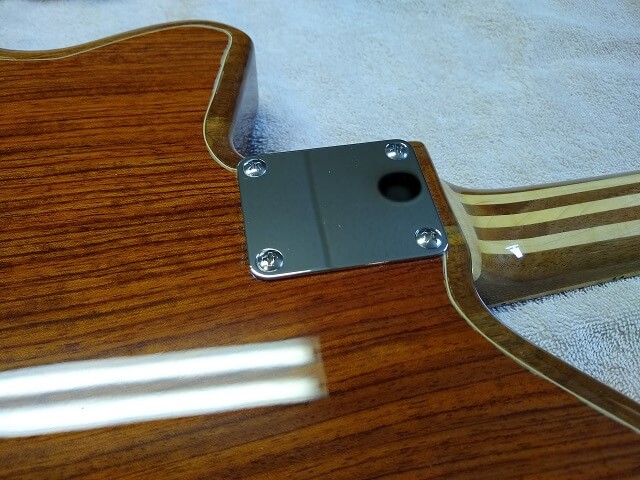
At this point I ran into my next issue. I ran some string up each E string path from the bridge to the nut and checked to make sure there was equal space on both sides of the fretboard indicating that the neck was aligned. Well guess what? It wasn't aligned. In fact it was way off. Far enough off that I was worried I was going to have to do something drastic to re-route the neck pocket in the correct place.
Not wanting to go to that extreme if I didn't need to, I took a desparate approach. I reamed out the neck screw holes in the body slightly larger than the screws. This allowed the neck to slide around a little bit in the pocket when the screws weren't completely tight. I then muscled the end of the neck in the proper direction and cranked the screws tight. Miracle of miracles, it worked. The strings now aligned pretty well. The gap around the neck pocket isn't as tight as I would like it to be, but at least it will work without having to do major surgery. Like the finish chips, if I were building this guitar for someone else I would probably back way up and redo some things. However this guitar is going to be a player and is a salvage job anyway, so I can live with this.
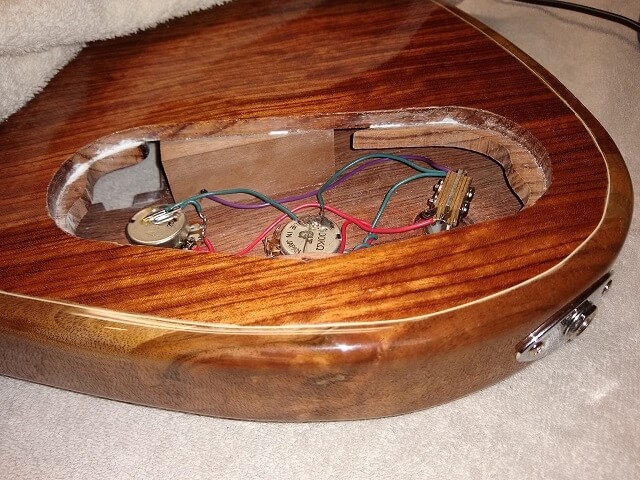
All of the wiring that could be done outside of the guitar was soldered together. I find it a lot easier to do as much wiring as I can on my bench without having to squeeze my fingers and the soldering iron inside the control cavity. With that initial wiring done I then installed the pots, switch and output jack into the guitar.
I hadn't drilled the holes for the pickup ring mounting screws prior to spraying the lacquer. My reasoning was by drilling the holes after assembly, I could slightly move the rings around to ensure that the pickup pole pieces aligned perfectly with the strings. Well, this was a great idea on paper, but when I put the pickups in place on the guitar I discovered that the holes I had cut for the pickup were so tight that there wasn't any wiggle room. As it turned out, the pole pieces aligned correctly anyway, so it was all good.
I put down some tape to allow my marks to be seen, placed the pickups in the holes and then used an awl to make a dent in each ring hole where I should drill. Then I pulled out the pickups and drilled the holes.
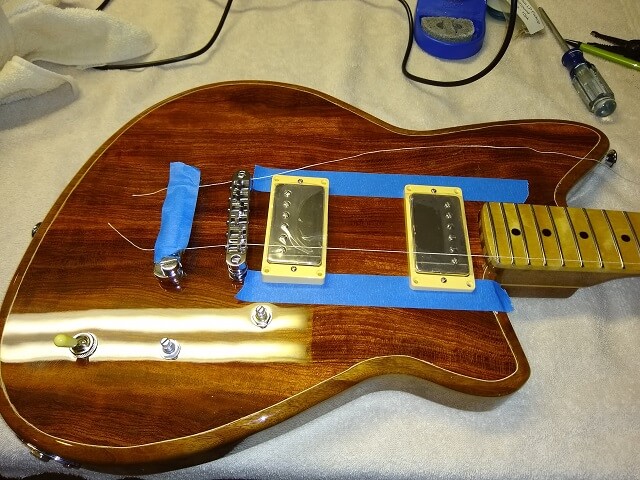
After mounting the pickups, I had to pull the neck pickup back out because I noticed that I accidentally mounted it in the ring upside down. Then, once that was corrected I noticed that the bridge pickup springs were completely compressed before the pickup could get raised high enough, so I had to pull that pickup back out too so I could cut the springs in half.
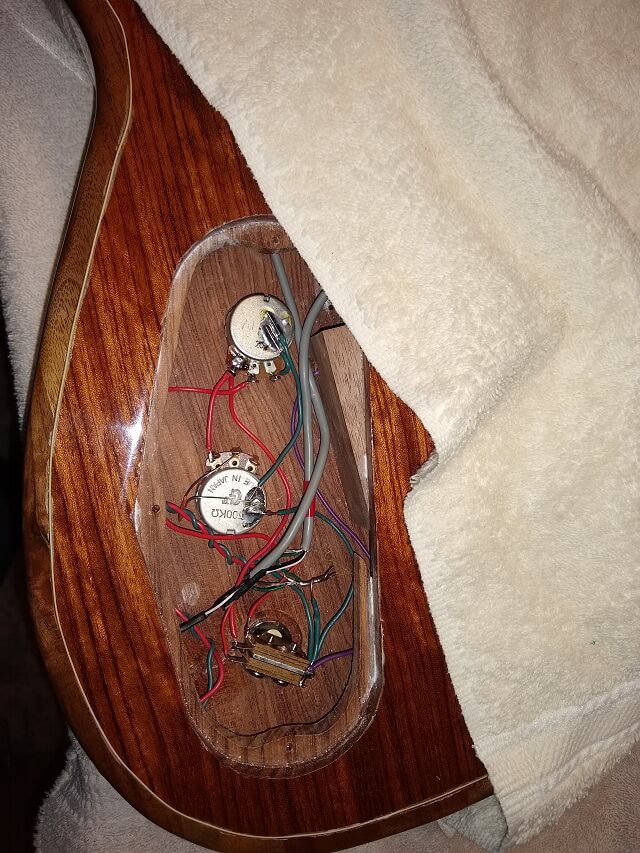
With everything mounted and back in place, I could finish soldering the pickup wires to the switch. I tested the electronics to make sure everything was working correctly and then screwed the back plate in place.
That was pretty much the end of the construction. The last thing I did was string it up and do a set-up. The truss rod adjustment amazingly still gave the proper amount of relief, so I didn't have to touch that. I set the intonation on the bridge. I then adjusted the action as low as it would go without the frets buzzing. I love low action on my guitars, but this particular guitar's action was so crazy low that I even raised it just slightly because it was too low for my tastes (I didn't think that could happen!)
I had carved and slotted the bone nut back when the neck was installed on the original banana pudding guitar. It seemed to work just fine back then, but for whatever reason once the neck was mounted on this guitar, the low E and A string nut slots were now too low which caused them to buzz when played open. I sprinkled a little baking soda in these two slots and wicked in some CA glue. This raised the height on these two strings just a hair and fixed the string buzzing problem.
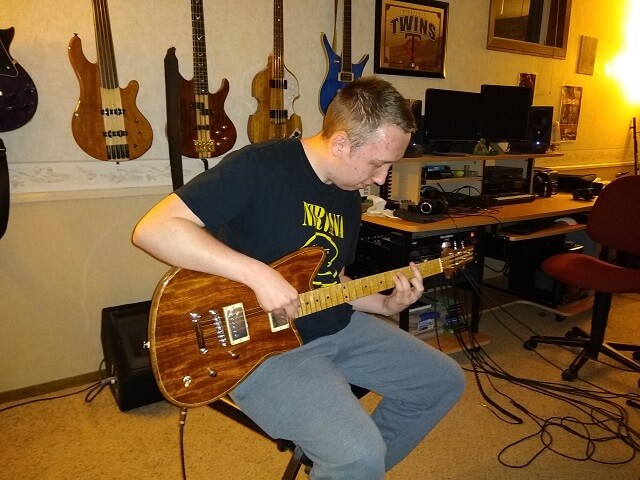
With everything finished, the Tundra Boy and I decided to plug it in and hear how it sounds. Normally I am pretty strict about not playing a guitar much before I take my final photos, just to prevent any accidental scratches or marks. However after I started playing, the guitar played so well and sounded so good that I wound up playing for a solid half an hour before the Tundra Boy grabbed it from me. Then he played it for a half an hour. So we broke my rule a little, but it was worth it because despite a few cosmetic flaws this turned out to be a fabulous instrument.
Return To The Main Music Gallery
This page last updated on 04/27/2020