


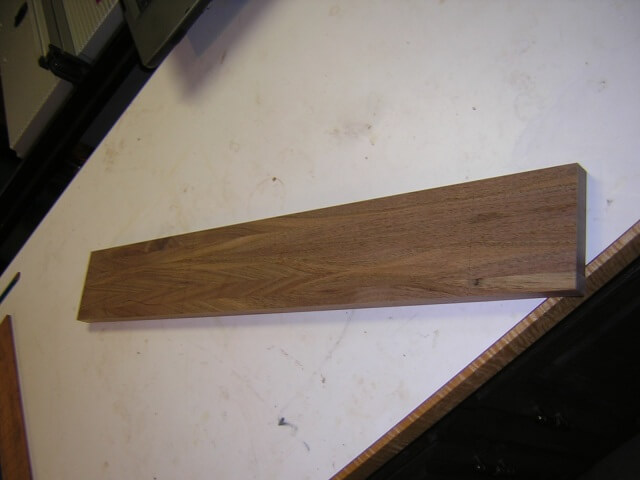
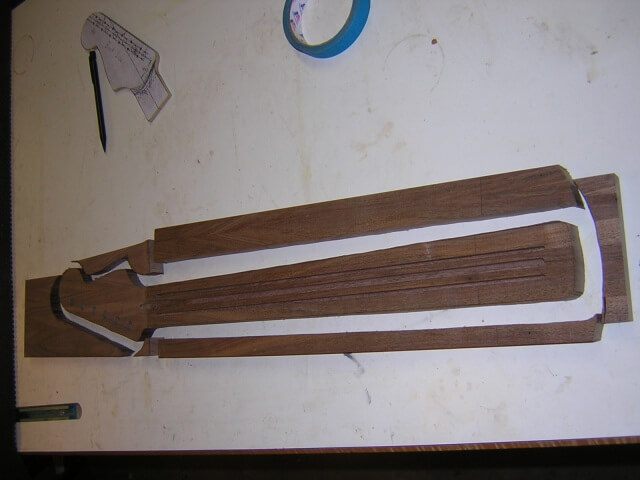
I started building the neck by taking some of the scraps from my father's cremation urn and cutting them into strips. I took six of these strips and glued them together. When the glue dried, I planed and jointed the piece into a blank about 28" long, 5" wide and 1" thick.
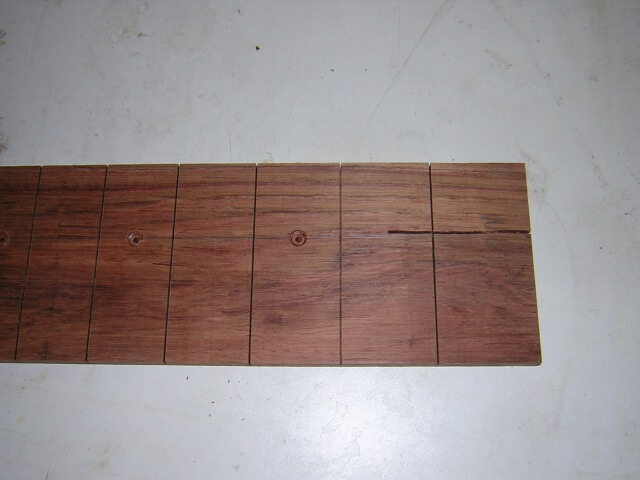
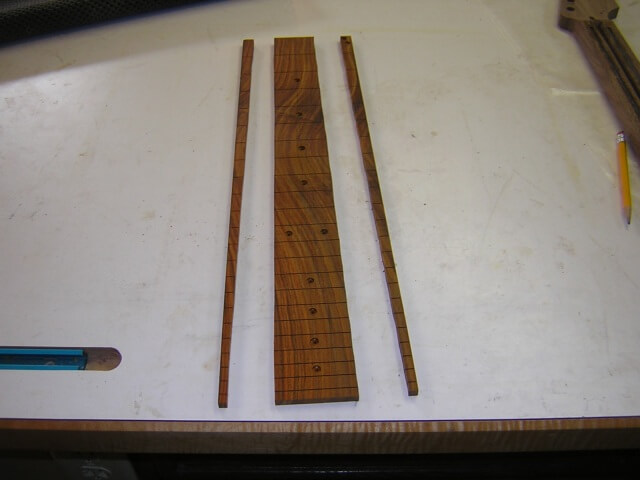
For a fretboard, I selected a rosewood one in which I had cut fret slots a while ago. The project for which this fretboard was originally intended never came to fruition, so I decided to use it for this guitar instead.
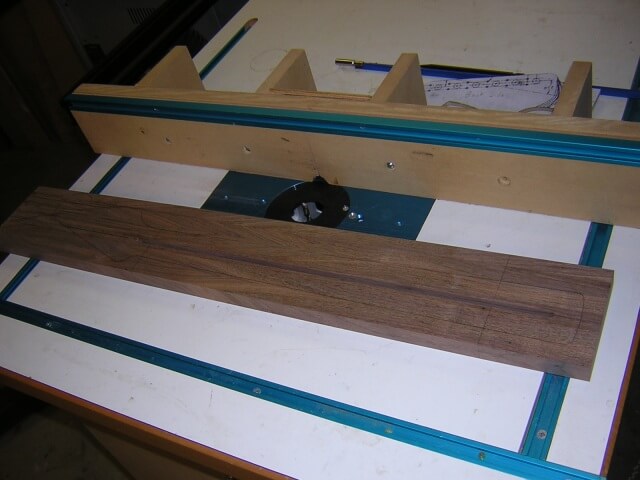
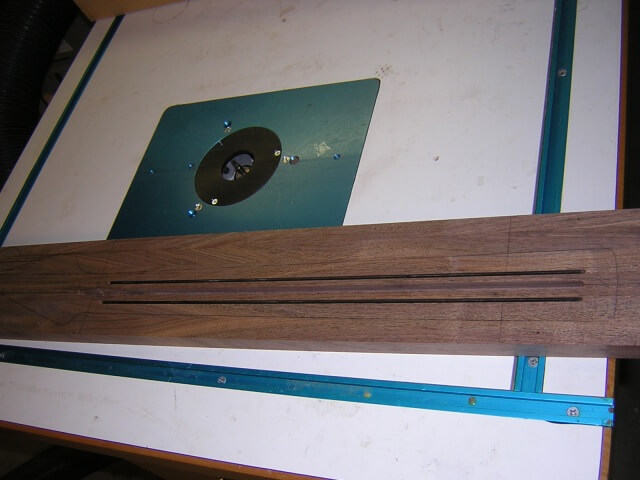
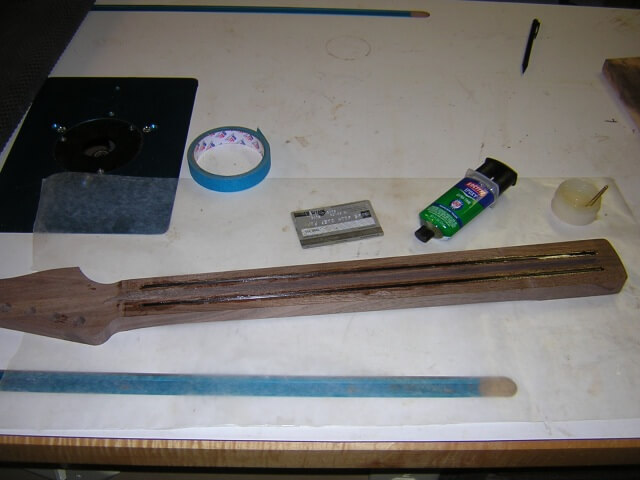
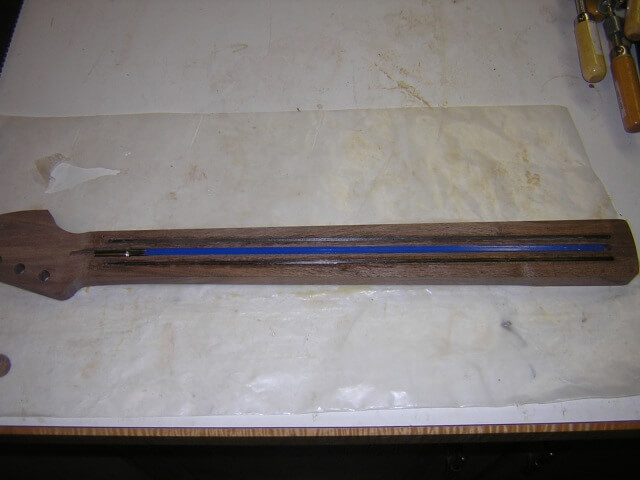
After spending a bit of time planning and marking up the neck blank with a pencil, I began by routing the truss rod slot on the front side. A traditional Stratocaster has the truss rod installed from the back. However, I use double-action truss rods on my guitars (versus the forward-only rod that Fender uses) which meant the rod would be installed from the front. In case you're wondering, the reason Strats have the walnut "skunk stripe" down the back of the neck is to fill the slot where the truss rod was installed.
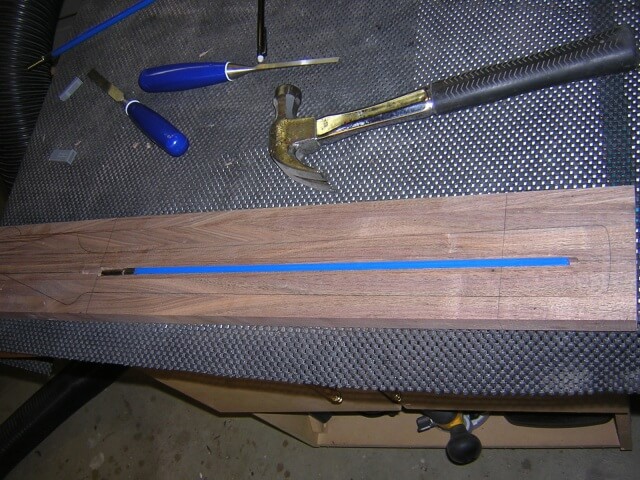
The rod I'm using in this neck has a slightly larger adjustment end. This necessitated making the slot a little wider in this area. I just used a sharp chisel and a hammer to tweak this area until the fit was just right.
In another non-Fender move, I routed channels for two carbon fiber rods on either side of the truss rod slot. I'm not trying to make a Strat copy down to every last detail, just trying to capture the spirit of the instrument. Carbon fiber rods are cheap insurance against neck warping and "dead spots" on the neck.
Next, I drilled the holes for the tuning pegs. I could have done this step at various points during the neck construction. I just felt like doing it at this time, so I did.
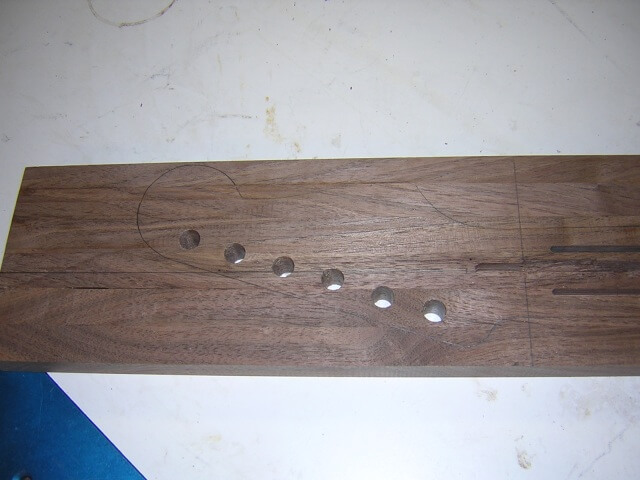
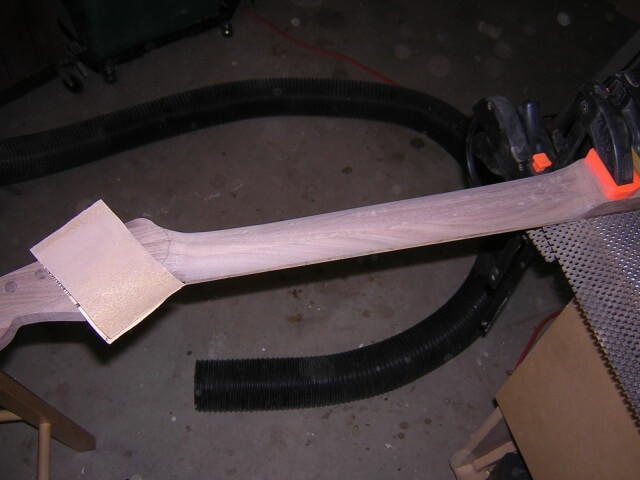
Rather than an angled headstock, Strats utilize a flat headstock. In order to make the tuning pegs lower than the nut, the face of the headstock is cut lower than the face of the neck. I shaved off this piece at the band saw.
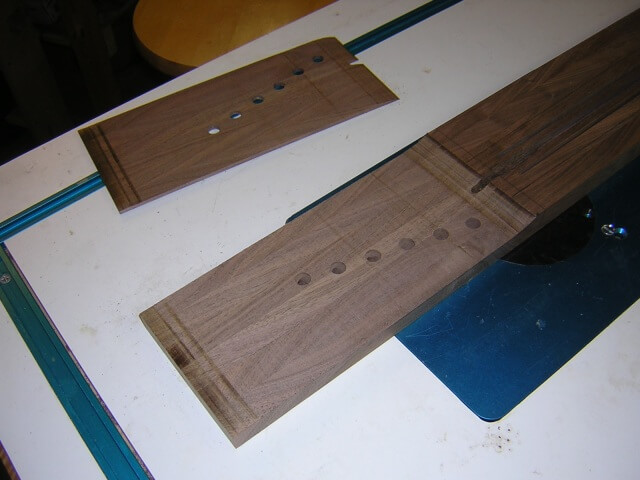
Now I flipped the neck blank over and cut the rear neck profile. This too was done at the band saw. I did this now because I still had a straight edge on the neck to run on the table of the saw. Once the neck side are cut, it would have been a lot more difficult to make this cut at that time.
With the front and back profiles cut, I could now cut the outline of the neck. I did this at the bandsaw, taking care to stay slightly outside my marked lines. I wasn't cutting to final dimensions at this point, just removing any excess. The exact cuts would be done at the router table.
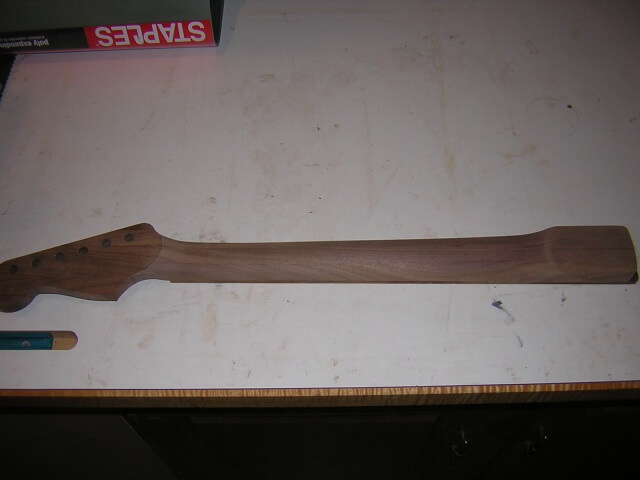
I began final trimming with the headstock. I had created a template out of 1/8" hardboard. I attached this template to the back of the neck with double-sided tape then used a pattern cutting bit on the router table to shape the headstock. I had to use extreme caution when routing around the end of the headstock as in this area the router has a tendency to grab the end grain and tear out chunks of wood. The way to avoid this is to make a bunch of passes, shaving as little wood as possible each time.

Next I moved to the other end of the neck and routed the heel. I used the same method as the headstock, only with a template I had created for the heel. This heel template fits exactly into the neck pocket template I made for the body.
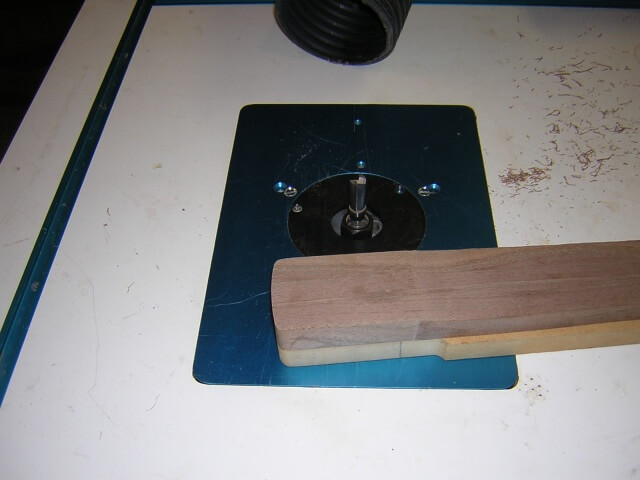
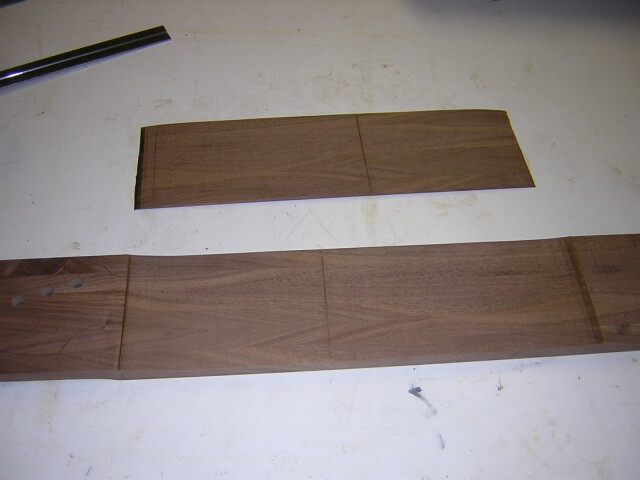
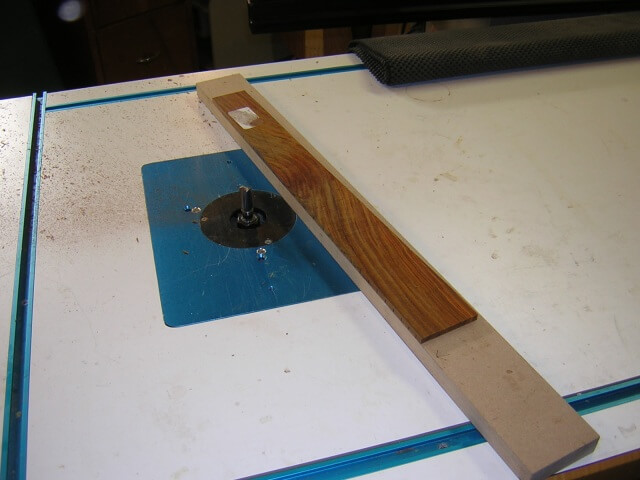
With the two ends of the neck routed to final dimensions, I then attached a jointed edge of a board to the neck, connecting the two ends. I then ran this jointed edge against the pattern cutting bit to create a perfectly straight neck side. With one side done, I removed the board and re-attached it to the other side and repeated the routing process.

At this point in time I glued the carbon fiber rods into the routed channels using slow set epoxy.
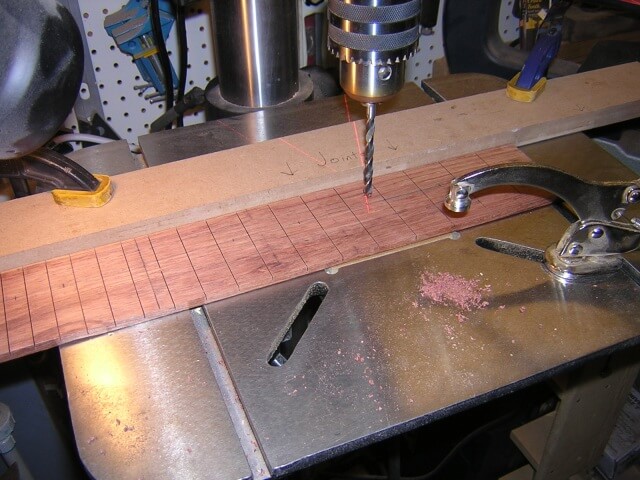
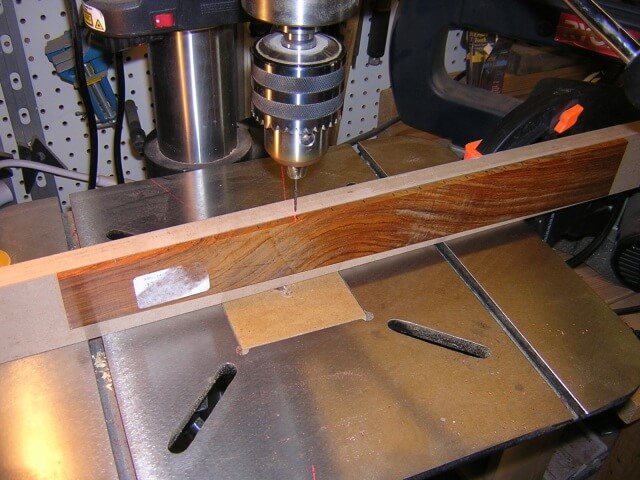
Moving on to the fretboard, I needed to drill holes for the dot inlays. I marked the neck, then used a straight edge on the drill press as a fence to ensure the holes were in the exact right place.
Now we have an example of how mistakes happen to everyone. I wanted to cut the edges of the fretboard blank in order to form the tapered sides. I had already marked a centerline down the board (which was used for locating the inlay holes.) I then used this line as a reference to mark where the final edges of the fretboard should be located. With all my marks made, I went over to the bandsaw and started cutting. About two inches into the cut I suddenly realized that instead of following one of the fretboard edge lines, I was cutting down the center of the fretboard. Oops.
Well, it happens. More often than I care to admit actually. There was no practical way of salvaging this fretboard. The only thing I could do was start over with a new board.
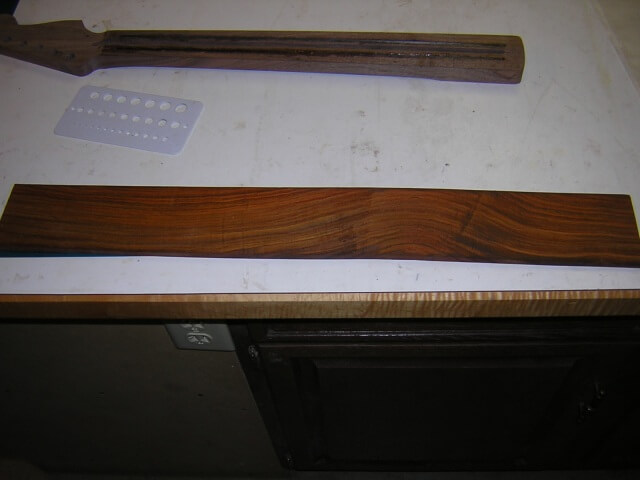
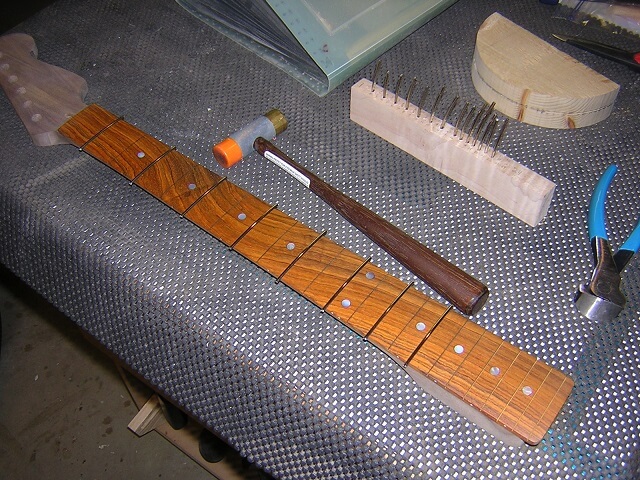
This did give me an opportunity to change my mind on the type of wood I used for the fretboard. After working a while with the rosewood I originally selected, I had come to the conclusion that it was too similar in color to the walnut of the neck and body. I decided this time to select a wood that would give a more interesting contrast. I looked through my wood stock and selected a very pretty piece of cocobolo.
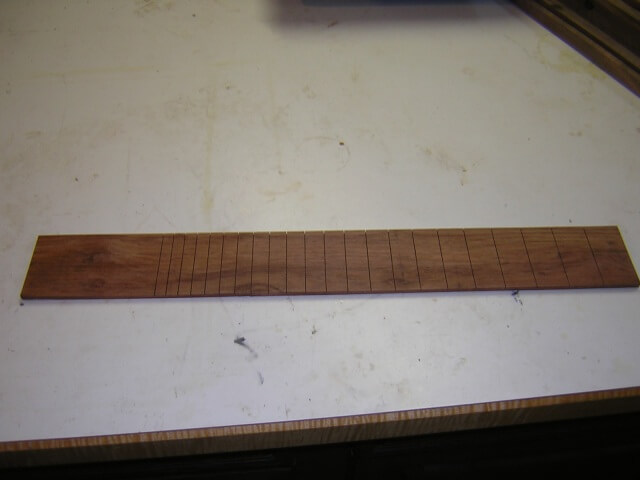
I pulled out my fretboard slotting jig and attached it to the tablesaw. This jig has marks for different scale lengths. The process involves aligning the fretboard edge with each mark for that scale length and running it through my slotting blade.
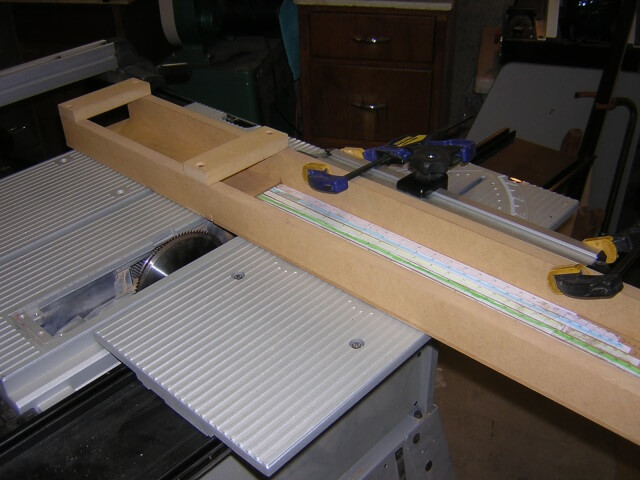
Cutting the fretboard takes about three minutes. Converting the saw back and forth for the operation takes about 20 minutes. I slotted this fretboard at 25 1/2" scale length, same as the old fretboard.

Once again I went through the process of drilling holes for the fret position markers. The holes in the corner were used when I was setting the correct depth for the drill press. These test holes were in an area that will be removed once I taper the fretboard.
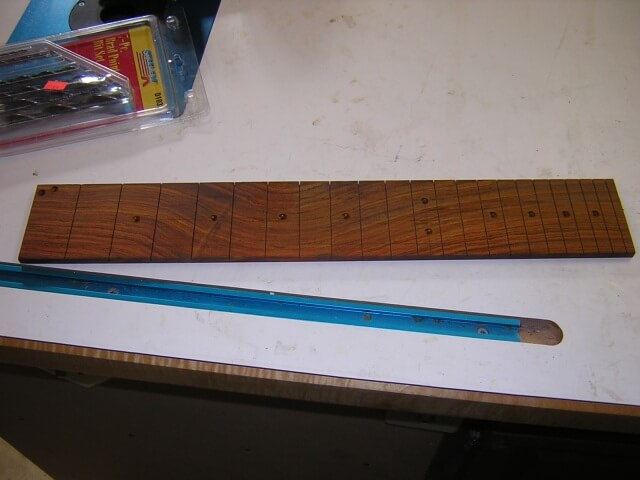
At this point I was back to the same step where I destroyed the original fretboard. You can be sure I was careful not to repeat the same mistake again! I removed the sides of the fretboard to create the tapered profile. I did this at the bandsaw and just made rough cuts at this point, so I stayed about 1/16" outside of my line.
For the final tapering of the fretboard, I wanted a perfectly straight edge. To accomplish this I taped a piece of MDF to the fretboard blank. The MDF had an edge jointed perfectly straight, and I lined this straight edge up against my marking line. I then used a flush trim bit on the router table to cut the fretboard to the exact size I wanted. With one edge complete I flipped the fretboard around and repeated the process for the other side.
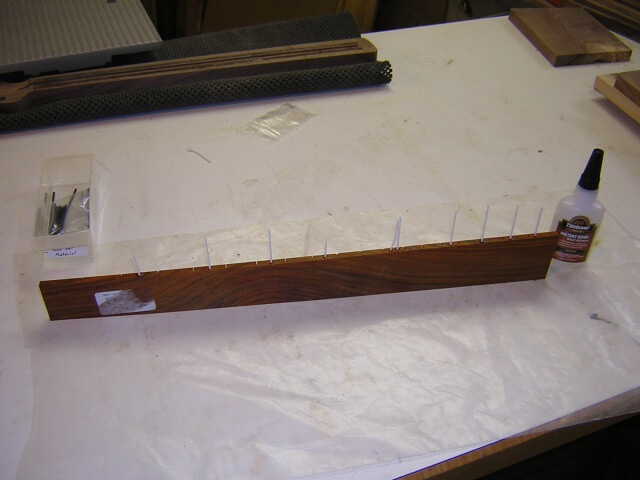
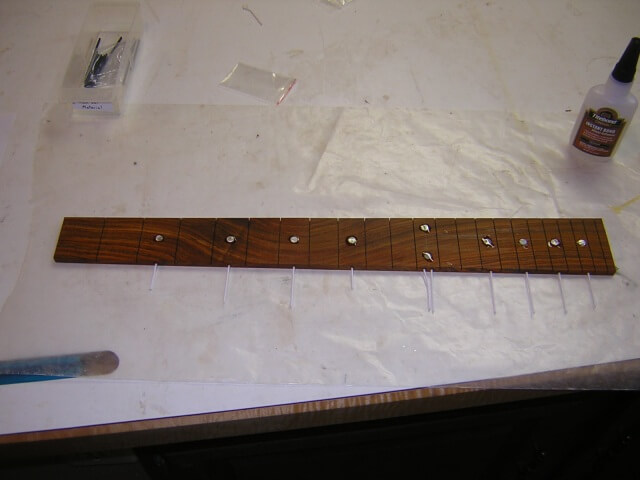
Now it was time to install the side dot markers. I did this at the drill press. Again, I used double-sided tape to attach the fretboard to a piece of MDF and drilled each hole. I ran the MDF against a fence clamped to the drill press table so that each hole would be the same distance from the bottom of the fretboard. By the way, that white stuff on the wood is the remnant of the label that was on the board when I purchased it. When this photo was taken I had peeled off most of it, but hadn't yet removed the residual stuff still stuck to the board.
With the holes drilled, it just took a drop of super glue in each and the plastic side dot material was inserted. Once dry I could clip off the excess and sand the markers flush with the fretboard side.
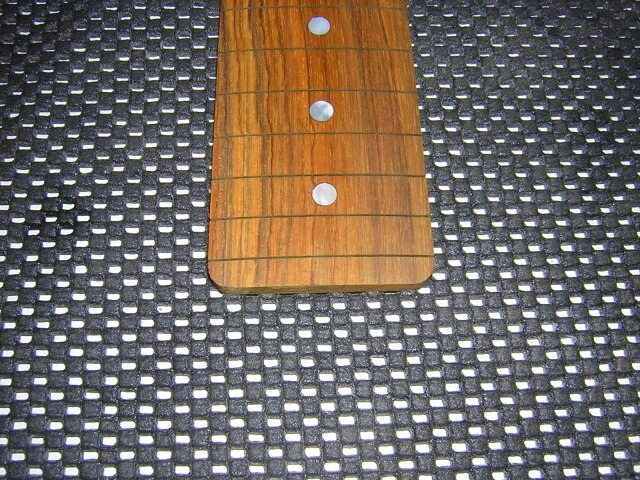
While the glue for the side dot material was drying, I used this opportunity to install the dot inlays on the front of the fretboard. I put some super glue in each hole and pushed the dot inlay into place.
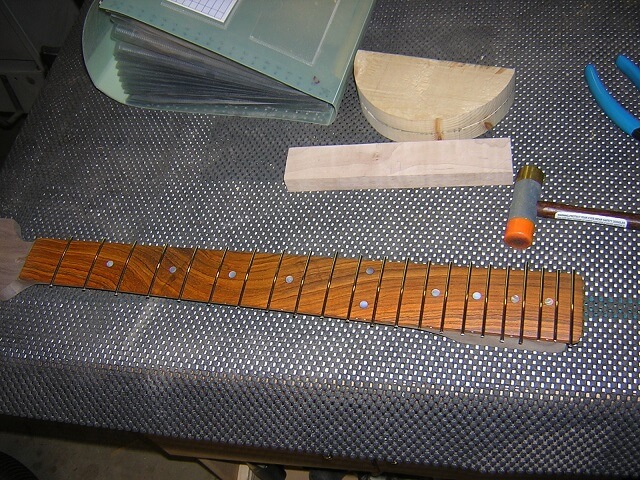
When the glue for the dot inlays had dried it was now time to radius the fretboard. I went with a standard 10" radius which is pretty common on Stratocasters. To sand the radius I taped the fretboard down to my radius jig and just rubbed the sanding block back and forth until the whole fretboard had an even curve. At the same time this process also sanded the dot inlays flush to the face of the fretboard and removed the excess glue squeeze-out.
The ends of Strat fretboards aren't a sharp corner, but instead have more of a rounded curve. I rounded the end of the fretboard over on my oscillating spindle sander. I marked the radius by using some circular object (probably a socket, but I don't remember specifically) and then sanded the curve up to the line by eye.
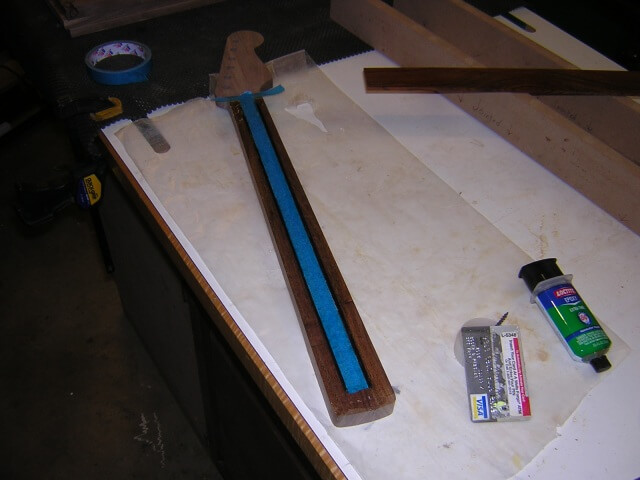
With the fretboard done, it was now time to glue it to the neck. Before I could do that, however, I needed to be sure to remember to put the truss rod in place. That would have been a bummer to forget. I generally put a few little squirts of silicone caulk in the truss rod channel before pressing the rod into place, just as some insurance against the rod rattling inside the neck later on. I have to be extra careful when doing this, however, as silicone can be very bad news when applying a finish. I have to make sure I don't get any silicone anywhere I don't intend as it will pretty much thwart any attempts at spraying lacquer without fisheyes.
I use epoxy to glue fretboards to my neck blanks. I used to use regular wood glue, which worked fine from a strength standpoint. However I frequently would have my necks "back bow" after the glue dried. If I hadn't been using dual-action trussrods and been able to force the neck back to straight I probably would have wrecked some necks. After researching the problem I found it was pretty common among people who use PVA glue. Apparently the moisture in the glue is enough to cause the neck to bow backwards. The solution is to use a glue that isn't water based, and epoxy fits that bill perfectly.
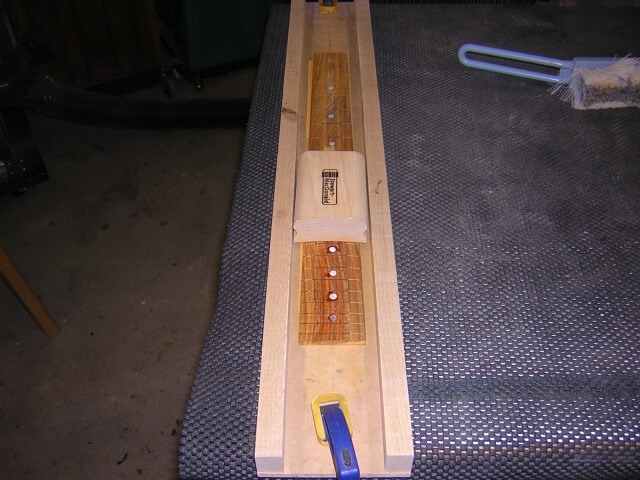
One thing you don't want to do when gluing a fretboard to the neck is to accidentally glue the truss rod in place rendering it useless. If I were to just spread glue over the whole neck it could squeeze into the truss rod channel and cause this problem. The trick to avoiding this issue is to run a strip of masking tape down over the truss rod channel, then spread the glue. When the tape is removed this keeps the glue about 1/4" from the truss rod channel. When the fretboard is clamped in place the glue will squeeze towards the channel, but there won't be enough for it to seep all the way into the channel.
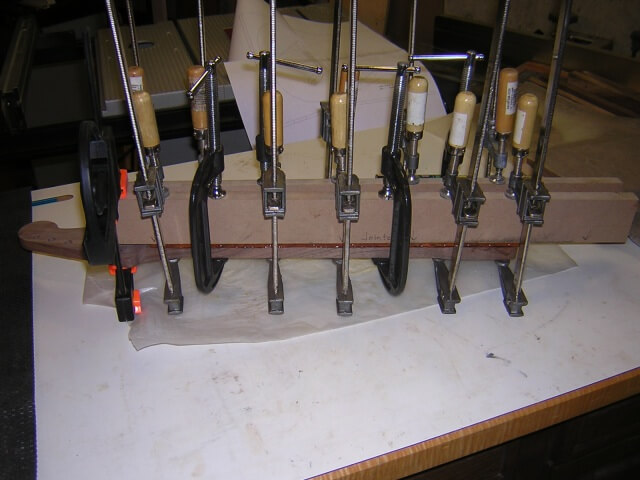
The fretboard was positioned and clamped to the neck using a set of clamping cauls. These cauls are simply strips of MDF that have had the edges jointed perfectly straight. Using these cauls hold the neck true while the glue dries, and (hopefully) as a result the neck will be arrow straight once the clamps are removed. It works pretty well. As a bonus the cauls take the brunt of the clamps which keeps me from dinging up the face of the fretboard, and also the cauls spread the clamping force more evenly across the neck.
After the glue had dried and the clamps were removed, it was time to carve the neck. As I've mentioned many times, carving the neck is my favorite part of building a guitar. This is the part of building a guitar that seems to be the most intimidating for those who've never done it, but in reality is easier than it looks.
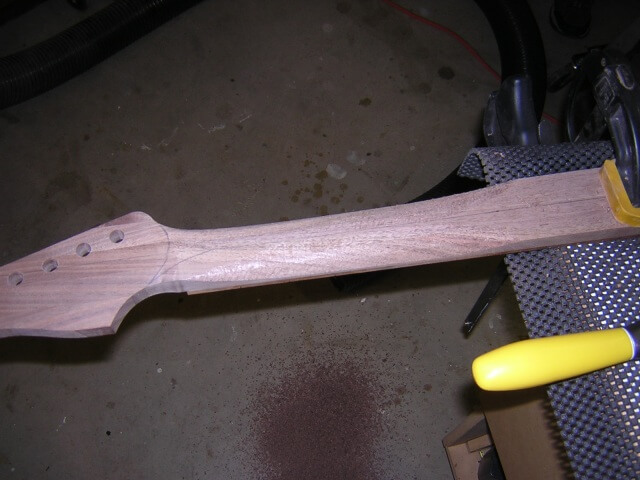
There's an old joke about a sculpter who was planning on carving a statue of an elephant. Someone asked him how he could create such a sculpture from a giant hunk of rock. He responded, "It's easy. I just remove any parts of the rock that aren't an elephant."
Carving a neck is the same way. I just remove any wood that doesn't make it feel like a neck. I'll take a bit of wood away and then feel it. Once it feels like a guitar neck in my hand then I know I'm done.
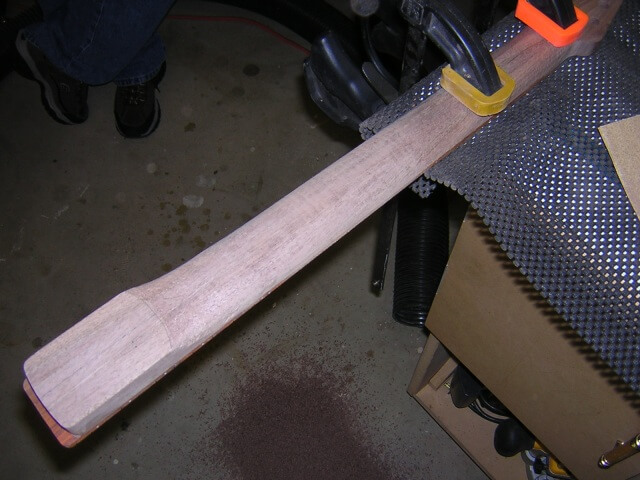
The carve was done, so now it was time to sand the back of the neck smooth. This was the last neck I did using my old Stanley surform tool. It works, but tends to be rather aggressive and take big hunks out of the wood. As a result I spend a lot of time sanding out the scrapes and gouges left from the carve. Since that time I was given a nice dragon rasp by my wife, which I now use. It's a little bit slower wood removal, but leaves a much smoother surface and reduces my sanding time significantly.
After a lot of sanding, the neck was finished. I was particularly happy with the way this one turned out. It feels really nice.
Flipping the neck over it was time to install the frets. I still use the old "hammer them down" method, then use a little super glue to hold them in place. I start by putting them in to every other fret slot. I once read that by doing this you are less likely to warp the neck. I don't know if that's true or not, but it's no extra work to do it this way so I do. If it isn't true, I'm not out anything. However if it is true, then I potentially could wreck a neck. The downside is too great for me to not use this method.
Once I have every other fret installed, I went back and installed the remaining frets.
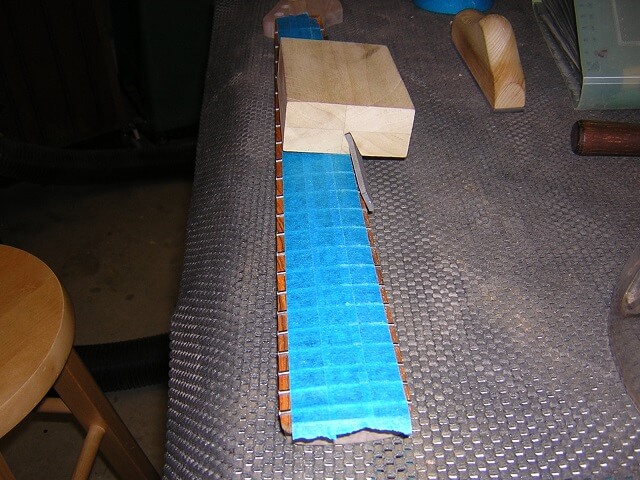
The frets are installed longer than the fretboard is wide. A fret nipper tool is used to cut the frets flush to the end of the neck. The squared-off end of the fret wouldn't be very comfortable to play, so the frets are beveled at about a 30 degree angle. I built a block to hold a file in the proper angle while I grind the fret edges down to meet the fretboard. You can do this by just holding the file at a certain angle but I haven't had much luck being accurate using that method, hence the jig. I put blue painters tape on the frets to keep me from gouging them up with the wood block.
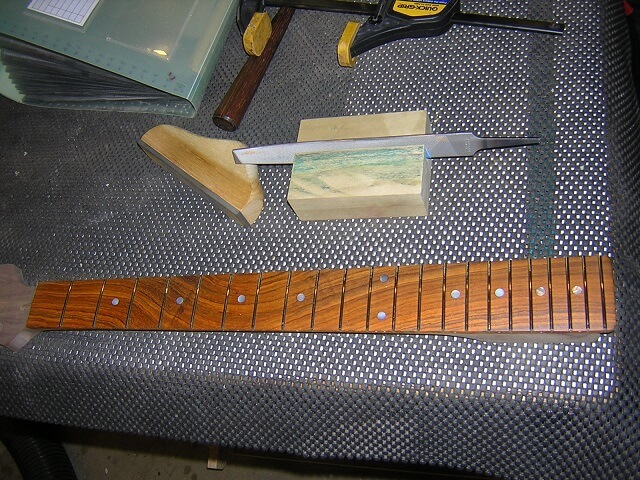
The frets are now installed. They still need to be leveled, crowned and polished but I generally do that after I spray a finish.
Now that the neck is pretty much done, we can move on to building the body.
Return To The Main Music Gallery
This page last updated on 06/28/2018