


This article describes a method that will allow you to cut perfectly sized (width) dados, with only two test cuts. Admittedly, the title of this article is a little strange. Why would you want to create perfect dados on the second try? Wouldn't it be better to adjust the dado stack correctly the first time and only need one test cut?
Well, yes if there was a fool-proof way to do that, we would like to only set up the dado stack once and be on our way making useful cuts, rather than plowing grooves through our scrap buckets trying to tweak the width. In reality, though, most of us find ourselves either making repeated cuts trying different combinations of shims, trying to guestimate the width of the dado stack with a ruler or (as I've been guilty of before discovering this method) settling for dados that are a little tight or loose rather than going through the hassle of getting it right.
The procedure I describe below will allow you to get "dead on" dado widths while only adjusting the shims once. So, this procedure does require undoing the arbor nut twice. Occasionally I can get lucky and get the dado set up correctly the very first time, but this is the exception rather than the rule. So, figuring that the odds are pretty good that I'm going to be adjusting the shims at least once after the initial set up, this method will ensure that it's dead on the second time at the expense of knowing for sure it will be incorrect the first time. Also, this procedure only addresses the dado stack's width. For the depth and location of the dado, you're on your own, but generally those are much easier to get set correctly. So here goes:
Step 1: First, we need to install the dado stack with the two outside cutters and the appropriate chippers needed to cut a dado of the desired width. Along with the cutters and chippers, also install every shim that came with your dado set (hopefully shims came with your dado set; some of the cheaper ones don't, in which case if you haven't aquired shims you might as well stop reading now.) By installing every shim it will make the dado slightly wider than what is desired, but that's what we want for this step.

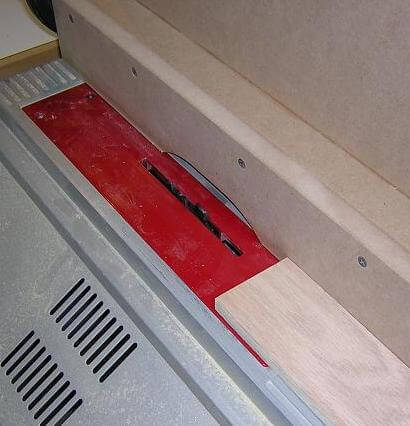
Step 2: Put your throat plate back in place and set the saw up for a test cut. Plow out a dado in a piece of scrap. In the example below, I'm cutting a 1/4" dado, so I'm only using the two cutters and no chippers, but the procedure is the same if you are using chippers.
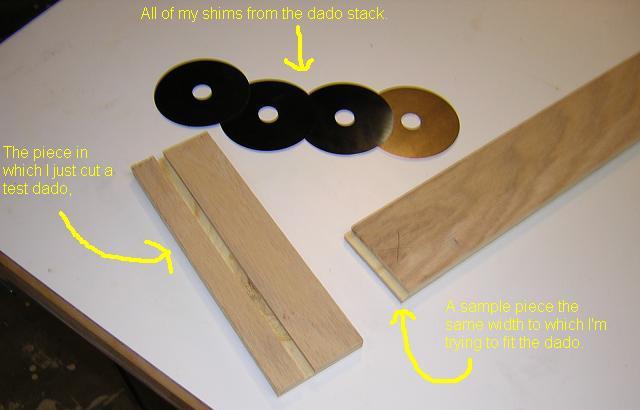
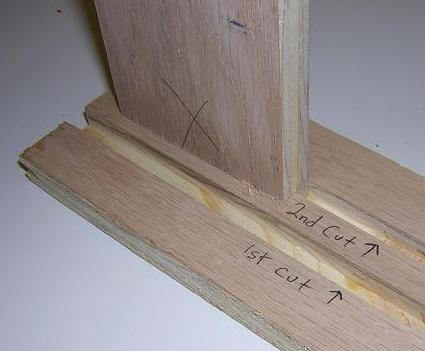
Step 3: After making the test cut, remove the arbor nut, and enough of the cutters and chippers to take all of the shims out of the saw. Set them next to the test piece you cut in step 2, along with a sample piece the same width as the width of the stock to which we're fitting the dado. Make sure you get all of the shims out of the saw, as accidentally leaving one in may mess things up. In my example, I'm fitting the dado to a tongue I've cut in some plywood. And yes, I know the picture is a little blurry; I'm a woodworker, not a photographer (and not that great of a woodworker.)
Step 4: Put your sample piece into the dado you cut in step 2. It should either fit perfectly or (more likely) be loose. If it is too tight, you need to start over and add another chipper to your dado stack, as you didn't initially set it up wide enough.
It is possible that the dado fits perfectly. If this is the case, you're done with step 4; you know you need to use all of your shims in the next step.
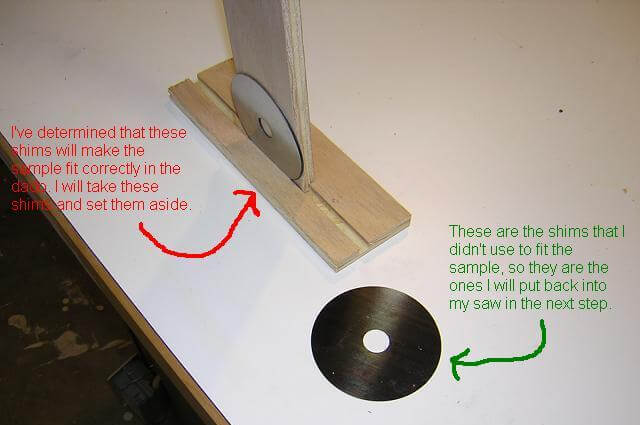
More likely, the dado is too wide, resulting in a loose fit. Leave the sample in the dado and start sliding shims into the space between the sample piece and the shoulder of the dado. Find a combination of shims that will make the sample fit perfectly in the test dado. Very imporant! Once you find the right combination of shims, set these shims aside and gather together the remaining shims to use in the next step. Don't use the shims that help the sample fit in the dado; gather the shims you didn't use to fit the sample.
If you've put all of your shims into the test dado and the sample piece is still too loose, then you initially set up the dado stack with too many chippers. You'll have to remove a chipper and return to step 1.
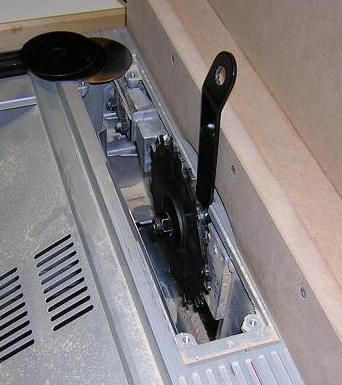
Step 5: Reinstall your dado stack using the shims you gathered in step 4. Again, don't install the shims you used to size the sample in the dado, use the remaining shims. I'm driving this point home because if you don't do this correctly, the dado won't fit right and you'll be cursing my name and calling me a doofus. Yes, I'm a doofus, but I don't like to be called one.
Step 6:Cut another test dado using this adjusted setup and marvel that it fits your sample piece perfectly! Yes, it requires that you do two setups, but it sure beats four or five tries playing with different shim combinations.
Return To The Main Wood Gallery
This page last updated on 06/28/2018