


I thoroughly enjoyed building my first chessboard, and was surprised how quickly I was able to get the project together. I have been saving for a planer for a while, but I am still a ways away from being able to afford one. After seeing the prices that good quality, hardwood chessboards command, I came up with the idea of building a chessboard to sell.
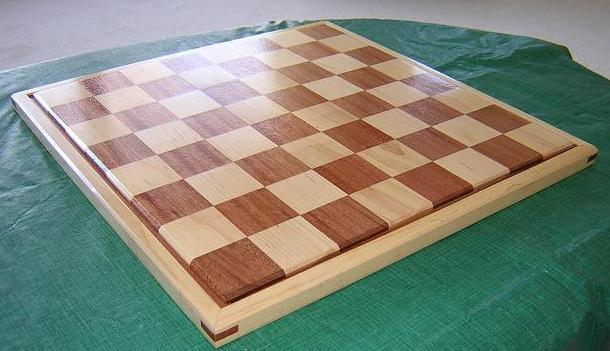
My last chessboard was made out of maple and walnut. I had originally thought to make this chessboard using the same materials, however when I went to purchase the stock I wasn't overly impressed with the walnut that was available that day (and I certainly wasn't impressed with the price - whew!) That's when I noticed a beautiful piece of mahogany, at about 1/2 of the price of walnut. I had never worked with maghogany before, but I decided to give it a try. I came home with mahogany and maple stock.
I began this chessboard the same way I did the last one. I ripped four strips of maple 17 1/2" long by 1 3/4" wide, and four strips of mahogany the same size. I then laid them out next to each other, alternating the maple and mahogany, and glued them up. This time, I made sure to take steps to keep the glue up flat, so avoid the problems I had with the last chessboard. Also, I cleaned up any glue squeeze-out before the glue dried, as I discovered this would save much sanding later on.
After the blank had dried, I removed the clamps, rotated the board 90 degrees from the way the strips were glued together, and cut eight more strips the same width as before (actually, I hadn't touched my fence since I cut the first strips, so it was all set up.) I made sure to number the strips in the order I cut them so I could lay them out in the same order. I then flipped every other strip end-for-end to create the checkerboard pattern and glued them up. On the second glue up on a chessboard, you have to be very careful to align the ends because you can't trim them to length once you're done. I also took the same precautions about ensuring the glue-up was flat and cleaned up the squeeze out while it was easy.
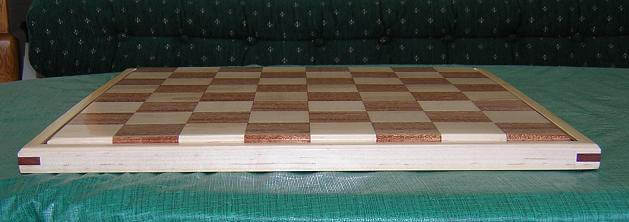
While the board was drying, I cut 4 strips of mahogany 3/4" by 1/4" wide for splines. I didn't want to just glue a border to the edge of the playing field, as the expansion and contraction of the wood might take it's toll on the glue joints over time.
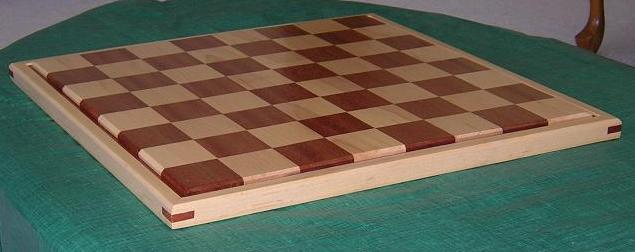
I also cut the pieces for the frame out of maple. I had originally intended to use mahogany for the frame and make it wider than what it turned out, but I ran out of mahogany. I had enough maple on hand to make a thin frame. Because I was building this board to sell, I wanted to maximize my profit so I used the stock I had on hand. In the end, I think it turned out fine.
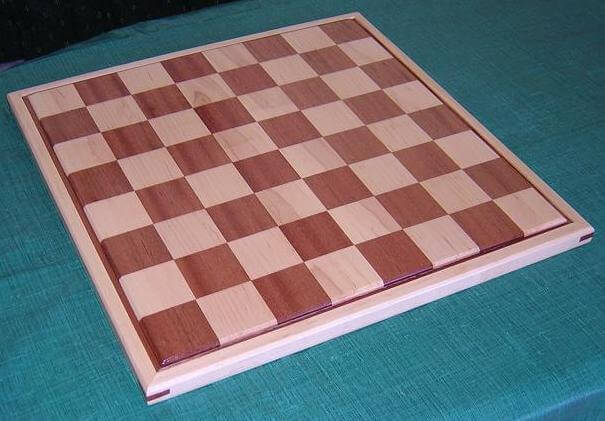
After the playing field was glued up, I spent a long time sanding the board and getting everything smooth. I sanded the bottom as well, but not as fine as the top. Using a 1/4" straight bit in the router table, A groove was cut on each side of the playing field and the inside edge of the border to accept the mahogany splines. I also cut a 1/8" chamfer on the top edge of the playing field and the top edge of the frame.
Now it was time to do the final glue-up. The frame pieces were carefully mitered to length and sized fit the board and the spline pieces. I glued the splines to the frame pieces, but did not use glue in the grooves on the playing field. This is just a friction fit and should give the wood some room to breathe. I clamped the assembly with a band clamp and let it cook for a day.
Once the glue had dried, I decided that the small miter joints weren't very strong, and the frame may come apart if the board were accidentally dropped (hey, it happens.) I decided to reinforce the joints with mahogany splines. I built a spline cutting jig out of MDF to hold the board diagonally upgright and used a 1/4" straight bit to cut the slots in each corner. I then cut some mahogany stock to 1/4" width, put plenty of glue in the slots and put the splines in place. When the glue dried, I cut off the excess spline material and sanded everything smooth. I like the decorative look the splines give the corners of the board.
After a good sanding, I finished the board with three coats of semi-gloss poly, sanding with 0000 steel wool between coats.
My current plan is to list this chessboard on eBay. It will be difficult, as I have my heart and soul into this project (as I do nearly all my projects.) I have some more projects waiting on the backburner, however, that require a planer so this one will (hopefully) help me towards that end.
Return To The Main Wood Gallery
This page last updated on 06/28/2018