


DISCLAIMER! Within this article I have links to products I purchased to complete this project. I am not promoting these products, affiliated with their manufacturers, nor do I get any compensation if you use the links to buy them yourself. The links do not have any tracking IDs in them, so the sites have no idea how you got to their page. I do not sell anything on this web site, nor do I intend to accept any advertising money. I run this site as a hobby, fund it completely by myself and get no financial kickback from any company. I just wanted to be clear in case anyone is worried that I put links on this page to try and make a buck. I just put the links in this article to possibly save you some time. If you decide not to use my links, it's no cheese off my pizza. And now let's get on with the article…
First off, let me just say that I don't condone cell phone use while riding, driving or for that matter even walking. We as a modern society have become slaves to these little electronic devices, and have developed a Pavlovian response to every ding, beep and buzz our phone makes. We would be far better off if we figured out that just because our phone made a noise doesn't mean we have to immediately respond to it.
That being said, there are certainly benefits to having a cell phone while riding. Outside of the obvious benefit of making a call in the event of an emergency, there are other uses as well. My radio plays music that gets played via a bluetooth connection to my phone. My GPS shows real time traffic and weather radar via the phone's cellular data function. Sometimes you see scenery pretty or interesting enough that it warrants pulling over to snap a photo, so it's nice to have the phone handy.
Just don't text or do anything else that takes your focus off of the fact that you're piloting a half-ton missile down the road that could easily injure or kill someone (including yourself) in a moment of inattention.
On my previous motorcycle, a 1999 Yamaha Roadstar, I would just keep the phone in my pants pocket. However with my next motorcycle, a 2019 Indian Roadmaster, I decided I had enough real estate available on the handlebars to get a cell phone mount. This puts the phone in a convenient location, but more importantly gives me more slack in my pants into which I can squeeze my fat body. I mean, let's be honest here.
Regarding cell phone mounts, there are a ton of them out there. After shopping around I purchased a Tackform mount. Their reviews were stellar, the mount holds the phone extremely securely, it's simple to attach and remove the phone with one hand, and it's made from metal with high quality chrome to match the rest of my bike. I'm happy with my purchase and I highly recommend this product, but I'm not here to sell you anything so buy what you want.
With all the things my cell phone handles while I travel, battery life became a concern. It would be problematic to be wanting to look at the radar at a storm rolling in, only to discover that your phone battery died because you were jamming on tunes for the last 500 miles. It would be nice if I could have a plug where I could charge my phone while I rode.
My Indian Roadmaster has a "glove box" up on the dashboard that includes a USB port. This certainly would charge the phone. Unfortunately that would also place the phone in an inconvenient spot if I wanted to pull over and take a picture. Likewise, there is a 12-volt power outlet in one of the saddlebags and another one in the trunk, but those places are even more inconvenient to access.
It would really be cool if I could charge the phone while it was still sitting in the handlebar mount. I suppose I could just run a long cord from the glovebox or the luggage over to the phone, but that would look tacky and we all know us motorcycle riders are kind of vain like that.
No, what would be snazzy is if I had a USB power port located near the phone mount so that I could just plug in the phone using a 6" USB cable. If you also think this would be nifty to have on your Indian motorcycle too, then you're on the right page. Here's my tutorial on how I added this feature to my motorcycle.
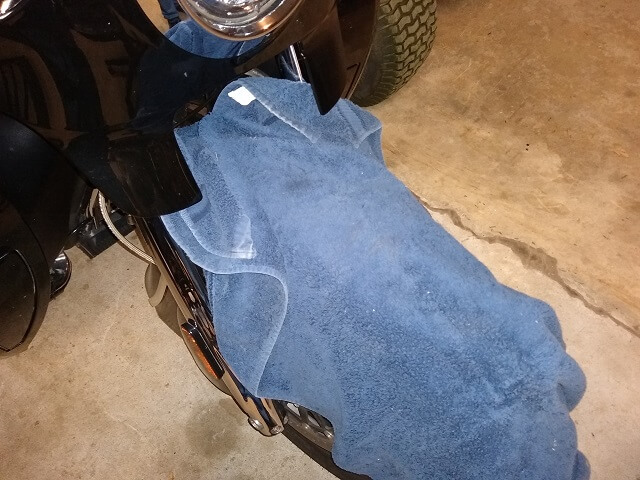
To begin this project (or most projects for that matter) we want to protect the motorcycle from inadvertent damage. I will be working around the front fairing area of the motorcycle. It would be really easy to accidentally drop a wrench, and with my luck it would land squarely on top of the fender. To prevent scratches and reduce the chances of dents, I put an old towel over the fender. Make sure it's an old towel. If you use the nice guest towels your spouse may put scratches and dents in you.
Note that the next few steps are for the standard Indian Roadmaster that has the classic "locomotive" fairing. There are other model Roadmasters (i.e. the Limited and Dark Horse models) that have a more Harley-esque fairing. Most of this procedure may still work for you, but there will be things that I'm doing that you don't need to do, and there may be things you will have to do that I won't include. I don't know for sure as I don't own one of these models. Just prepare for a little improvisation if you have a non-standard Roadmaster. Also, this procedure will likely also work for the Chieftan models with the locomotive fairing, but again I don't own one so I can't say for sure.
The first thing we need to do is remove the chrome fairing cover plate. This is held in place by two 4mm allen head bolts. So grab yourself a 4mm allen head wrench. In my case, I grabbed one from my bicycle repair stand.
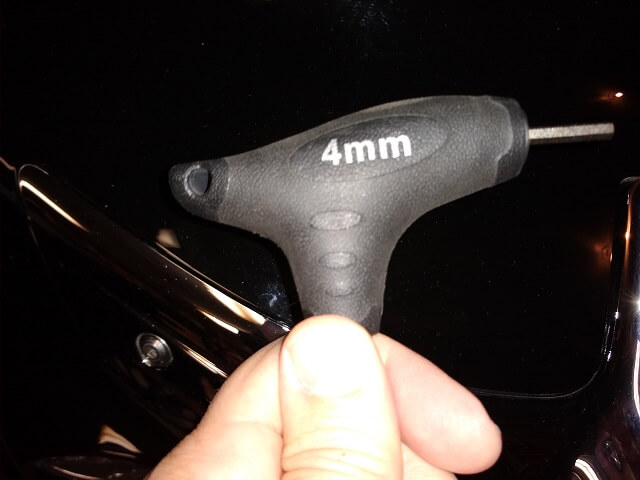
There are two allen head bolts, one on each side of the cover plate. They're not hidden, so it should be obvious which ones they are. Remove them. Put the bolts in a safe place where you won't lose them.
It's good to note how tight the bolts were when you removed them, so later on when you put them back you can tighten them roughly the same amount. These bolts aren't under a lot of torque, and I've heard that they're easy to strip out if you tighten them too much (thankfully I don't know this from experience.) The real OCD among us could use a torque wrench and look up the exact amount of Newton-meter force required, but I didn't get that uptight about it. Just get it in the same range and don't overtighten.
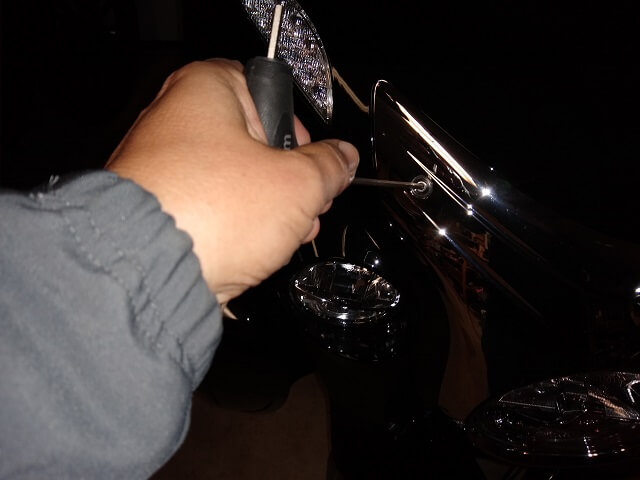
With the two bolts removed you'll discover that the fairing cover is still firmly stuck in place. There are three flared posts on the back of the cover which are a friction fit inside three corresponding rubber gaskets. You need to gently pry these posts out of the grommets. Use your fingers; there shouldn't be any need for a prying tool. You'll feel it as each post comes loose.
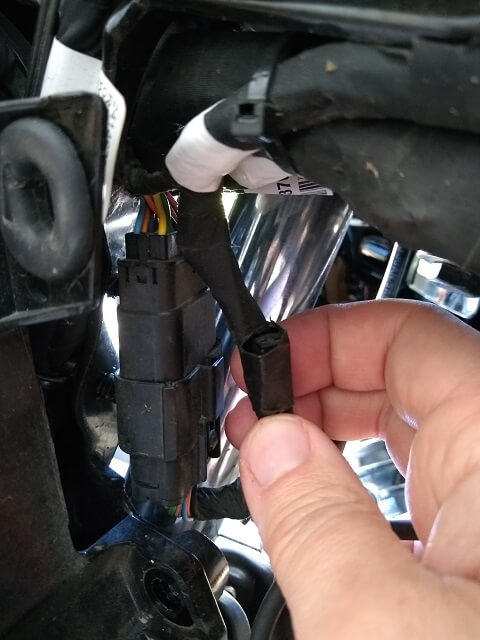
After the fairing cover is removed, put it in a safe place where it won't get knocked to the floor or scratched up. Now we want to remove the headlight. There are three bolts that hold the headlight assembly in place. Don't worry, they aren't the bolts that change the headlight aim, so you won't have to worry about getting the headlight back in the right position when you reassemble it later. I think the bolts are 11mm, but don't quote me on that. I forgot to write down the size when I had my motorcycle apart, and weeks later as I'm writing this I'm too lazy to go back and take everything apart again just to measure.
In any event, find the right size socket and remove these three bolts. Put them safely with the fairing cover bolts. Careful, as without these bolts in place the headlight is going to want to drop out of the fairing. With the headlight loose, you can either unplug it from the electrical harness and set it aside, or just let it carefully dangle on top of your towel-covered fender. I've done it both ways.

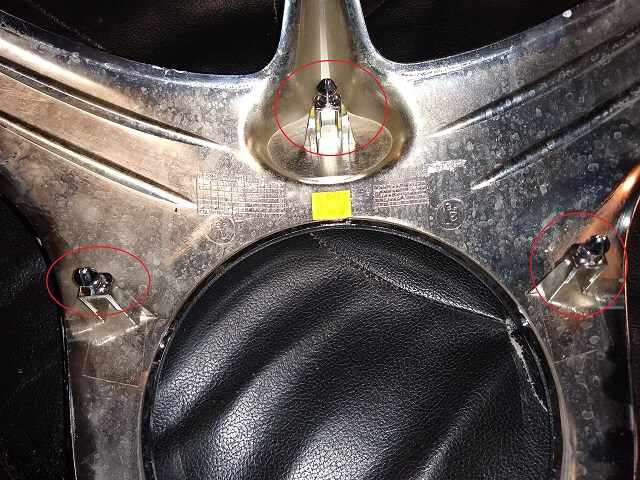
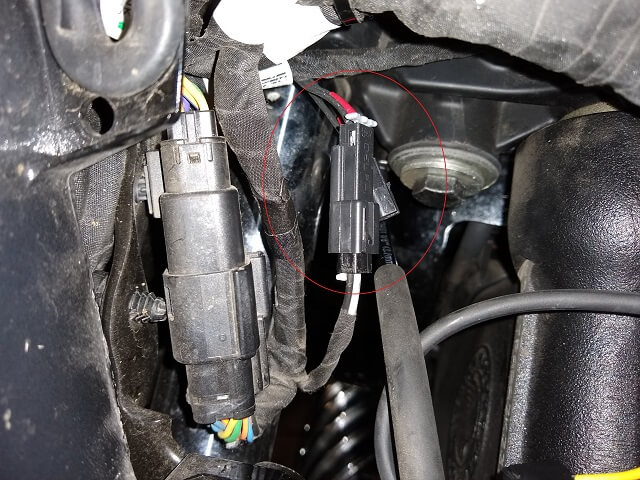
If you look in the hole where the headlight used to be located, on the left side you should see the wiring harness tied to part of the fairing. In this bundle of wires there should be a "lump" wrapped in electrical tape. Carefully unwrap this lump and you will find a two port electrical connector end that's not hooked up to anything. This is going to be where we tap into the wiring harness to power the USB port.
It's actually pretty handy that Indian provided this connector. By using the connector we do not have to cut or splice the wiring harness. If down the road we want to remove our USB port we can do so and return the motorcycle to a completely unmodified state. Well, completely unmodified other than the little bit of electrical tape we undid to find the connector. I guess you can keep the tape in a safe place "just in case" if you're into that sort of thing.
There are two styles of connector ports that Indian has used (so far, anyway) If you have a 2018 or older Indian, they use a larger connector interface that's easier to find. If you have a 2019 or later Indian, they use a smaller interface that took some hunting to figure out what style it is. I have a 2019 so what is pictured is the smaller version.
Of course, I had to figure out the hard way that there are two different styles. I initially ordered the wrong connectors. Then I took everything apart and discovered there were two styles of connectors. Then I had to return the first set of connectors and order the correct ones. Then I had to take everything apart a second time. So hopefully you can learn from my mistake and do it right the first time.
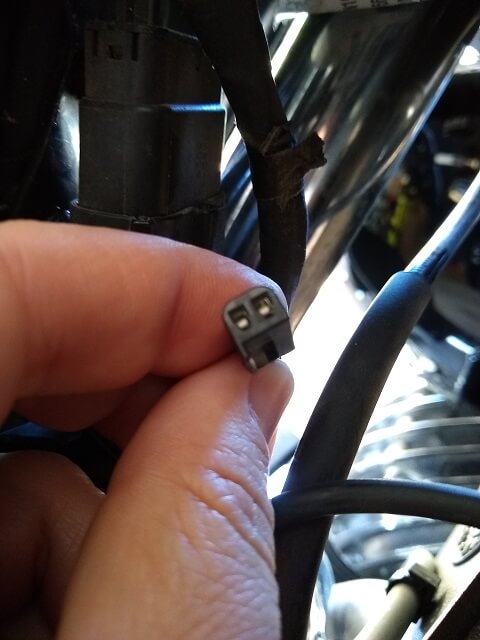
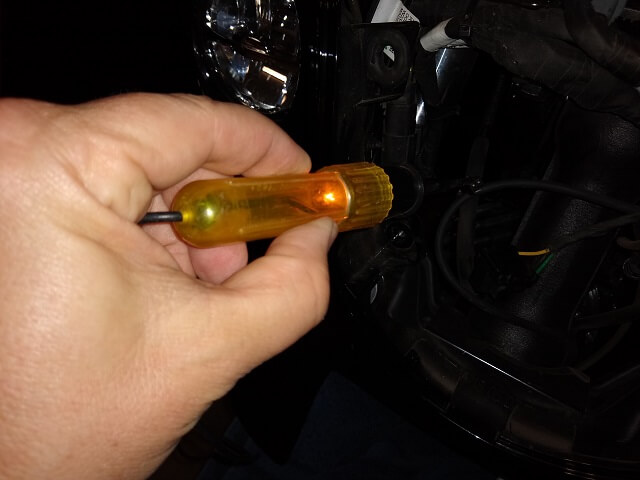
Regardless of style, this connector has two wires attached to it: hot (+12v) and ground. On my motorcycle, both wires running into the connector were black, so it was impossible to know which wire was hot just by looking at it. You don't want to guess, because if you guess wrong it could fry your USB port, blow fuses or (worse yet) destroy any device you plug in to the USB port. Get yourself an electrical tester and figure out which side of the connector has power and which side is ground. By the way, this is a switched power source so you need to have the bike's ignition turned on to do this test.
It doesn't need to be a fancy tester. A simple "go/no go" test light will work just fine. The one I'm using below is literally falling apart after more than 30 years of use. However it still is getting the job done so I hate to discard it, even though I have to hold it together whenever I use it.
Make sure you note which side of the connector is hot. Write it down or mark it with a piece of tape so you can remember. Just don't mix it up later.
You need to obtain the corresponding connector to join up to the plug inside your fairing. Ideally you're reading through this whole tutorial ahead of time so you don't get to this step and then have to leave your motorcycle torn apart while you're waiting for the UPS delivery driver to bring you the parts you just realized that you need to order.
For 2018 and older bikes, the connectors are available at Amazon. This is actually a pack of ten (five of each gender), but they're so cheap that you probably wouldn't save much money by trying to purchase just a single connector: MUYI 5 Kits 2 Pin Connector
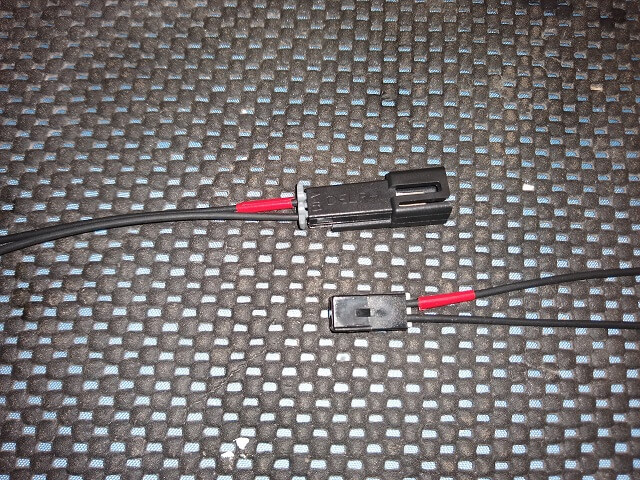
For 2019 and newer bikes, I wasn't able to find the connectors on Amazon. At least they weren't available on Amazon at the time I wrote this article. With some help from another poster on the Indian Motorcycle Forum I was able to find these connectors at Bellinger Motor Sports: GM Delphi/Packard 2 Way Plug (Female)
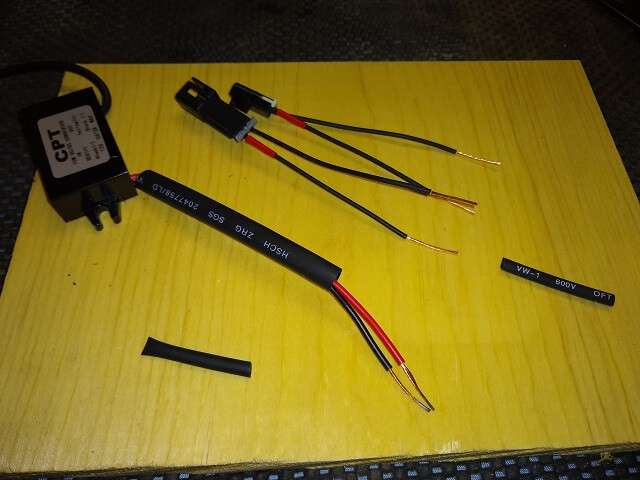
In my case, I decided to get extra fancy. In addition to the female connector above, I also bought a GM Delphi/Packard 2 Way Plug (Male) connector. I did this so later on when I connect my USB port to the motorcycle, I will still have another power connection port available. I plan to use this additional connection to power my Garmin GPS unit. You don't have to get as fancy as me. If you don't foresee any future electrical connection needs, purchasing a single connector that will plug into the existing harness will be just fine.
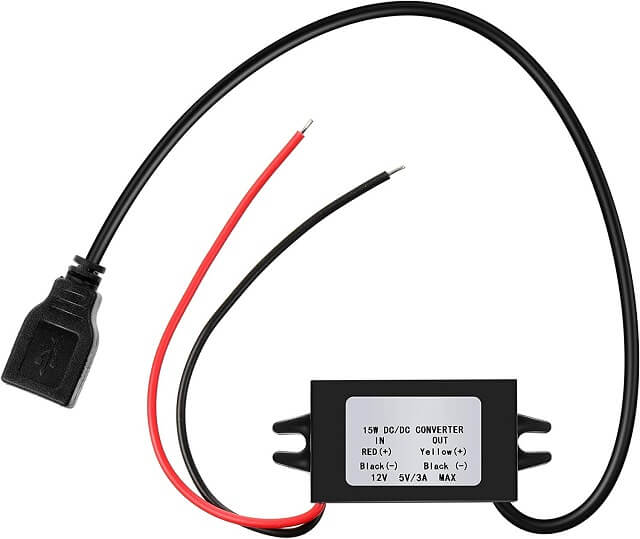
Hey, while you're ordering stuff, don't forget to pick up a 12 volt USB power converter. Here's the one I used: 12 volt To female USB Type A Power Converter. The product notes say it doesn't put out enough juice to power all Samsung phones, but I don't use a Samsung phone so that isn't an issue for me. If you do own a Samsung, you may want to shop around for a similar item that puts out enough amperage.
I then relocated to my workbench for the next few steps where I built the USB port harness.
I prepped all my wires by cutting them to length (they came way longer than what I needed) and stripping the ends. I also cut some pieces of heat shrink tubing that I would use to cover up the bare wires once I have everything connected. You can use black electrical tape to cover the bare wires too, but if you have some heat shrink tubing available I recommend going that route. It looks a lot neater and doesn't turn to sticky goo the way electrical tape does after a few years.
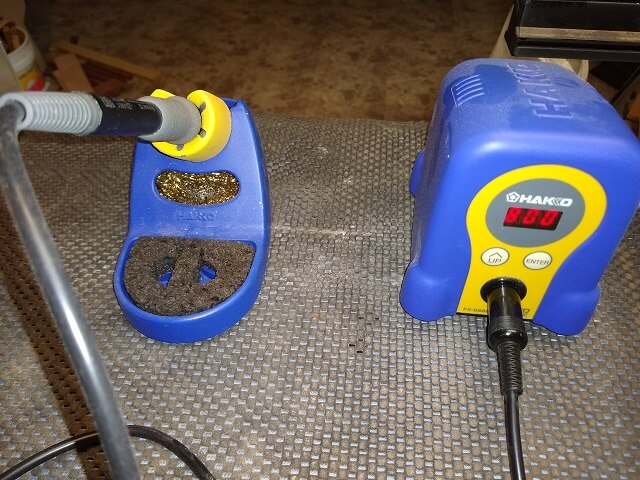
Hopefully you haven't read this far only to realize that at minimum you're going to need a way to solder wires. I suppose you could just twist wires together and hope they stay connected, but I don't recommend that approach. I do enough soldering on various projects that years ago I invested in a quality soldering station. A cheapo soldering pen would work just fine for this little project.
They make solderless electrical connectors as well, if you want to go that route. Just don't use wire nuts. Those are fine for home use, but in a vehicle they tend to vibrate loose which leaves you with exposed wires just waiting to short out.
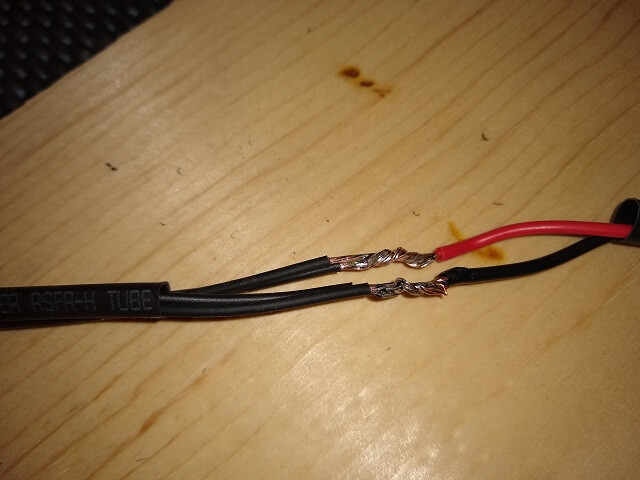
Remember when you figured out which side of the connector on the motorcycle was hot? Hopefully you do. In my photos you will see that I marked the hot side of my connectors with a piece of red tape. You want to solder the wire that comes from the 12 volt power source in the connector to the hot wire leading into the USB power converter. Likewise, the ground wire from the connector should be soldered to the ground wire leading into the USB power converter.
Remember to heat the work, not the solder. And you don't need to use a ton of solder, just enough to keep the wires from coming apart after everything cools down. If you've never soldered before, go watch some YouTube tutorials; it's a useful skill to have, and really isn't that difficult.
I then slid my heat shrink tubing over the solder joints and used a heat gun to shrink them down. Make sure there's no exposed wire peeking out from the ends of the heat shrink tubing. You don't want the wires to short to each other, or to another metal part on the motorcycle.
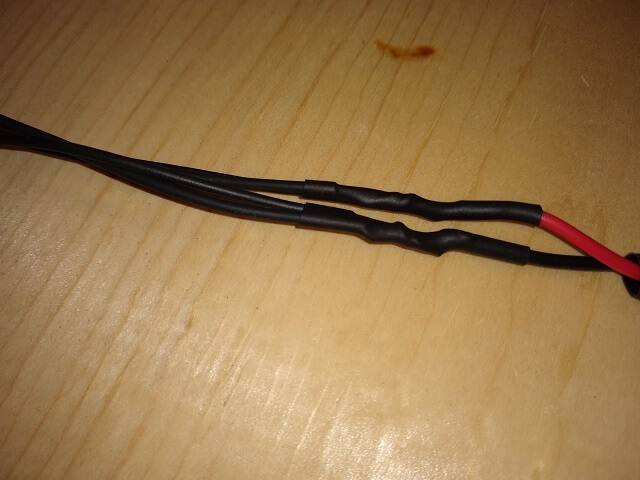
For extra protection, I wrapped the two individual heat shrunk wires in a single larger chunk of heat shrink tubing. You don't have to do this step if you don't want to, but I found it made the whole assembly a lot neater looking. Also, you can see that (as mentioned above) I have both male and female connectors at one end of my assembly so I can power a GPS unit. If you chose not to add the second connector, that's fine; your assembly will just look a little simpler.

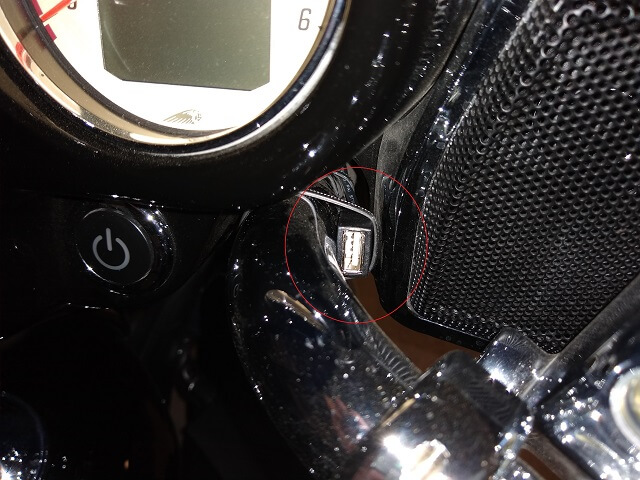
Now it's time to find a spot on the bike where the USB port can be mounted. I selected a spot on the handlebars up underneath the faring where it wasn't super-visible and hopefully was a bit protected from rain. However, I made sure it was close enough to my cell phone mount that my 6" USB cable would reach. I lashed it to the handlebars using wire ties. This makes it easy to remove if down the road I want to relocate or get rid of it altogether.
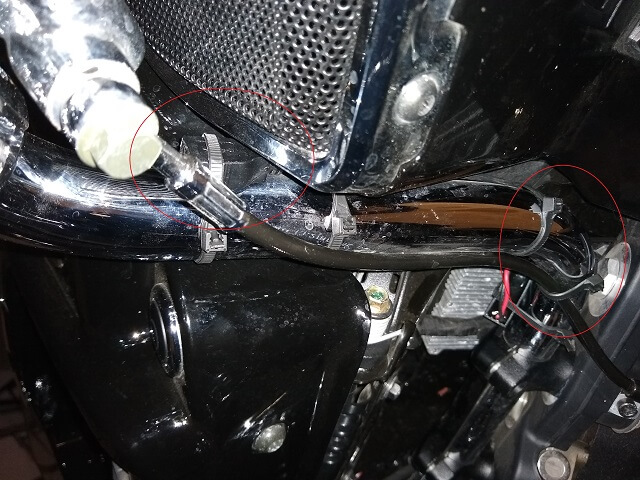
Here's another view of the USB port mounting from the bottom. I used more wire ties to neatly guide the USB cable down the handlebars, and to keep the 12 Volt converter box from bouncing around while the motorcycle is in motion. Ignore all the dust, smudges and water spots. The bike sure looked clean in person, but the close-up picture with the flash made every bit of dirt jump out.
Pass the wire through the faring and out the front by the headlight hole. Then it's just a matter of connecting the USB adapter to the motorcycle's wiring harness.
Test your USB port to make sure it works (remember that the power connection is switched, so the port should only work when the motorcycle ignition is turned on.) If it has power, then you can reinstall the headlight and fairing cover. You're done!
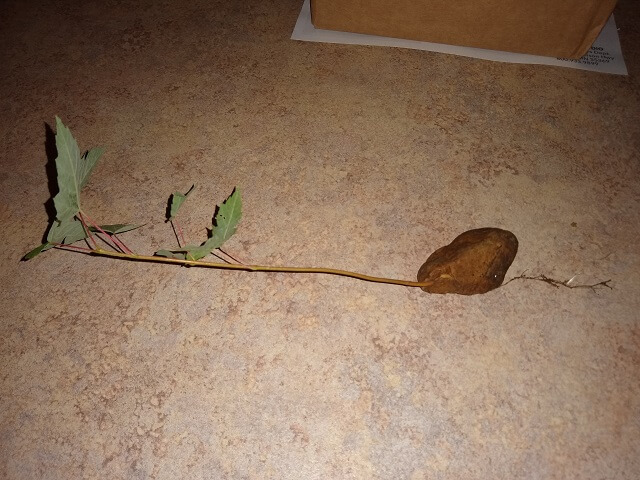
This next photo has nothing to do with adding a USB power port, but has everything to do with the tenacity you sometimes need to solve problems such as this. Around the time I was working on this project, I was doing some yard work. In the midst of working, I looked down and saw this volunteer maple tree that somehow grew through a rock. I had to examine it closely to make sure that's actually what happened, and sure enough. Talk about one motivated maple sprout!
Return To The Main Motorcycle Gallery
This page last updated on 11/15/2022